

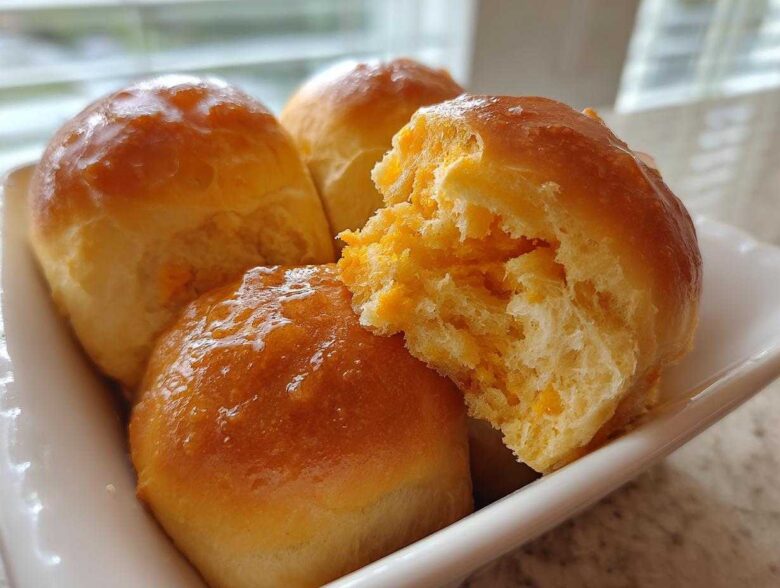
Oh my gosh, is there anything better than pulling a tray of warm, impossibly soft bread out of the oven? Honestly, nothing beats that smell! If you’ve been looking for the recipe that will completely change your holiday table game, stop scrolling right now. These sweet potato rolls are my absolute pride and joy. They are the softest, most tender yeast rolls you will ever make, and the sweet potato gives them this gorgeous, barely-there sweetness that is just divine.
I remember serving these for the first time at Thanksgiving—you could hear my uncle actually groan with happiness! People think rolls are just fluffy filler, but these become the star side dish. They are rich, slightly sweet, and hold up perfectly to everything from gravy to leftover turkey sandwiches the next day. Trust me, these rolls are the secret weapon for making baked goods look totally professional, even if you’re just an everyday baker like me. We’re going to use that sweet potato puree to guarantee moisture!
Why These Are the Best Sweet Potato Rolls You Will Bake
What makes these rolls stand head and shoulders above the standard dinner roll? It’s all about that beautiful, orange-hued moisture that lingers long after they come out of the oven. These are truly Soft Sweet Potato Rolls, and they stay that way! We aren’t just aiming for bread here; we are aiming for a Tender Yeast Rolls Recipe masterpiece. That cooked sweet potato pulp acts like a natural sponge, soaking up the liquids in the dough and then slowly releasing steam during baking.
It’s this high moisture content, combined with careful kneading, that gives us that wonderful soft pull when you tear one apart. They aren’t dense like a bun; they are cloud-like, truly.
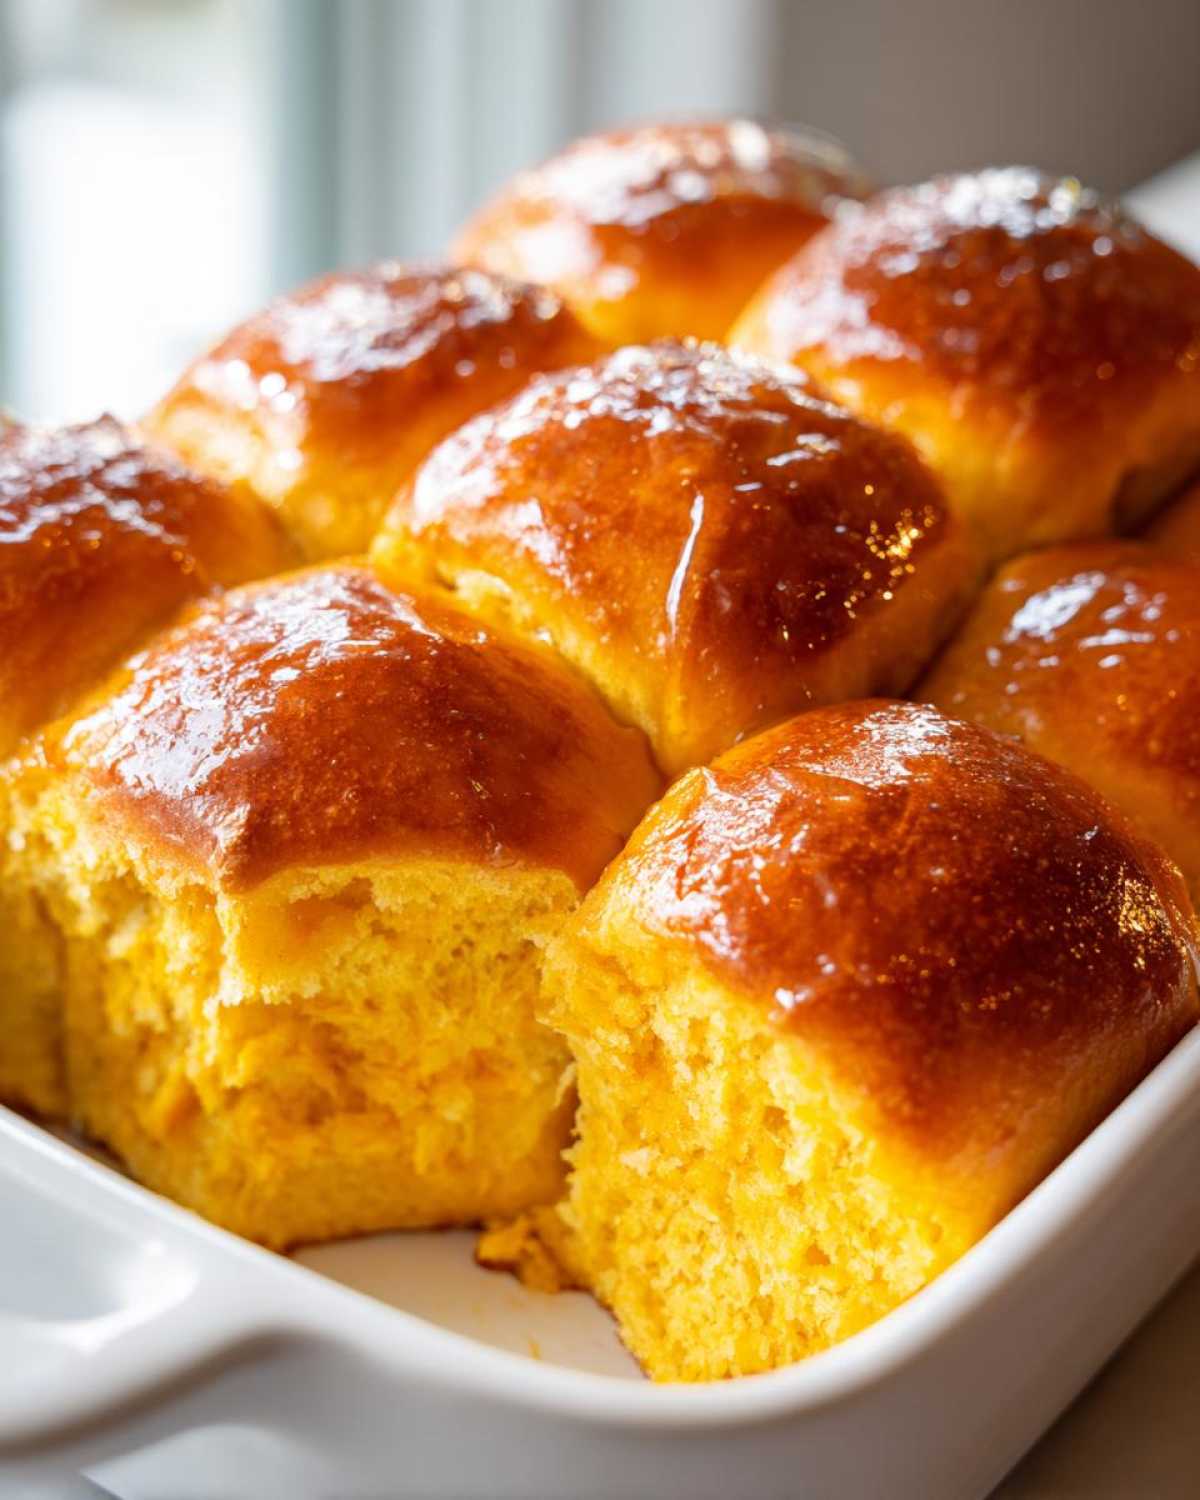
Achieving That Fluffy Dinner Rolls Texture
The secret to that pillowy interior is twofold: the sweet potato and the elbow grease! When you knead the dough, you’re building strong gluten networks. These networks trap all the natural moisture from the puree and the milk. Once you get that smooth, elastic dough, you know that when it rises twice, those trapped pockets are going to inflate perfectly, giving you those beautiful, light, Fluffy Dinner Rolls everyone fights over.
Gathering Ingredients for Perfect Sweet Potato Rolls
Okay, let’s talk about what you need for these incredible rolls. You’ll need mashed sweet potato—and I mean real mashed potato, not the stuff from a can that’s full of sugar! We want that rich, earthy flavor. Also, pay close attention to your milk temperature; it has to be warm enough to wake up the yeast but not so hot that you kill it. We are aiming right smack in the middle, between 105 and 115 degrees F. If the milk is too cold, your yeast just sleeps, and that ruins the rise. Your egg needs to be at room temperature too, trust me on that one!
We’re also using a full stick of softened butter—no shortcuts here—and a good amount of sugar to feed the yeast and add that slight sweetness that makes these sweet potato rolls so addictive. Don’t worry about writing it all down right now; I’ve got the full list waiting for you right below this section. But grab those key items first!
Ingredient Notes and Substitutions
The most important thing here is that mashed sweet potato. If you bake your sweet potatoes ahead of time, let them cool completely, and make sure the puree is super smooth. If it’s watery, it will throw off your dough hydration completely, leading to a sticky mess that won’t knit up right. You want a thick puree that feels like thick cake batter.
Now, for a little expert tweak that I love, if you want an even chewier roll structure—especially if these are going to be leftovers—swap out about half your all-purpose flour for bread flour. Bread flour has more protein, which builds stronger gluten strands, giving you more chew when you bite into your tender rolls.
Step-by-Step Guide to Making Sweet Potato Rolls From Scratch Bread
Alright, deep breaths! Making bread from scratch can sound intimidating, but since we’re working with such a moisturizing dough thanks to the sweet potato, this is honestly one of the easiest yeast recipes around. We are going to walk through this slowly, so you end up with those beautiful, light rolls!
First things first: the yeast needs a drink! Combine your warm milk and the yeast in a small bowl. You need the milk to be between 105 and 115 degrees F. If you don’t have a thermometer, just test it on your wrist—it should feel quite warm, almost hot, but not scalding. Let that sit for about five minutes until it gets foamy and bubbly. If it doesn’t foam, your yeast is dead, and you need to start over with fresh yeast, don’t skip this step!
While that’s waking up, get your large bowl ready. Cream that softened butter and the sugar together until they look pale and fluffy. Then beat in your mashed sweet potato and that room-temperature egg until everything is just about combined. Now, pour in your active yeast mixture and the salt. Mix that up well!
Activating Yeast and Mixing the Dough
This is where you start seeing it turn into dough. Add your flour gradually, about a cup at a time. Honestly, measuring flour is tricky because of how it packs, so you might need a little less or a little more than the recipe calls for. Keep mixing until it forms a shaggy, soft dough that mostly pulls away from the sides of the bowl. It’s going to feel soft and slightly sticky right now, which is exactly what we want!
If your dough is just globbing onto the spoon and won’t form a ball, add flour a tablespoon at a time until it just starts looking manageable. But remember, too much flour makes dense rolls, so stop adding flour as soon as you think it can hold itself together.
Kneading and The First Rise for Tender Rolls Recipe
Time for my favorite part: kneading! Dump that dough onto a lightly floured surface. You need to work it for about five to seven minutes. Don’t rush this; this is where you develop the structure that keeps the dough elastic. You’re looking for the dough to feel smooth, supple, and elastic—it should spring back slowly when you poke it. When you’re done, it should look shiny compared to when you first dumped it out.
Now, put that lovely dough into a lightly oiled bowl. Turn it over once so the top is coated in oil—this keeps it from drying out while it rests. Cover the bowl tightly with plastic wrap. Find the warmest, draft-free spot in your kitchen. This first rise takes about an hour to an hour and a half, or until it has truly doubled in size. Don’t peek too much, but make sure it gets big!
For anyone needing technical details on mixing, I always recommend reading up on proper emulsification techniques. You can find a great primer on that right here, even though we’re keeping it simple today!
Shaping and Baking Your Golden Brown Rolls
Once it’s doubled, gently punch the air out—don’t smash it, just deflate it slightly. Divide the dough into 12 or 16 equal pieces. Use your hands to roll each piece quickly into a tight, smooth ball. I like to pinch the bottom seam closed while rolling it on the counter to create a nice tension ball.
Place these little balls close together in your greased 9×13 pan. They need to snuggle up! Cover them again and let them have their second rise. This is shorter, usually 30 to 45 minutes, until they look puffy and soft, almost touching.
When they look puffy, preheat that oven to 375 degrees F. Give the tops a nice, gentle brush with your beaten egg wash—this is the secret to a beautiful, deep color. Bake them for 15 to 20 minutes. Keep an eye on them, because those Sweet Potato Rolls will go from golden to dark quickly! As soon as they come out of the oven, brush the tops immediately with melted butter. That melted butter soaking in gives you that perfect, shiny, Golden Brown Rolls finish and extra buttery flavor.
Tips for Success with Your Sweet Potato Baking
Honestly, nine times out of ten, these rolls come out perfectly when you follow the steps, but sometimes things go a little sideways, right? I’ve learned a few tricks over the years to troubleshoot and ensure these Sweet Potato Rolls are absolutely tender every single time we bake them, especially around the holidays when the kitchen is chaotic!
First, about that puree: Make sure your mashed sweet potato is completely cool before adding it to the butter/sugar mixture. If it’s warm, it will melt the butter you just creamed, and suddenly you’ve lost all that beautiful air you whipped in there. Warm puree basically cheats you out of the fluffy texture we are trying to achieve!
Second, resist the urge to add extra flour when you are kneading, especially if the dough feels sticky after the first rise. Stickiness during the rise is sometimes normal for high-moisture doughs like this. If you add too much flour during kneading, you guarantee dense rolls later. If it’s truly impossible to work with on the counter, lightly oil your hands instead of flouring them. That little bit of oil goes a long way!
Third, check your yeast environment! If your kitchen is cold, the dough won’t double. I always turn my oven on to its lowest setting for just one minute, turn it OFF, and then put the covered bowl inside that slightly warm (not hot!) oven to rise. This creates the perfect humidity and warmth for happy yeast. This little step in your Sweet Potato Baking process makes a huge difference in rise time reliability.
Finally, my last piece of advice is about the egg wash. While the egg wash gives you that gorgeous color, if you are worried about them darkening too much before the interior is done, you can skip the egg wash entirely and just brush heavily with melted butter during the last 5 minutes of baking. Either way, you get shiny, perfect rolls!
Serving Suggestions for Your Sweet Potato Rolls
Honestly, these rolls are so good they barely *need* anything, but why stop at good when you can have incredible? The slight, earthy sweetness from the sweet potato puree means these rolls are incredibly versatile. They are amazing on their own, served piping hot straight from the oven, maybe just pulled right apart!
Of course, these are mandatory as one of your Thanksgiving Side Dishes. They cut through the richness of turkey, mashed potatoes, and stuffing perfectly. But hey, don’t save them just for November! They are fantastic alongside a big bowl of chili or stewed chicken in the middle of winter. Their soft texture makes them the best for soaking up sauces or just using as a slightly sweet scoop for your mashed sides.
If you want to make them extra special for company, try swapping out plain melted butter for a simple compound butter. It takes two minutes, and everyone thinks you’re a baking genius! Just soften up a little butter—maybe softened to room temperature is better for mixing now—and whip in some fresh herbs. Rosemary pairs shockingly well with the sweet potato flavor, so mix about a teaspoon of finely chopped fresh rosemary into three tablespoons of butter. A little sprinkle of flaky sea salt on top of the herbed butter, and boom, you have elegant sweet potato rolls ready for any dinner table.
Storage and Reheating Instructions
Life is too short to worry about keeping rolls fresh, but luckily these sweet potato rolls are pretty resilient! If you have any leftovers—which I seriously doubt, because they disappear fast—storage is easy. Just let them cool completely first. Seriously, if you wrap them while they are warm, that trapped steam turns into water, and we are back to a soggy mess! Once they are totally cool, pop them into an airtight container or a heavy-duty Ziploc bag. They stay wonderfully soft at room temperature for about three days. Because they are so moist to begin with, they hold up better than a simple white roll.
Now, if you made a huge batch for the holidays and know you won’t eat them all in three days, they freeze like a dream! As the recipe notes mentioned, let them cool 100%, put them in a freezer-safe zip bag, and squeeze out as much air as you can. They are good in the freezer for about three months. This is my favorite way to make a big batch ahead of time!
Reheating is crucial to bring back that ‘just baked’ magic. For refrigerated rolls, I like to wrap them loosely in foil—just enough to keep the outside from drying out too fast—and pop them into a 350-degree oven for about 7 to 10 minutes. You want them warmed through evenly, not scorched! If you’re heating them straight from frozen, you need a bit more time; bump that temperature down slightly, maybe 325 degrees F, and let them heat under the foil for 15 to 20 minutes until they feel soft all the way through. That melted butter brush on top immediately after reheating is non-negotiable for the best experience.
Frequently Asked Questions About Sweet Potato Rolls
I know you might have some last-minute questions before you dive into the dough! When baking with specialty ingredients like sweet potato, things can get a little murky. That’s totally normal. I’ve gathered the questions I hear most often whenever I bring these rolls to a potluck.
Don’t hesitate to try these out, even if you think you’re having trouble. These sweet potato rolls are more forgiving than you think, especially since the puree packs in so much moisture! I always check the contact page if I’m truly stuck, which is linked here for reference.
Can I make Quick Sweet Potato Rolls using baking powder instead of yeast?
You absolutely *can*, but I’ll be straight with you: you won’t get the same result, and this recipe is specifically designed for that beautiful, classic yeast rise. If you skip the yeast and use baking powder—about 2 teaspoons should do the trick—you are essentially making a sweet potato biscuit rather than a roll. Biscuits are delicious, yes, but they won’t have that airy, stretchy, pull-apart quality of these yeast rolls. You’ll end up with something denser and more crumbly. If you need it fast, go for it, but if you want real, unbelievable Fluffy Dinner Rolls, stick with the active dry yeast!
How do I make these into Sweet Potato Cinnamon Rolls Recipe?
Oh, what a fun idea! That takes us completely out of the dinner side dish category and straight into breakfast heaven. To pivot this recipe, you need to modify the dough slightly. First, I would cut the sugar in the dough down by half, or maybe even eliminate it entirely, since the filling will be sweet. You’ll also skip the salt, or significantly reduce it, as the filling will be salty-sweet.
For the filling, just cream together some softened butter, plenty of brown sugar, lots of cinnamon, and maybe a dash of nutmeg. Roll out your dough instead of balling it up, spread that filling all over, roll it into a log, and slice it like normal cinnamon rolls! Skip the egg wash and instead, after the second rise, bake them as usual. Once they are hot out of the oven, hit them with a simple cream cheese glaze—cream cheese, powdered sugar, and a splash of milk or vanilla extract. They turn into a totally different, sweeter beast!
Estimated Nutritional Value for These Buttery Sweet Potato Buns
If you are tracking things, I wanted to give you a quick snapshot of what’s in one serving. Based on the ingredients listed, one of these wonderfully soft rolls clocks in around 180 calories. They have about 7 grams of fat and 27 grams of carbs, which is what you expect from a rich bread dough!
Keep in mind that these values are just estimates, as homemade baking always varies based on the size of your potatoes and exactly how much flour you incorporate. For full transparency, you can review the detailed breakdown here on the site.
Share Your Experience Baking These Rolls
I’m so excited for you to try these! Truly, these sweet potato rolls are one of my go-to comfort bakes, and I hope they become a staple for your family too. Once you pull that pan out of the oven, I’d love to know what you thought!
Please leave a comment below letting me know how many dozen you managed to bake and how quickly they disappeared. Did you stick to the butter glaze or go rogue? Let me know! If you took a picture of that gorgeous golden crust, feel free to tag me on social media—I absolutely love seeing my recipes make it into your kitchens! Happy Baking!
Estimated Nutritional Value for These Buttery Sweet Potato Buns
If you are tracking things, I wanted to give you a quick snapshot of what’s in one serving. Based on the ingredients listed, one of these wonderfully soft rolls clocks in around 180 calories. They have about 7 grams of fat and 27 grams of carbs, which is what you expect from a rich bread dough!
Keep in mind that these values are just estimates, as homemade baking always varies based on the size of your potatoes and exactly how much flour you incorporate. For full transparency, you can review the detailed breakdown here on the site.
Share Your Experience Baking These Rolls
I’m so excited for you to try these! Truly, these sweet potato rolls are one of my go-to comfort bakes, and I hope they become a staple for your family too. Once you pull that pan out of the oven, I’d love to know what you thought!
Please leave a comment below letting me know how many dozen you managed to bake and how quickly they disappeared. Did you stick to the butter glaze or go rogue? Let me know! If you took a picture of that gorgeous golden crust, feel free to tag me on social media—I absolutely love seeing my recipes make it into your kitchens! Happy Baking!
PrintSoft Sweet Potato Dinner Rolls

Make tender, fluffy sweet potato rolls perfect for any dinner or holiday meal. This recipe yields soft, slightly sweet bread with a beautiful golden color.
- Prep Time: 30 min
- Cook Time: 20 min
- Total Time: 145 min
- Yield: 12 to 16 rolls
- Category: Side Dish
- Method: Baking
- Cuisine: American
- Diet: Vegetarian
Ingredients
- 1 cup mashed sweet potato (about 1 large sweet potato)
- 1/2 cup warm milk (105-115 degrees F)
- 2 1/4 teaspoons active dry yeast
- 1/4 cup granulated sugar
- 1/2 cup (1 stick) unsalted butter, softened
- 1 large egg, room temperature
- 1 teaspoon salt
- 3 1/2 to 4 cups all-purpose flour
- 1 egg, beaten (for egg wash)
Instructions
- Combine the warm milk and yeast in a small bowl. Let stand for 5 minutes until foamy.
- In a large bowl, cream together the softened butter and sugar until light and fluffy. Beat in the mashed sweet potato and the egg until combined.
- Add the yeast mixture and salt to the sweet potato mixture. Mix well.
- Gradually add the flour, one cup at a time, mixing until a soft dough forms. You may need slightly less or more flour.
- Turn the dough out onto a lightly floured surface. Knead for 5 to 7 minutes until the dough is smooth and elastic.
- Place the dough in a lightly oiled bowl, turning to coat. Cover the bowl with plastic wrap and let it rise in a warm place for 1 to 1.5 hours, or until doubled in size.
- Punch down the risen dough gently. Divide the dough into 12 or 16 equal pieces. Roll each piece into a smooth ball.
- Place the dough balls close together in a greased 9×13 inch baking pan. Cover and let rise again for 30 to 45 minutes, or until puffy.
- Preheat your oven to 375 degrees F. Brush the tops of the rolls lightly with the beaten egg wash.
- Bake for 15 to 20 minutes, or until the tops are golden brown.
- Remove from the oven. Brush the tops immediately with melted butter for extra flavor and shine. Serve warm.
Notes
- For the best texture, ensure your mashed sweet potato is smooth and not watery.
- If you prefer a richer flavor, substitute half of the all-purpose flour with bread flour.
- These rolls freeze well after baking. Cool completely, place in an airtight bag, and freeze for up to 3 months. Reheat in a 350 degree oven until warm.
Nutrition
- Serving Size: 1 roll
- Calories: 180
- Sugar: 6
- Sodium: 180
- Fat: 7
- Saturated Fat: 4
- Unsaturated Fat: 3
- Trans Fat: 0
- Carbohydrates: 27
- Fiber: 2
- Protein: 4
- Cholesterol: 25