

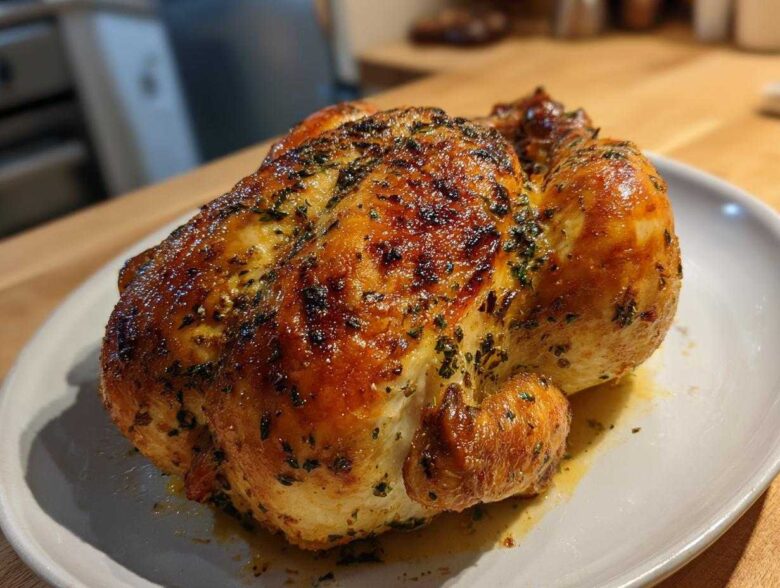
Honestly, if you’re still roasting your whole chicken upright, you are missing out on pure magic! I finally figured out the secret to getting that perfectly crisp, crackly skin you usually only find at fancy restaurants, right here in my own oven. Ditch the trussing and the long wait times! When you learn the spatchcock chicken technique, you unlock faster cooking times and guarantee a juicy roasted chicken every single time. Trust me, once you see how easy this is, you’ll never look back. Mastering this technique is why I started this blog in the first place—I just wanted to share the best ways to cook for friends and family, which you can always read more about on our About Us page!
Why This Perfect Juicy Spatchcock Chicken Recipe Works
I know what you’re thinking: why mess with tradition? But this method of preparing a spatchcock chicken gives you benefits that traditional roasting just can’t match. It’s all about maximizing the bird’s surface area, which is a game-changer for roasting. It’s honestly the secret weapon for any easy roast chicken night!
- It cooks much faster—seriously, you slash your roasting time almost in half!
- The meat cooks far more evenly, meaning you don’t end up with dry breast meat while waiting for the thighs to finish.
- The texture advantage is huge; we get supreme internal moisture paired with fantastic exterior crunch.
Achieving Crispy Skin Chicken Every Time
The secret here is geometry, friends! When the bird is flattened out, the skin gets direct, blazing heat from the top element of your oven. There’s no awkward breast shield hiding the back, so all that surface area crisps up beautifully all at once. It’s the easiest way I know to get genuinely crispy skin chicken without having to fight with high broiler settings at the end.
Faster Cooking for Your Weeknight Chicken Dinner
Because the chicken is flat instead of puffed up high, the heat penetrates evenly and quickly. This means you can pull off an amazing family style chicken roast on a Tuesday if needed! Forget waiting two hours; this spatchcock chicken is often ready in under an hour, making it the perfect weeknight chicken dinner savior.
Essential Ingredients for Flavorful Spatchcock Chicken
Okay, let’s talk about what makes this Lemon Herb crust absolutely sing on top of our perfectly flattened bird. You don’t need a massive pantry for this! It’s all about using potent, straightforward spices that really pop against the rich flavor of the roasted meat. I gathered all the things you need for an incredible flavorful spatchcock chicken right here.
We are using simple pantry staples, but the way we combine them is what elevates this from a simple roast to something really special. Don’t skip the lemon zest—that’s where the *brightness* comes from!
- One whole chicken, please, around 4 pounds. That size works best for even roasting in most standard ovens.
- Two tablespoons of good old olive oil to help everything stick and crisp up nicely.
- One tablespoon of dried rosemary. Yes, dried is better here; it toasts up nicely without burning like fresh leaves sometimes do.
- One tablespoon of dried thyme.
- One teaspoon of garlic powder and one teaspoon of onion powder. These provide the deep background savory flavor.
- One teaspoon of salt and half a teaspoon of black pepper—season generously!
- The zest of one whole lemon. I mean it, use the whole lemon’s skin!
- Finally, the juice of half a lemon, saved for drizzling right before it goes into the oven.
Herb and Lemon Crust Components
When you mix up your seasoning blend, treat it like you’re building a foundation. Everything needs to be finely incorporated. I take a tiny prep bowl and actually use a tiny whisk—or the back of a spoon if you, like me, sometimes can’t find the whisk! Make sure you get that salt and pepper thoroughly mixed with the dried herbs and the lemon zest.
What you’re aiming for is consistency. You want that herb coating to look almost like thick, fragrant sand. When you rub this blend all over that butterflied chicken, you want an even layer from wing tip to leg. This even distribution of spices is key to that incredible crust we keep talking about!
How to Spatchcock Chicken: The Best Spatchcock Technique
Alright, this is the part that intimidates everyone, but I promise once you see it, you’ll realize it’s mostly just an exciting bit of butchery! Learning how to spatchcock chicken is the single biggest step toward roasting success. First things first: you absolutely need strong kitchen shears. Don’t even try this with regular scissors; you’ll just frustrate yourself! Safety first, always be mindful of where your fingers are when cutting.
Lay your spatchcock chicken breast-side down. Starting from the tail end, cut straight up along one entire side of the backbone. Make a clean cut all the way to the neck cavity. Repeat that cut on the other side of the backbone. Pop that backbone out—save it for stock later if you’re feeling frugal! Now comes the satisfying part of this butterflied chicken cooking method: flip the bird over onto the cutting board and push down hard right on the center breastbone. You’ll hear a loud, satisfying *CRACK*, and bam—the chicken is flat!
Preparing the Chicken for Roasting
Once it’s flat, you need to focus on moisture control. I cannot stress this enough: pat that chicken bone dry! Grab tons of paper towels and just keep blotting the skin until it feels almost scratchy dry. If the skin is wet, it steams instead of roasts, and we want zero steaming happening here. This drying ritual is absolutely critical if you want that ultimate crispy skin chicken everyone dreams about.
After drying, it’s seasoning time! Get that herb and lemon mixture we made earlier and really work it over the whole bird. Don’t forget to gently loosen the skin over the breast meat and rub some seasoning directly onto the meat itself for extra flavor underneath. After seasoning, check out the official recipe disclaimer just in case, but generally, we are ready for the oven!
Roasting Instructions for Your Oven Spatchcock Chicken
Now that we have our beautiful, flat, seasoned spatchcock chicken ready to go, we get to the best part: fire it up! You’ll want to preheat your oven to a nice, hot 425 degrees Fahrenheit (about 220 Celsius). We need this heat to blast that skin into crispiness while the inside cooks through evenly.
Get the flattened bird set up on a wire rack inside a rimmed baking sheet—this elevates it so air can circulate all around. I use that rack every time! Roast the chicken for about 45 to 60 minutes. That time range is wide because chickens vary, but your goal is to hit that sweet spot internally. You are looking for 165 degrees Fahrenheit (74 Celsius) right in the thickest part of the thigh, measured with an instant-read thermometer of course. That temperature guarantees you a safe and wonderfully perfectly cooked chicken.
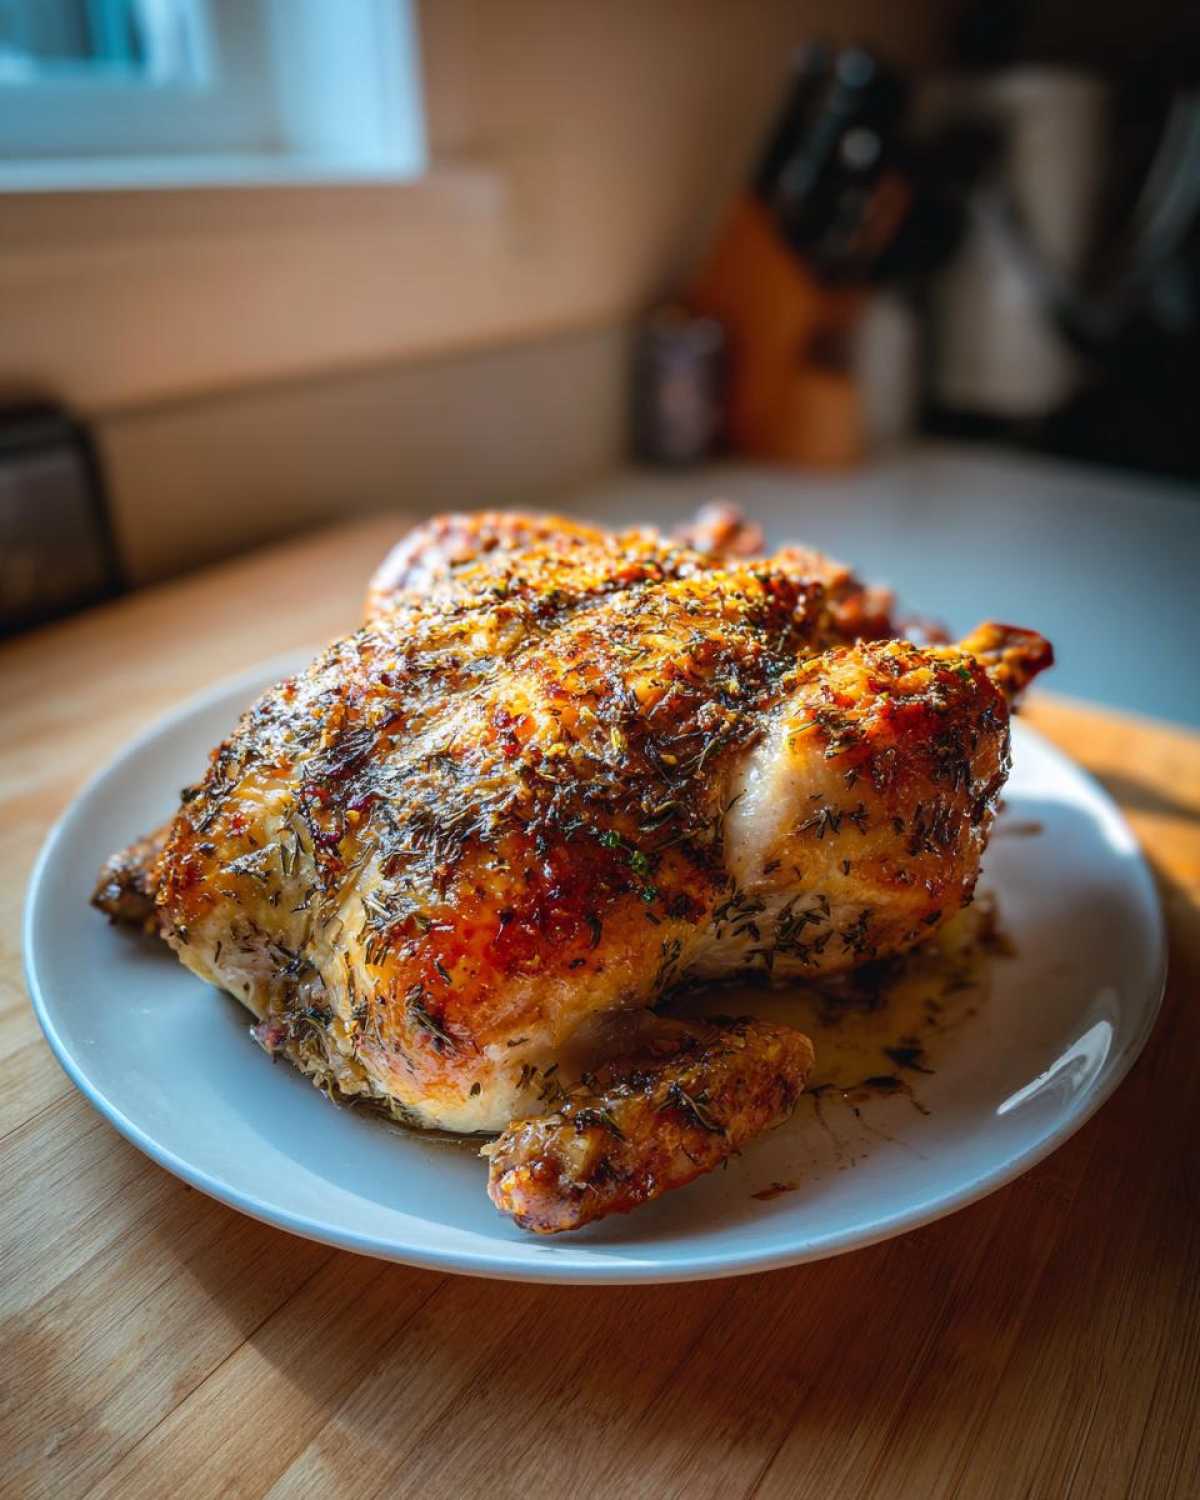
Once it hits temp, pull it out! And please, please, please let it rest. Ten full minutes resting on the pan before you even think about carving. This lets all those delicious juices redistribute themselves back into the meat. Resist the urge to slice early; waiting is the final secret to perfection!
Tips for Maximum Juiciness in Your Spatchcock Chicken
The main concern with any roast is always drying out the breast, but this method practically prevents it. To ensure ultimate juiciness in your juicy roasted chicken, two things matter most: the setup and the prep!
First is placement. Using that wire rack ensures that heat gets underneath the bird, not just on top. But here is one of Grandma’s little tricks—if you have time before that 45-minute cook window, let your seasoned chicken sit uncovered in the fridge for a few hours. Yep, dry brining right on the skin! It draws moisture out of the skin but keeps the meat nice and juicy underneath. It really supercharges the crispiness, so if you can swing it, definitely try that for your next roast!
Ingredient Notes and Substitutions for Spatchcock Chicken
I get so many questions about what happens if you’re missing an ingredient, especially when it comes to herbs. Don’t worry if you don’t have dried rosemary sitting around! Cooking should be flexible, especially when aiming for a tasty Lemon Herb Chicken Recipe like this one. My main rule is always: use what you have, but know the trade-offs.
If you are substituting fresh herbs for the dried ones listed, the general rule of thumb is that fresh herbs are usually much stronger. You’ll want to triple the amount of fresh herbs you use compared to the dried measurements. So, instead of one tablespoon of dried thyme, grab about three tablespoons of freshly chopped thyme leaves. It’s a little more work chopping them, but the flavor is vibrant!
What about the lemon? If you only have fresh lemon juice but no zest, you’ll lose a little bit of that intense citrus punch that helps balance out the savory herbs. If you have no fresh lemon at all, a half teaspoon of good quality lemon zest powder can step in, though the flavor won’t be quite as bright. It’s a trade-off, but it still works for a great simple chicken roast.
Just remember the most important swap you cannot really make is the drying process! Whether you use paprika, sage, or stick exactly to this recipe, making sure the chicken skin is super dry before seasoning is the non-negotiable step for that gorgeous crisp exterior. That beats any seasoning substitution!
Serving Suggestions for a Family Style Chicken Roast
When you pull this amazing, flat chicken out of the oven, everyone gathers—it just looks like a centerpiece! Since the spatchcock chicken cooks so quickly, you need sides that are just as simple and don’t occupy your entire oven for hours. My goal for a family style chicken roast is always maximizing flavor while minimizing cleanup. Keeping things on one pan, or requiring very little active cooking time, is my jam!
For ultimate ease, try roasting vegetables right underneath the chicken! If you use a rimmed baking sheet (as we recommended) but skip the wire rack in favor of laying veggies directly on the pan, those heavenly chicken drippings will baste everything below. Total win!
We use those wonderful drippings for potatoes or root vegetables. Toss some quartered Yukon Golds, carrots, and maybe some cut-up onions with a little olive oil, salt, and pepper. Spread them onto your pan, put the chicken right on top (yes, directly on the veggies this time!), and everything cooks together. They soak up all that rich flavor and become this incredible, soft side dish to accompany your flavorful spatchcock chicken.
If you are having a big gathering or need something green that’s ready in five minutes, I always turn to blanched green beans or asparagus. A quick five minutes in boiling water, then tossed with butter and a tiny squeeze of lemon juice, makes a gorgeous, bright counterpoint to the herbs in the meat. It keeps the whole meal feeling light and fresh, perfect for a lovely simple chicken roast!
Storage and Reheating Instructions for Leftover Spatchcock Chicken
First off, who has leftovers when you make a perfectly roasted bird? Just kidding, I usually do manage to hide a thigh or two! But seriously, if you’re doing a big batch for healthy chicken meal prep later in the week, storage definitely matters because that lovely crispy skin will soften up once it’s refrigerated. That’s just science, I can’t fight it!
The absolute best way to store any leftover chicken, including this beautifully seasoned bird, is to let it cool down completely first, then pack it into a truly airtight container. You don’t want any fridge smells sneaking in or any moisture build-up from hot food trapping steam inside the container. Keep it in the fridge, and it should be good for about three to four days. Don’t leave cut-up chicken sitting out for more than two hours, especially in the summer.
Now, reheating is where we have to be gentle. If you toss a slice of this flavorful breast meat into the microwave, you’re begging for dry, chewy results. We want to bring back that juiciness we worked so hard to lock in!
For best results, skip the microwave entirely. I prefer reheating the pieces in a skillet or a low oven. If you are using a skillet, heat it up over medium-low heat with just a tiny splash of broth or water in the pan—not enough to drown the chicken, just enough to create a little steam blanket. Cover the pan and let the chicken warm through gently. This keeps it moist and tender.
If you’re reheating larger pieces, the oven works well. Set your oven to about 325 degrees Fahrenheit. Lay the chicken pieces right on a baking sheet and cover them loosely with foil. This traps enough steam to warm the meat without turning the leftover skin into a rubbery mess. It’s a little slower, but protecting that lovely texture is worth the extra ten minutes!
Frequently Asked Questions About Spatchcock Chicken Recipe
I know that even with a detailed recipe, sometimes you just need a quick answer to a burning question floating around in your head while you’re prepping the bird. Dealing with a whole chicken can feel daunting, but this spatchcock chicken recipe is built for speed and simplicity, so let’s clear up any last bits of doubt!
If you tried this out and have a question that isn’t covered here, please don’t hesitate to reach out to us over on our Contact page; I genuinely love hearing from fellow cooks!
What is the best internal temperature for spatchcock chicken?
This is the most important question you can ask for a worry-free roast! Since we are dealing with two different cuts of meat—the breasts and the thighs—we have to rely on measuring the internal temperature for a perfectly cooked chicken. You are aiming for 165 degrees Fahrenheit (74 Celsius) when you check the thickest part of the thigh, making sure your probe doesn’t touch any bone.
Now, here’s a pro tip: because the breast meat cooks faster, the breast might hit 160 degrees Fahrenheit first. As long as the chicken is sitting and resting properly after you pull it out, the carryover cooking will bring that breast up to that safe 165 degrees without drying it out. If you pull the thigh out at 165°F, you are golden, safe, and you’ve ensured maximum internal moisture. That’s the expert difference!
Can I grill a spatchcock chicken instead of roasting it in the oven?
Oh, absolutely! This is one of my favorite transitions, especially when barbecue season hits. Since the bird is already flattened for your oven spatchcock chicken, it’s perfectly primed for grilling—it cooks fast and evenly right on the grates!
When grilling, you’ll want to use mostly indirect heat, just like you would for a whole bird. Start it over the cooler side of the grill to cook through, and then finish it over the hotter side just long enough to get those gorgeous grill marks and extra crisp skin. It adds a lovely smoky note that substitutes beautifully for the herb crust if you wanted to try a Cowboy Butter spatchcock version down the road!
How long do I need to rest a spatchcock chicken?
I know it’s tempting to carve the second it comes out, especially since your house smells incredible, but you must let it rest! Since this bird cooks faster than a traditionally trussed one, it doesn’t need quite as long, but don’t skimp. For a 4-pound spatchcock whole chicken, aim for a minimum of 10 minutes resting time, tented loosely with foil so the skin stays a little crispy while the juices settle. Trust me, 10 minutes is the magic number for a truly juicy roasted chicken.
What if I can’t find a 4-pound chicken?
No worries at all! The general guideline for this technique—whether you are doing a quick roast chicken or meal prepping—is that they cook roughly 15 minutes per pound at 425°F. A 3-pound bird might be ready in 40 minutes, while a slightly larger 5-pounder might need closer to 75 minutes. Always default to the internal temperature, not the clock, but use those time estimates to plan your side dishes.
Estimated Nutritional Information for Spatchcock Chicken
You guys know I keep things real around here, and that means talking about the numbers, even though my focus is always on flavor first! While this Lemon Herb Chicken Recipe is naturally pretty healthy—lots of protein and virtually no carbs—it’s important to remember these figures are just estimates based on my specific ingredient amounts. Brands vary, how much oil you actually use varies, and that 4 lb chicken might have been a 4.2 lb chicken!
I always say you should cook what tastes good and focus on whole ingredients, but for those tracking macros, here’s a general look at what you can expect from one serving (which is roughly a quarter of the whole bird):
- Serving Size: 1/4 chicken
- Calories: 350
- Protein: 45g (We love that solid protein punch!)
- Fat: 18g (Mostly healthy fats from the olive oil!)
- Saturated Fat: 5g
- Trans Fat: 0g
- Carbohydrates: 1g
- Fiber: 0g
- Sugar: 0g (We rely on the savory herbs, not added sweeteners!)
- Sodium: 450mg (This will change based on how much salt you add during seasoning.)
- Cholesterol: 150mg
It’s a fantastic, lean centerpiece! Just keep in mind that if you decide to cover this bird in a heavy sauce later on, or if you pair it with creamy mashed potatoes, those numbers will shift upward quickly. This core recipe, however, is a genuinely good foundation for a healthy chicken meal prep plan for the week. Since we are talking policy and information correctness, you can always take a look at our official Privacy Policy for more details on how we handle recipe information.
Share Your Perfect Spatchcock Chicken Success
Wow, we made it! You now know the secret to the ultimate crispy skin chicken and how to execute the best spatchcock technique at home. Seriously, I’m so proud of you for tackling this! I hope your kitchen smells exactly like mine does right now—all lemon, rosemary, and rich roasted poultry.
But the journey doesn’t end with me telling you about it! I absolutely live for hearing how your attempts turn out. Did you stick to this Lemon Herb crust, or did you get wild and try a Garlic Butter Spatchcock variation? Maybe you even turned it into a one-pan wonder with some sweet potatoes underneath!
Please, take a second and drop a rating for this spatchcock chicken recipe using the star system below. It lets me know what’s working for everyone! And if you have any tweaks, funny stories about the backbone removal (it always startles me!), or brilliant side dish pairings, leave a comment below. Sharing our kitchen wins makes cooking so much more fun.
I can’t wait to see that perfectly flat, gorgeous bird you pulled out of the oven. Happy roasting, friends!
PrintPerfect Juicy Spatchcock Chicken with Crispy Herb & Lemon Crust

Learn the technique to spatchcock a chicken for faster cooking, maximum juiciness, and incredibly crispy skin using a simple lemon and herb seasoning.
- Prep Time: 15 min
- Cook Time: 60 min
- Total Time: 75 min
- Yield: 4 servings
- Category: Dinner
- Method: Roasting
- Cuisine: American
- Diet: Low Fat
Ingredients
- 1 whole chicken (about 4 lbs)
- 2 tablespoons olive oil
- 1 tablespoon dried rosemary
- 1 tablespoon dried thyme
- 1 teaspoon garlic powder
- 1 teaspoon onion powder
- 1 teaspoon salt
- 1/2 teaspoon black pepper
- Zest of 1 lemon
- Juice of 1/2 lemon
Instructions
- Place the chicken breast-side down on a cutting board. Using strong kitchen shears, cut along both sides of the backbone, starting from the tail end, until the backbone is removed.
- Flip the chicken over and press down firmly on the breastbone until it flattens completely. This is the spatchcocking technique.
- Pat the chicken very dry with paper towels. This step is crucial for crispy skin.
- In a small bowl, mix the olive oil, rosemary, thyme, garlic powder, onion powder, salt, pepper, and lemon zest.
- Rub the herb mixture evenly over the entire surface of the chicken, including under the skin if possible.
- Place the flattened chicken, skin-side up, on a wire rack set inside a rimmed baking sheet. Drizzle the lemon juice over the top.
- Roast in a preheated oven at 425 degrees Fahrenheit (220 degrees Celsius) for 45 to 60 minutes, or until an instant-read thermometer inserted into the thickest part of the thigh reads 165 degrees Fahrenheit (74 degrees Celsius).
- Remove the chicken from the oven and let it rest for 10 minutes before carving.
Notes
- To remove the backbone easily, use sharp, heavy-duty kitchen shears.
- For the crispiest skin, allow the seasoned chicken to sit uncovered in the refrigerator for 2 to 4 hours before roasting.
- If you do not have a wire rack, place the chicken directly on a roasting pan, but the skin may not crisp as evenly underneath.
Nutrition
- Serving Size: 1/4 chicken
- Calories: 350
- Sugar: 0
- Sodium: 450
- Fat: 18
- Saturated Fat: 5
- Unsaturated Fat: 13
- Trans Fat: 0
- Carbohydrates: 1
- Fiber: 0
- Protein: 45
- Cholesterol: 150