

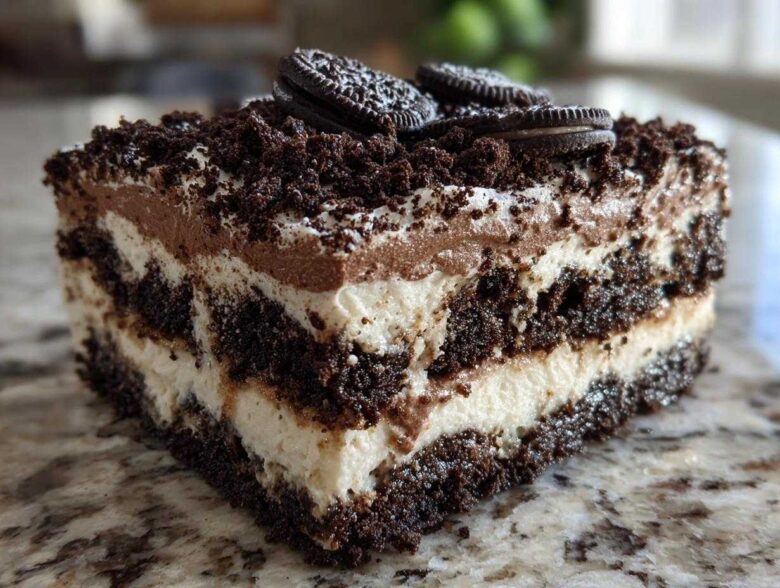
Listen, if you’re looking for a dessert that instantly takes everyone back to childhood parties or your last big summer BBQ, stop scrolling right now. You just found the absolute best **dirt cake** recipe on the internet. Seriously! This isn’t some fussy, complicated bake; this is the ultimate easy, no-bake treat that looks super impressive. My secret—and honestly, it’s not much of a secret—is getting that creamy filling just right so it contrasts perfectly with the crunchy chocolate cookie crumbs. I’ve made this specific version, the classic Oreo style, for every major family reunion since I was in high school, and it vanishes first, every single time. Trust me, mastering this creamy texture is way more important than perfecting your rolling!
Why This Easy Dirt Cake Recipe is a Family Favorite Dessert
What’s not to love about a treat that skips the oven entirely? This dessert is my go-to because it checks every busy host’s box. It’s fast, it’s fun to look at, and it’s incredibly rich, which is why I keep making it for every potluck dessert situation.
- It’s the ultimate no bake dirt cake—zero oven time needed!
- It satisfies that craving for a truly nostalgic chocolate dessert.
- The layering makes it look complex, but it’s one of the easiest party ready desserts out there.
- That creamy dirt cake filling is just pure comfort food goodness.
Gathering Ingredients for Your Classic Dirt Cake
Okay, let’s talk ingredients because this is where we nail the texture. You need a full package of those classic Oreos—don’t skimp on quality here because they *are* the dirt! For the creamy filling, you absolutely must have your butter and cream cheese softened completely. I mean truly soft, let them hang out on the counter for at least an hour. We’re making the perfect layered cookie dessert, and room temperature fats are the secret to that smooth fold!
Ingredient Notes and Substitutions for Creamy Dirt Cake Filling
Don’t ever try swapping real butter for margarine in this recipe; it just doesn’t emulsify the same way, and you end up with a runnier filling. Trust me on this one. For the pudding, use instant mix—not cook-and-serve—and make sure your milk is ice cold so it sets up properly. If you want to jazz up the flavor, try using coffee instead of half the milk for a mocha dirt cake twist! If you’re worried about texture, avoid using any low-fat dairy options; sometimes those watery substitutes just won’t hold up when layered.
Step-by-Step Guide to Making No Bake Dirt Cake
Now we get to the fun part! We are going to tackle the cream, then the cookie crust, and finally, we’ll put it all together. Keep your whisk handy, but remember that gentle hands are needed once the whipped topping comes into play. The whole process moves pretty fast, but don’t rush that chilling time at the end; that two hours is non-negotiable if you want firm, structured layers!
Preparing the Homemade Oreo Crumbs Dessert Base
Grab your rolling pin and a super sturdy Ziploc bag—this is surprisingly therapeutic! Toss in the entire package of Oreos. If you like a slightly finer, more uniform ‘dirt,’ hit them a few times on the counter before bagging them up, and then use a food processor for about 30 seconds. If you only have a rolling pin, just use some elbow grease until they look sandy. The most important part here is setting aside about one cup of those beautiful crumbs for the very top layer. This reserved portion makes the final topping look authentic!
Mixing the Rich Chocolate Dirt Pudding Layer
First, let’s tackle the pudding. Whisk your instant chocolate pudding mix into the cold milk for two full minutes. It thickens quickly, but let that bowl sit while you work on the richness base. In your second bowl, beat the cream cheese, softened butter, and powdered sugar until it’s absolutely lump-free—we want zero texture surprises from the cheese! Once that’s smooth, gently fold in the thawed whipped topping, being careful not to deflate it too much. Finally, fold the pudding mixture into the cream cheese base until everything is perfectly married into that rich creamy dirt cake filling. Don’t overmix once the pudding is in!
Assembling Your Layered Cookie Dessert Dirt Cake
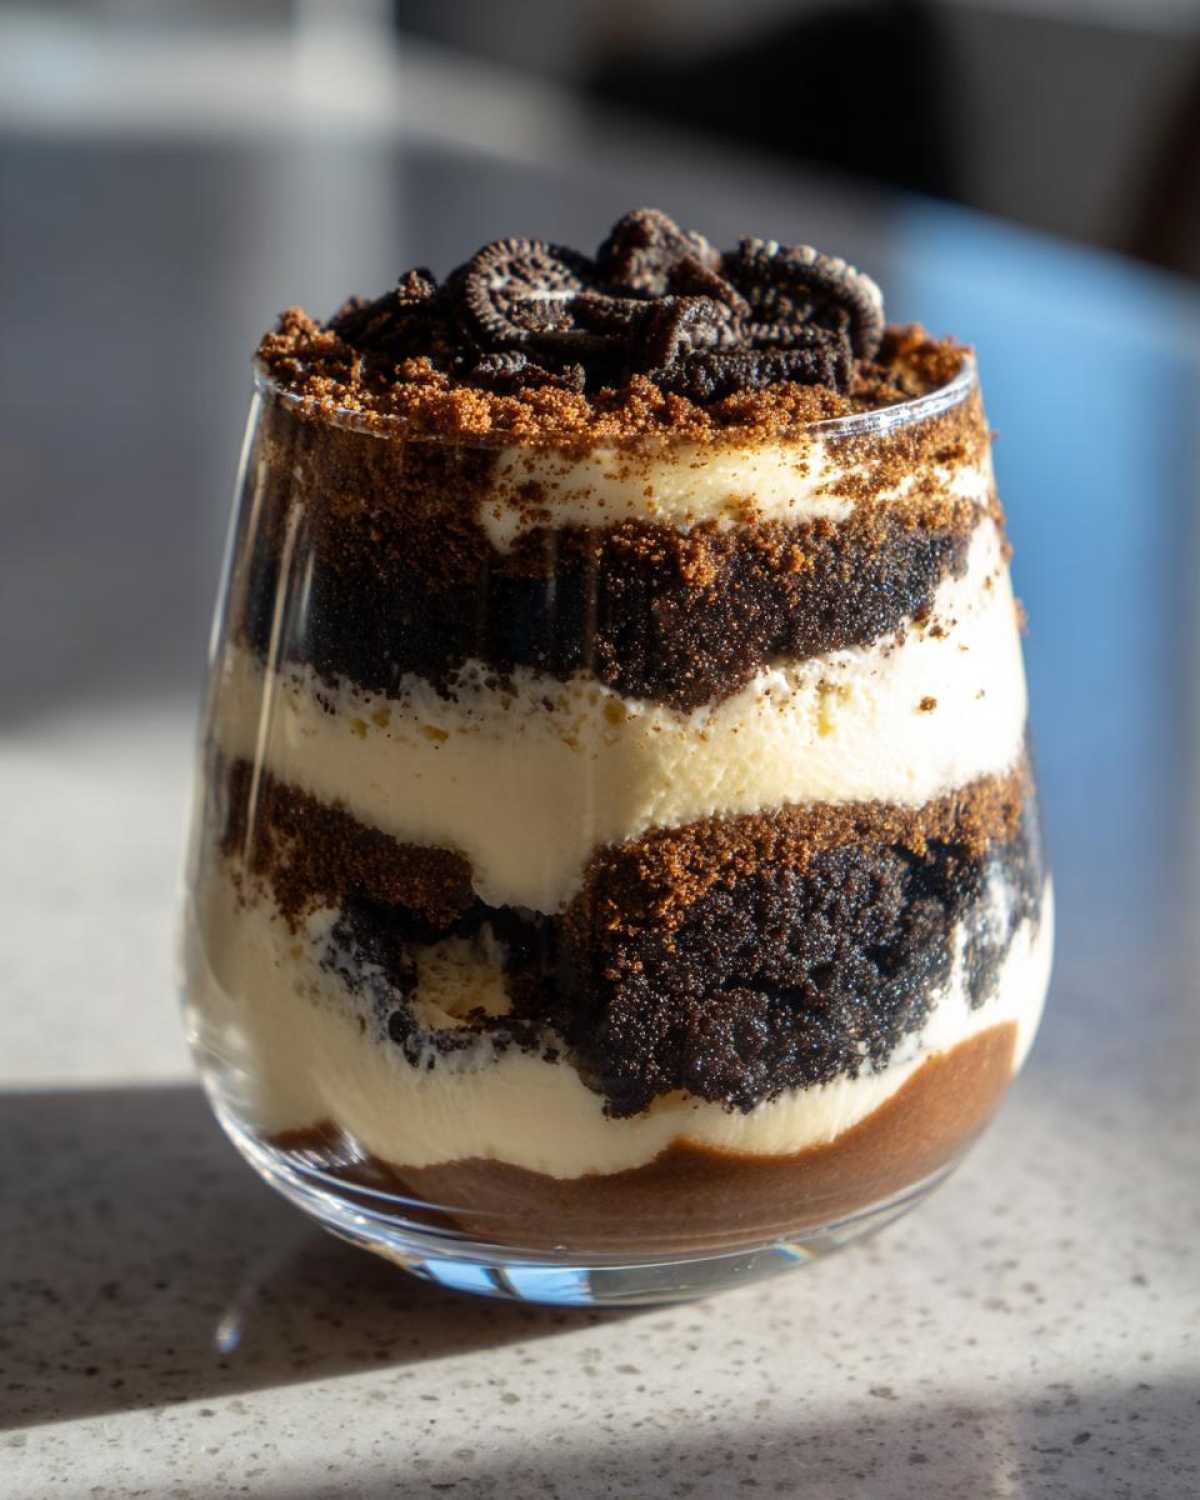
Time to make this look like actual, delicious dirt! Whether you’re using one giant trifle dish—which is my favorite way to show off the layers—or single serving cups, the layering technique is key for visual impact. We want nice, distinct bands of dark cookie layers separated by that pale, sweet filling. Start by spreading a generous layer of your crushed Oreos across the bottom. Don’t pack it down too hard, we want it loose!
Next, spread half of your creamy filling evenly over that cookie base. Then, you repeat the process: another nice layer of crumbs goes on top of the filling. Finish it off by spreading the remainder of your filling over that second cookie layer. This structure ensures every scoop gets a perfect mix of cookie and cream.
Finally, take the reserved cup of crumbs we set aside earlier and sprinkle it over the very top. This is what truly sells the ‘dirt’ look before we add the critter element.
Finishing Touches: Dirt Cake with Gummy Worms Decoration
You absolutely cannot have a proper **dirt cake** without some wiggly residents! This is the fun part for the kids, or honestly, for me. Before you pop the whole thing into the fridge to chill, gather up your gummy worms. You don’t just want them sitting on top; you want them to look like they are burrowing their way out! Stick them deep into that final layer of crumbs and filling at various angles so they seem to be emerging. They settle in nicely as the cake chills up, reinforcing the whole illusion. It’s the perfect, slightly silly ending to this easy layered pudding dessert.
Tips for Success with Your No Bake Dirt Cake
Even though this is a super simple, no bake dirt cake, I’ve learned a few tricks the hard way over the years. If you follow these little rules religiously, you’ll end up with perfectly structured layers that don’t weep on the plate!
First up: temperature management is everything for that creamy dirt cake filling. You must ensure your cream cheese and butter are truly softened. If they are still stiff when you start beating them with the powdered sugar, you’re going to end up with lumps that just won’t dissolve into the pudding mixture later. Nobody wants a gritty dessert that’s supposed to be smooth!
Second, when you get to the whipped topping—handle it gently! When you are folding the whipped topping into the cream cheese base, use a wide spatula and cut down through the middle and scoop up. You’re trying to incorporate air, not beat the air out of it. Over-mixing at this stage will deflate the volume, leaving you with a dense, heavy layer instead of a light, airy chocolate pudding filling.
And finally, the big one: chilling time is completely non-negotiable. You see the recipe calls for a minimum of two hours, but honestly? If you can leave your **dirt cake** covered tightly in the fridge overnight, that’s even better. Chilling lets those cookie crumbs soften just enough to cut like silk instead of shattering when you try to scoop them. If you try to serve it after just 30 minutes, you’re going to have a big, soupy mess.
Storage and Reheating Instructions for Your Dirt Pudding
Now, if you’ve made a gigantic bowl of this amazing layered cookie dessert and can’t possibly eat it all in one sitting—which, honestly, I usually can—you’re probably wondering about leftovers. Good news! This **dirt cake** actually stores beautifully because it’s a no-bake wonder. Since we aren’t dealing with baked cake structure, the moisture just helps the cookie layers get softer and more decadent!
The most important thing when storing is covering it tightly. If you used a large trifle bowl, I usually cover the entire thing with plastic wrap, making sure the wrap doesn’t actually touch the gummy worms or the top crumb layer. If you made individual dirt pudding cups, just pop lids on those babies or use plastic wrap tucked around the edges.
You want to keep it in the fridge, of course. It holds up really well for about three days, but here’s my personal opinion—and I’ve tested this for science, naturally—it is absolutely at its peak flavor and texture within 24 to 30 hours. After that second day, those cookie crumbs can get a little too soft for my preference, tasting more like chocolate mush than glorious ‘dirt’!
Since this is a pudding and cream-based dessert, reheating is definitely not an option. Don’t even try the microwave; you’ll end up with hot, separated cream cheese sludge, and that’s just sad. Always serve your leftover **dirt pudding** cold, straight from the refrigerator, for that perfect refreshing bite!
Variations on the Classic Dirt Cake
While the traditional chocolate version is simply unbeatable, sometimes you just need to shake things up a little bit, right? I love making little tweaks, especially when I’m making this for grown-up get-togethers or if I need a quick chocolate dessert that looks a bit different than the usual big bowl.
One of my absolute favorite easy swaps is turning this into a sophisticated mocha delight. If you’re looking for a **Mocha Dirt Cake**, all you have to do is make one small adjustment when you mix the pudding. Just use rich, cold coffee instead of 1/2 cup of the regular milk. It deepens the chocolate flavor so much! You get this lovely bitter undertone that cuts through the sweetness of the cream cheese layer beautifully. I seriously recommend trying that for your next party!
Another brilliant variation that I often use when serving a crowd or packing something for a friend who needs a quick treat is making individual servings. Forget the big dish—let’s talk **Dirt Pudding Cups**! Simply follow the exact same layering instructions we talked about, but use small mason jars, clear plastic cups, or even nice wine glasses if you’re feeling fancy. This is especially handy if you’re making a dessert ahead of time for parties because you can seal each one and keep them organized in the fridge until serving time.
If you’re feeling bold and want to change up the base flavor entirely, you can absolutely swap out the chocolate instant pudding for vanilla or even butterscotch! If you use vanilla pudding, you might want to amp up the chocolate flavor in the cookie layer by crushing up a few extra Oreos into the base layer for color balance. Or, try the cheesecake pudding mix if you find it—that makes for an amazing, tangy **creamy dirt cake filling** that pairs surprisingly well with the dark cookie crumbs.
For a very simple crunch variation, try adding some chopped peanut butter cups into the filling layer—just fold them in gently along with the pudding. It adds texture and a salty-sweet punch to the whole affair without changing the overall structure too much. Remember, the magic here is that it’s a **quick chocolate dessert**, so major changes aren’t needed to make it feel new again!
Frequently Asked Questions About Making Dirt Cake
It’s super common to have questions when you’re diving into a new recipe, even one as straightforward as this classic **dirt cake**! I’ve gathered the ones I hear most often from readers and friends. Hopefully, these clear up anything standing between you and serving up the best **no bake dirt cake** at your next event!
Can I make this dirt cake ahead of time for parties?
Yes, absolutely! That’s one of the real superpowers of this recipe—it’s one of the best make ahead desserts for parties! You can assemble the entire thing, layers and all, cover it tightly, and chill it for up to 24 hours. I find that 12 hours is the sweet spot; it gives the cookie layers enough time to soften up nicely but keeps the filling wonderfully fresh. But here’s the crucial advice: if you are decorating with those adorable gummy worms, wait until about 30 minutes before serving to stick them in. If you put them in too early, they can get a little sticky or start to bleed color into the top cookie layer overnight.
Do I really need to crush the Oreos myself? Can I use pre-crushed crumbs?
You definitely *can* use pre-crushed crumbs if you’re in a massive pinch, but trust me, you’ll sacrifice texture! When you crush them yourself—whether with a food processor or my favorite method, a rolling pin—you get that wonderful mix of fine powder and slightly larger, uneven pieces. That texture variance is what makes it look and taste like real ‘dirt’ in this dessert with crushed Oreos. The store-bought ones tend to be too uniform and fine, leading to a less interesting mouthfeel in that layered cookie dessert.
What if I don’t have/like cream cheese? Can I make a filling without it?
That’s a great question, especially if you’re avoiding dairy or just don’t keep cream cheese on hand! The cream cheese is what provides the necessary stability and tang to hold up that heavy pudding and whipped topping mixture for that signature creamy dirt cake filling. If you skip it, you’re basically making a simple chocolate pudding fluff, which will likely weep and separate after an hour or two. If you absolutely must substitute, try using an equal amount of softened Neufchatel cheese (which is 1/3 less fat) or even a block of softened silken tofu if you’re adventurous, but know that the structure won’t be quite as firm as the classic version.
My pudding mixture seems too runny. What did I do wrong?
Don’t panic! This is usually one of two things. First, did you use *instant* pudding mix, not cook-and-serve? Cook-and-serve won’t thicken up without heat. Second, the milk has to be very, very cold—like, straight from the back of the fridge cold—to activate the gelling agents in the instant mix. If it’s still runny after whisking for a full two minutes, add just another tablespoon of milk until you see a noticeable thickening, and then let it sit for the full five minutes before folding it into your cream cheese base. Because this is a quick chocolate dessert, patience during the initial pudding set is key.
Can I scale this easy dirt cake recipe up for a huge potluck?
Of course! This recipe scales beautifully. If you want to triple it, just triple everything! The main thing to adjust is the container you use. If you are making 3x the amount, skip the trifle dish and go for a full half-sheet pan or a large 9×13 pan. You’ll still layer it—bottom layer of crumbs, half the filling, middle layer of crumbs, remaining filling, and then the final crumb topping. Just remember that if you use a much larger, shallower dish, the chilling time might be slightly less than the two hours because the layers are thinner!
If you need to get in touch with any other sneaky baking questions, feel free to reach out over at my contact page!
Nutritional Estimates for this Quick Chocolate Dessert
Since we are dealing with cream cheese, butter, sugar, and cookie goodness, we know this isn’t exactly a health food, but it’s worth knowing the general breakdown for this delightful quick chocolate dessert. These estimates are based on the provided recipe serving 10 people in a standard trifle dish configuration, but remember, every scoop gets a little different amount of filling versus crumb!
- Serving Size: 1 serving
- Calories: Approximately 450 per slice.
- Fat: About 28g (a fair bit of that is the butter and cream cheese doing the heavy lifting for that texture!).
- Sugar: Watch out—around 45g, which really highlights why we love this as a special occasion treat.
- Protein: Around 5g.
- Carbohydrates: Roughly 48g.
Keep in mind these are estimates! If you use lower-fat cream cheese or lighten up on the sugar a bit, those numbers will shift. We include this just for general awareness, but honestly? You should focus on enjoying every bite of this perfect nostalgic chocolate dessert!
For more information about how we calculate these figures, please check out our site policies linked below.
Learn more about our recipe standards here.
Nutritional Estimates for this Quick Chocolate Dessert
Since we are dealing with cream cheese, butter, sugar, and cookie goodness, we know this isn’t exactly a health food, but it’s worth knowing the general breakdown for this delightful quick chocolate dessert. These estimates are based on the provided recipe serving 10 people in a standard trifle dish configuration, but remember, every scoop gets a little different amount of filling versus crumb!
- Serving Size: 1 serving
- Calories: Approximately 450 per slice.
- Fat: About 28g (a fair bit of that is the butter and cream cheese doing the heavy lifting for that texture!).
- Sugar: Watch out—around 45g, which really highlights why we love this as a special occasion treat.
- Protein: Around 5g.
- Carbohydrates: Roughly 48g.
Keep in mind these are estimates! If you use lower-fat cream cheese or lighten up on the sugar a bit, those numbers will shift. We include this just for general awareness, but honestly? You should focus on enjoying every bite of this perfect nostalgic chocolate dessert!
For more information about how we calculate these figures, please check out our site policies linked below.
Learn more about our recipe standards here.
PrintClassic No-Bake Oreo Dirt Cake

Make this simple, creamy, no-bake dessert using crushed Oreos, chocolate pudding, and whipped topping. It is perfect for parties and requires no oven time.
- Prep Time: 20 min
- Cook Time: 0 min
- Total Time: 2 hours 20 min
- Yield: 10 servings
- Category: Dessert
- Method: No Bake
- Cuisine: American
- Diet: Vegetarian
Ingredients
- 1 package (14.3 ounces) Oreo cookies
- 1 package (3.9 ounces) instant chocolate pudding mix
- 2 cups cold milk
- 1 container (8 ounces) frozen whipped topping, thawed
- 1/2 cup butter, softened
- 1 package (8 ounces) cream cheese, softened
- 1 cup powdered sugar
- 1 package (7.5 ounces) gummy worms for decoration
Instructions
- Place all Oreo cookies into a large zip-top bag. Crush them finely using a rolling pin until they resemble dirt. Set aside about 1 cup of crumbs for topping.
- In a large bowl, whisk together the instant chocolate pudding mix and cold milk for two minutes until slightly thickened. Let it stand for five minutes.
- In a separate bowl, beat the softened butter, softened cream cheese, and powdered sugar together until smooth and creamy.
- Gently fold the thawed whipped topping into the cream cheese mixture until just combined.
- Fold the pudding mixture into the cream cheese mixture until fully incorporated. This is your filling.
- In a large trifle dish or individual cups, begin layering. Place a layer of crushed Oreos on the bottom.
- Spread half of the creamy filling over the cookie layer.
- Add another layer of crushed Oreos.
- Spread the remaining filling over the second cookie layer.
- Top the entire dessert with the reserved 1 cup of crushed Oreo crumbs.
- Press gummy worms into the top layer to look like they are coming out of the ‘dirt.’
- Chill the dirt cake for at least 2 hours before serving.
Notes
- You can use a stand mixer or hand mixer for the cream cheese mixture for the smoothest texture.
- For individual servings, layer the ingredients in small clear cups or mason jars.
- If you prefer a richer flavor, substitute 1/2 cup of the milk with cold coffee when making the pudding.
Nutrition
- Serving Size: 1 serving
- Calories: 450
- Sugar: 45
- Sodium: 350
- Fat: 28
- Saturated Fat: 15
- Unsaturated Fat: 13
- Trans Fat: 0.5
- Carbohydrates: 48
- Fiber: 2
- Protein: 5
- Cholesterol: 55