

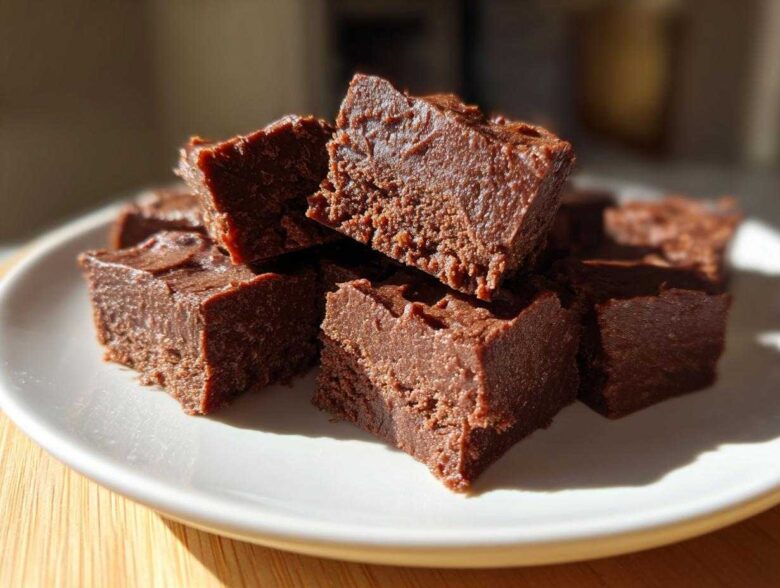
If you’ve ever promised homemade candy for a party and then panicked because you didn’t want to mess with candy thermometers or endless stirring, I have found our salvation! Seriously, ditch the complicated recipes because I’m about to show you the ultimate easy 3-ingredient chocolate fudge that guarantees success every single time. I spent years trying to create incredible, creamy results without the stress, and this simple combination cracked the code. This isn’t just fast; it’s genuinely decadent and rivals anything you could buy from a gourmet shop. Trust me, this will become the cornerstone of your sweet treats collection.
If you want to know more about the people behind these super helpful kitchen finds, feel free to take a peek at our story here.
Why This 3-Ingredient Chocolate Fudge is Your New Family Favorite Fudge
We all want that rich, melt-in-your-mouth experience when we think of homemade candy, but the stovetop required for traditional recipes can scare anyone off! This little wonder right here changes everything. It’s the perfect solution when you need Quick Dessert Ideas for an impromptu get-together or just a serious chocolate craving hits at 8 PM. It’s pure magic, truly.
The best part is that this ultra-simple method gives you that gorgeous, velvety mouthfeel you’d expect from a holiday treat. Making this fudge is practically foolproof, delivering professional results with kindergarten-level effort!
Achieving Creamy Fudge Texture Without a Candy Thermometer
You absolutely do not need to worry about watching gauges or testing for the hard-ball stage. The reason this works so well is because of our secret backbone ingredient: sweetened condensed milk. That high-fat, high-sugar base already has the right structure built in! It melts down smoothly with the chocolate chips into a stable emulsion.
This combination basically does the most complex part of candy-making for you. That means you get guaranteed Creamy Fudge every time, without risking crystallization. It’s a neat little shortcut based on well-understood basic confectionery science, I promise!
Quick Dessert Ideas: From Prep to Chill in Under 20 Minutes
When I say fast, I mean it! We’re looking at just about five minutes of actual active prep time. The stovetop takes maybe ten minutes to melt everything perfectly smooth. That means in less than twenty minutes, your pan is ready for the fridge!
Seriously, for Simple Confectionery, nothing beats this. You spend more time choosing which topping to sprinkle on top than actually cooking the base. This makes it my go-to when I need something impressive made with nearly zero fuss. It’s the definition of Homemade Candy made easy!
Gathering Ingredients for Foolproof Fudge
Because this recipe has so few moving parts—only three, remember!—you absolutely must treat your ingredients like gold. Don’t try to skimp here; the quality shows through brilliantly in the final product. This recipe doesn’t hide behind tons of cocoa powder or nuts; it relies on these three superstars to shine, making the simplest fudge taste amazing.
Ingredient Clarity for Perfect Fudge
Here is the absolute, non-negotiable list. Please pay close attention to the details, because substituting the wrong kind of milk can turn your smooth topping into a complete disaster. We need:
- One full 14-ounce can of sweetened condensed milk. Don’t grab evaporated milk—that won’t work for this!
- Two full cups of semi-sweet chocolate chips. If you use chunks, they melt unevenly, and we want ultra-smooth results here.
- Exactly one teaspoon of vanilla extract. It just pulls all those beautiful chocolate notes forward.
Stick exactly to these measurements for the best outcome. I promise, you’ll build serious confidence making this homemade candy!
Step-by-Step Chocolate Fudge Tutorial
Okay, let’s get down to the cooking part! Since this is a stovetop method, it moves fast, so have your pan ready before you even turn on the burner. We’re aiming for smooth, glossy perfection, and the key here is temperature control. You want to coax the chocolate until it melts, not shock it into becoming grainy!
Preparing Your Pan and Melting the Fudge Base
First things first: Prep that pan! Grab an 8×8 inch dish and line it with parchment paper, making sure you leave a nice little overhang on two sides. That overhang is our lifeline later because it’s how we get this perfectly set fudge out without breaking it.
Next, combine your milk and chocolate chips right in a medium, heavy-bottomed saucepan. Put that pan over very low heat. And I mean *low*. Keep stirring constantly until everything is totally melted and looks like silk. Here’s vital advice for Foolproof Fudge: Do not, under any circumstances, let this mixture come to a boil! Boiling ruins the sugar structure and you end up with crumbly fudge instead of that beautiful soft texture we’re after.
Finishing and Setting Your Decadent Desserts Fudge
Once it’s beautifully smooth and silky on the stove (that’s the stovetop method doing its job!), pull the pan completely off the heat immediately. Now, quickly stir in that teaspoon of vanilla extract. It brightens up the whole flavor profile beautifully.
Pour that glorious mixture right into your prepared dish and use a spatula to spread it out evenly. Don’t overwork it; just get it level. Then, it’s chill time! This needs at least two hours in the refrigerator to firm up completely. Patience here secures you the title of making the Best Fudge Ever.
If you’re looking for more detailed instructional help on what to avoid in candy making, check out this important disclaimer. We want this to be a success!
Tips for Success When Making Quick Fudge
Even though this is an incredibly easy recipe, I’ve learned a few tricks over the years just in case things get a little grumpy on the stove. Remember, since we aren’t using stabilizers or complicated steps, temperature management is your best friend during this quick Stovetop Fudge process. Don’t walk away when it’s melting!
If you follow the low-heat rule, you usually won’t have issues, but sometimes the transition from stove to paper can cause things to look a little dull. If the mixture seems stiff or starts to seize up before you get it into the pan—maybe the burner was too hot—don’t panic! You can often save it by popping it back on the absolute lowest heat for just thirty seconds while stirring vigorously.
Troubleshooting Common Issues with Easy Fudge Recipes
Graininess is the number one enemy of beautiful, glossy fudge. If your finished product is gritty instead of smooth, it almost always means your heat rose too high and the sugar started to crystallize. Unfortunately, once that happens, it’s tough to fix perfectly once it sets.
If it seems too thick to spread easily, check that you didn’t accidentally add an extra tablespoon of chips. If it sets up too hard in the pan, chances are you cooked it slightly too long. You can sometimes place the cut squares in a slightly warmer spot (like on top of the fridge for ten minutes) before serving to soften them up just a touch. It’s all about gentle heating!
Variations for Gourmet Fudge and Holiday Fudge
This easy three-ingredient setup is fantastic on its own, but if you are looking to make this fudge truly stand out—maybe for gifting or as a stunning Holiday Fudge centerpiece—you’ve got lots of easy avenues to explore! Remember, since the base recipe is so simple, adding these little touches really elevates it into something approaching Gourmet Fudge without adding any real complexity.
I love making a big batch of this basic chocolate fudge every December. It’s the first thing everyone asks for, and it requires zero emotional investment compared to my fancier baked goods!
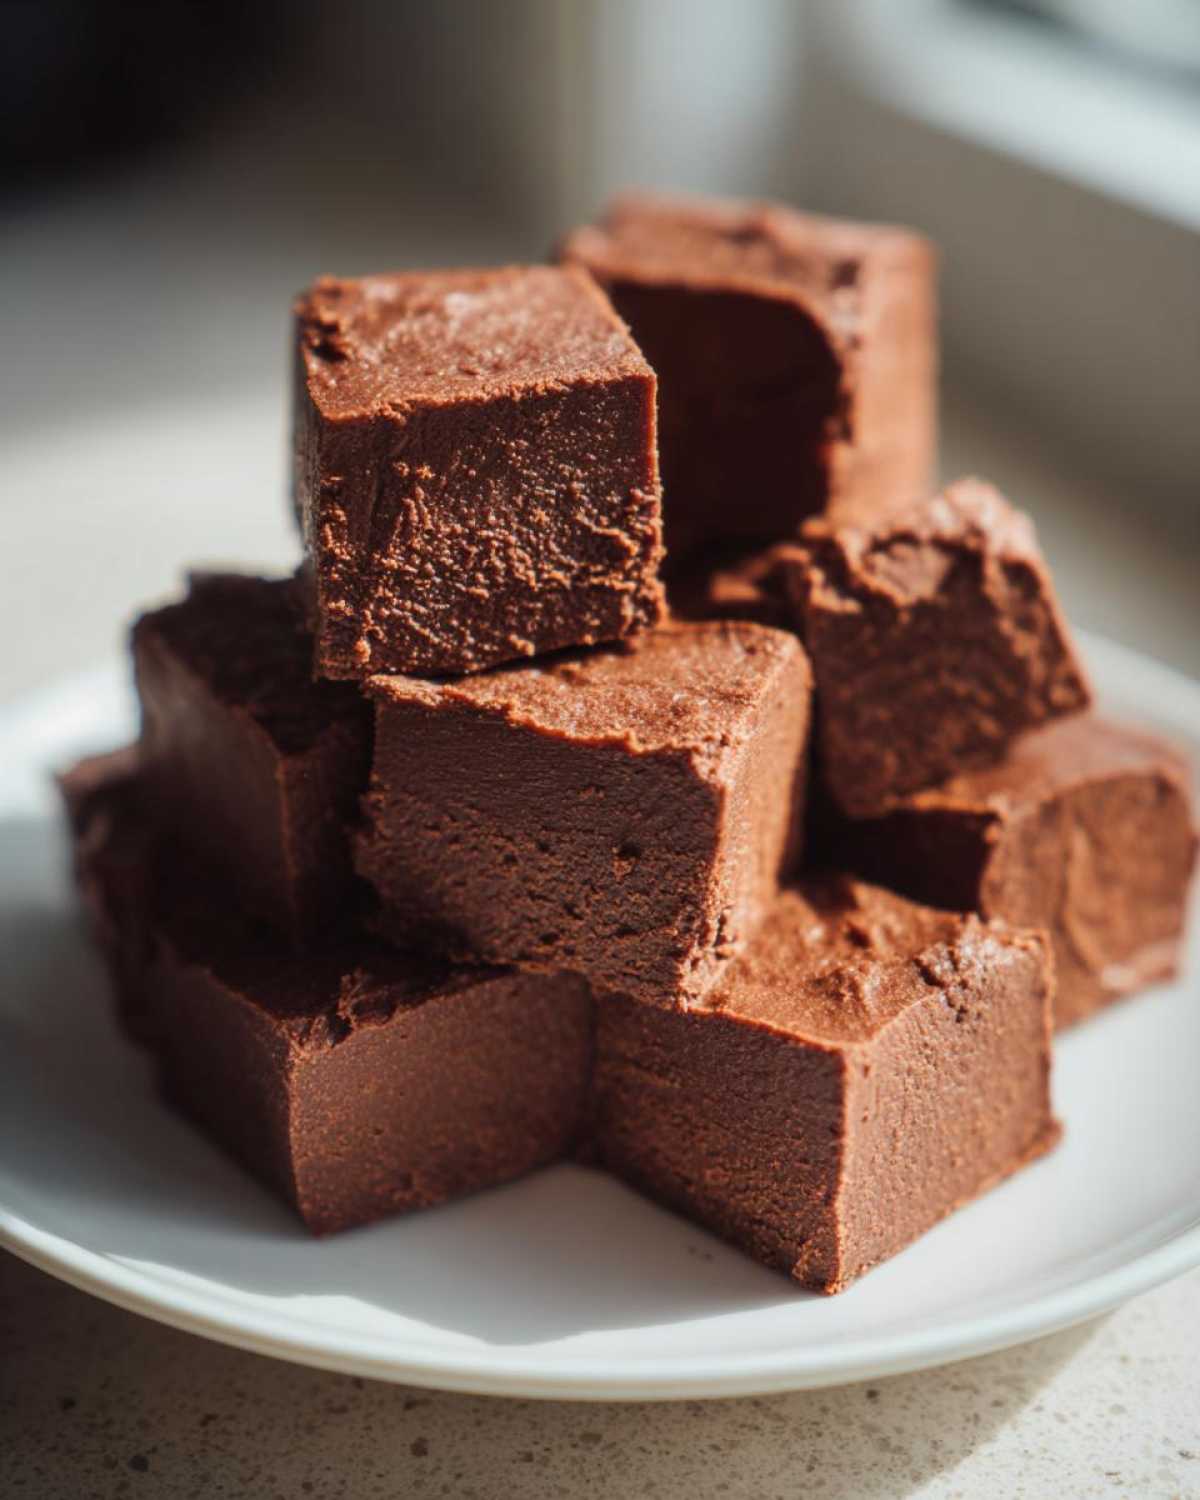
Creating Peanut Butter Fudge Recipe Swirls
This is my absolute favorite way to dress up this quick dessert. If you want a beautiful ribbon design that looks like it took hours but actually took five extra minutes, you have to try the peanut butter swirl. It adds a wonderful salty-sweet balance against the rich chocolate base.
What you need to do is take about half a cup of creamy peanut butter. Don’t just dump it in cold! Melt that peanut butter gently in the microwave or stovetop until it’s smooth and easily pourable. Then, once you’ve poured your chocolate fudge mixture into the prepared pan (right before chilling!), drizzle the melted peanut butter over the top in lines or dollops.
Take a knife or a skewer and gently drag it through the lines you just made, just a few times. Don’t overmix, or the colors will blend entirely! You want distinct paths of peanut butter running through the chocolate. Pop it straight into the fridge, and you’ve mastered Peanut Butter Fudge Recipe swirls!
Also, don’t forget the basic flavor substitutions. If you swap the semi-sweet chips for dark chocolate chips, you get a much deeper, adult flavor profile in your homemade candy. That’s an instant upgrade right there!
Storage & Serving Suggestions for Your Homemade Candy
Once you’ve resisted the urge to eat the whole pan yourself, you need to know how to store this amazing Simple Confectionery! Since this fudge sets up beautifully firm, you actually have two great options for keeping it fresh. If you plan on serving it within a few days, keeping it in an airtight container at cool room temperature works perfectly fine. It stays slightly softer that way, which I personally love.
If you’ve made a huge batch—and trust me, you probably will—storing it in the refrigerator in that same airtight container extends its life significantly. Just remember to take the pieces out about thirty minutes before serving if they’ve been chilling, so they soften up just a little before slicing.
Remember Step 7 from the instructions? Cutting is the final hurdle! Lift the entire slab out using those parchment overhangs. Then, use a large, sharp knife to cut it into roughly 16 small squares. These little bites are perfect served alongside a strong cup of coffee or arranged nicely on a platter for guests. They make fantastic, easy gifts, too!
Frequently Asked Questions About Making Fudge
You’ve seen how easy this is, but sometimes those last little questions pop up before you commit to mixing! I get it; when dealing with No Bake Candy, you want certainty. Here are the things I get asked most often about keeping this 3-ingredient fudge totally perfect:
Can I skip the vanilla extract?
You technically can, but I really, really discourage it! The vanilla won’t make your fudge grainy or ruin the texture, but it acts like a beautiful little flavor bridge between the sweet milk and the chocolate. Without it, the flavor feels a little flat. It’s such a small amount, so just use the teaspoon. Trust me on this one!
What if my finished fudge turns out grainy instead of creamy?
This is the number killer for all homemade candy! If it’s grainy, it means the temperature got too high during melting, and the sugar crystallized. Since this recipe uses sweetened condensed milk, it’s fairly resistant, but if you let it simmer or boil, it will happen. The only real fix is to try and gently reheat a small portion over very low heat, stirring constantly, but honestly, if it’s fully set, the texture is just set that way. Next time, keep that heat *low*!
Is it safe to double the recipe for a crowd?
Yes! This easy fudge recipe scales up beautifully, which is great news for holiday baking. When you double it, you’ll need a 9×13 inch pan instead of the 8×8. Just remember that because the depth of the fudge layer is thinner in the larger pan, it might set just a tiny bit faster in the fridge. You’ll still get that perfect texture, though!
If you have any other burning confectionery questions that I haven’t covered here, please feel free to reach out via our contact page. I love hearing from you!
Estimated Nutrition for This Easy Fudge
I know when I’m grabbing a piece of this delicious fudge, I’m really not thinking about calories, but I still like to keep track of what we’re eating, especially when the kids sneak an extra piece! Since this only uses three ingredients, the nutrition is honestly pretty straightforward. Remember, what you see here is based on a serving size of one small square, cut from the full 16-square batch using standard semi-sweet chips.
Because we use different brands of chocolate chips and even the type of milk can vary slightly, these numbers are truly our best guess—our estimate. Always keep this in mind when you’re planning out your dietary needs!
Here is the breakdown of what’s inside one delightful square of this quick dessert:
- Serving Size: 1 square
- Calories: 180
- Sugar: 22 grams (Yes, that’s high, but it is candy!)
- Sodium: 45 mg
- Fat: 9 grams
- Saturated Fat: 5 grams
- Protein: 3 grams
I always find it helpful to keep this information handy, especially if you are baking this type of homemade candy for an event where you might have guests with specific dietary concerns. You can always find our site’s full approach to recipe transparency by checking out the privacy policy, which covers how we handle all this data!
Share Your Family Favorite Fudge Experience
That’s it! You are now officially equipped to make the easiest, creamiest, most crowd-pleasing fudge known to humankind. Honestly, seeing how quickly this classic treat comes together is always a thrill for me, even after all these years of baking it.
Now I want to hear from you! Did you stick with the classic chocolate, or did you try swirling in that peanut butter? Did you add a sprinkle of sea salt on top? Don’t keep your successes a secret!
Hop down into the comments and tell me how it went. I absolutely love seeing photos when you try this recipe, so please share them with the community! If you rate this easy fudge recipe, give it five stars down below—it really helps other busy bakers find this simple magic trick! Happy swirling!
PrintEasy 3-Ingredient Chocolate Fudge

Make rich, creamy chocolate fudge quickly using only three common ingredients. This recipe is simple and yields a decadent treat.
- Prep Time: 5 min
- Cook Time: 10 min
- Total Time: 15 min
- Yield: 16 squares
- Category: Dessert
- Method: Stovetop
- Cuisine: American
- Diet: Vegetarian
Ingredients
- 1 (14 ounce) can sweetened condensed milk
- 2 cups semi-sweet chocolate chips
- 1 teaspoon vanilla extract
Instructions
- Line an 8×8 inch baking pan with parchment paper, leaving an overhang for easy removal.
- In a medium, heavy-bottomed saucepan, combine the sweetened condensed milk and chocolate chips.
- Heat the mixture over low heat, stirring constantly until the chocolate is completely melted and the mixture is smooth. Do not let it boil.
- Remove the pan from the heat and stir in the vanilla extract.
- Pour the fudge mixture into the prepared baking pan and spread it evenly.
- Refrigerate for at least 2 hours, or until firm.
- Lift the fudge out of the pan using the parchment paper overhang. Cut into small squares before serving.
Notes
- For a richer flavor, use dark chocolate chips instead of semi-sweet.
- If you prefer a peanut butter swirl, melt 1/2 cup of peanut butter separately and gently swirl it into the fudge before chilling.
- Store the finished fudge in an airtight container at room temperature for up to one week, or refrigerated for longer storage.
Nutrition
- Serving Size: 1 square
- Calories: 180
- Sugar: 22
- Sodium: 45
- Fat: 9
- Saturated Fat: 5
- Unsaturated Fat: 4
- Trans Fat: 0
- Carbohydrates: 25
- Fiber: 1
- Protein: 3
- Cholesterol: 10