

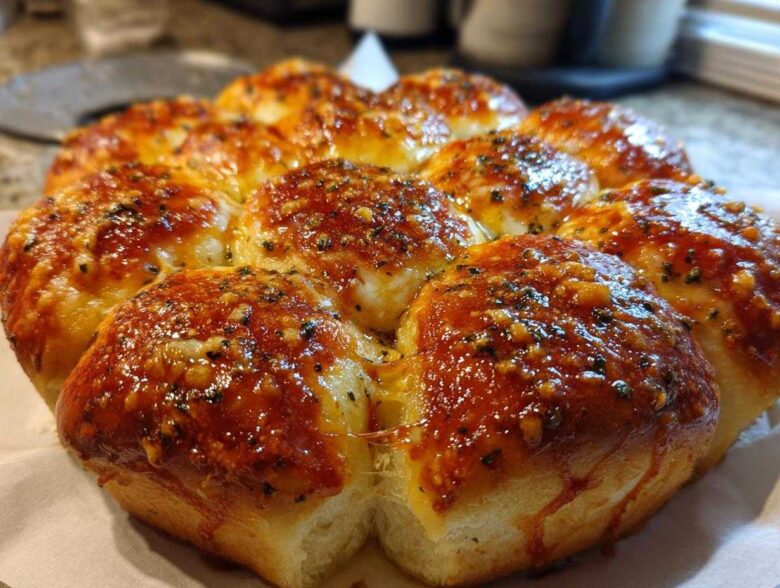
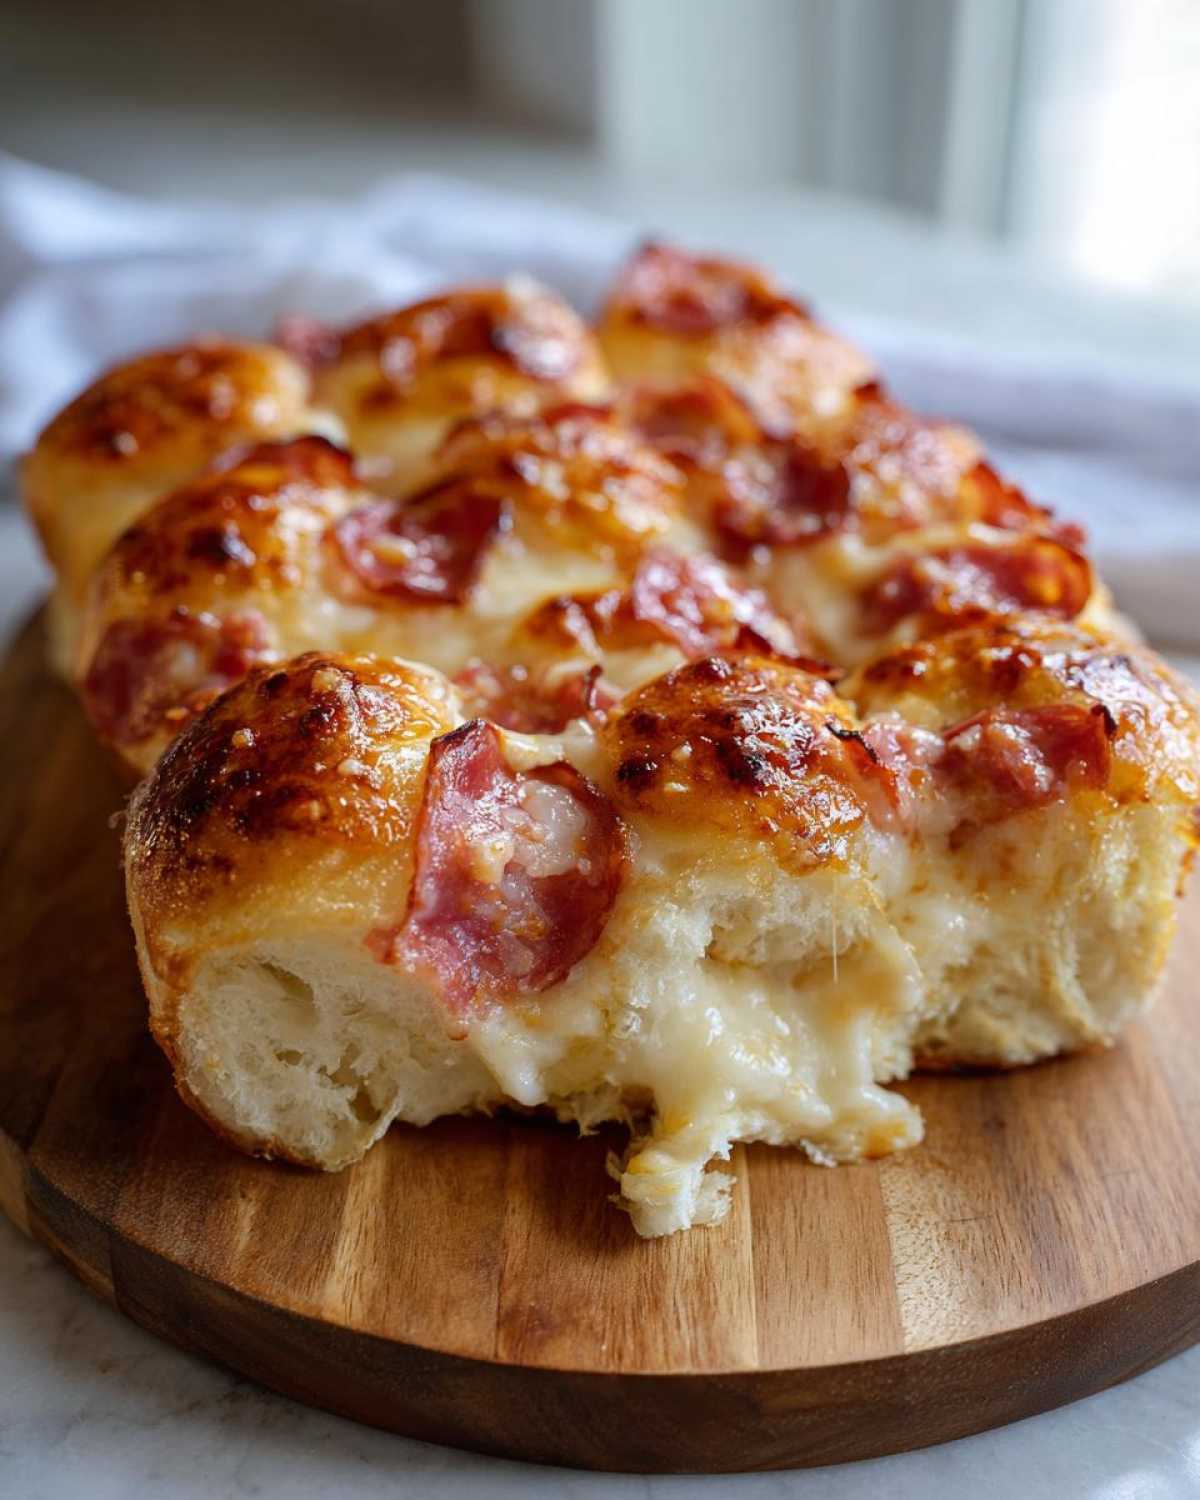
Oh my goodness, if you need a show-stopping, ridiculously easy appetizer that disappears the second you set it down, you simply have to try these! I swear, every single time I bring my version of these Hawaiian Roll Pepperoni pizza sliders to a party—whether it’s a casual Sunday football gathering or just a random Tuesday night when the kids are starving—I’m asked for the recipe. They are the definition of crowd-pleasing. Seriously, assembling these takes about ten minutes, and they bake up into the most glorious, cheesy, pull-apart bites you could ever imagine. I’m already planning on making a double batch for the next big game!
Why This Easy Pizza Sliders Recipe Works for Any Event
Honestly, the reason I keep these on heavy rotation is pure practicality, mixed with delicious convenience! You get that amazing pizza flavor without dealing with dough, stretching, or individual assembly for every single person. They are fantastic game day appetizers because you can prep the whole pan and slide it right into the oven.
Plus, cleanup is almost nonexistent, which, let’s be real, is half the battle when you’re feeding a crowd. They’re so fast, too—truly a miracle when you need a quick weeknight dinner that feels way more fun than regular dinner. I just love seeing everyone reach in to pull their own perfect little sandwich.
The Magic of Hawaiian Roll Sliders
The bread choice here is completely non-negotiable for me, and if you’ve tried these, you know why! Hawaiian rolls have that signature subtle sweetness, right? That little hint of sugar is what makes these pizza sliders absolutely irresistible.
When they bake under that garlic butter layer, the sweetness just melts into the savory pepperoni and salty mozzarella. It creates this incredible balance that plain white slider buns just can’t match. It’s the structure and the flavor jackpot all in one package of soft, pillowy bread.
Want to know more about what drives our kitchen philosophy? You can always learn more about why we test recipes so thoroughly over on our About Us page!
Gathering Ingredients for Perfect Pizza Sliders
Okay, let’s get down to brass tacks because successful pizza sliders rely totally on getting the right building blocks layered just so. Don’t skimp or substitute wildly here, especially when you’re aiming for that perfect gooey texture we talked about. We need to break the ingredient list down into two vital components: what goes inside, and what makes that amazing top layer.
For the Slider Base and Filling
You need a 12 count package of those sweet Hawaiian rolls—keep them whole, that’s essential! For the filling, I use about half a cup of your favorite pizza sauce, not too watery, please. Then, pack on the cheese: we’re talking 1 1/2 cups of shredded mozzarella cheese because we want maximum pull! Finally, surround that cheese with about 1/2 cup of sliced pepperoni. If you use little mini pepperonis, they fit perfectly.
Crafting the Garlic Butter Sliders Topping
This is where the flavor magic truly happens! You’ll need 4 tablespoons of unsalted butter, melted down until it’s smooth. Whisk that right up with 1 teaspoon of garlic powder and 1/2 teaspoon of dried Italian seasoning—don’t skip the seasoning, it lifts everything! Once everything is assembled, you finish it off by crowning the whole thing with 1/4 cup of grated Parmesan cheese. That combination makes these some of the best melty mozzarella sliders ever.
Step-by-Step Guide to Making Baked Slider Recipe
If you’ve got your ingredients ready, the assembly is so straightforward you’ll wonder why you ever ordered delivery pizza! Remember, we are aiming for that beautiful, unified top crust so we can pull off perfect pizza sliders later. Grab your 9×13 baking dish, and let’s get this party started!
First things first: get that oven preheated to 350 degrees Fahrenheit. While it warms up, lightly grease your baking dish. It doesn’t need much, just enough so those sweet rolls don’t decide to glue themselves to the bottom.
Preparing the Buns and Layering the Pizza
Now for the crucial part of the assembly! Take your whole package of Hawaiian rolls and, using a large serrated knife, slice the whole block horizontally, like one big loaf. Be super careful here! You want the bottom halves to stay perfectly connected, and likewise for the top halves. You do *not* want to cut individual rolls yet; we need that structural integrity for the layering.
Place the entire bottom half of the rolls into your prepared dish. Now we build! Spread that pizza sauce evenly, making sure you get coverage right to the edges. Then, sprinkle all your shredded mozzarella cheese beautifully over the sauce layer. Finally, arrange your pepperoni slices evenly across the cheese. This layering is what creates those amazing, cheesy pull apart pizza sandwiches that everyone fights over.
We save the top buns for just a moment while we make that incredible glaze!
Applying the Glaze and Baking Your Pizza Sliders
In a tiny little bowl—I use one of my prep bowls—whisk together your melted butter, the garlic powder, and that Italian seasoning we discussed. Take your top halves of the rolls and place them *gently* back onto the filling sandwiching everything in there. Now, grab a pastry brush (or even just use the back of a spoon, I won’t tell!) and brush that glorious garlic butter mixture evenly over the entire top surface of the rolls.
Trust me on this next part: cover the baking dish loosely with aluminum foil. This traps the steam initially, ensuring the bread softens up perfectly and the cheese starts melting beautifully without the top burning. Bake it covered for 15 minutes.
After that first bake, take the foil off! We need that exposure to get that perfect crunch. Bake uncovered for another five to seven minutes, or until the tops are perfectly golden brown and you can see that cheese bubbling away. You can check out my official recipe disclaimer here if you have any questions about substitutions or potential baking variations!
Tips for Perfect Cheesy Slider Recipe
We’ve made it this far, and the results should be amazing, but let me drop a few final bits of advice to make sure these cheesy slider recipe miracles turn out flawless every single time you bake them. My absolute biggest personal tip, which I learned the hard way, is to use a really robust, deeply flavored pizza sauce. A watery sauce leads straight to sogginess, and nobody wants that!
Also, regarding the cheese: pre-shredded mozz sometimes has anti-caking agents that stop it from melting smoothly. If you have time, shredding a block of low-moisture, whole-milk mozzarella yourself will give you the absolute best, stretch-iest result. You want that glorious cheese pull when you separate these handheld pizza snacks!
Ingredient Notes and Substitutions for Handheld Pizza Snacks
Now, I know not everyone loves pepperoni—even though, come on, it’s the king here! If you’re swapping it out, remember that any meat has to be cooked first, like crumbled sausage or crispy bacon. If you’re ditching meat entirely, throw in some thinly sliced black olives or sautéed mushrooms, but make sure you wick out *all* the excess water from them first, or your bottom buns will weep!
And if, heaven forbid, you can’t find those glorious Hawaiian rolls? Don’t panic! Any soft, slightly sweet dinner roll will work in a pinch. Just make sure they’re touching side-by-side in that pan when you brush on the butter. If you’re looking for some legal grounding on why we share these tried-and-true fixes, feel free to look over my Terms and Conditions document!
Serving Suggestions for Your Pizza Sliders
Once these beauties come out of the oven, golden and bubbling, you have a serious feast on your hands! While they are robust enough to be their own main event, especially for kids, sometimes you want to round out the plate a little, especially if you’re serving these savory pull apart bread snacks at a party.
I rarely bother with anything too heavy because the sliders themselves are pretty satisfying. Freshness is key to cut through all that glorious cheese and butter, you know?
- The Dipping Sauce Factor: Even though there’s sauce inside, never underestimate how much people love to dip! A small bowl of warmed marinara sauce on the side is fantastic for that extra layer of pizza flavor. If you want something zesty, try a quick ranch dressing—the coolness against the hot, spicy pepperoni is just addictive.
- Keep it Light on the Side: Since these are so rich and cheesy, pair them with something light and crunchy. A simple side salad with a bright vinaigrette works wonders. Forget heavy potato salads; we need something acidic to refresh the palate between bites of that melty mozzarella.
- Veggies Next to the Good Stuff: For game day spreads, I often just put out some celery and carrot sticks. They are there for dipping, of course, but they also just look colorful next to the warm tray of sandwiches. Plus, it makes me feel slightly better about having eaten twelve of them myself!
These appetizers are so versatile; they go from being the star of the show at a New Year’s party to being the easiest thing you’ll ever make for a busy school night dinner. Just pick your favorite dip, and you’re good to go!
Storage and Reheating for Leftover Pizza Sliders
Okay, let’s talk about the inevitable—what happens when you actually have leftovers! It’s rare around here, but when it does happen, you absolutely need to store them correctly so they taste almost as good the next day. This isn’t like leftover cold pizza you eat straight from the box; these rely on that soft bun texture, and we need to protect that!
The best way to store any extra pepperoni pizza bites you might have is right in the same 9×13 dish you baked them in, provided it has a tight-fitting lid. If you don’t have a lid, just transfer them to one large airtight container. Make sure they cool down slightly—maybe 20 minutes on the counter—before sealing them up tight.
They are perfectly fine sitting in the refrigerator for up to three days. I wouldn’t push much past that, just because the bread starts to absorb too much moisture from the cheese and sauce, and we want to avoid any sogginess.
The Best Way to Reheat Your Sliders
Now, here comes the important part of maintaining texture! You might be tempted to pop one or two into the microwave to zap them warm, but please, resist that urge! Microwaving these will turn that beautiful Hawaiian roll into a sad, slightly rubbery thing. We want golden tops and gooey centers again, not microwaved dough.
The oven is your best friend for reheating, just like making the original baked slider recipe! Arrange the leftovers on a small baking sheet lined with parchment paper—this keeps the bottoms from steaming. Pop them into an oven that’s only slightly warm, maybe 300 degrees Fahrenheit.
Give them about 8 to 10 minutes to warm all the way through. If the tops look a little pale or dry after that time, you can quickly pop them under the broiler for about 60 seconds—watch them like a hawk because Parmesan burns fast! This quick blast restores that slightly crisp, buttery top layer and gets the cheese fully melted again. It brings them right back to life so you can enjoy those kid friendly pizza meals all over again!
Frequently Asked Questions about Pizza Sliders
I get so many great questions after folks try my favorite pizza sliders for the first time! It’s funny how such a simple recipe can spark so much curiosity. Most people want to know how to prep them for those huge Super Bowl snacks spreads or how to tweak the cheesy layers. Don’t worry, I’ve answered the most common things I hear below!
Can I make these ahead of time?
That’s the million-dollar question when you’re trying to execute a full party menu! You absolutely *can* assemble these ahead of time, which makes them even closer to a true 30 minute meal when guests arrive. You can put the entire thing together—sauce, meat, cheese—and place the top buns on. Cover the dish really tightly with plastic wrap (or foil, if you prefer) and stick it in the fridge for up to about 12 hours.
Just remember one thing: if you assemble them and chill them, you’ll definitely need that initial foil coverage for the baking time, and you might need to add an extra 5 to 7 minutes to the covered bake time since they’re going in cold from the fridge. They still taste fantastic, though!
What is the best cheese to use besides mozzarella?
I love that you’re thinking about boosting that gooey factor! Mozzarella is essential for the stretch, but it’s a bit mild on its own. If you want something with a bit more punch, go ahead and swap maybe a quarter cup of that mozzarella for Provolone. Provolone melts beautifully and gives you that slightly sharper, tangier flavor that pairs so well with pepperoni.
Some people even sneak in a little shredded smoked Gouda if they want a real showstopper—it makes for seriously amazing melty mozzarella sliders, but just be careful not to use too much, since it has a stronger flavor profile. A little blend never hurt anybody, that’s what I always say!
How do I keep the garlic butter from burning?
That sweet, garlicky, Parmesan crust is what makes these garlic butter sliders so special, so burning it is a total disaster! The main trick here, which I detailed in the instructions but is worth repeating, is the initial foil covering. When you bake them covered for the first 15 minutes at 350°F, that steam keeps the tops moist while the internal heat builds up and melts the cheese thoroughly.
The magic happens when you pull the foil off for those final 5 to 7 minutes. That’s when you allow the butter and Parmesan to caramelize just slightly and turn golden brown. If your oven runs notoriously hot, just keep an eye on them during that last uncovered period—maybe check them at the 4-minute mark!
If you have any other pressing questions about this recipe or want to talk about making them even faster, feel free to send a note through our Contact page! I love hearing from you all!
Nutritional Estimates for This Recipe
Now, I know half of you come here just for the recipe, and the other half wants to know exactly what kind of party food you’re bringing to the table! Since these are made with regular ingredients and are meant to be fun, these numbers are just my best estimate based on standard pantry staples. Please remember that these figures can change wildly depending on the brand of Hawaiian rolls or the specific type of pepperoni you use. I’ve tried to keep things as average as possible!
This breakdown is based on a serving size of just one of these adorable little sandwiches. If you’re like me and can’t stop at one, you’ll need to multiply these numbers! If you want to check out the policies surrounding how we conduct our recipe testing and provide disclosures, you can always review my Privacy Policy.
- Calories: Around 245 per slider. That sounds low, but trust me, they are satisfying!
- Fat: Roughly 12 grams total. That includes about 6 grams of saturated fat, mostly coming from that glorious cheese and butter topping.
- Carbohydrates: About 25 grams, mostly coming from the sweet rolls.
- Protein: A solid 11 grams, thanks to the mozzarella and pepperoni.
- Sugar: This is where the Hawaiian roll shines through, hitting around 7 grams.
They’re relatively balanced for an appetizer, especially considering how much flavor power they pack! Enjoy them responsibly, or just make a second batch—I won’t tell anyone!
Share Your Game Day Appetizer Creations
Well, that’s it! You’ve got the secret, the ingredients, and the method for the absolute best pizza bites you’ll ever make. Now the real fun begins: eating them!
I pour my heart and soul into making sure every recipe I share here is something that becomes a staple in *your* kitchen, just like it is in mine. Once you pull those golden, gooey sliders out of the oven, I desperately want to know what you think!
Please, please, please come back down to the comments section below and let me know how they turned out for you. If you made any sneaky swaps or tried a topping variation, shout it out so others can see! Did you add extra garlic powder? Did you manage to keep the kids away while they were cooling (I never do)?
If this recipe saved your weeknight dinner or totally won over your friends at your last gathering, give it a little love! I always appreciate it when you take a moment to hit that 5-star rating button right below the recipe card. It really helps other folks find these recipes!
We love building this community together, and I truly appreciate you trusting me with your kitchen for this recipe. For more details on how this site operates and how we handle user feedback, check out my Cookie Policy!
Happy baking, and enjoy those amazing, cheesy, savory handhelds!
PrintHawaiian Roll Pepperoni Pizza Sliders with Garlic Butter Glaze
Make quick, cheesy, pull-apart pizza sliders using Hawaiian rolls, pepperoni, mozzarella, and a savory garlic butter topping. This recipe is perfect for game days or easy weeknight meals.
- Prep Time: 10 min
- Cook Time: 22 min
- Total Time: 32 min
- Yield: 12 sliders
- Category: Appetizer
- Method: Baking
- Cuisine: American
- Diet: Vegetarian
Ingredients
- 1 package (12 count) Hawaiian sweet rolls
- 1/2 cup pizza sauce
- 1 1/2 cups shredded mozzarella cheese
- 1/2 cup sliced pepperoni
- 4 tablespoons unsalted butter, melted
- 1 teaspoon garlic powder
- 1/2 teaspoon dried Italian seasoning
- 1/4 cup grated Parmesan cheese
Instructions
- Preheat your oven to 350 degrees Fahrenheit. Lightly grease a 9×13 inch baking dish.
- Carefully slice the entire package of rolls horizontally, keeping the bottom halves together and the top halves together. Place the bottom halves in the prepared baking dish.
- Spread the pizza sauce evenly over the bottom layer of rolls.
- Sprinkle the mozzarella cheese over the sauce.
- Arrange the pepperoni slices evenly over the cheese layer.
- Place the top halves of the rolls back onto the filling.
- In a small bowl, whisk together the melted butter, garlic powder, and Italian seasoning.
- Brush the garlic butter mixture evenly over the top of the assembled sliders.
- Sprinkle the grated Parmesan cheese over the buttered tops.
- Cover the baking dish loosely with aluminum foil. Bake for 15 minutes.
- Remove the foil and bake for an additional 5 to 7 minutes, or until the cheese is fully melted and the tops are golden brown.
- Let the sliders cool for 2 minutes before slicing between the rolls to serve.
Notes
- For a different flavor, substitute the pepperoni with cooked, crumbled sausage or ham.
- If you do not have Hawaiian rolls, use any soft, sweet slider bun.
- You can add a thin layer of cream cheese to the bottom layer before the sauce for extra richness.
Nutrition
- Serving Size: 1 slider
- Calories: 245
- Sugar: 7
- Sodium: 450
- Fat: 12
- Saturated Fat: 6
- Unsaturated Fat: 6
- Trans Fat: 0
- Carbohydrates: 25
- Fiber: 1
- Protein: 11
- Cholesterol: 25