

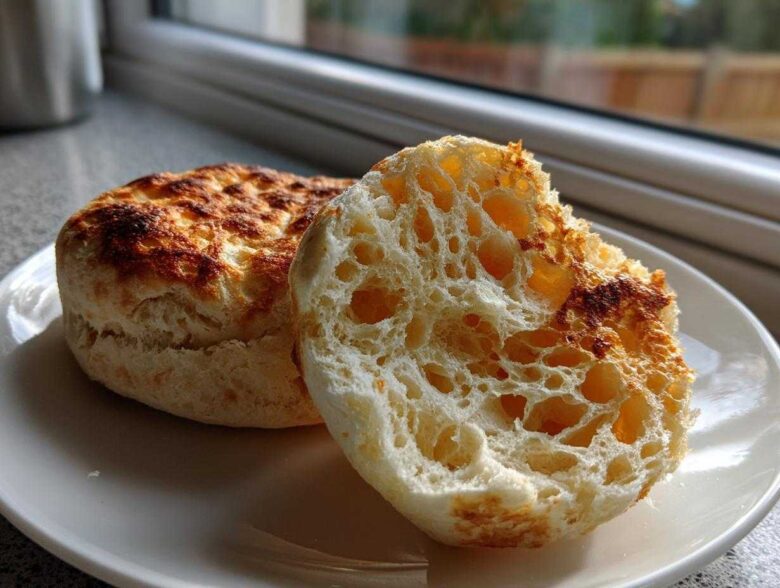
I used to think English muffins were something you just bought in a plastic bag, you know? They were fine for a quick breakfast sandwich, but let’s be honest, those store-bought ones are always a little… flat. They never seemed to have those amazing little holes we all crave. Well, thank goodness for Liam, because he taught me that making homemade English muffins from scratch is ridiculously easy and worth every second. Forget the oven! We make these beauties right on the stovetop, and I promise you, we are getting those signature, buttery, spongy nooks and crannies every single time. If I can master this simple, no-knead technique, you absolutely can too. Liam handles the precise science, and I make sure the steps are crystal clear for you! Head over to my full guide on how to make English muffins for timing details!
Why You Will Love This Homemade English Muffin Recipe
I know there are a million things you could be baking on a weekend morning, but trust me on this one. This specific english muffin recipe is a total game-changer, even if you usually stick to the grocery store.
First off, this is a truly no-knead english muffin situation, which means we skip all that tiring folding and working of the dough. Liam calls it ‘hands-off magic,’ and I agree! It just needs time to rise beautifully.
- While many bread recipes demand an oven, we cook these entirely on the griddle. That stovetop cooking technique keeps the edges perfectly soft and golden brown, preventing that dry crust you sometimes get from baking.
- The result? The fluffiest texture imaginable. You get that soft, tender interior that perfectly soaks up butter without falling apart.
- They are wonderfully freezer friendly muffins! We always double the batch because I love having ready-made bases for those hectic mornings when a quick pop in the toaster is all you have time for. They’re perfect for our favorite breakfast recipes later in the week.
- It’s truly an easy recipe. If you can mix yeast and flour in a bowl, you’re basically done with the hard part!
Essential Ingredients for Perfect English Muffins From Scratch
Okay, let’s talk about what goes into these incredible homemade English muffins. Because this is a no-knead recipe, the quality of the ingredients really matters since we aren’t banging the dough around to develop structure! Here is exactly what you need for a batch of about 10 to 12 glorious muffins.
- 1 cup warm water (and this is important—think bath water, about 105–115°F)
- 2 1/4 teaspoons active dry yeast
- 1 tablespoon granulated sugar
- 3 1/2 cups all-purpose flour, plus more for dusting
- 1 teaspoon salt
- 1/4 cup buttermilk (or milk with 1/2 teaspoon lemon juice added)
- 2 tablespoons unsalted butter, melted
- Cornmeal or semolina, for dusting
Liam, my resident technical wizard, always insists on checking that water temperature. If it’s too cold, the yeast just sleeps, and we won’t get any rise! Too hot, and you kill it completely. A quick thermometer check is the difference between a flat hockey puck and a fluffy English muffin. Always listen to the Professor on that one step!
Ingredient Notes and Substitutions for Your English Muffin Recipe
Don’t feel like you have to run to the store for a specific ingredient. We usually have buttermilk on hand, but if you don’t, don’t panic! Just stir half a teaspoon of fresh lemon juice or white vinegar into a quarter cup of regular milk and let it sit for five minutes. It curdles just enough to give us that lovely little tang we want in these English muffins from scratch.
Now, the dusting! You see that gritty texture on the outside of store-bought muffins? That comes from the cornmeal or semolina we use on the baking sheet and sometimes lightly on top of the dough before cutting. That little bit of texture is what keeps them from sticking to the griddle and gives them that authentic, rustic coating. Don’t skip it—it’s key for the overall experience!
How to Make Fluffy English Muffins: Step-by-Step Instructions
This is where the magic happens, and frankly, it’s way easier than I thought it would be when I first stood next to Liam watching him. Since we aren’t kneading for strength, we rely on the yeast and time to do all the heavy lifting. Remember, gentle hands are key here to keep all those beautiful air bubbles intact, which is exactly what guarantees those homemade English muffins are light and airy.
- First things first, we activate the yeast. Get that warm water, yeast, and sugar mixed up in your big bowl. Let it sit for about ten minutes until it’s foamy. I used to rush this part, but Liam always tells me the foamy top is like the yeast waving hello, confirming it’s ready to work!
- Next, stir in your liquids—the buttermilk and the melted butter. Notice how we’re adding the dry stuff last?
- Now for the flour and salt. Dump them right in and mix it up with a sturdy wooden spoon until it looks like a sticky, shaggy mess. That’s it! Stop stirring when you can’t stir easily anymore. I remember the first time I tried this, I kept thinking, “This isn’t dough, it’s batter!” But Liam reminded me, “Patience, Clara. It’s no knead english muffins, not no-mix muffins.”
- Cover that bowl up and go do something else for an hour to an hour and a half. Let it double in size.
- Once it’s puffy, gently turn the dough out onto a surface dusted with just a little flour. Lightly pat it down or roll it to about half an inch thick. You want to treat this dough like it’s fragile glass; minimal pressing!
- Use your 3-inch cutter to stamp out the rounds. If you do it quickly, you’ll get nice, clean edges.
- Dust your tray heavily with cornmeal—this prevents sticking and gives great texture. Place your cut dough rounds onto the meal and let them rest for another 30 minutes. That second proofing is crucial for lift!
- Time for the griddle! Heat up a big, dry skillet or griddle over medium-low heat. You hear me? Medium-low! If it’s too hot, the outside burns before the inside cooks, and you end up with raw centers. Cook them for about 8 to 10 minutes per side until they look lovely and golden.
- Once they cool just enough to handle, take them off the heat. They are already cooked, but now comes the most important step for texture.
The Secret to Achieving English Muffin Nooks and Crannies
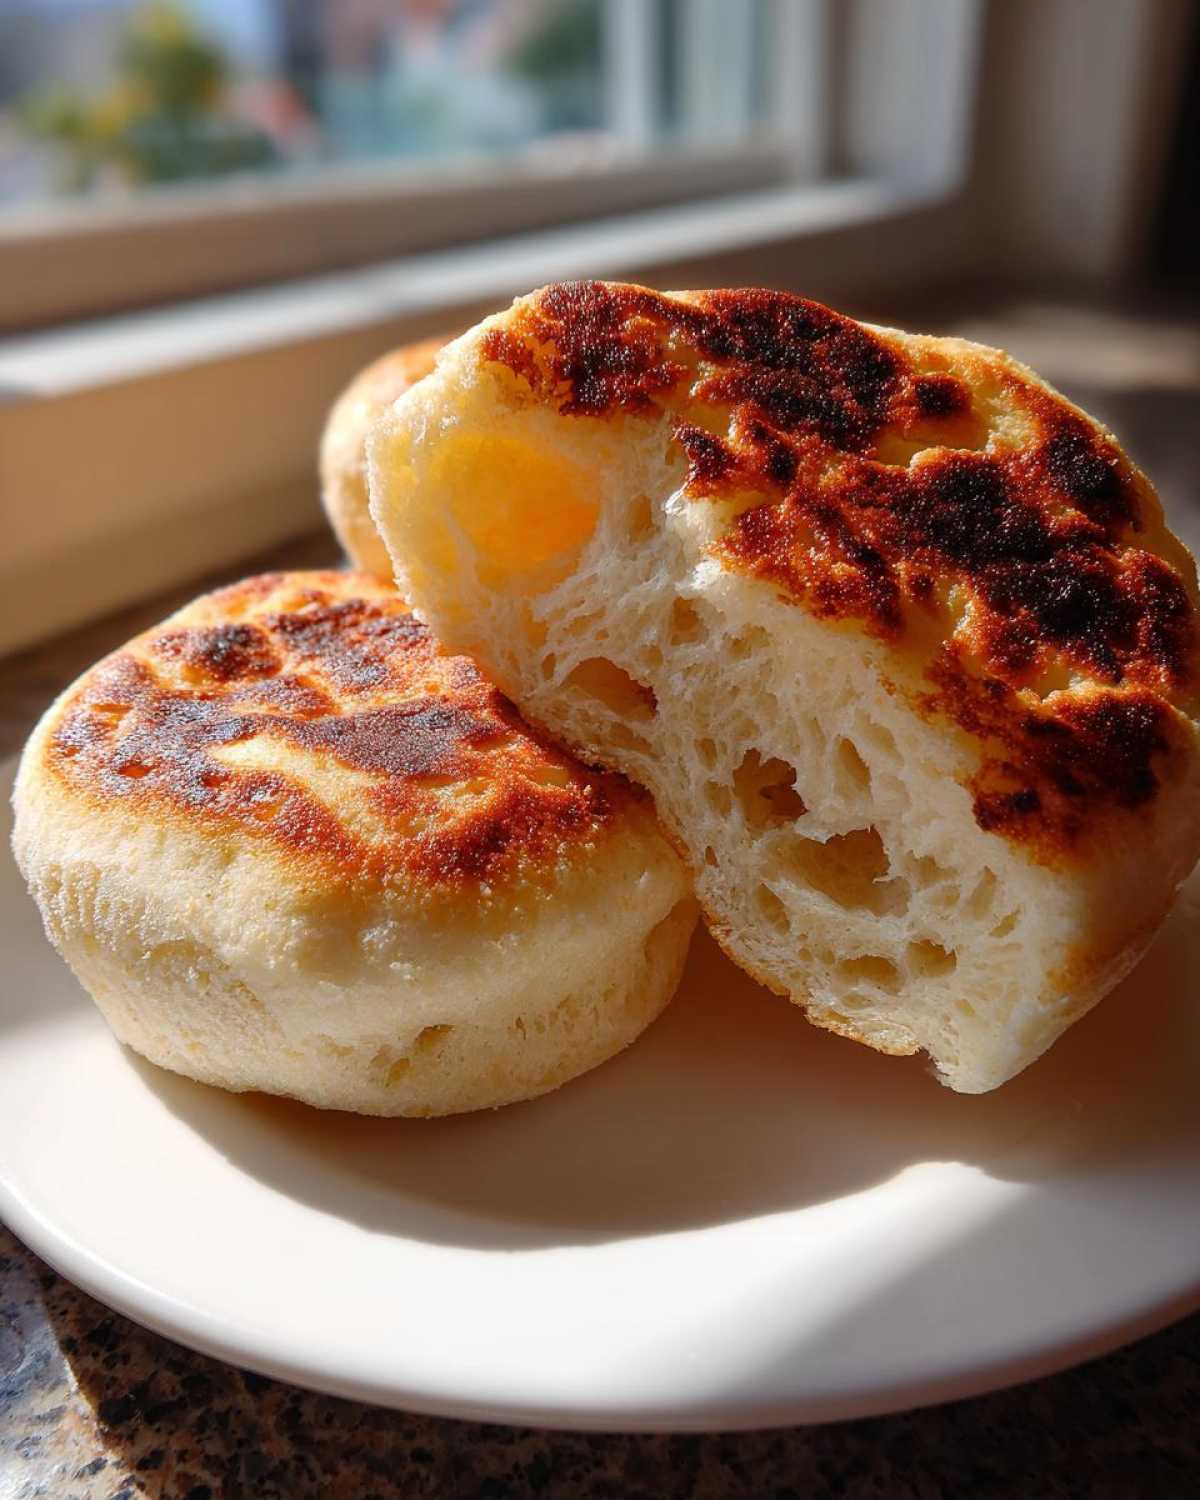
This is the part that separates the bakery-style muffins from the sad, squishy ones. It involves two main actions: one before you toast them, and one after you toast them. First, during shaping, if you feel like it needs a little encouragement for holes, take a fork and gently prick the side of the raw muffin round. It sounds weird, but it helps guide the heat. Also, avoid over-handling the dough when cutting; those air pockets need to stay put!
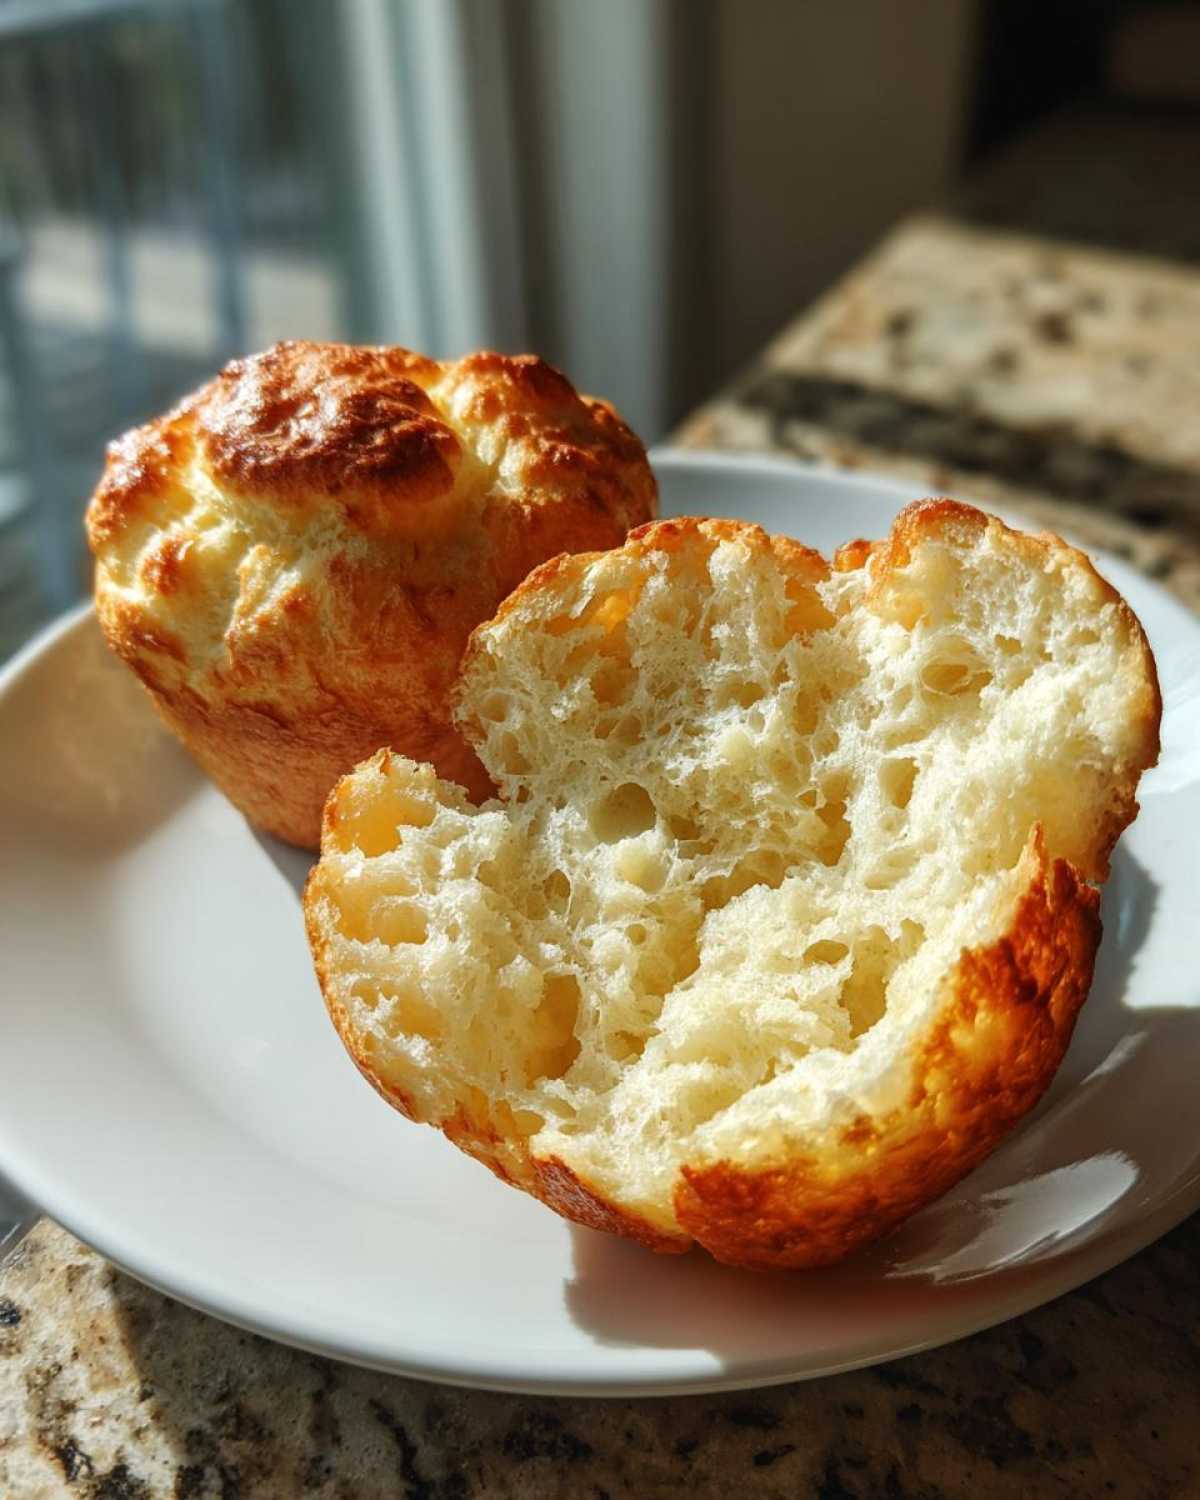
The *real* secret, though, comes after they are cooked and cooled slightly. Never, ever slice your english muffins half with a sharp knife. A knife compresses all those beautifully developed internal bubbles flat. Instead, use a fork! Poke around the edges and gently pull the two halves apart. You’ll instantly see the gorgeous, airy tunnels inside. It’s the best little kitchen trick Liam ever showed me, and it makes every bite infinitely better, especially when you use them for breakfast sandwiches or those fancy Eggs Benedict dishes (check out my guide to poached eggs when you master this!).
Equipment Needed for Stovetop English Muffins
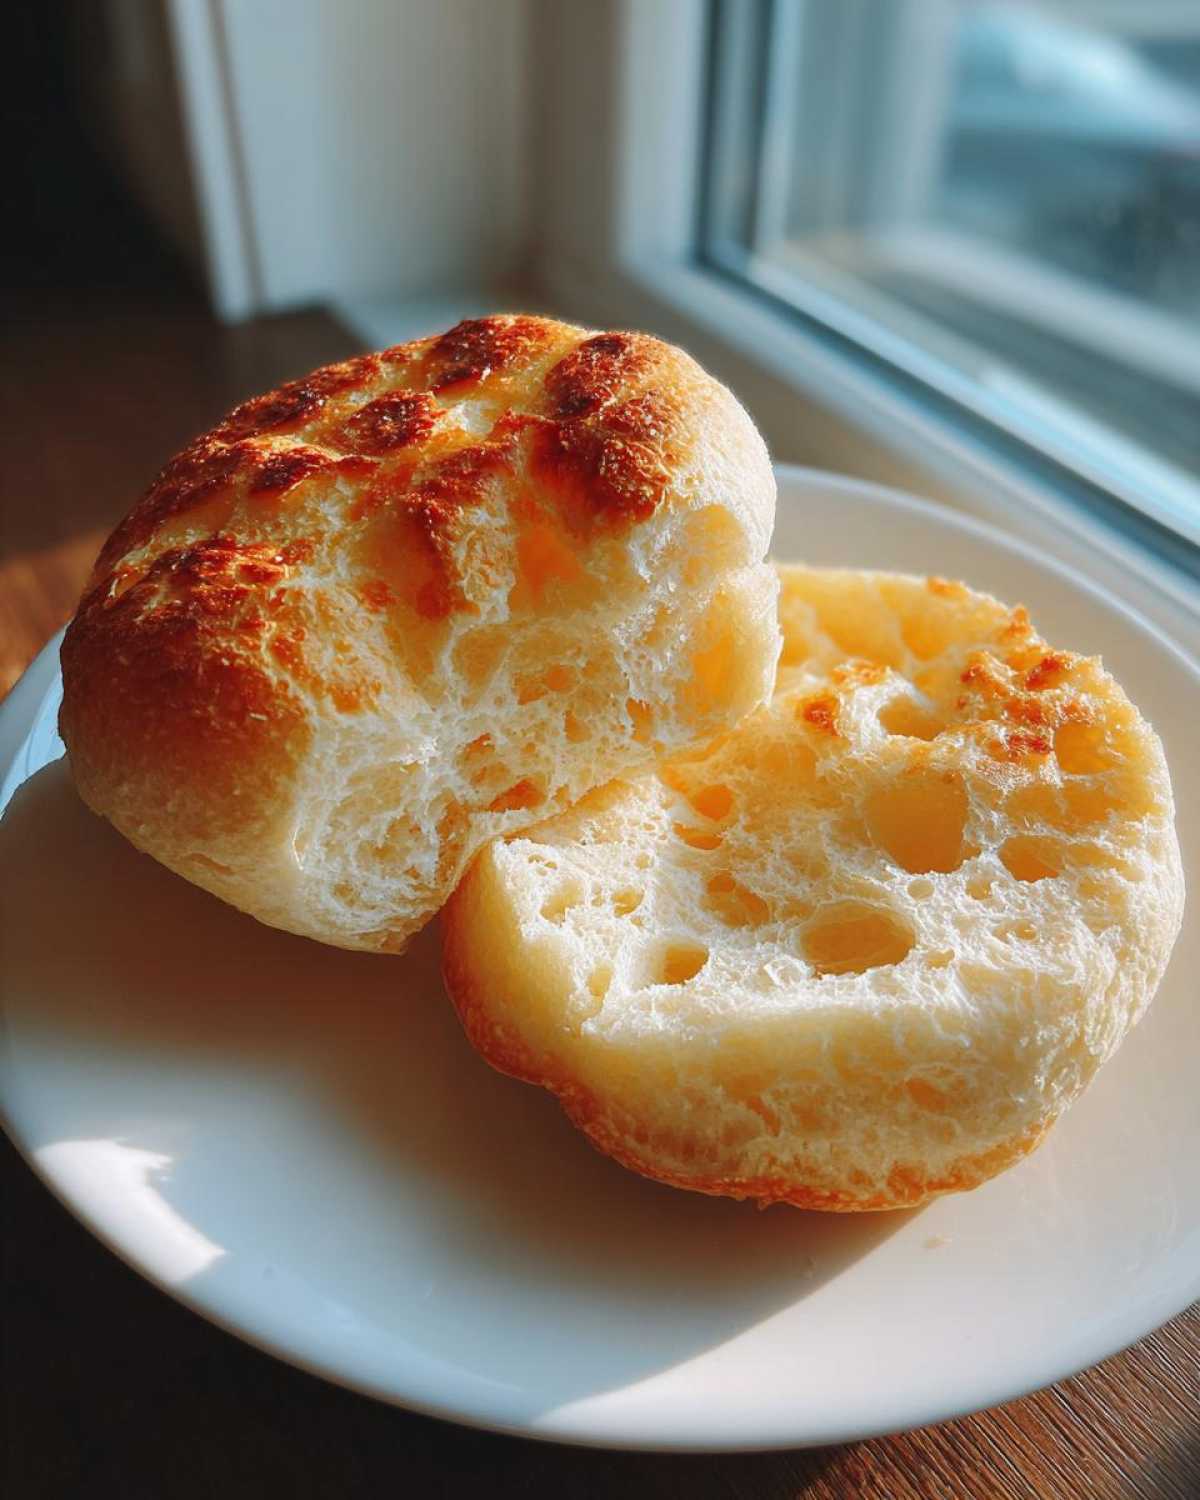
When you’re making stovetop English muffins, you don’t need a whole collection of fancy gear, which is why I love this recipe so much for beginners! It uses things I pretty much always have lying around the kitchen, so there’s no excuse not to try this.
Here are the basics that Liam and I rely on every time we whip up a batch:
- A large mixing bowl: You need space for that dough to expand without climbing up and over the sides.
- A good, sturdy wooden spoon or spatula: We are mixing by hand for the initial shaggy dough, so something comfortable to grip is helpful.
- A 3-inch round cutter: This is what gives us that classic, perfect shape. If you don’t have a dedicated biscuit cutter, a wide, clean drinking glass can work in a pinch!
- A large, dry griddle or heavy-bottomed non-stick skillet: This is where the cooking happens. Because we aren’t using any oil or butter on the heat surface, you want something that distributes heat evenly so your muffins cook slowly and don’t burn on the bottom.
- A baking sheet or large tray: You need a dedicated space to let the cut rounds have their second rise after dusting them heavily with cornmeal.
That’s really it! See? No stand mixer required, no special steam injector things. Just simple tools for making some of the best soft griddle bread you’ll ever taste.
Serving Suggestions: What to Eat with Your Homemade English Muffins
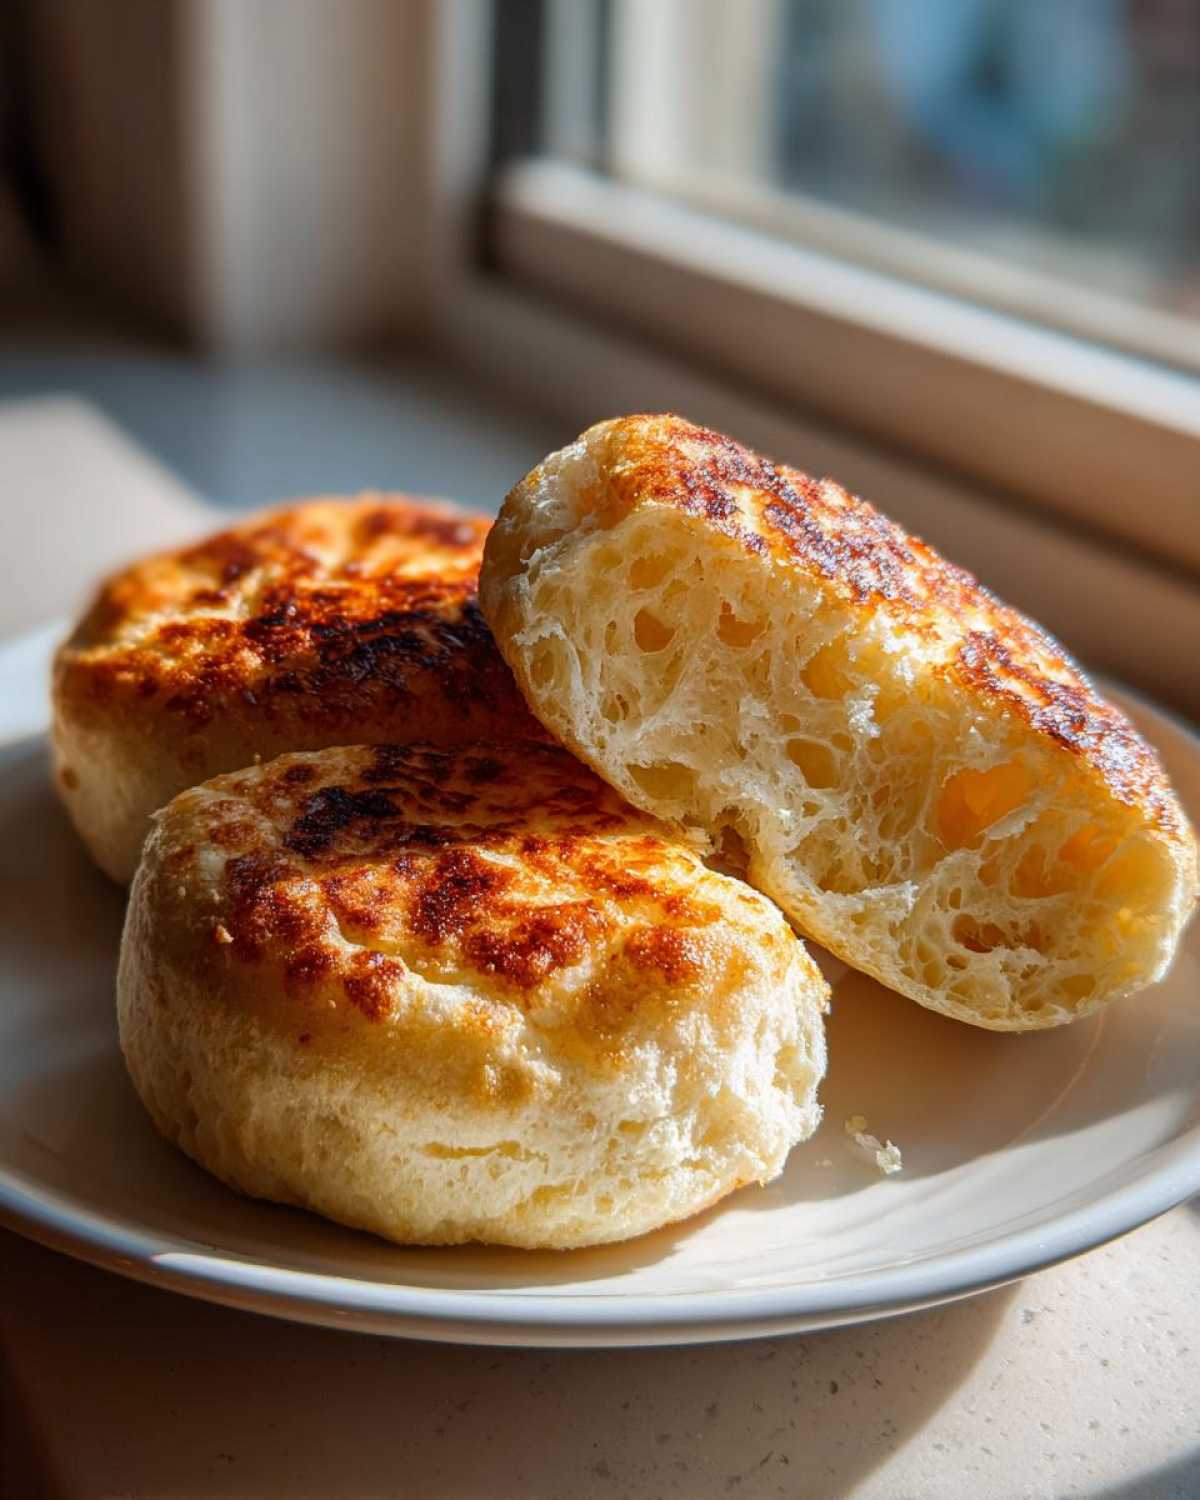
The best part about making these perfect English muffins is knowing how incredibly versatile they are. Once they’re split, toasted, and you see those glorious holes ready to grab butter, the possibilities for your brunch recipes open right up!
Honestly, I could eat mine with just a very thick layer of good, slightly salted butter—maybe next time I’ll even go for some homemade jam! But Liam and I usually reserve these for when we want something a little more substantial than toast, especially since they hold up so well to heavy toppings.
The number one use in our house has to be for epic breakfast sandwiches. Seriously, the texture of these homemade ones makes the whole sandwich ten times better. Think crispy bacon, a perfectly fried egg (the yolk running just a little bit), and a slice of melty cheddar cheese. It’s comfort food heaven, and it tastes so much better when you know you baked the bread yourself!
If you’re feeling fancy and want to dive into a proper weekend brunch, these are the absolute perfect base for Eggs Benedict. That spongy interior soaks up hollandaise sauce beautifully without getting soggy too fast. If you’re tired of making poaching eggs separately, Liam actually worked out an amazing version—you should check out his recipe for Eggs Benedict Casserole if you want to feed a crowd!
And hey, don’t forget about quick meals! If you’re looking for ultra-fast quick breakfast ideas that use these, simply toast them, top with sauce, cheese, and maybe a pepperoni, and pop them under the broiler for two minutes. Instant English Muffin Pizzas! It’s a lifesaver on busy mornings.
Storage and Make Ahead Tips for Your English Muffins
One of the things that makes baking at home so rewarding is being able to bake once and eat for days, right? These homemade english muffins are fantastic for batch baking, and I’m so happy to report they are incredibly make ahead breakfast friendly. You just need to follow a couple of rules so they stay fluffy and don’t get hard.
First, you absolutely must let them cool completely before you even think about storing them. If you wrap them up even slightly warm, that trapped steam turns into condensation, and you’ll end up with sad, soggy bottoms instead of that perfect, slightly crisp exterior we worked so hard for.
For room temperature storage, which is good for about 3 days, keep them in a paper bag, not plastic. A paper bag lets a little bit of the moisture escape while still keeping them soft. Plastic traps that moisture and can sometimes make the cornmeal coating a bit gummy.
But here is the real win: they freeze like a dream! Once they are totally cool, arrange them in a single layer on a baking sheet and pop those into the freezer until they are solid. After they’re frozen, you can transfer them all into one heavy-duty, airtight freezer bag. Liam says they keep perfectly for up to three months this way. It makes grabbing a base for your breakfast sandwiches just as fast as grabbing a store-bought pack, but so much tastier!
When you’re ready to eat one straight from the freezer, don’t bother thawing it. Just toss it directly into the toaster on medium. They reheat beautifully and come out perfectly toasted with all the internal fluffiness still intact. It’s my favorite way to grab a quick bite!
Troubleshooting Common English Muffin Issues
Look, baking is fun, but sometimes things go a little sideways, right? Even Liam has had a batch that turned out less than perfect. Don’t worry if your first batch of english muffins doesn’t look exactly like the ones in the fancy magazines. Usually, it’s just one tiny adjustment needed. I want to save you the head-scratching when you run into these common hiccups!
The issue I see most often is pale muffins. If your homemade english muffins come out looking ghostly white or just slightly blonde, that’s a clear sign the heat was too low. Remember how I stressed medium-low? If it’s too low, the muffin dries out before it ever gets that signature golden color. You need enough gentle heat to cook the entire center through while simultaneously achieving that lovely brown crust. Try turning the heat up just a hair next time!
Now, let’s talk about density. If you bite into one and it feels heavy, almost like a scone instead of a light, airy bread, you probably over-mixed the dough or you didn’t let it rise long enough. Since this is a no knead english muffin recipe, we are relying 100% on the yeast creating the gas bubbles. If you kneaded it like you would traditional bread, you actually knock those bubbles out, resulting in a dense result. Did you punch it down too aggressively? Try to be as gentle as possible when you handle that dough after the first rise!
And finally, we circle back to the most important texture cue: the nooks. If you cooked them perfectly but they are solid inside when you try to split them, you likely used a sharp knife instead of a fork. I know it seems silly, but a knife just slices through the interior structure we worked so hard to build. You’ve got to use a fork to gently prick around the edge and tease the halves apart. That creates the signature tunnels and ridges for your butter to melt into! Trust me; mastering that fork technique is the final hurdle to mastering how to make English muffins.
Frequently Asked Questions About Making English Muffins
I know you might have a few last little questions swirling around before you tackle these, especially if you’re trying a homemade bread baking project for the first time. That’s totally normal! When Liam and I first started tasting our way through this recipe, we had a million questions too. Clara here, I’ve collected the ones that came up most often when I was learning the ropes.
Can I make these English Muffins without buttermilk?
Absolutely, yes! I totally get it—sometimes you just need to bake with what you have on hand, and that should never stop you from making these delicious English muffins from scratch. If you don’t have buttermilk, just take a quarter cup of regular milk—whole milk works best here—and whisk in half a teaspoon of white vinegar or fresh lemon juice. Let that sit on your counter for five minutes until it looks slightly thickened or curdled—that’s your DIY buttermilk substitute!
It gives the muffins a little tang, which I adore, but if you skip it entirely and just use regular milk, they will still be perfectly wonderful and incredibly fluffy English muffins. They just won’t have that professional bakery flavor component. If you love tangy baked goods, you should check out my very favorite buttermilk pancakes recipe as well!
Do I have to use a griddle, or can I use a skillet?
You do not need a dedicated griddle! That’s one of the reasons this makes such a great easy English muffin recipe. A large, heavy-bottomed skillet works just as well, provided it can hold a wide, even surface area. The main goal is consistent, medium-low heat across the whole base. If your skillet is small, remember you’ll just have to cook in smaller batches, but the principle remains the same: dry heat, slow cooking.
I would avoid using a thin, cheap pan because those tend to have hot spots, meaning some of your English muffins will burn while others stay pale. A nice cast-iron skillet is technically perfect, but any good non-stick pan you have that covers a large area will handle these stovetop English muffins beautifully.
How do I ensure I get plenty of Nooks and Crannies?
Ah, the million-dollar question! Honestly, this is less about the ingredients and more about the handling and splitting technique. First, for the ‘nooks,’ make sure you let your dough rest during both proofing stages—don’t rush the rise! Also, remember that second rest after you cut the rounds; that gives the yeast one last little burst of energy before cooking.
But the absolute guarantee comes right at the end. Liam is very strict about this: Do not use a knife to cut them open for toasting! A knife slices and compresses all those beautiful internal tunnels. You must use a fork—poke gently around the circumference and pull them apart. When you do that, you expose all those airy cavities, which is exactly what you want when you are making excellent English muffins for your morning toast or your breakfast sandwiches.
Can I make these ahead of time and freeze them?
Yes, please do! This is what makes them a wonderful make ahead breakfast staple around here. Once your English muffins are fully cooked and totally cooled down (this is key—no residual heat!), you can store them in an airtight freezer bag. They freeze perfectly for weeks. When you want one, just take it straight from the freezer and pop it into your toaster. They reheat beautifully and taste just as fresh as the day you made them. It’s my favorite way to prep for busy weekends!
A Final Word on Your Baking Journey
I really hope you give this recipe a try! Seeing those fluffy rounds cook slowly on the griddle is so satisfying, and honestly, taking that first bite of a homemade muffin—especially when you feel the butter melting right down into those perfect little pockets—is such a rewarding feeling.
Remember what Liam always says: It’s not just about following the steps; it’s about understanding the *why* behind the yeast, the tenderness, and the slow cooking. That’s the whole TasteTaught philosophy in a nutshell: learning the language of food so you can trust your instincts next time you’re in the kitchen.
We put so much love and so many specific tips into these instructions to make sure you succeed right out of the gate. However, if you have a question that popped up while you were mixing, or if you want to tell me what topping you slathered on your masterpiece, please leave a comment below! I read every single one.
And if you’re looking for more adventures like this—things that seem intimidating but turn out incredibly delicious—definitely check out our main blog page for more lessons from Liam. We can’t wait to see how your English muffins turn out! If you’re curious how other folks are making theirs, you might also enjoy reading more inspiration over at this resource.
PrintFluffy Homemade English Muffins with Classic Nooks and Crannies

Learn how to make soft, fluffy homemade English muffins from scratch using a simple stovetop method. This recipe guarantees those signature nooks and crannies perfect for holding melted butter or making breakfast sandwiches.
- Prep Time: 20 min
- Cook Time: 25 min
- Total Time: 1 hour 55 min
- Yield: 10-12 muffins
- Category: Breakfast
- Method: Griddle Cooking
- Cuisine: American
- Diet: Vegetarian
Ingredients
- 1 cup warm water (about 105-115°F)
- 2 1/4 teaspoons active dry yeast
- 1 tablespoon granulated sugar
- 3 1/2 cups all-purpose flour, plus more for dusting
- 1 teaspoon salt
- 1/4 cup buttermilk (or milk with 1/2 teaspoon lemon juice added)
- 2 tablespoons unsalted butter, melted
- Cornmeal or semolina, for dusting
Instructions
- In a large bowl, combine the warm water, yeast, and sugar. Let this mixture sit for 5 to 10 minutes until it becomes foamy. This shows the yeast is active.
- Stir in the buttermilk and melted butter into the yeast mixture.
- Add the flour and salt to the wet ingredients. Mix with a wooden spoon until a shaggy, sticky dough forms. Do not overmix.
- Cover the bowl with plastic wrap and let the dough rise in a warm place for 1 to 1.5 hours, or until it has doubled in size. This is a no-knead dough, so patience is key.
- Gently punch down the risen dough. Turn it out onto a lightly floured surface. Sprinkle a little flour on top of the dough.
- Pat or lightly roll the dough out to about 1/2 inch thickness. You want to handle it minimally to keep the air inside.
- Use a 3-inch round biscuit or cookie cutter to cut out the English muffins. If you want the classic look, use a fork to gently prick the sides of each round to encourage nooks and crannies during cooking.
- Generously dust a baking sheet or large tray with cornmeal or semolina. Place the cut dough rounds onto the prepared surface, leaving space between them.
- Cover the rounds loosely and let them rest for a second proofing for 30 minutes.
- Heat a large, dry griddle or non-stick skillet over medium-low heat. You do not need oil or butter for cooking.
- Carefully place the dough rounds onto the warm griddle, working in batches. Cook for 8 to 10 minutes per side. The heat must be low enough to cook the inside thoroughly without burning the outside. They should be golden brown.
- Once cooked, remove the muffins from the griddle. For the best texture, split them open using a fork, not a knife, to preserve the internal structure.
- Toast the split sides lightly before serving with butter, jam, or your favorite toppings for breakfast sandwiches.
Notes
- To achieve maximum nooks and crannies, use a fork to split the muffins open after they are cooked and cooled slightly. A knife compresses the interior.
- These English muffins freeze well. Cool them completely, then store them in an airtight, freezer-safe bag for up to 3 months. Thaw on the counter or reheat directly in the toaster.
- If you prefer a slightly tangier flavor, substitute the buttermilk with an equal amount of plain yogurt mixed with a little water to reach the correct consistency.
Nutrition
- Serving Size: 1 muffin
- Calories: 180
- Sugar: 2
- Sodium: 250
- Fat: 3
- Saturated Fat: 1
- Unsaturated Fat: 2
- Trans Fat: 0
- Carbohydrates: 34
- Fiber: 1
- Protein: 5
- Cholesterol: 5