

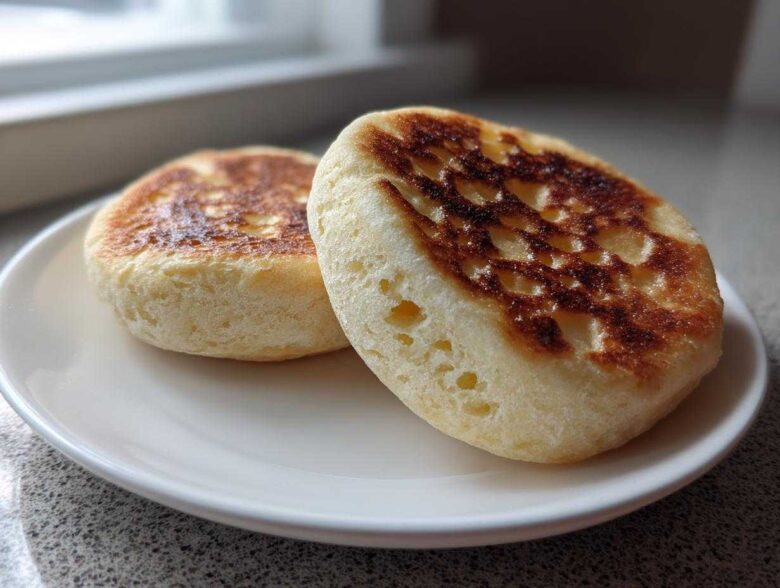
Oh, are you tired of those sad, squashed supermarket English muffins that look like flat disks? Me too! If you’ve ever dreamed of slicing one open under the bright light and seeing a glorious, impossible maze of those famous ‘nooks and crannies’—the kind that hold butter and jam perfectly—then you are in the absolute right spot. Forget the myths about complicated starters or hours of kneading because I’m here to share the secret to truly easy homemade english muffins.
This recipe cracks the code. We’re ditching the oven entirely, relying on simple yeast, and using the stovetop to build that signature chewy crust and airy interior. Trust me, once you try these fresh, tender muffins, you’ll never go back to the bagged stuff again. I learned this method from an old neighborhood baker, and it changed my entire breakfast routine!
If you’re curious about who I am and why I love sharing easy bread secrets, you can check out my little corner of the internet here, but mostly, let’s get your griddle hot and start baking!
Why This Is the Best Homemade English Muffins Recipe
Honestly, I get asked all the time about the best English muffin recipe, and this one always wins because it’s shockingly simple for the reward! We aren’t doing a heavy knead here, which is why I classify these as Easy English Muffins From Scratch. The magic really comes down to technique over time. Unlike those huge, fluffy homemade loaves you might bake, these need a low-and-slow cook on the griddle, which traps the air structure inside perfectly.
You end up with the most tender, Fluffy Homemade English Muffins without needing specialty equipment or that four-hour proofing time. It feels like cheating, but I promise, it’s just smart baking! The payoff is the texture, which is exactly what we’re aiming for.
Achieving Perfect English Muffin Nooks and Crannies Tutorial
So, how do we get those little pockets? It’s all about yeast and heat control. We use just enough yeast to get a good rise during the resting period, which creates pockets of gas in that sticky dough. When we put them on a dry, medium-low griddle, the outside sets slowly while the trapped gas bubbles expand upward before finally setting. If your heat is too high, the outside burns before the inside fully puffs up. Keep that heat gentle, and those nooks will appear every single time!
Ingredients for Your Easy Homemade English Muffins
You don’t need a fancy pantry for this recipe—which is why I love it for a spontaneous weekend breakfast! The ingredient list is super straightforward, relying on pantry staples to create that incredible texture in your homemade english muffins recipe. We’re using baking soda and powder alongside the yeast here, which gives us an extra lift, just in case your yeast is feeling a little sleepy.
Just make sure your milk is lukewarm—not hot! If it burns the yeast, the whole batch is a bust. I always use fresh, active dry yeast because I want that guaranteed foam-up before I mix anything else in. Here’s exactly what you’ll need for about eight lovely, thick muffins:
- 2 cups all-purpose flour
- 1 tablespoon sugar
- 1 teaspoon salt
- 1 teaspoon baking soda
- 1 teaspoon baking powder
- 1 cup milk, lukewarm
- 2 teaspoons active dry yeast
- 2 tablespoons melted butter, plus more for griddling
See? Basic stuff! Grab your biggest bowl and let’s move on to the mixing stage. It’s all downhill from here!
How to Prepare Homemade English Muffins Step-by-Step
Okay, now for the fun part! Even though we’re skipping the heavy work, the timing here is everything to ensure we get those beautiful, open interiors. I always put on some good music while the yeast is blooming because the next active steps move pretty quickly. Just remember: gentle hands win the day with this dough.
If you have any questions about ingredient substitutions or why we use certain methods, I’ve put a little disclaimer note right here, just in case, before we dive into making these amazing homemade english muffins.
Activating the Yeast and Mixing the Homemade English Muffins Dough
First things first, you need to wake up that yeast! Pour your lukewarm milk into a small bowl, sprinkle in the yeast and a tiny bit of sugar—that’s its breakfast. Wait about five minutes until it looks foamy and happy. If it doesn’t foam, toss it and start over with warmer milk!
In your big mixing bowl, quickly whisk the dry stuff together: flour, the rest of the sugar, salt, baking soda, and baking powder. Now, pour in that bubbly yeast mix and the melted butter. Stir with a big wooden spoon until it just comes together. I mean it—stop mixing when you see flour streaks! If you overmix this, you’ll activate too much gluten, and your muffins will turn into dense little frisbees. We want sticky and shaggy right now.
Proofing and Shaping Your Homemade English Muffins
Cover that bowl with a clean tea towel and find a warm spot in your kitchen. Let it rest, undisturbed, for a full hour. You want it to look nice and puffy—doubled in size is the goal! Resist the urge to poke it constantly!
Once proofed, lightly flour your counter—and I mean lightly! Tip the dough out. This dough is soft, so you’re not kneading it; you’re just gently patting or rolling it until it’s about half an inch thick. Now, grab a 3-inch biscuit or cutter and pop out your rounds. Lay them on a baking sheet that’s dusted with flour. Cover them loosely again and let them sit for a quick second rest—about 20 minutes. They need this little break before hitting the heat!
Stovetop English Muffins Cooking Technique
This is where the magic really happens! You need a heavy skillet or a dedicated griddle, and guess what? Skip the oil or butter for now! We cook these Stovetop English Muffins dry. Heat your skillet over medium-low heat. Too high, and you burn the outside before the inside cooks.
Place your dough rounds on the warm griddle, making sure they aren’t touching. Cook them for a good six to eight minutes on the first side. You are looking for a beautiful, even golden-brown color. The most important rule here: DO NOT press down on them with your spatula! Ever! That presses out all the air you worked so hard to create. Flip them gently and cook the second side for another six to eight minutes. When they lift easily and are golden on both sides, they are done!
Tips for Success Making Homemade English Muffins
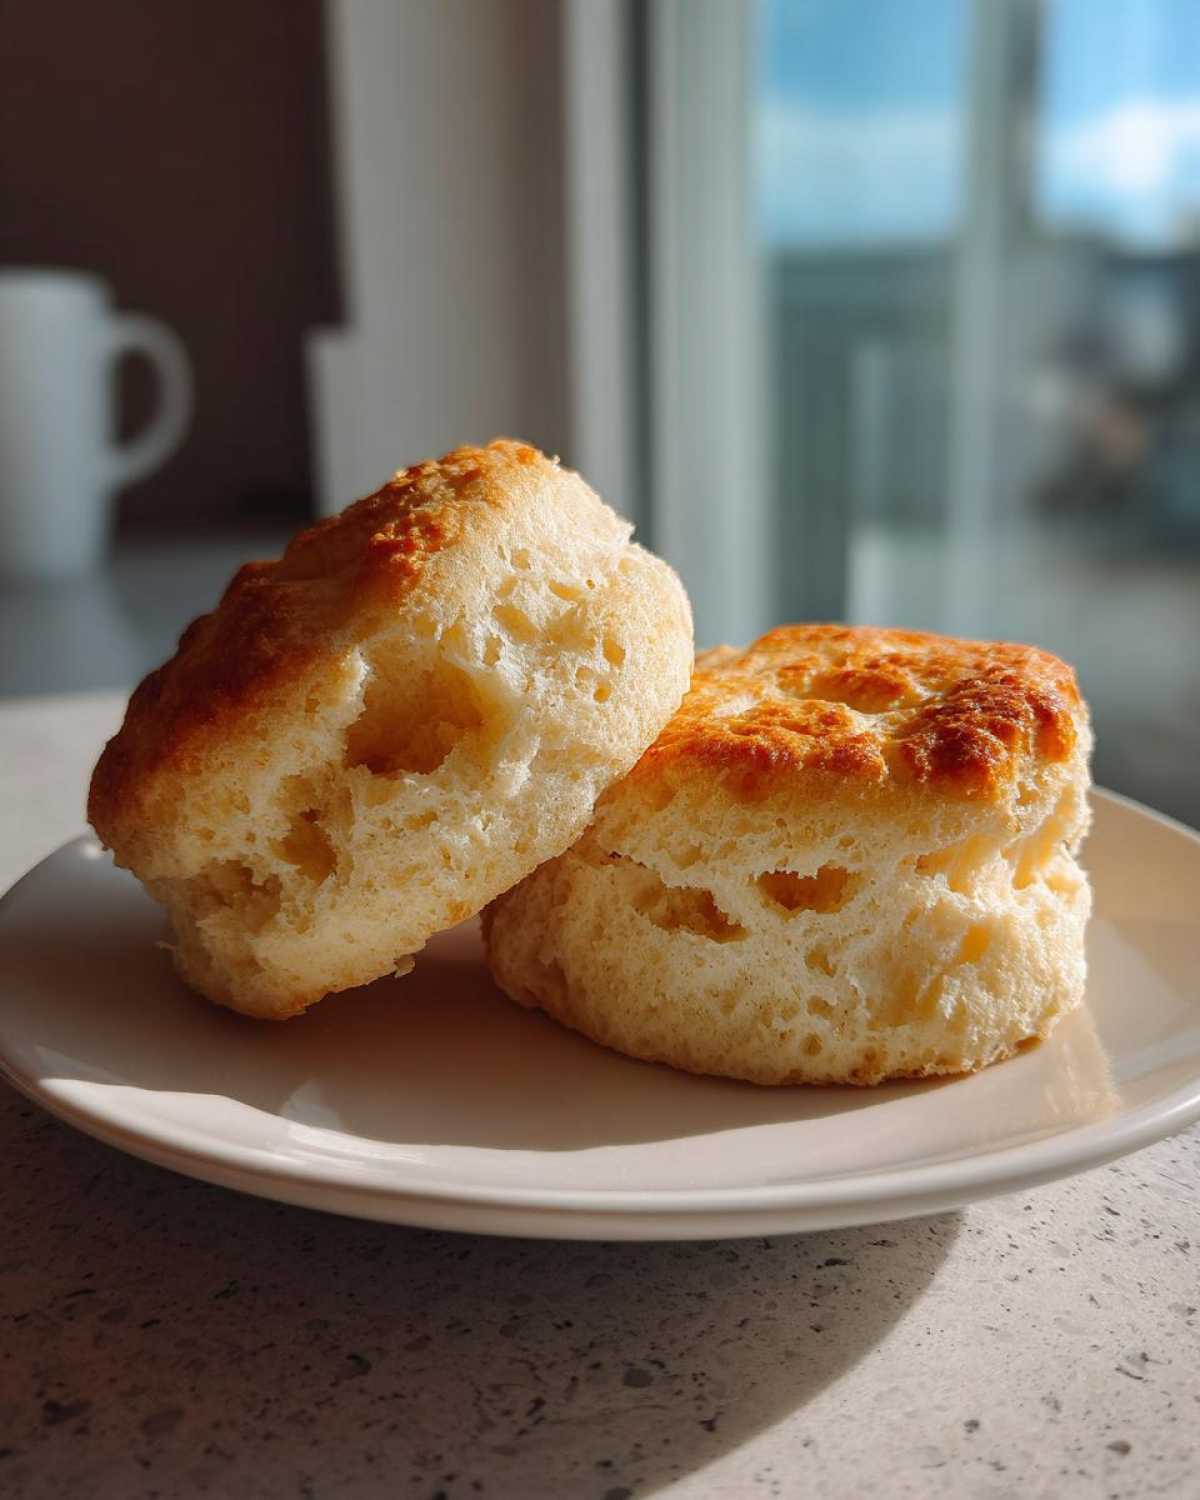
So, you’ve got your perfectly cooked, golden-brown rounds cooling on the rack. Congratulations! You’ve already done ninety percent of the hard work. But don’t undo it all now by trying to slice them like a regular piece of bread. We need one final secret to make sure those beautiful internal pockets turn into buttery traps!
My biggest piece of advice for homemade english muffins is all about that final split. If you use a sharp knife, you are slicing straight through those delicate walls connecting one cranny to another. It seals them shut! We want that texture to stay open and absorbent, right?
Why You Must Split Homemade English Muffins With a Fork
Seriously, grab a fork. The technique is simple but completely game-changing. Run the tines of a fork around the circumference of the muffin where you intend to split it, focusing on gently prying rather than cutting. This action tears the crumb open naturally, following the lines of the air pockets you created during the proofing and cooking stages.
When you toast a fork-split muffin, those rough, torn edges toast up perfectly brown and crunchy, while the inner texture remains soft and ready to soak up pools of melted butter or cream cheese. It’s the only way to truly honor the effort you put into achieving those incredible ‘nooks and crannies’!
Storage & Reheating Instructions for Homemade English Muffins
These homemade english muffins are seriously best when eaten the day they’re made, but let’s be realistic—who can stop at just one batch?
For short-term storage, just keep them in a loosely sealed paper bag on the counter for a couple of days. If you want them to last longer, freezing is the way to go! For freezing, let them cool completely first, then wrap them tightly in plastic wrap and pop them in a freezer bag. They’ll hold up beautifully for about three months. When you’re ready to eat them, toss them straight from the freezer into the toaster. No need to thaw!
Seriously, grab that fork, split it open, and watch those nooks soak up the heat!
Serving Suggestions for Your Homemade English Muffins
Now that you’ve mastered the bake and you have a stack of perfectly textured homemade english muffins cooling, you might wonder, what’s the best way to serve these beauties?
Of course, a slather of salted butter melting into those nooks is pure heaven, but don’t stop there! These muffins are sturdy enough to handle bigger jobs, too. They are fantastic when toasted and topped with something tangy, like good quality marmalade or maybe a thick layer of homemade strawberry jam.
If you’re leaning toward a savory breakfast, these are the absolute foundation for next-level English Muffin Breakfast Sandwiches. Because they are so soft and chewy but still hold their shape, they don’t fall apart under the weight of an egg, bacon, and a slice of melted cheddar. Seriously, try making your breakfast sandwiches on these instead of store-bought—it’s a game-changer for your weekend mornings.
Another favorite in my house is a schmear of Boursin cheese and a sprinkle of flaky salt. They just make everything taste better because they’re made with love, right in your very own kitchen!
Frequently Asked Questions About Homemade English Muffins
It’s totally normal to have questions when you’re venturing into scratch baking, especially when trying to nail down that perfect texture! I remember the first few times I made these, I worried constantly about the heat and the rise. Don’t sweat it! Here are the answers to the most common things folks ask me about making these wonderful homemade english muffins.
If you have a technical sticking point or a deep-dive question, you can always reach out to me via my contact page! But for now, let’s clear up the big ones before your next batch.
Can I make these No Knead English Muffins faster?
That’s the eternal question, isn’t it? While this is certainly faster than a traditional kneaded bread, the time is mostly dedicated to the yeast doing its work, and yeast really likes to take its time! The 5-minute yeast activation is non-negotiable—you have to confirm it’s alive. The main time consumer is that one-hour bulk proof. Can you shorten proofing time? Maybe if you put it in a really warm spot (like a turned-off oven with the light on), but I honestly wouldn’t try to rush it past 45 minutes on the low end. Rushing the proofing is the fastest way to end up with thick, dense disks instead of those beautiful, airy soft and chewy English muffins.
What if I don’t have a griddle for my Stovetop English Muffins?
You absolutely do not need a big, fancy flat-top griddle! In fact, I often just use one of my heavy, cast-iron skillets because they hold heat so evenly. That even heat is more important than the size. If you only have regular frying pans, just make sure you cook in batches so that the pan doesn’t cool down drastically between muffins. You might have to adjust your medium-low setting slightly between batches, but just keep watching that color! The key is a dry, heavy surface for your Stovetop English Muffins.
My muffins are pale, not golden brown. What did I do wrong?
Usually, pale muffins mean your heat was too low, or you didn’t leave them on long enough! Remember, we aren’t using any fat in the pan, so the browning relies purely on the sugars caramelizing against the hot metal. If you followed the 6-8 minutes per side and they are still pale, turn your heat up just a tiny notch and let them go another minute or two. They need that golden crust to set the structure firm for splitting later!
Can I use Bread Flour instead of All-Purpose Flour?
You totally can, but you need to be cautious! Bread flour has more protein, which means more gluten development. Since these are already very forgiving, using bread flour might edge them a bit too chewy. If you swap, reduce the milk by a tablespoon or two, and be extra careful not to over-mix them when combining the ingredients. For the absolute fluffiest result, stick to all-purpose, like the recipe calls for!
Estimated Nutrition for Homemade English Muffins
Now, I’m no nutritionist, so please take this information with a grain of salt—or perhaps, a sprinkle of flour! These values are just my best estimate based on the standard ingredients I used in this homemade english muffins recipe. Since we aren’t adding any butter on the griddle to the final count (that’s up to you!), these numbers reflect just the muffin itself, yielding about 8 portions.
For all the legal nerds out there, you can find my full privacy policy details here, but for everyone else, here’s a quick peek at what you’re putting in your mouth!
- Serving Size: 1 muffin
- Calories: 180
- Sugar: 3g
- Sodium: 350mg
- Fat: 4g
- Protein: 5g
- Carbohydrates: 32g
They’re honestly a pretty balanced way to start the day, especially when you’re making something from scratch bakery favorites!
Share Your Homemade English Muffins Creations
Alright, you’ve done it! You’ve braved the yeast, honored the resting times, and successfully cooked your first batch of spectacular homemade english muffins on the stovetop. That’s something to be really proud of!
My absolute favorite part of sharing these scratch recipes is seeing what you all create in your own kitchens. Did you get those epic crannies? Did you slather them with honey butter? I want to hear every detail!
Please hop back to the top of the page and leave a star rating—it really helps me know if I’ve guided you successfully through the process. And if you snapped a picture of your golden-brown beauties, definitely tag me on social media! It makes my day to see your amazing baking accomplishments.
If you have any final thoughts or thoughts, don’t hesitate to check over the site terms, but mostly, enjoy that perfect English muffin moment!
PrintEasy Homemade English Muffins with Nooks and Crannies

Make classic English muffins at home using this simple recipe that focuses on achieving the signature open texture.
- Prep Time: 20 min
- Cook Time: 20 min
- Total Time: 1 hour 40 min
- Yield: 8 servings
- Category: Breakfast
- Method: Griddling
- Cuisine: American
- Diet: Vegetarian
Ingredients
- 2 cups all-purpose flour
- 1 tablespoon sugar
- 1 teaspoon salt
- 1 teaspoon baking soda
- 1 teaspoon baking powder
- 1 cup milk, lukewarm
- 2 teaspoons active dry yeast
- 2 tablespoons melted butter, plus more for griddling
Instructions
- Combine the lukewarm milk, yeast, and a pinch of sugar in a small bowl. Let it sit for 5 minutes until foamy.
- In a large bowl, whisk together the flour, remaining sugar, salt, baking soda, and baking powder.
- Pour the yeast mixture and the melted butter into the dry ingredients. Mix with a spoon until just combined into a sticky dough. Do not overmix.
- Cover the bowl and let the dough rest in a warm place for 1 hour, or until it has doubled in size.
- Lightly dust a work surface with flour. Gently turn the dough out. Pat or lightly roll the dough to about 1/2 inch thickness.
- Use a 3-inch round cutter to cut out the muffins. Place the cut rounds on a lightly floured baking sheet.
- Cover the rounds loosely and let them rest for another 20 minutes.
- Heat a dry, heavy skillet or griddle over medium-low heat.
- Place the dough rounds on the warm griddle, leaving space between them. Cook for 6 to 8 minutes per side until golden brown. Do not press them down.
- Remove the muffins from the griddle. For the best texture, let them cool completely before splitting them open with a fork.
Notes
- To get the best ‘nooks and crannies,’ avoid pressing down on the muffins while they cook on the griddle.
- If you prefer a softer exterior, you can brush the cooked muffins lightly with melted butter immediately after removing them from the heat.
- Split the cooled muffins with a fork rather than a knife to maximize the internal texture for toasting.
Nutrition
- Serving Size: 1 muffin
- Calories: 180
- Sugar: 3
- Sodium: 350
- Fat: 4
- Saturated Fat: 2
- Unsaturated Fat: 2
- Trans Fat: 0
- Carbohydrates: 32
- Fiber: 1
- Protein: 5
- Cholesterol: 10