

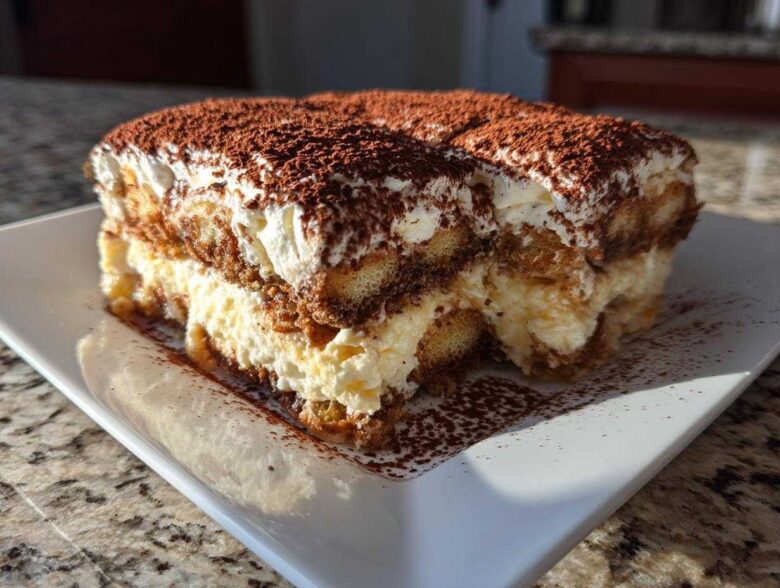
When I first started cooking, the idea of making a truly impressive, restaurant-quality dessert felt impossible. I thought elegance meant hours in the oven and complicated techniques. Then Liam showed me this tiramisu recipe, and everything changed! Seriously, this is the ultimate showstopper dessert that actually takes less than 30 minutes of active work. We’re skipping the oven entirely, leaving out the raw eggs for peace of mind, and still capturing that deep, authentic Italian flavor we both adore. If you want to wow your guests while keeping things genuinely simple, trust me; this recipe, which felt like a major milestone for me to master—and you can read more about our journey on the About Us page—is exactly what you need.
Why This Easy Tiramisu Recipe Is Your New Go-To
I know you want gorgeous, impressive desserts, but you don’t always have hours to spend fussing. That’s why this particular tiramisu recipe is going to be the first one you save! Liam always tells me that the best recipes are the ones you actually use, and this one means you get incredible flavor without the stress.
You can whip this up fast and let the fridge do the rest of the heavy lifting. Here’s what makes it such a winner for us:
Quick Prep Time for Your Tiramisu Recipe
Seriously, the active setup time is wild! We’re talking about just 25 minutes to get everything layered and ready for the fridge. If you need a spectacular dessert on short notice, this will instantly become your favorite Quick Tiramisu Recipe. It’s our secret weapon when guests text saying they’re stopping by!
No Baking Required: The Ultimate No Bake Tiramisu Recipe
No oven wars means no stress about burning or deflating layers, which I used to panic about constantly! Since this is the ultimate No Bake Tiramisu Recipe, your biggest challenge will be keeping it hidden in the fridge long enough to set. It’s truly such an Easy Tiramisu to pull off.
Safe and Creamy Mascarpone Dessert (Tiramisu Without Raw Eggs)
For all my fellow nervous bakers out there—including me when I first started—I love that this method lets us skip the raw egg worry right out of the gate. We use the cream and the sugar whisking technique to create stability, keeping things safe and giving you that luscious, Creamy Mascarpone Dessert texture that separates the good tiramisu from the very best!
Ingredients for the Best Tiramisu Recipe
Okay, let’s talk about what goes into this heavenly creation! Liam always stresses that while this tiramisu recipe is easy, using the right ingredients makes the difference between good and *wow*. Because we aren’t adding any complicated pastry components, every single item listed here needs to be top-notch. Don’t even think about skimping on the coffee!
Have everything measured and ready to go before you start mixing. We call that *mise en place*, and it keeps our quick prep time smooth as silk.
Key Components for Your Creamy Mascarpone Dessert
- 1 1/2 cups strong brewed espresso, cooled (This is non-negotiable! Strong coffee makes this an Authentic Italian Dessert.)
- 1/4 cup coffee liqueur or dark rum (Totally optional, but it adds such a wonderful depth of flavor!)
- 2 large egg yolks
- 1/2 cup granulated sugar
- 8 ounces mascarpone cheese, softened to room temperature (Crucial—cold mascarpone lumps up!)
- 1 teaspoon vanilla extract
- 1 1/2 cups heavy whipping cream, cold (Has to be cold to whip correctly!)
- 1 package (7 ounces) ladyfingers (Savoiardi biscuits are the traditional choice for that perfect snap and soak.)
- Unsweetened cocoa powder, for dusting (Use the good stuff; it matters for the finish!)
Simple Tiramisu Tutorial: Step-by-Step Instructions
Okay, this is where the magic happens, and I promise you, if you just follow Liam’s patient guidance here, you’ll nail this! We’re building this incredible dessert layer by layer. Remember, this entire assembly moves fast once you have the coffee ready, but don’t rush the mixing part—that sets up the cream.
Here is the full run-down on putting together this absolutely delicious tiramisu recipe. Check out how Natasha made hers too, for another great perspective on building this classic! You can see a video guide here.
Preparing the Coffee Soak for Tiramisu with Ladyfingers
First things first, make sure your strong espresso is completely cool. If it’s even warm, it will melt your beautiful mascarpone cream later, and we can’t have that! In a shallow dish—one that lets you easily dip the biscuits—mix your cooled espresso and, if you decided to use it, your coffee liqueur or rum. That little splash of alcohol really boosts the whole Espresso Soaked Dessert flavor profile, making it taste just like the real deal you get at the best Italian cafes.
Creating the Smooth Mascarpone Cream Base
This is where Liam taught me how to build volume without using a whisk attachment for everything. In a bowl, take those two egg yolks and the sugar. You have to whisk them—I mean really whisk them—until the color changes from deep yellow to a pale, almost creamy white. That takes about three to five minutes of serious effort, but it’s essential for texture! Once it’s pale and thick, gently whisk in your room-temperature mascarpone cheese and the vanilla until it’s smooth. Be careful not to beat it much once the cheese is in; we just want it incorporated smoothly.
Achieving Lightness: Folding in the Whipped Cream
Now we lighten up that rich base! Take your cold heavy cream and whip it separately until stiff peaks form. You want peaks that stand up straight when you lift the beaters. Now for the most important part of the cream-making process: folding. Add about a third of the whipped cream to the mascarpone mixture and physically fold it in gently until it’s mostly combined. Then, add the rest and fold until you see no white streaks remaining. See? This folding technique traps all that air and turns the dense cheese into a light, airy cloud. This is the magic behind the ultimate Creamy Mascarpone Dessert! If you ever get confused while poaching or separating eggs for other recipes, Liam walks you through it when talking about perfectly cooked eggs.
Assembling Your Layered Italian Cake
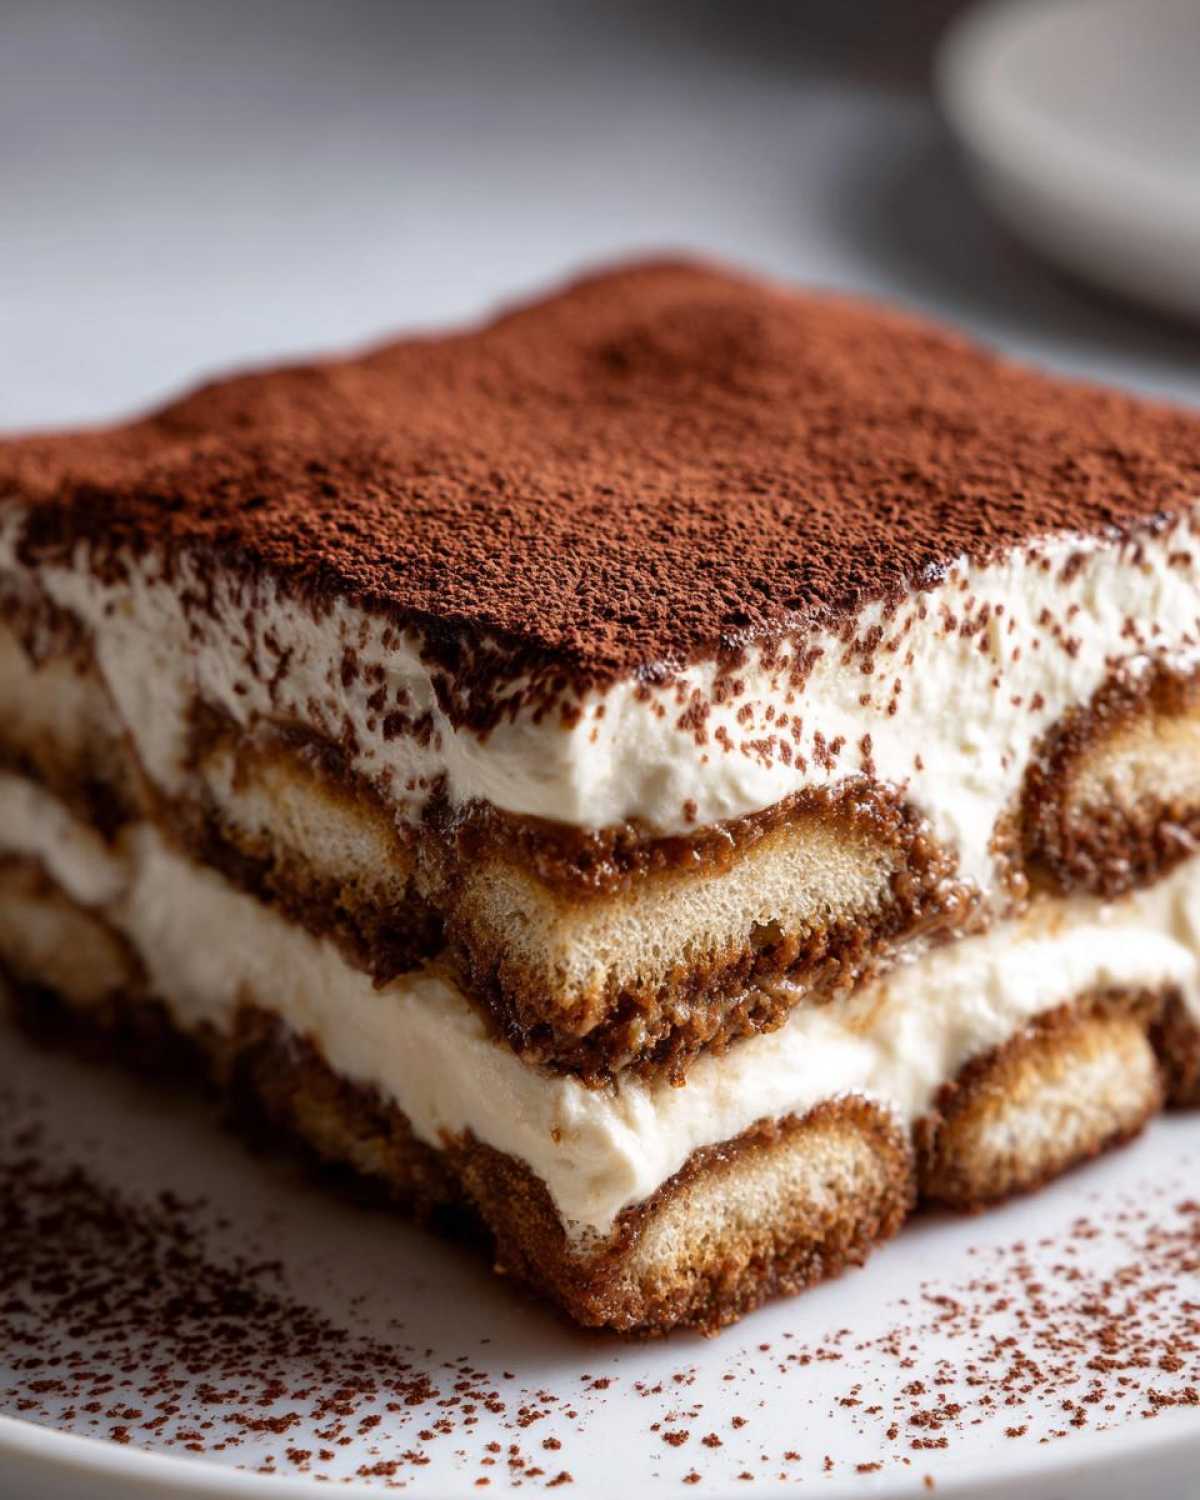
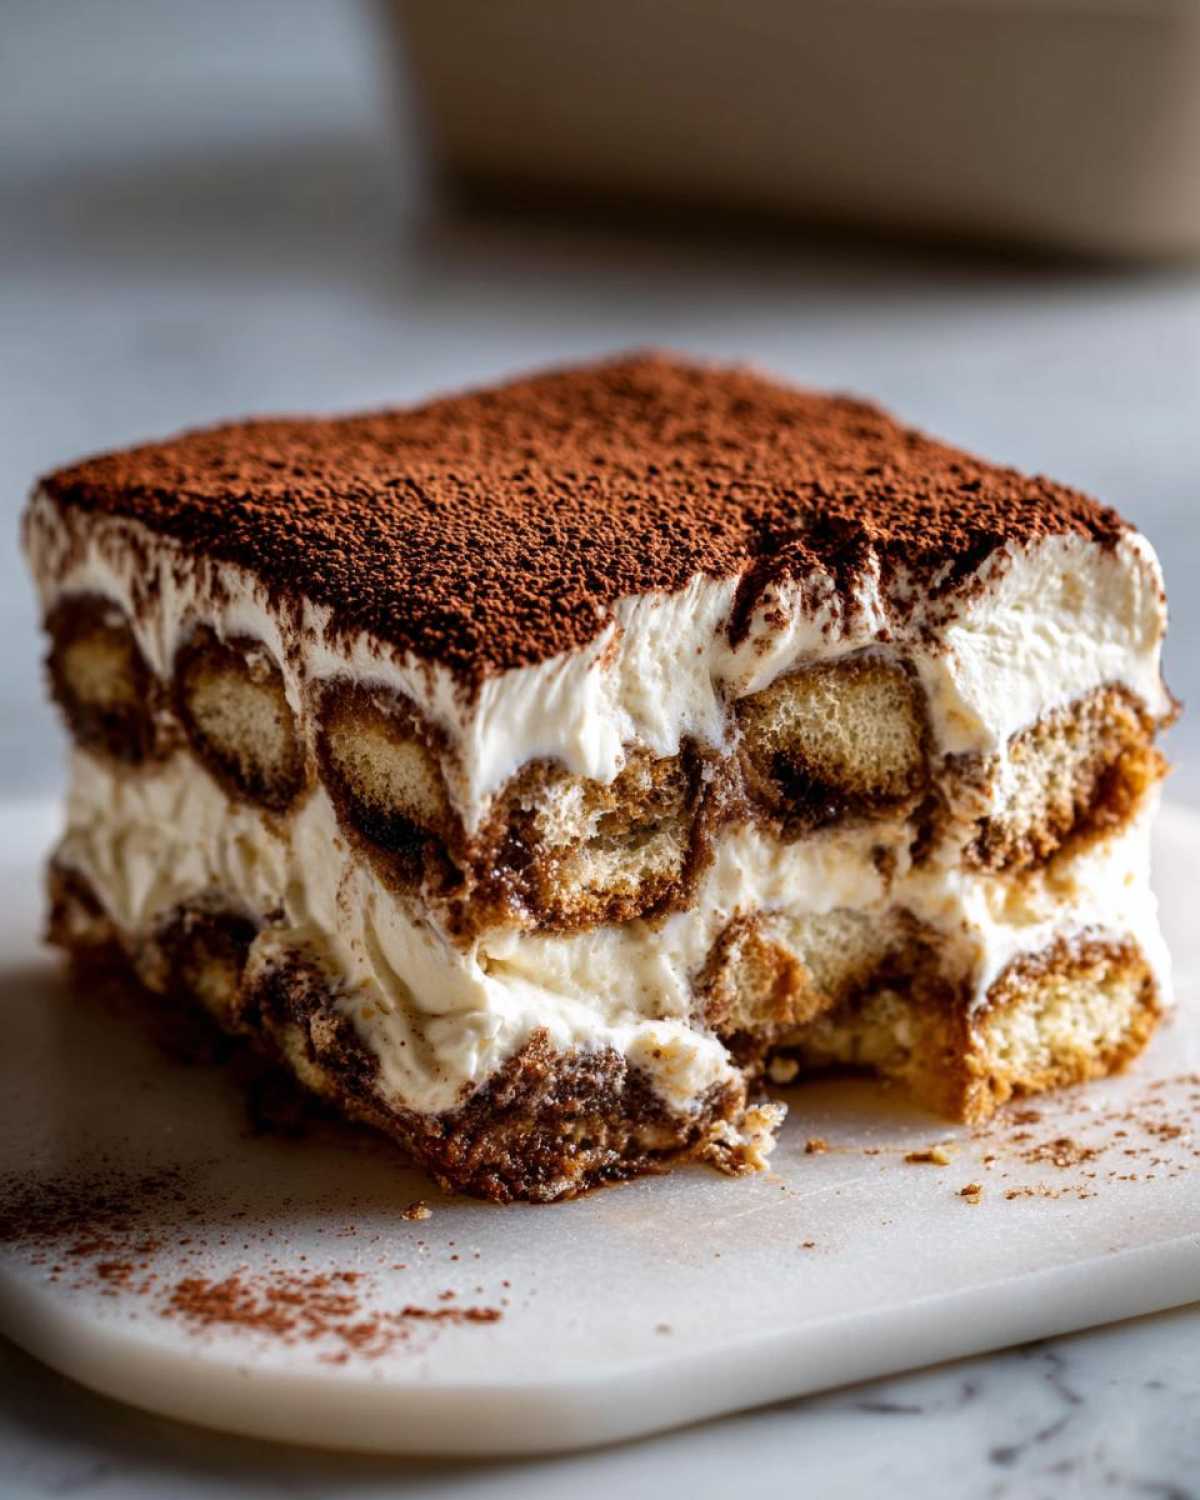
Time to build! Grab your serving dish—I usually use an 8×8 square dish because it makes for perfect slices. Dip each ladyfinger into that coffee mixture *very quickly*. I mean a quick dip on the bottom and a quick dip on the top. Do not let them soak! If you leave them in there for more than a second total, you’ll end up with sad, mushy layers in your beautiful Layered Italian Cake. Arrange that first layer snugly. Then, spread half of your marvelous mascarpone cream over the top. Repeat the dipping and layering process for the second set of biscuits, and finish by spreading the rest of the cream evenly over the top. Make sure the top layer is perfectly smooth—that’s your canvas for the cocoa powder!
The Essential Chill Time for Perfect Tiramisu Recipe Results
We are almost there! Cover that dish tightly with plastic wrap. This recipe demands patience now. You need to get this into the fridge for a minimum of six hours, but honestly, overnight is when this thing sings. That chilling time allows the ladyfingers to soften just right and lets all those deep coffee and creamy notes marry together perfectly. Seriously, waiting is the hardest part, but it’s what makes this the Best Tiramisu Recipe out there.
Expert Tips for the Best Classic Italian Dessert
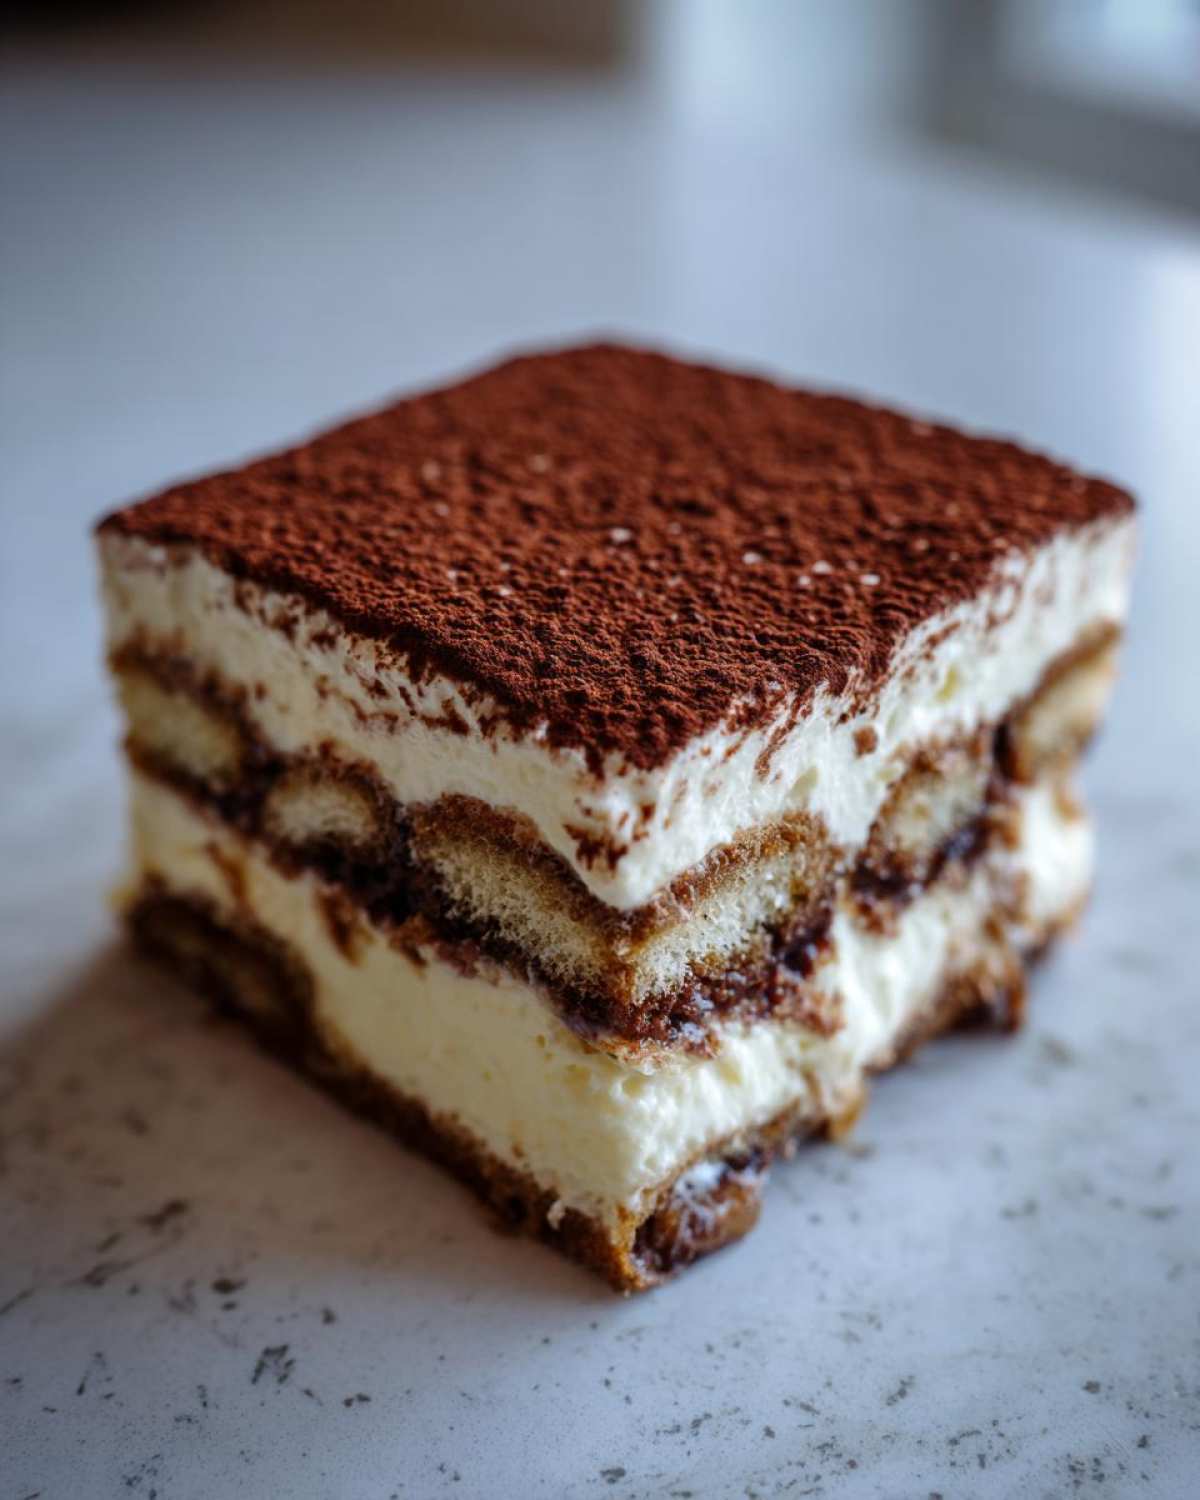
Now that you have the basic steps down for our tiramisu recipe, I want to share a few tricks Liam taught me that really push this over the edge from ‘good’ to ‘you must share this everywhere.’ These little details are what separate a basic attempt from the Best Tiramisu Recipe you’ll ever make. It’s all about technique and respecting the ingredients!
Making This Tiramisu Without Raw Eggs Safely
If you’re still nervous about that egg yolk step, even though we aren’t using them raw in the main recipe, you can always temper them! I found this intimidating at first, but it’s really just gentle cooking. You set a heat-safe bowl over a saucepan of simmering water (a double boiler setup) and slowly whisk the yolks and sugar until the mixture reaches 160°F (71°C). This pasteurizes them completely! It’s a little extra step, but it gives you total peace of mind if you’re serving guests. I think Liam mentioned something about heating things gently in his guide on muffin making, which uses gentle heat too.
Coffee Quality and Ladyfingers for Your Tiramisu Recipe
Listen up: if you use weak coffee, your tiramisu will taste weak. Period. You need espresso, or at the very least, coffee brewed so strong it’s almost syrupy. Think about it—this strong coffee liquid is the main flavor note besides the cheese! Also, please stick to Savoiardi biscuits if you can find them. They are designed to be dipped. If you look at Emma’s version of the classic, you can see how important those firm biscuits are for a sturdy Authentic Italian Dessert layer.
Serving Suggestions for Your Elegant Dinner Party Dessert
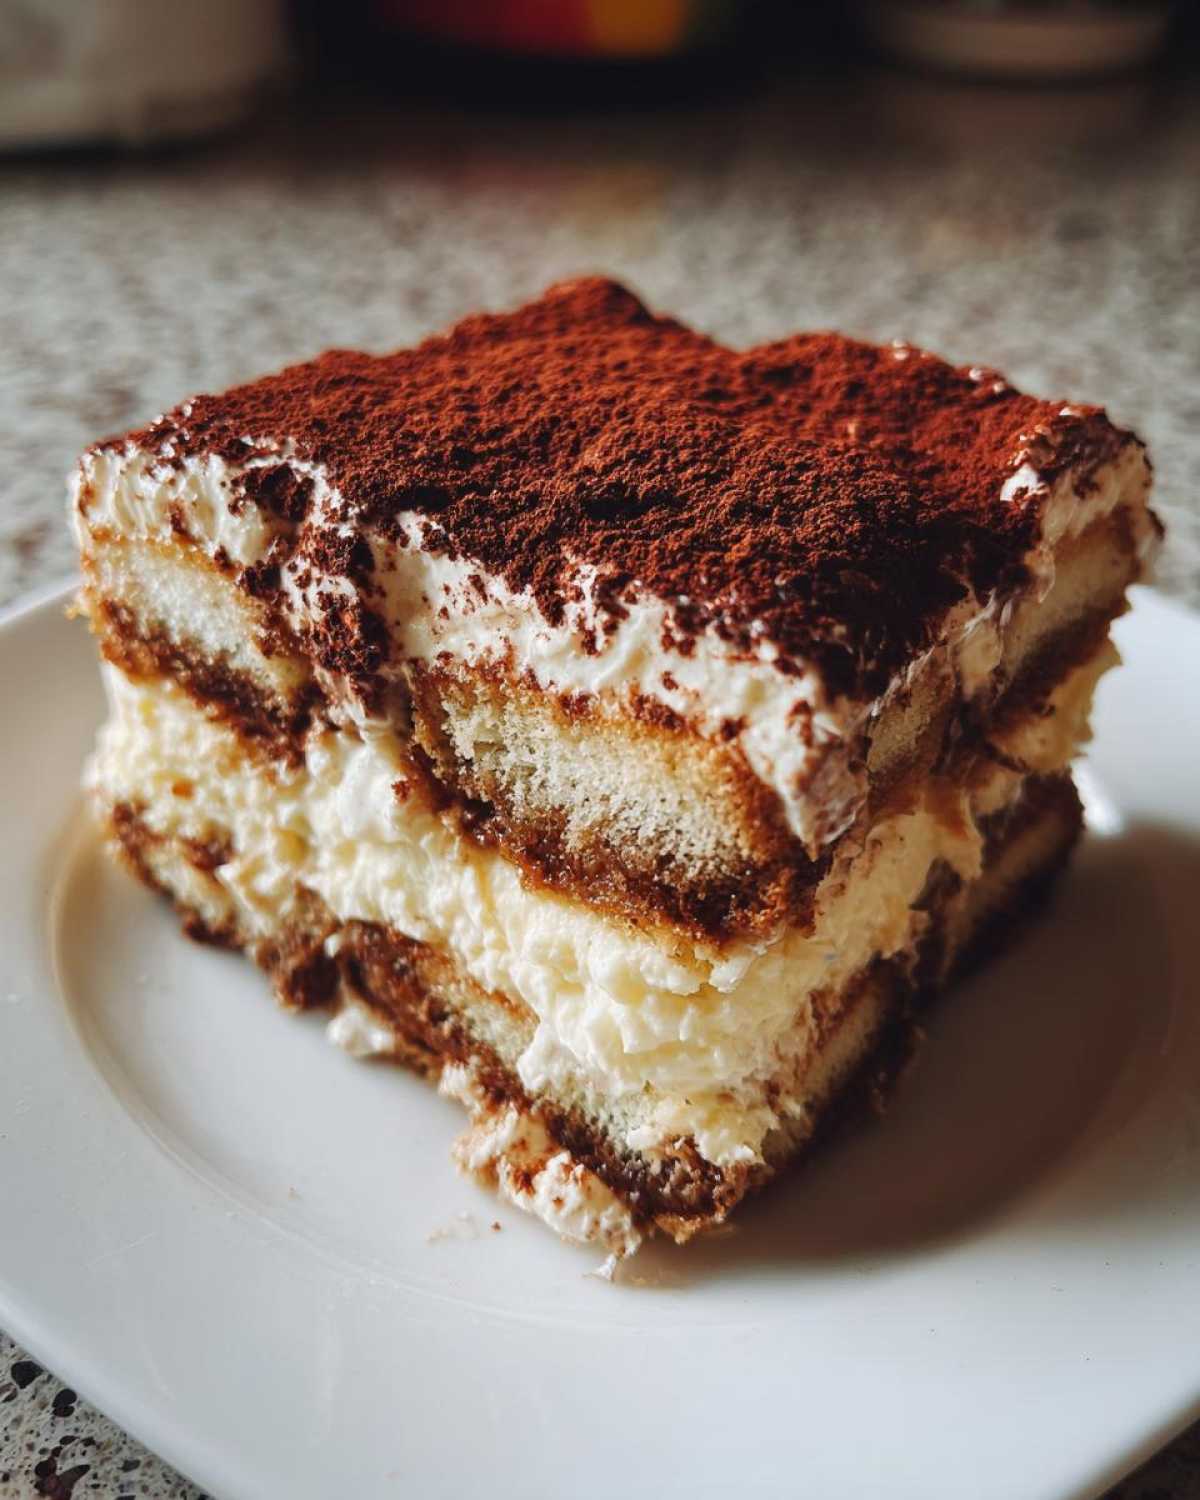
This tiramisu recipe is guaranteed to be the star of any dinner party, Clara and I agree! Since it’s already so rich and creamy, you don’t need much accompaniment, but presentation is everything. I love slicing it into neat squares while it’s still cold, perhaps topping each individual slice with a single, perfect fresh raspberry or a tiny shaved piece of dark chocolate.
If you need a little something extra on the side, consider serving it alongside a small pot of my famous warm chocolate dipping sauce—you can find the recipe for that over here. It’s just delightful when you want to make dessert feel extra decadent!
Storage and Make Ahead Desserts Guidance
This is honestly one of my favorite secrets about this tiramisu recipe—it’s the ultimate Make Ahead Dessert! Liam is always telling me that making dessert the day before is the key to a relaxed dinner party, and he is 100% right. You absolutely need to chill this thing; those six hours (or better yet, overnight!) aren’t just suggestions; they are mandatory for structure and flavor.
When it chills, the coffee soaks fully into the ladyfingers, making them melt-in-your-mouth tender, and the mascarpone cream firms up just enough that when you slice it, you get those gorgeous, defined layers. Don’t worry about reheating this at all; it needs to be served cold, straight from the fridge. If you have leftovers (which is rare in our house!), cover it tightly. It stays wonderfully fresh for up to three days, though frankly, the day-two flavor boost is unbeatable. If you want ideas for other recipes that are great made ahead, you should check out Liam’s amazing apple dumpling recipe; those are perfect for making ahead too!
If you’re curious about how others assemble theirs or store leftovers, you can see some alternative looks for a classic dessert over at Cooking Lola’s site. But trust me, once you try our overnight method, you won’t go back!
Frequently Asked Questions About This Tiramisu Recipe
I know you’re going to have questions after trying this project. That’s totally normal! Liam and I always found that reading the FAQs really helped secure the win when we were learning a new technique. Ask me anything; I’ve probably had that exact thought while whipping cream. If you scroll through our full blog archive, you’ll see we cover all the nitty-gritty details for a reason!
Can I use regular coffee instead of espresso in this Easy Tiramisu?
You totally can, but with a big caveat. If you are chasing that deeply rich, authentic Italian vibe, espresso is the only way to go. It’s stronger and has a cleaner, more concentrated flavor that penetrates the ladyfingers best. If you absolutely must use regular coffee, you’ll need to brew it super strong—I mean, double the grounds you normally use! Think of it as concentrated coffee, not your morning weak drip. Otherwise, your Easy Tiramisu will just taste… watery.
What is the best way to dust cocoa powder on the Tiramisu?
This seems like such a tiny step, but it makes the final presentation pop! You must wait until the absolute last second to do this—right before you slice into it or serve it. If you dust it early, the moisture from the cream will soak into the powder and make dark, damp spots instead of a light, velvety topping. I always grab the finest mesh sieve I own, load it up with unsweetened cocoa powder, and just gently tap it over the surface. That way, you get a perfectly even, light coating across the entire top of your dessert.
How long can I keep this No Bake Tiramisu Recipe refrigerated?
Good question! Since this is the ultimate No Bake Tiramisu Recipe, we rely completely on refrigeration both for setting and safety. I think it tastes the absolute best about 12 to 24 hours after assembly because the flavors have fully merged. You can safely keep it covered tightly in the fridge for up to three days. After day three, the ladyfingers might start getting a little too soft for my liking, even though it’s still safe to eat. So, aim for enjoying it the next day!
Estimated Nutritional Data for Your Tiramisu Recipe
Okay, Clara always makes me put this disclaimer in because, clearly, we aren’t dieticians! But if you’re counting calories or watching your sugar, you need a rough idea of what’s in your gorgeous slice of this tiramisu recipe. These figures are estimates based on the specific ingredients we used in our version, so please keep that in mind.
Here’s the general breakdown for one slice:
- Serving Size: 1 slice
- Calories: 410
- Sugar: 28g
- Sodium: 95mg
- Fat: 28g
- Protein: 7g
Remember, this is a rich, decadent treat, so enjoy every single coffee-soaked bite!
Share Your Homemade Tiramisu Guide Experience
Wow, we made it! You’ve successfully navigated the journey from strong espresso to a beautiful, creamy, no-bake Italian masterpiece. I’m so proud of you for trying out this tiramisu recipe. Liam and I put so much heart into making sure these instructions felt like we were right there with you in the kitchen, guiding your hands.
Now, the best part! I absolutely love hearing from you all. Did you serve it at a big celebration? Did the folks at the table go silent when they took that first bite? Please, please leave a star rating below to let us know how this Classic Italian Dessert turned out for you. Even better, if you snap a picture of your gorgeous layers, tag us on social media! We thrive on seeing your wins.
If you have any lingering questions about soaking the ladyfingers, keeping the mascarpone chilled, or anything else, don’t hesitate to drop a comment! You can also reach out directly through our contact page if you need a one-on-one chat. We built TasteTaught to be a place of learning and connection, one delicious recipe at a time. Happy serving!
PrintThe Ultimate Easy No-Bake Tiramisu: Authentic Italian Flavor Without Raw Eggs
Learn how to make a classic, creamy Italian Tiramisu recipe that is easy, requires no baking, and skips raw eggs. This guide gives you the simple steps for an elegant, coffee-soaked dessert perfect for any dinner party.
- Prep Time: 25 min
- Cook Time: 0 min
- Total Time: 6 hr 25 min
- Yield: 8 servings
- Category: Dessert
- Method: No-Bake
- Cuisine: Italian
- Diet: Vegetarian
Ingredients
- 1 1/2 cups strong brewed espresso, cooled
- 1/4 cup coffee liqueur or dark rum (optional)
- 2 large egg yolks
- 1/2 cup granulated sugar
- 8 ounces mascarpone cheese, softened to room temperature
- 1 teaspoon vanilla extract
- 1 1/2 cups heavy whipping cream, cold
- 1 package (7 ounces) ladyfingers (Savoiardi biscuits)
- Unsweetened cocoa powder, for dusting
Instructions
- Prepare the coffee soak: In a shallow bowl, combine the cooled espresso and the coffee liqueur or rum, if using. Set aside.
- Make the mascarpone cream base: In a medium bowl, whisk the egg yolks and granulated sugar together until the mixture is pale yellow and thick. This takes about 3 to 5 minutes of vigorous whisking.
- Gently whisk the softened mascarpone cheese into the egg yolk mixture until just combined and smooth. Stir in the vanilla extract. Do not overmix.
- Whip the cream: In a separate, clean bowl, use an electric mixer to beat the cold heavy whipping cream until stiff peaks form.
- Fold the whipped cream into the mascarpone mixture in two additions, using a spatula. Fold gently until no white streaks remain, creating a light, creamy filling.
- Assemble the Tiramisu: Quickly dip each ladyfinger, one at a time, into the coffee mixture. Do not soak them too long, or they will become soggy. You want a quick dip on each side.
- Arrange a single layer of the dipped ladyfingers in the bottom of an 8×8 inch baking dish or a similar sized serving dish.
- Spread half of the mascarpone cream mixture evenly over the layer of ladyfingers.
- Repeat the process: Dip and arrange a second layer of ladyfingers over the cream.
- Top with the remaining mascarpone cream, spreading it evenly to cover the top layer completely.
- Cover the dish tightly with plastic wrap and refrigerate for at least 6 hours, but preferably overnight. This chilling time is essential for the flavors to meld and the dessert to set.
- Before serving, use a fine-mesh sieve to generously dust the top layer with unsweetened cocoa powder. Slice and serve this **best Tiramisu recipe** cold.
Notes
- For a truly **authentic Italian dessert**, use high-quality espresso. The coffee flavor is key.
- If you are concerned about using raw eggs, you can temper the yolks over a double boiler until they reach 160°F (71°C) before whisking with sugar. This pasteurizes them, making this a safe **Tiramisu Without Raw Eggs** option.
- This is a fantastic **make ahead dessert**; it tastes better the next day.
- When dipping the ladyfingers, work quickly. They absorb liquid fast.
Nutrition
- Serving Size: 1 slice
- Calories: 410
- Sugar: 28g
- Sodium: 95mg
- Fat: 28g
- Saturated Fat: 17g
- Unsaturated Fat: 11g
- Trans Fat: 0.5g
- Carbohydrates: 32g
- Fiber: 1g
- Protein: 7g
- Cholesterol: 150mg