

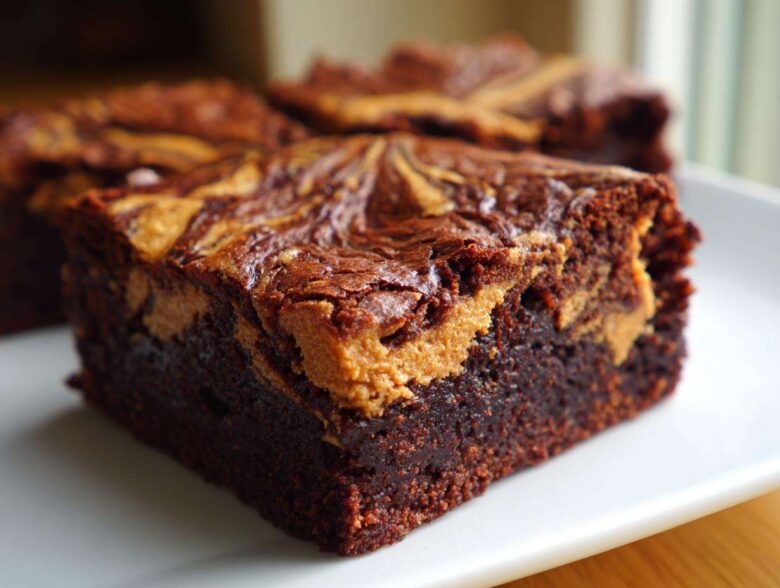
When that deep, desperate craving hits—you know, the one that needs something rich, chocolatey, and utterly decadent—you need a recipe that absolutely delivers. Forget dry, crumbly squares; we are making the ultimate homemade treat today: perfect **peanut butter swirl brownies**! When I was learning to bake from Liam, these were the first real showstopper dessert he taught me to master. They bridge that gap between simple baking and pure indulgence, giving you that gorgeous, fudgy base mixed with that creamy, unmistakable peanut butter ribbon. If you’ve ever felt lost in the kitchen like I did when we started TasteTaught, don’t worry. This recipe is completely achievable for you, too.
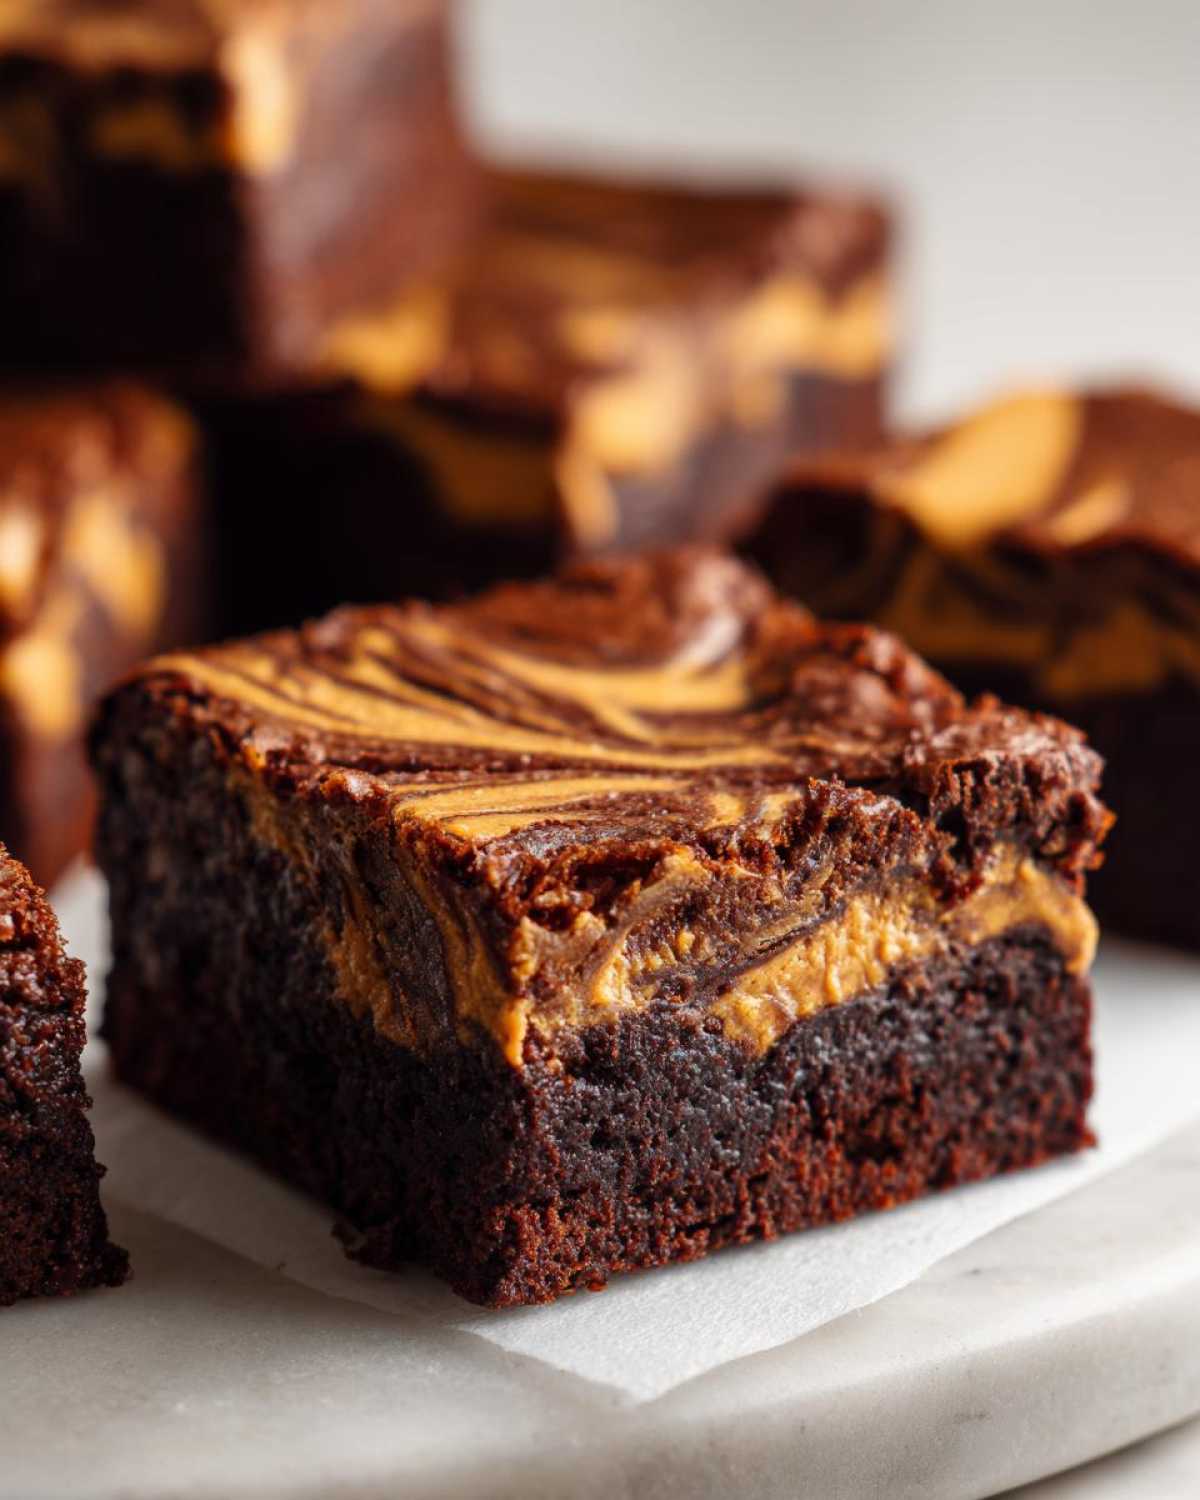
Why You Will Love These Peanut Butter Swirl Brownies
I keep making these over and over again because they truly hit every single sweet-tooth requirement. Liam jokes that this is the recipe that turned me into a full believer in homemade desserts! You are going to absolutely adore:
- They are intensely **fudgy brownies** with that perfect crackly top. Seriously, the texture is everything!
- The swirl process is so much easier than you think. We are talking about distinct, gorgeous ribbons of peanut butter—true **marbled chocolate treats** without the fuss.
- Because they use simple pantry staples, this qualifies as one of the best **easy dessert recipes** you’ll keep in your back pocket forever.
- The contrast between the rich dark chocolate and the salty, nutty peanut butter layer is just heaven.
- They are crowd-pleasers! Whenever I bring these to a friend’s house, they vanish first. They just smell amazing while baking, too.
- Perfect for **baking for beginners brownies** because even if you slightly under-bake them (which we like!), they just come out extra gooey!
Essential Ingredients for Perfect Peanut Butter Swirl Brownies
Okay, time to gather everything up! You only need a few simple things for this recipe, which is why I love it so much. There are no weird specialty powders—just quality basics that combine beautifully. Getting the right kind of peanut butter is important here, so stick to creamy unless you’re feeling a crunchy surprise!
Here is your shopping list for these absolutely perfect **peanut butter swirl brownies**:
- 1/2 cup (115g) unsalted butter, melted (This is key for the fudgy texture!)
- 1 cup (200g) granulated sugar
- 2 large eggs, room temperature is best
- 1 teaspoon vanilla extract
- 1/3 cup (40g) unsweetened cocoa powder – use a good one!
- 1/2 cup (65g) all-purpose flour
- 1/4 teaspoon salt
- 1/4 teaspoon baking powder
- 1/2 cup (120g) creamy peanut butter (softened slightly for easy swirling)
That’s it! See? Not scary at all. Having everything measured out before you start means the mixing process flies by.
Equipment Needed for Your Peanut Butter Swirl Brownies
Before we even think about melting butter, let’s make sure your kitchen is ready for action. Having the right tools set up makes the whole process smooth—and trust me, when you’re mixing that rich chocolate batter, you don’t want to stop halfway to hunt for a whisk!
Liam always reminds me that good baking starts with having the right vessel. Here is the shortlist of what you’ll need to create these amazing two-layer brownies:
- An 8×8 inch baking pan. This size is essential for getting that dense, gooey square we are aiming for when baking these treats.
- Parchment paper. Don’t skip this! I make sure to cut a long strip so it creates an overhang on two sides. This is your built-in handle for lifting the whole batch out cleanly later.
- A medium mixing bowl for the wet ingredients and a separate small bowl for whisking the dry ingredients. Keeping them separate prevents me from over-developing the gluten in the chocolate base.
- A sturdy whisk to beat the eggs and sugar until they are fluffy.
- A rubber spatula for folding in the flour mixture gently.
- A microwave-safe small bowl, just for softening up that peanut butter layer!
- A butter knife, a skewer, or even a thin offset spatula. This is what we use to make those beautiful, messy ribbons on top. Keep it light and gentle when you swirl!
Gathering these bits first makes the actual mixing feel more like playing than actual intense labor. You are all set for greatness!
Step-by-Step Instructions to Make Fudgy Peanut Butter Swirl Brownies
Wow, we are finally at the fun part! As Liam always says, the steps here are straightforward, but they are designed to guarantee you get those deeply **fudgy brownies** we talked about. Follow the ingredients list closely, and trust me on the mixing instruction—don’t rush it, but don’t overdo it! Making amazing **peanut butter swirl brownies** is easier than people think once you see the flow.
Preparing the Pan and Oven
First things first, we need heat! Go ahead and preheat your oven to 350°F (175°C). Now grab that 8×8 inch pan. I line mine with parchment paper, making sure the paper hangs over two of the sides like little handles. This is my favorite baking trick! It lets you lift the entire cooled slab right out of the pan later—no sticking, no fuss!
Mixing the Brownie Batter Base
Grab your whisk and cream the melted butter with the sugar in your main bowl. Beat in your eggs one by one, followed by the vanilla. In a separate, smaller bowl, quickly whisk together your dry stuff: cocoa powder, flour, salt, and baking powder. Now, this is crucial for that **gooey brownie recipe** texture: add the dry mixture to the wet mixture slowly, mixing *only* until you can’t see any more dry streaks. I mean it! Stop mixing right there. Overmixing ruins the fudginess.
Creating the Creamy Peanut Butter Swirl
Time for the star attraction! Take your half-cup of creamy peanut butter and warm it in the microwave for maybe 15 or 20 seconds. You just want it soft enough to drop spoonfuls easily, not runny. Plop spoonfuls randomly all over that lovely chocolate batter. Then, take your knife or skewer and gently drag it through the batter just a few times—we want lovely **swirled dessert bars**, not a uniform tan mess. Keep the swirls gentle!
Baking and Cooling for the Best Texture
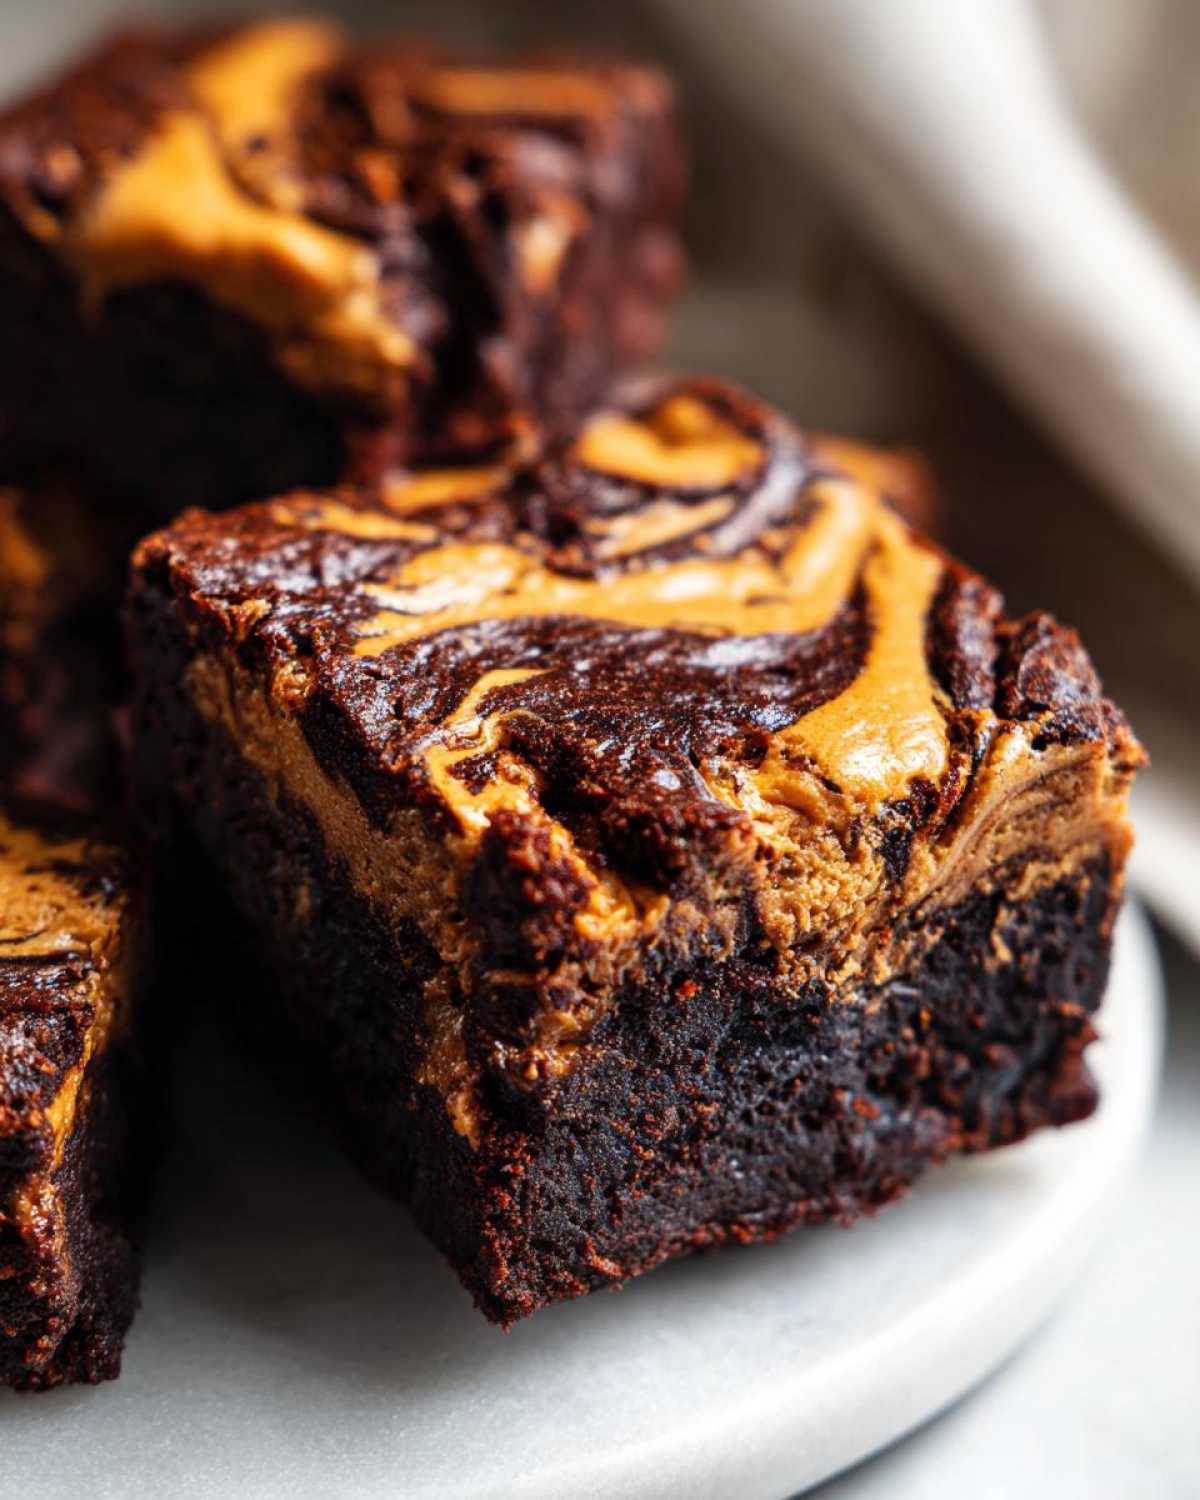
Pop the whole pan into that hot oven for about 25 to 30 minutes. You are looking for the edges to be set, but remember what Liam taught me: the toothpick test is key! Stick a toothpick near the center; you want it to come out covered in moist crumbs, not wet batter. Once they look done, take them out! Have patience now, because you absolutely must let these fudgy brownies cool completely in the pan before you use those parchment slings to lift them out for the final cut. If you cut them warm, they will absolutely fall apart on you.
Tips for Achieving the Best Peanut Butter Swirl Brownies
We want these to be showstoppers, right? We want that dense, **rich chocolate fudge** quality shining through, layered with that perfect creamy stripe. Liam’s notes—the ones underlined twice on the recipe cards—were all about fine-tuning the technique for consistency. When I first tried this recipe, I ruined a batch by using the electric mixer for everything, so please listen to me on this!
Here are the secrets I learned trying to perfect these **peanut butter swirl brownies**:
- No Mixer for the Dry Stuff: This is the biggest tip for fudgy texture. You must mix your flour, cocoa, salt, and baking powder by hand with a whisk. Seriously, put the electric mixer away during this step! Using a mixer when adding the flour is how cake batter is made, and we absolutely do not want cakey brownies here. We want maximum gooeyness!
- The Magic of Moist Crumbs: When you test for doneness, remember that ‘baked’ for a brownie is different than ‘baked’ for a cake. If your toothpick comes out bone dry, you’ve gone too far and cooked out all the intended goo. Aim for moist crumbs clinging to the toothpick—that guarantees the best result when they cool down. If you want that shiny crust, pulling them right at this moment helps achieve it.
- Peanut Butter Consistency is Key: If your peanut butter is too stiff straight from the jar, it will sink right down into the chocolate batter instead of staying on top to swirl beautifully. That’s why you see that little heating step in the instructions. You just want it soft enough to spoon easily, not piping hot or runny. This ensures you get those gorgeous definition lines when you create your swirl, just like in the best chocolate chip cookie recipe prototypes we worked on!
- Cool Completely Before Cutting: I know, I know! It’s torture waiting when they smell this good. But if you try to slice into these warm, they will smear into a delicious, gooey mess (which might be fun, but it won’t look like the picture!). Use that parchment overhang and let them chill until they are totally firm before slicing into perfect squares.
Storage and Reheating Instructions for Decadent Baked Goods
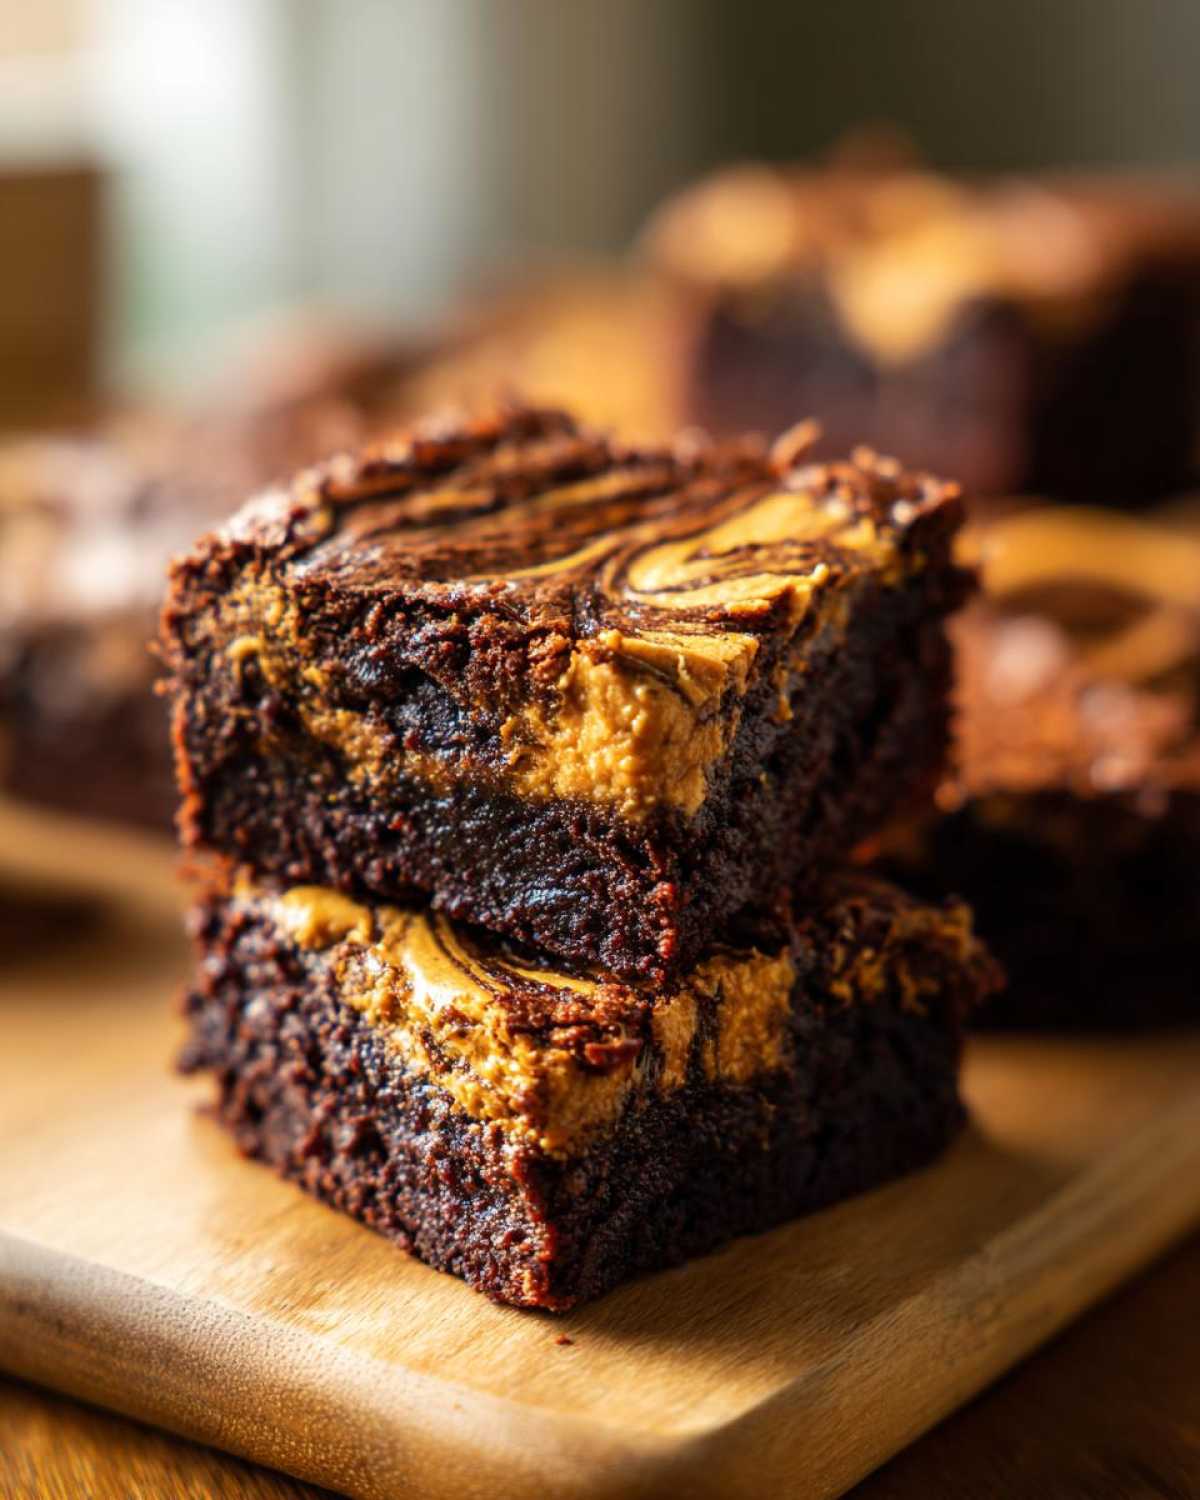
Now that you’ve poured your heart into making these perfect squares, we need to talk about keeping them luscious! The best part about these **chocolate peanut butter dessert** bars is that they are actually better the next day once they’ve set up completely. You definitely shouldn’t rush the cooling process, though!
When you’re ready to store them—and this applies even if you had to cut them slightly early—grab an airtight container. I like to separate the layers slightly with small squares of parchment or wax paper, especially if you managed to get a really glossy top crust. This stops any stray crumbs or sticky spots from ruining that beautiful finish.
They keep wonderfully at room temperature. Seriously, just keep them covered on your counter for up to four days. Don’t try putting them in the fridge unless your kitchen is insanely hot; honestly, the cold tends to dry out baked goods like brownies and ruin that signature gooey center we worked so hard to achieve when we mixed everything by hand.
If you made a massive batch (and trust me, I’ve done that!), freezing is a fantastic option. Once they are completely cool—and I mean *completely*—slice them into the squares you plan to eat later. Wrap each individual square tightly in plastic wrap, then place those wrapped portions into a freezer-safe bag. They’ll be good for about two months. When you want one, just pull it out and let it thaw on the counter for about an hour. It thaws beautifully, retaining that homemade taste and moisture.
Variations on Classic Peanut Butter Swirl Brownies
Okay, so you’ve nailed the basic recipe. You know how to get that perfect fudgy base and that beautiful marble, and now you’re ready to customize your **peanut butter swirl brownies**! That’s the best part about baking from scratch—you get to play editor! Liam encourages me to try little tweaks every time I make a batch just to keep things interesting.
Here are a couple of super simple ways you can adapt this recipe without losing that essential fudgy texture we’ve worked so hard to secure:
Add Some Extra Chocolate Goodness
If you think the chocolate-to-peanut-butter ratio could use a little boost, this is the easiest change! Right before you pour the batter into the pan in Step 5, fold in about half a cup of chocolate chips. Now, I prefer semi-sweet for a richer taste, but milk chocolate works if you like things sweeter. You can use mini chips or regular ones—it doesn’t matter much since they’ll be suspended within that fudgy matrix anyway!
Pro Tip: If you want the absolute highest level of decadence, toss some mini peanut butter chips in with your regular chocolate chips. That way, every bite has potential explosions of peanut butter flavor!
Switch Up the Peanut Butter Texture
We used creamy peanut butter in the main recipe because it gives you the smoothest, most elegant swirl. But who says we have to be elegant all the time? Feel free to swap the 1/2 cup of creamy peanut butter for crunchy peanut butter! This instantly adds texture and bite to the swirl layer. Just make sure you still warm it slightly so you can spoon it onto the batter easily.
If you are feeling adventurous, you could even try alternating batches! Maybe one week we do creamy, and the next we go crunchy for a totally different experience.
A Little Sprinkle of Salt Magic
This is Liam’s suggestion, and it’s brilliant for balancing out the sweetness. If your peanut butter is unsalted or only lightly salted, finish the top layer *before* you bake. After you’ve finished making your swirl pattern, take a tiny pinch of flaky sea salt—like Maldon—and sprinkle it lightly over the top. That little pop of crystalized salt hitting the warm chocolate and peanut butter swirl on top is just incredible. It elevates these from standard **peanut butter desserts** to something truly gourmet!
You can also check out my favorites for using peanut butter in other ways when I added pretzels to my Peanut Butter Pretzel Bark recipe. It’s all about finding that perfect salty-sweet spot!
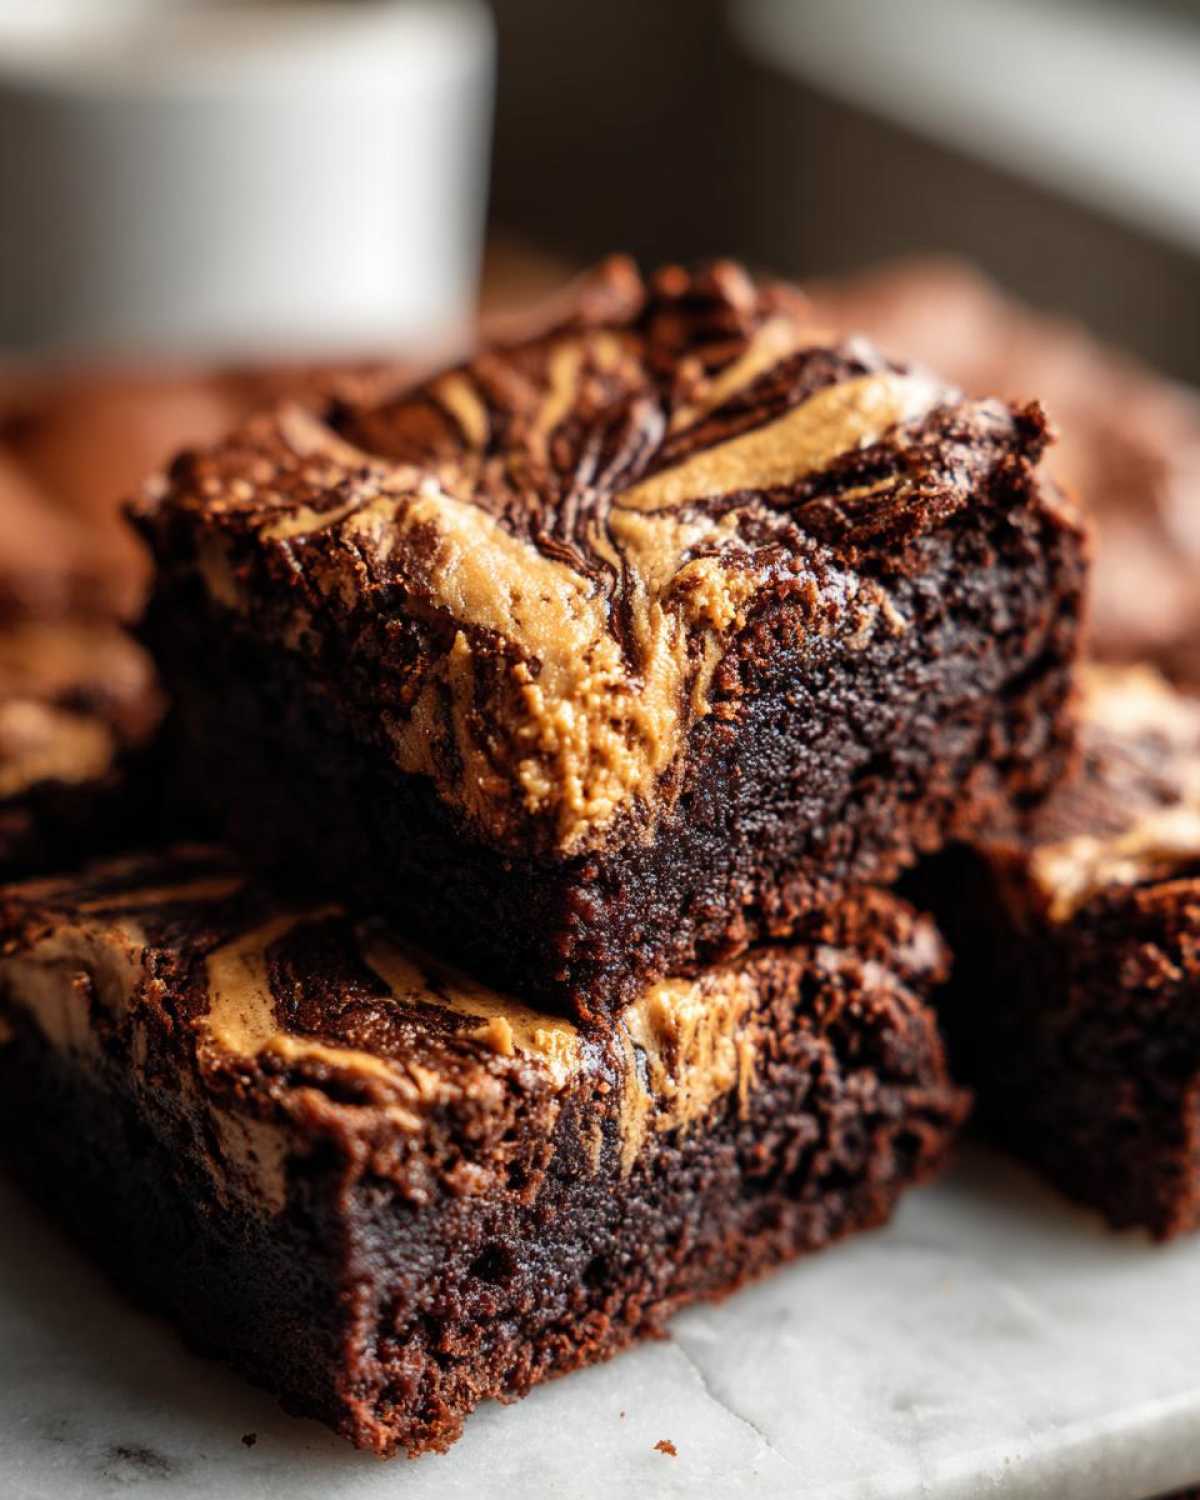
Frequently Asked Questions About Peanut Butter Swirl Brownies
I totally get it—when you commit to baking something this rich, you want to make sure you get it right the first time! Liam and I have tackled every snag possible while perfecting this recipe, so ask away! We want your experience making these **peanut butter swirl brownies** to be successful right out of the gate, especially if you’re new to the **baking for beginners brownies** club.
What is the best peanut butter consistency for the swirl?
For the prettiest, most distinct swirl, creamy peanut butter is definitely the winner here because it spreads so smoothly. If you only have natural peanut butter on hand, you *must* stir it really well first to incorporate all that separated oil back in. If it still seems too stiff to spoon nicely over the batter, just warm it for 10 or 15 seconds in the microwave. You really don’t want it runny, though—you want it soft enough to gently drag a knife through without it totally sinking into the chocolate batter underneath.
How do I ensure my brownies are fudgy and not cakey?
This is the golden question! Fudgy vs. Cakey all comes down to two things: fat ratios and mixing time. First, notice we use melted butter, not softened butter creamed with sugar—that’s a big clue we are leaning toward a denser, fudge texture. Second, and this is non-negotiable, stop mixing the second the dry ingredients disappear! If you keep going even for 30 extra seconds, you develop gluten and accidentally make a cake. Pull them out when the center toothpick isn’t gooey-wet, but has visible moist crumbs clinging to it. That slight under-baking is what guarantees that perfect center.
Can I substitute the granulated sugar with brown sugar?
You absolutely can, and it will change the flavor profile just a bit! If you swap the granulated sugar for brown sugar, you’ll get a slightly chewier texture and a little bit of a deeper, almost molasses-like flavor mixing in with the cocoa. Since this recipe relies heavily on granulated sugar for that signature crackly top and clean structure, I suggest keeping the ratio the same but only swapping half the white sugar for light brown sugar on your first try. If you want lots of extra advice on baking things from scratch, feel free to check out the rest of my notes on the TasteTaught blog!
Do these freeze well?
Yes, they do! If you managed to resist eating them all in one day, they freeze surprisingly well, though that fudgy texture gets a little firmer when cold. You must let them cool 100% first. Slice them into squares, wrap each one tightly in plastic wrap, and then pop them into a heavy-duty freezer bag. They last great for about two months. When you want one, let it sit on the counter for maybe an hour. It thaws perfectly, and that peanut butter swirl stays intact!
Estimated Nutritional Information for Peanut Butter Swirl Brownies
I always look at the nutrition when I’m about to devour something this decadent—it helps make the indulgence feel officially sanctioned, right? Liam laughs because he knows I’m still going to eat it regardless, but here are the general estimates for one square based on the ingredients used in this recipe. Please remember these are just estimates, as your brands of cocoa and peanut butter can change things up!
- Serving Size: 1 square
- Calories: 320
- Sugar: 28g
- Fat: 18g (This is where the fudginess comes from!)
- Protein: 6g
- Carbohydrates: 37g
It’s worth every single calorie, trust me. If you are planning a kid’s party or bringing these to a gathering, it’s good to know what you’re serving, but when it comes to rich, homemade treats like this, sometimes ignorance is bliss!
Share Your Peanut Butter Swirl Brownies Creations
This is my absolute favorite part! Liam and I get so much joy seeing the treats you all make in your own kitchens. If you followed along and baked up a batch of these heavenly **peanut butter swirl brownies**, please come back and let us know how they turned out! Drop a rating at the top of the post—it helps other bakers know this recipe is worth their time.
Did yours turn out super fudgy? Did you manage to get that perfect, clean swirl pattern? Did you add any secret variations like extra sea salt? I want to hear all the details! You can share pictures with us by reaching out through our contact page or tagging us on social media. We love building this community of bakers who are learning one delicious recipe at a time. Happy baking, friends!
Estimated Nutritional Information for Peanut Butter Swirl Brownies
I always look at the nutrition when I’m about to devour something this decadent—it helps make the indulgence feel officially sanctioned, right? Liam laughs because he knows I’m still going to eat it regardless, but here are the general estimates for one square based on the ingredients used in this recipe. Please remember these are just estimates, as your brands of cocoa and peanut butter can change things up!
- Serving Size: 1 square
- Calories: 320
- Sugar: 28g
- Fat: 18g (This is where the fudginess comes from!)
- Protein: 6g
- Carbohydrates: 37g
It’s worth every single calorie, trust me. If you are planning a kid’s party or bringing these to a gathering, it’s good to know what you’re serving, but when it comes to rich, homemade treats like this, sometimes ignorance is bliss!
Share Your Peanut Butter Swirl Brownies Creations
This is my absolute favorite part! Liam and I get so much joy seeing the treats you all make in your own kitchens. If you followed along and baked up a batch of these heavenly **peanut butter swirl brownies**, please come back and let us know how they turned out! Drop a rating at the top of the post—it helps other bakers know this recipe is worth their time.
Did yours turn out super fudgy? Did you manage to get that perfect, clean swirl pattern? Did you add any secret variations like extra sea salt? I want to hear all the details! You can share pictures with us by reaching out through our contact page or tagging us on social media. We love building this community of bakers who are learning one delicious recipe at a time. Happy baking, friends!
PrintFudgy Peanut Butter Swirl Brownies: The Ultimate Homemade Treat
Learn to make rich, fudgy chocolate brownies perfectly marbled with a creamy peanut butter swirl. This recipe delivers decadent, homemade brownies that are simple to achieve.
- Prep Time: 15 min
- Cook Time: 30 min
- Total Time: 45 min
- Yield: 9 servings
- Category: Dessert
- Method: Baking
- Cuisine: American
- Diet: Vegetarian
Ingredients
- 1/2 cup (115g) unsalted butter, melted
- 1 cup (200g) granulated sugar
- 2 large eggs
- 1 teaspoon vanilla extract
- 1/3 cup (40g) unsweetened cocoa powder
- 1/2 cup (65g) all-purpose flour
- 1/4 teaspoon salt
- 1/4 teaspoon baking powder
- 1/2 cup (120g) creamy peanut butter
Instructions
- Preheat your oven to 350°F (175°C). Line an 8×8 inch baking pan with parchment paper, leaving an overhang for easy removal.
- In a medium bowl, whisk together the melted butter and granulated sugar until combined.
- Beat in the eggs one at a time, mixing well after each addition. Stir in the vanilla extract.
- In a separate small bowl, whisk together the cocoa powder, flour, salt, and baking powder.
- Gradually add the dry ingredients to the wet ingredients, mixing only until just combined. Do not overmix to keep the brownies fudgy.
- Pour the brownie batter into the prepared pan and spread evenly.
- In a small, microwave-safe bowl, warm the 1/2 cup of peanut butter for about 15-20 seconds until it is slightly softened and easily spoonable.
- Drop spoonfuls of the softened peanut butter over the top of the brownie batter.
- Use a knife or a skewer to gently swirl the peanut butter into the chocolate batter, creating a marbled pattern. Do not mix completely.
- Bake for 25 to 30 minutes. The edges should look set, and a toothpick inserted near the center should come out with moist crumbs attached, not wet batter.
- Let the brownies cool completely in the pan before lifting them out using the parchment paper overhang. Cut into squares and serve.
Notes
- For the fudgiest brownies, avoid using a mixer for the dry ingredients; hand-mixing prevents overdeveloping the gluten.
- If your peanut butter is too stiff to swirl, warm it slightly. You want it soft, not runny.
- To get that perfect, gooey center, pull the brownies out of the oven when a toothpick shows moist crumbs.
- These marbled chocolate treats keep well stored in an airtight container at room temperature for up to four days.
Nutrition
- Serving Size: 1 square
- Calories: 320
- Sugar: 28
- Sodium: 150
- Fat: 18
- Saturated Fat: 7
- Unsaturated Fat: 11
- Trans Fat: 0
- Carbohydrates: 37
- Fiber: 2
- Protein: 6
- Cholesterol: 55