

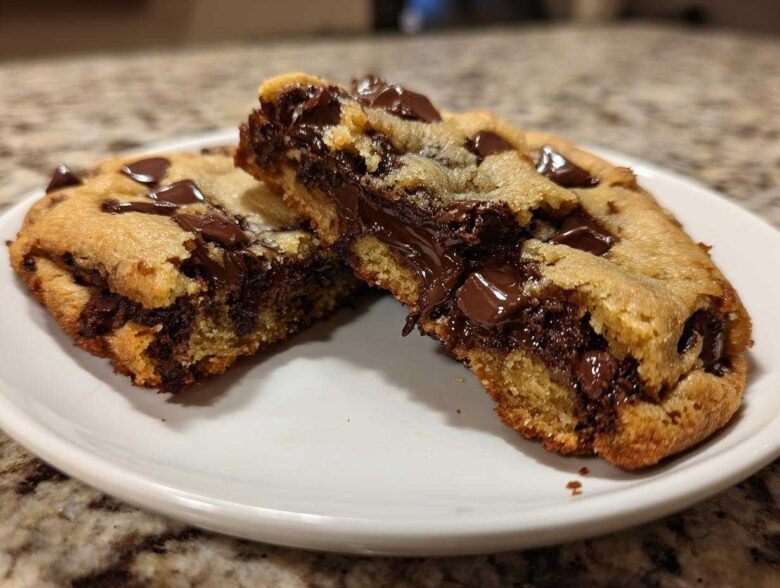
Okay, listen up, because I’m finally sharing the recipe that stopped my endless search. You know how many times I’ve made a batch of cookies only to have them spread into sad, flat, oily discs? It was tragic! I wasted so much butter and chocolate trying to find that illusive textural balance. But I cracked the code, and I promise you, this is the best chocolate chip cookie recipe you will ever use. Forget those dry, cakey fails; we are aiming for perfection here: thick, oh-so-chewy centers, edges that snap just right, and pockets of gooey chocolate that make you weak in the knees. This isn’t just a recipe; it’s a fundamental life improvement!
After what felt like a thousand test batches—and yes, I ate every single failure—I landed on this absolute winner. It uses brown butter, which sounds fancy, but trust me, it’s easier than you think, and it adds this incredible depth of flavor that makes people ask, “What did you put in these?!” This truly is my go-to for everything from a quick Tuesday night craving to helping out at neighborhood bake sales. If you’re ready to make the ultimate batch of cookies, grab your apron! You can read a little more about my philosophy behind baking over on the About Us page.
Why This Is The Ultimate Chocolate Chip Cookie Recipe
I know everyone claims they have the ultimate recipe, but this one actually delivers on the hype. If you’ve ever been chasing that perfect bakery-style cookie texture, you’re in the right place. This isn’t just another classic cookie recipe; it’s the roadmap to flawless results every single time. Seriously, once you try these, you won’t look back.
- They are genuinely bakery style cookies—thick, substantial, and look like they came from a fancy little shop downtown.
- We nail the balance between thick chewy cookies in the middle and those irresistible, slightly dark, crispy edge cookies.
- The flavor payoff from browning the butter makes this the best chocolate chip cookie recipe I’ve ever tested.
Achieving Thick Chewy Cookies Every Time
The secret weapon here is two-fold: the brown butter and the chill time. When you brown your butter—which you absolutely should do—you need to let it cool down slightly before mixing it with the sugars. If it’s too hot, it melts the sugar too fast, and BAM, flat cookies. Cooled brown butter hydrates the flour perfectly without encouraging spread, guaranteeing you end up with wonderfully thick chewy cookies that hold their shape during baking.
The Secret to Gooey Center Cookies and Crispy Edge Cookies
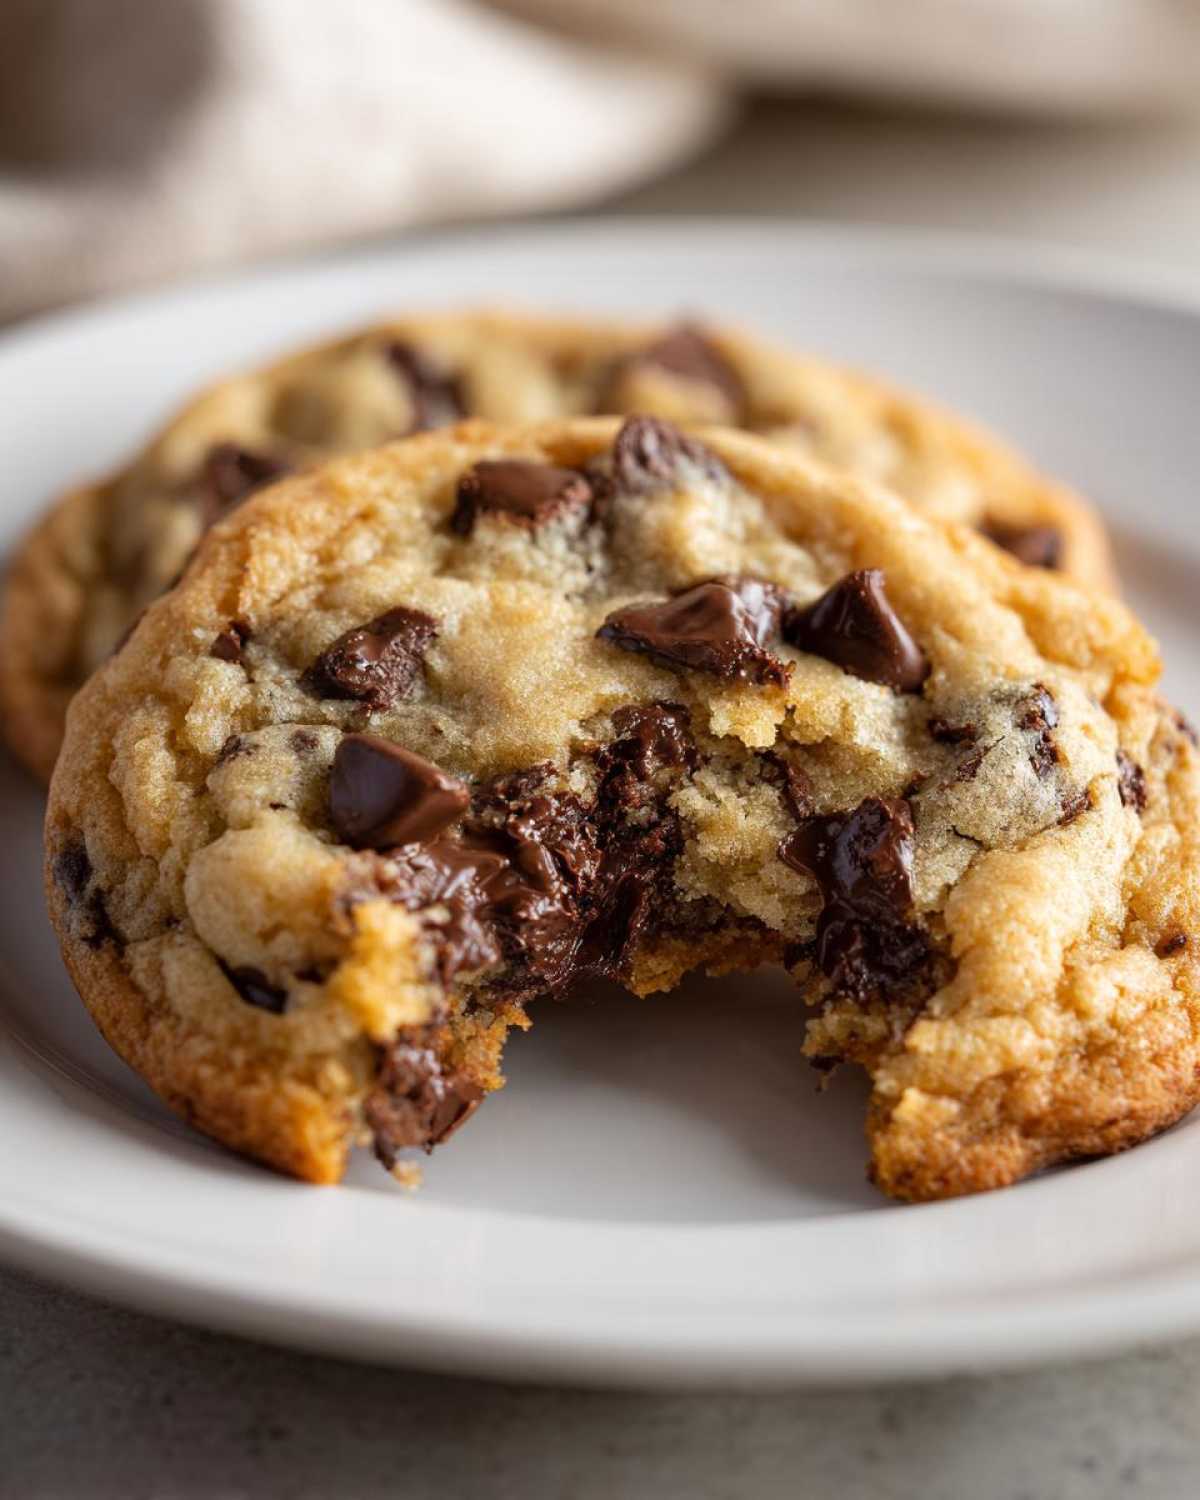
You want that melt-in-your-mouth center, right? That means pulling these babies out of the oven when they look just *barely* done. If the centers look set and matte, they are overbaked! You want golden, crinkly edges and centers that still seem a little soft and puffy. The moisture trapped inside creates those amazing pockets of gooey center cookies. Plus, the ratio of sugars we use helps the edges caramelize beautifully, giving you that crisp bite.
Ingredients for the Best Chocolate Chip Cookie Recipe
Okay, preparation is everything here, and I want you to have all your ducks in a row before you even think about mixing! Precision makes these superior. For the creaming section, you need 1 cup (that’s exactly two sticks!) of unsalted butter, but here’s the kicker: it needs to be browned and then cooled just a touch so it’s not screaming hot. We are using 1 cup of packed light brown sugar—make sure you really pack it in there to measure correctly—and 1/2 cup of plain white granulated sugar.
Next up are the binders: two large eggs that must be at room temperature, plus a whole tablespoon of pure vanilla extract. Don’t skimp on the vanilla here; it really adds character! For the dry stuff, grab 2 1/4 cups of all-purpose flour, 1 teaspoon of baking soda, and 1 teaspoon of salt. Finally, the star of the show: load up on 1 1/2 cups of semi-sweet chocolate chips or, even better, chunks!
Ingredient Notes and Substitutions for Your Chocolate Chip Cookie
Let’s talk about that butter again. Browning it adds this nutty, toffee-like note that transforms the whole experience. If you’re in a massive rush, you *can* use regular melted butter instead of browning it, but please know that you’re missing out on a huge flavor boost. It just won’t be quite the same chocolate chip cookie, okay?
Also, consider your chocolate! Chips are fine, but I always feel like using good quality chocolate chunks—or even chopping up a bar of chocolate yourself—gives you those beautiful, melted puddles when the cookies come out of the oven. That visual alone is worth the extra three minutes of chopping. This is the foundation for your classic cookie recipe, so treating the ingredients right matters!
How to Prepare Bakery Style Cookies: Step-by-Step Instructions
Putting this dough together is really straightforward, but we have to respect the steps, right? First things first, you need to deal with that butter. Melt it down gently in a saucepan over medium heat. Keep watching it because it goes from brown and nutty to burnt really fast! You’ll see those little milk solids start to deeply brown on the bottom—this is when you pour it immediately into a heatproof bowl to stop the cooking. Let it cool for about fifteen minutes; it needs to lose that scorching heat before the next step.
Once it’s managed, whisk that slightly cooled brown butter with the packed brown sugar and the white sugar until it looks nice and uniform. Then, beat in your room temperature eggs one at a time—don’t rush that! After the vanilla goes in, switch to dry ingredients. Mix the flour, baking soda, and salt separately, then add them to the wet ingredients gradually, mixing only until you just see the flour disappear. Overmixing is the enemy here; it develops gluten and makes your cookies tough instead of perfectly soft.
Finally, fold in those glorious chocolate chips. Now, here’s where many people mess up their perfect chocolate chip cookie batch: you have to chill the dough! Cover that bowl and stick it in the fridge for a minimum of two hours. Honestly? Overnight is the way to go for the richest flavor and the absolute thickest cookie. You can look over our site’s general recipe disclaimer right here if you have questions about ingredient differences, but trust me on the chilling!
Techniques for Perfect Chocolate Chip Cookie Dough Chilling
Chilling isn’t just something I suggest; it’s mandatory for these bakery style cookies! When the dough chills, the flour actually hydrates fully, which builds better structure, and the flavors have time to deepen—the brown butter really shines through! Plus, chilling solidifies the fat (the butter), meaning when it hits the hot oven, the cookie spreads way less. That’s how we get those satisfyingly thick chewy cookies that tower up instead of flattening out. Seriously, scrape the dough into a container, put a lid on it, and forget you made it for at least 12 hours if you can swing it. It’s the silent hero of this recipe!
Essential Chocolate Chip Cookie Baking Tips for Success
You’ve chilled the dough, you’ve preheated, and now it’s time for the payoff! Make sure your oven is truly at 375 degrees F. Too hot and the outside burns before the center melts, too cool and they spread. I always line my sheets with parchment paper; it’s non-negotiable for easy cleanup, but it also helps prevent scorching on the bottom.
When scooping, use a decent amount of dough—I aim for a solid 3-tablespoon scoop so they stay plump. And here’s my biggest pro tip for making these the best chocolate chip cookies visually: take a few extra chocolate chips and gently press them onto the top of each dough ball right before they go in. They melt beautifully on the surface, giving you that professional, loaded look.
The biggest fear is pulling them too soon, but don’t! Pull them when the edges look golden brown, but the center still looks slightly soft and pale. They will finish baking on that hot parchment paper for the five minutes they rest there, setting up perfectly into that ideal soft and chewy texture inside.
Making Your Chocolate Chip Cookie Dough Ahead of Time
This is fantastic news for busy folks—or those of us who can’t trust ourselves not to eat the whole batch in one sitting! Making the dough ahead of time is absolutely perfect for grabbing a quick treat later. Since chilling is so vital to getting those thick, structural chocolate chip cookies, you’re already halfway there.
For the refrigerator method, just cover your mixed dough tightly with plastic wrap and stash it in the main part of the fridge. It’s happy there for up to three days, and honestly, the flavor gets deeper and richer the longer it sits, which is a win-win!
If you want to freeze them for the future, which is my favorite trick for easy homemade cookies when guests suddenly drop by, scoop out your balls—about 3 tablespoons each—and place them on a parchment-lined tray. Freeze those until they are solid little stones. Then, transfer the frozen dough balls into a sturdy zip-top bag and keep them safe in the freezer for up to three months. Seriously, having rock-hard cookie dough ready to go is life-changing!
When you’re ready to bake straight from frozen, just add about 3 to 5 extra minutes to the baking time listed in the main instructions. Don’t try to thaw them first, or you’ll end up with soft dough and spread-out cookies. Baking from frozen keeps that glorious thickness intact while they bake through completely.
Serving Suggestions for Your Classic Cookie Recipe
I mean, look at them. They’re perfect. But even the ultimate chocolate chip cookies deserve the right presentation, don’t they? Honestly, while they are warm and the chocolate is molasses-soup gooey, just eat them standing over the sink so you don’t miss any drips. That’s my number one, completely unfiltered serving suggestion!
If you manage to wait until they’ve fully cooled—which takes serious willpower—they are absolutely incredible paired with an ice-cold glass of whole milk. Don’t act like you don’t have a glass ready. A piping hot cup of strong black coffee also cuts through the rich sweetness beautifully.
If you want to elevate them just a *tiny* bit more without doing a full glaze business, grab some flaky sea salt. I keep a little bowl of Maldon salt right by my baking station. Just sprinkle a few flakes over the top of the hot cookies right when they come out of the oven. It sounds dramatic, but that little pop of salt against the sweet chocolate in your classic cookie recipe? Game-changer, I promise you that.
Storage and Reheating Instructions for Soft and Chewy Cookies
First off, let’s talk about leftovers, because if your batch of chocolate chip cookies actually lasts more than 24 hours, you’ve shown remarkable self-control! When you do have successes still hanging around, storage is key to keeping that wonderful texture we worked so hard for.
You simply cannot leave these out on a plate uncovered. They’ll dry out faster than you can say, “More milk, please.” You need a truly airtight container. I prefer a sturdy, snap-lid plastic container, but a heavy-duty zip-top bag with all the air squeezed out works just as well. Stored correctly at cool room temperature, these soft and chewy cookies should stay perfect for about four full days.
Now, if you happen to pull one out on day five and it feels a little stiff? Don’t despair, you can totally bring it back to life! The microwave is surprisingly your best friend for reviving that gooey center.
For a single cookie, put it on a paper towel and microwave it for just 8 to 10 seconds. Seriously, don’t go past 10 seconds unless you want a molten mess! That quick burst of heat softens the sugars inside and makes the chocolate melt again instantly. It tastes like it just came out of the oven!
If you have a handful of cookies you want to revive, the oven is gentler. Pop them on a baking sheet at 300 degrees F for about 4 minutes. This warms them through evenly—giving you great warm edges and gooey insides—without turning them crispy like a cracker. Either way, you get that fresh-baked magic back instantly, saving you from having to bake a whole new batch of ultimate chocolate chip cookies!
Frequently Asked Questions About the Chocolate Chip Cookie
Can I skip chilling the dough for this recipe?
Oh, please don’t try it! I really advise against skipping the chilling period for this chocolate chip cookie recipe. Chilling is what ensures they bake up thick and chewy instead of spreading into thin wafers. When the dough is cold, the fat doesn’t melt immediately in the oven, so you get that beautiful height. If you’re in a rush, even 30 minutes in the freezer is better than nothing, but for the best results, aim for two hours minimum!
Why did my cookies spread too much in the oven?
This usually happens for two main reasons. First, was your brown butter too warm when you mixed in the sugar and eggs? If it’s hot, it instantly melts the butter into liquid, and you lose all the necessary structure. Second, did you use enough brown sugar? Brown sugar has more moisture than white sugar, and the ratio here is carefully calculated to give you the right combination of thick center and crispy edges. If they spread too much, it means your fat was too warm!
What’s the very best chocolate to use for the ultimate chocolate chip cookie?
This is a fun one! I am devoted to chocolate chunks or bars chopped roughly by hand. They melt into those lovely, irregular puddles that look so appealing. Semi-sweet chips are reliable, but if you want a richer flavor, use a blend! Try half semi-sweet and half milk chocolate. Using high-quality chocolate makes a genuine difference in the flavor payoff of your chocolate chip cookie.
Can I use margarine or shortening instead of butter?
You really shouldn’t, especially if you are aiming for the flavor we get from browning the butter! Butter contains milk solids that caramelize when browned, giving us that nutty, complex background flavor we need. Shortening doesn’t brown, and margarine has too much water content. Using butter is non-negotiable for achieving that perfect bakery style cookie texture we are aiming for here!
Estimated Nutritional Information for One Chocolate Chip Cookie
Now, I know we bake these cookies because they taste like happiness, not because we’re measuring every micro-nutrient, but it’s just good practice to know what we’re working with, right?
Because this recipe makes about 18 generous cookies, these numbers add up nicely, but keep in mind that because we use brown butter instead of just softened butter, and we use a hefty amount of rich chocolate, these are definitely an indulgence! We are talking about homemade, from-scratch, phenomenal cookies, so they aren’t exactly a health food, but oh my goodness, they are worth it.
- Calories: Approximately 250
- Fat: 14g (including about 8g Saturated Fat)
- Carbohydrates: 30g
- Sugar: 20g
- Protein: 3g
- Sodium: 150mg
Please remember that these figures are just estimates based on the specific ingredients called for in the recipe, especially the type of chocolate chips you decide to toss in there. If you use dark chocolate instead of semi-sweet, those numbers will shift a tiny bit! For full transparency regarding how we calculate these figures and other legal info about our site, you can check out our Cookie Policy page. Enjoy every single bite!
PrintThe Best Bakery Style Chocolate Chip Cookies
Make thick, chewy chocolate chip cookies with crispy edges using this reliable recipe.
- Prep Time: 20 min
- Cook Time: 12 min
- Total Time: 2 hours 32 min
- Yield: 18 cookies
- Category: Dessert
- Method: Baking
- Cuisine: American
- Diet: Vegetarian
Ingredients
- 1 cup (2 sticks) unsalted butter, browned and cooled slightly
- 1 cup packed light brown sugar
- 1/2 cup granulated sugar
- 2 large eggs, room temperature
- 1 tablespoon vanilla extract
- 2 1/4 cups all-purpose flour
- 1 teaspoon baking soda
- 1 teaspoon salt
- 1 1/2 cups semi-sweet chocolate chips or chunks
Instructions
- Brown the butter: Melt the butter in a saucepan over medium heat. Continue cooking, stirring occasionally, until the milk solids turn deep brown and the butter smells nutty. Pour into a heatproof bowl and let cool for 15 minutes.
- In a large bowl, whisk together the cooled brown butter, brown sugar, and granulated sugar until smooth.
- Beat in the eggs one at a time, mixing well after each addition. Stir in the vanilla extract.
- In a separate bowl, whisk together the flour, baking soda, and salt. Gradually add the dry ingredients to the wet ingredients, mixing on low speed until just combined. Do not overmix.
- Fold in the chocolate chips.
- Cover the dough and chill for at least 2 hours, or preferably overnight, for best texture.
- Preheat your oven to 375 degrees F. Line baking sheets with parchment paper.
- Scoop dough into balls, about 3 tablespoons each, and place them 3 inches apart on the prepared sheets. For extra thick cookies, press a few extra chocolate chips onto the tops of the dough balls.
- Bake for 10 to 13 minutes, or until the edges are golden brown and the centers still look slightly soft.
- Let the cookies cool on the baking sheet for 5 minutes before transferring them to a wire rack to cool completely.
Notes
- For a softer center, slightly underbake the cookies.
- Chilling the dough is key to preventing spread and achieving a thick cookie.
- You can substitute half the semi-sweet chips with milk chocolate or dark chocolate for varied flavor.
Nutrition
- Serving Size: 1 cookie
- Calories: 250
- Sugar: 20
- Sodium: 150
- Fat: 14
- Saturated Fat: 8
- Unsaturated Fat: 6
- Trans Fat: 0
- Carbohydrates: 30
- Fiber: 1
- Protein: 3
- Cholesterol: 55