

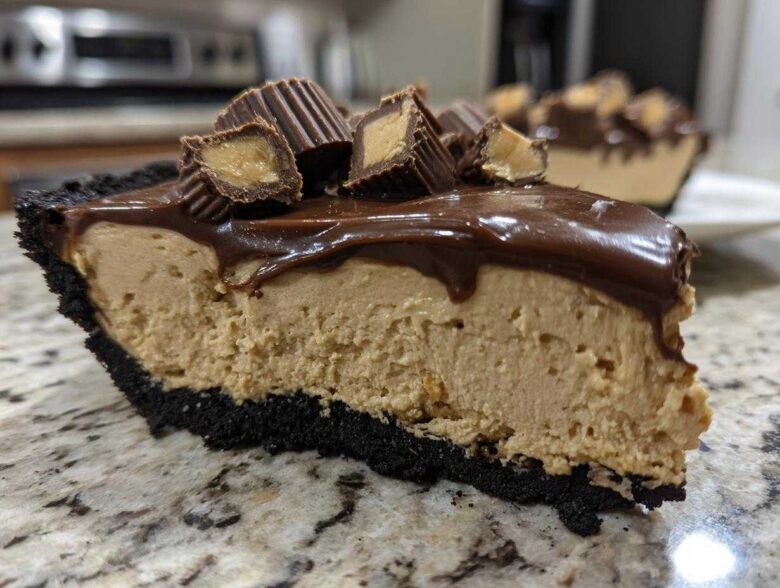
Oh my gosh, if you are having one of *those* days where only something ridiculously decadent and creamy will fix it, stop what you’re doing because I have the recipe for you! Seriously, forget turning on your oven in the summer heat or when you’re already stressed out about making dessert for a holiday gathering.
This is my reigning champion, the absolute best peanut butter pie you will ever whip up. It’s rich, it sets up perfectly firm, and the best part? It’s a total no-bake masterpiece. My cousin Brenda always begs for this recipe every single year for Thanksgiving, and honestly, if it can survive Brenda’s scrutiny, it can survive anything!
Why This No-Bake Creamy Peanut Butter Pie is a Crowd Pleaser
Listen, when people ask for my peanut butter pie recipe, they aren’t looking for something complicated. They want instant satisfaction, and that’s exactly what this pie delivers. It’s the perfect make-ahead dessert because once the filling goes in the crust, it’s chilling time, and you’re done!
- It boasts the creamiest filling you’ve ever encountered—it melts in your mouth, guaranteed.
- The chocolate topping sets up beautifully, giving you that incredible contrast with the salty-sweet peanut butter base.
- It travels like a dream, making it my go-to for potlucks and last-minute holiday baking emergencies.
Quick Prep Time for Your Peanut Butter Pie Recipe
You absolutely will not believe the active time involved here. Seriously, we are talking about less than 30 minutes of actual mixing! This makes it one of my favorite quick dessert recipes when I need something show-stopping but my brain is already fried. You mix, you pour, you chill. That’s it. No sweating over a hot oven, ever!
Gathering Ingredients for Your Decadent Peanut Butter Pie
Okay, before we get to the actual mixing, we have to talk about ingredients. Unlike some complicated baked desserts, this is where the magic really happens in terms of simplicity. But listen to me close: for this creamy peanut butter pie to be perfectly smooth, you absolutely must take your cream cheese out of the fridge an hour before you start. I mean it!
Cold cream cheese turns into little annoying lumps in your filling, and we aren’t having that. Room temperature cream cheese mixes right into that smooth, velvety texture we are aiming for. It’s my number one, non-negotiable expert tip for any decadent cream pie. Trust me on this one.
Crust and Filling Components for the Peanut Butter Pie
For the base, I usually cheat just a little bit because, hey, this is supposed to be easy! Grab yourself one pre-made 9-inch graham cracker crust. If you’re feeling frisky, an Oreo crust works wonders, but a graham cracker is the classic choice here.
Now for the filling itself. You’ll need:
- One cup of creamy peanut butter—don’t try crunchy, it messes up the texture!
- 8 ounces of that all-important softened cream cheese.
- One cup of powdered sugar—we sift this in later, trust me on the sifting!
- One teaspoon of vanilla extract because everything needs a little hug from vanilla.
- And finally, one 12-ounce container of frozen whipped topping, fully thawed. Make sure it’s thawed but still chilly.
Crafting the Chocolate Ganache Topping
The topping is what takes this from ‘good’ to ‘I need a nap after eating this.’ It’s a super quick, luscious chocolate layer. You only need three things for this layer, and honestly, you can skip the optional cups if you need to save money, but why would you?
Gather these components for your gorgeous topping:
- A half-cup of milk chocolate chips.
- One tablespoon of butter—real butter, it melts better!
- A quarter cup of heavy cream.
Oh, and if you want that extra little peanut butter punch on top, grab about a half-cup of those cute little mini peanut butter cups. We’ll toss those on last. See? The list isn’t scary at all!
Step-by-Step Instructions for the Perfect Peanut Butter Pie
Alright, now that we have all our goodies lined up—and that cream cheese is soft enough to spread on toast—it’s time for assembly! This is the fast part, but remember, the patience comes later when we chill everything. We are making the ultimate peanut butter pie here, so let’s treat the mixing gently.
Making the Homemade Peanut Butter Filling
First things first, grab your biggest mixing bowl. Beat that softened cream cheese until it looks totally smooth and fluffy—no lumps allowed! Once it’s looking nice and uniform, toss in your creamy peanut butter, your sifted powdered sugar (remember to sift!), and that teaspoon of vanilla. Beat that mixture until everything is happy and just combined. Don’t overmix here; we don’t want to whip too much air into this part.
Next comes the careful part. You have your container of thawed whipped topping. We need to gently fold that in with a spatula. And I mean gently. Fold it until you can’t see any white streaks anymore, but stop right there! Overmixing the whipped topping deflates it, and we want our filling light and airy, not dense and flat. Once folded, spoon this gloriously creamy mixture right into your graham cracker crust. Smooth the top nicely. Pop that in the fridge for at least four hours—I usually put it in overnight!
Chilling and Preparing the Chocolate Topping
Once your pie is firm—and I mean solid, not just jiggly—we tackle the topping. This is quick work! In a microwave-safe bowl, combine your chocolate chips and that tablespoon of butter. Microwave this in short 30-second bursts, stirring well after every blast, until it’s completely smooth and shiny. It’ll look thick, but wait!
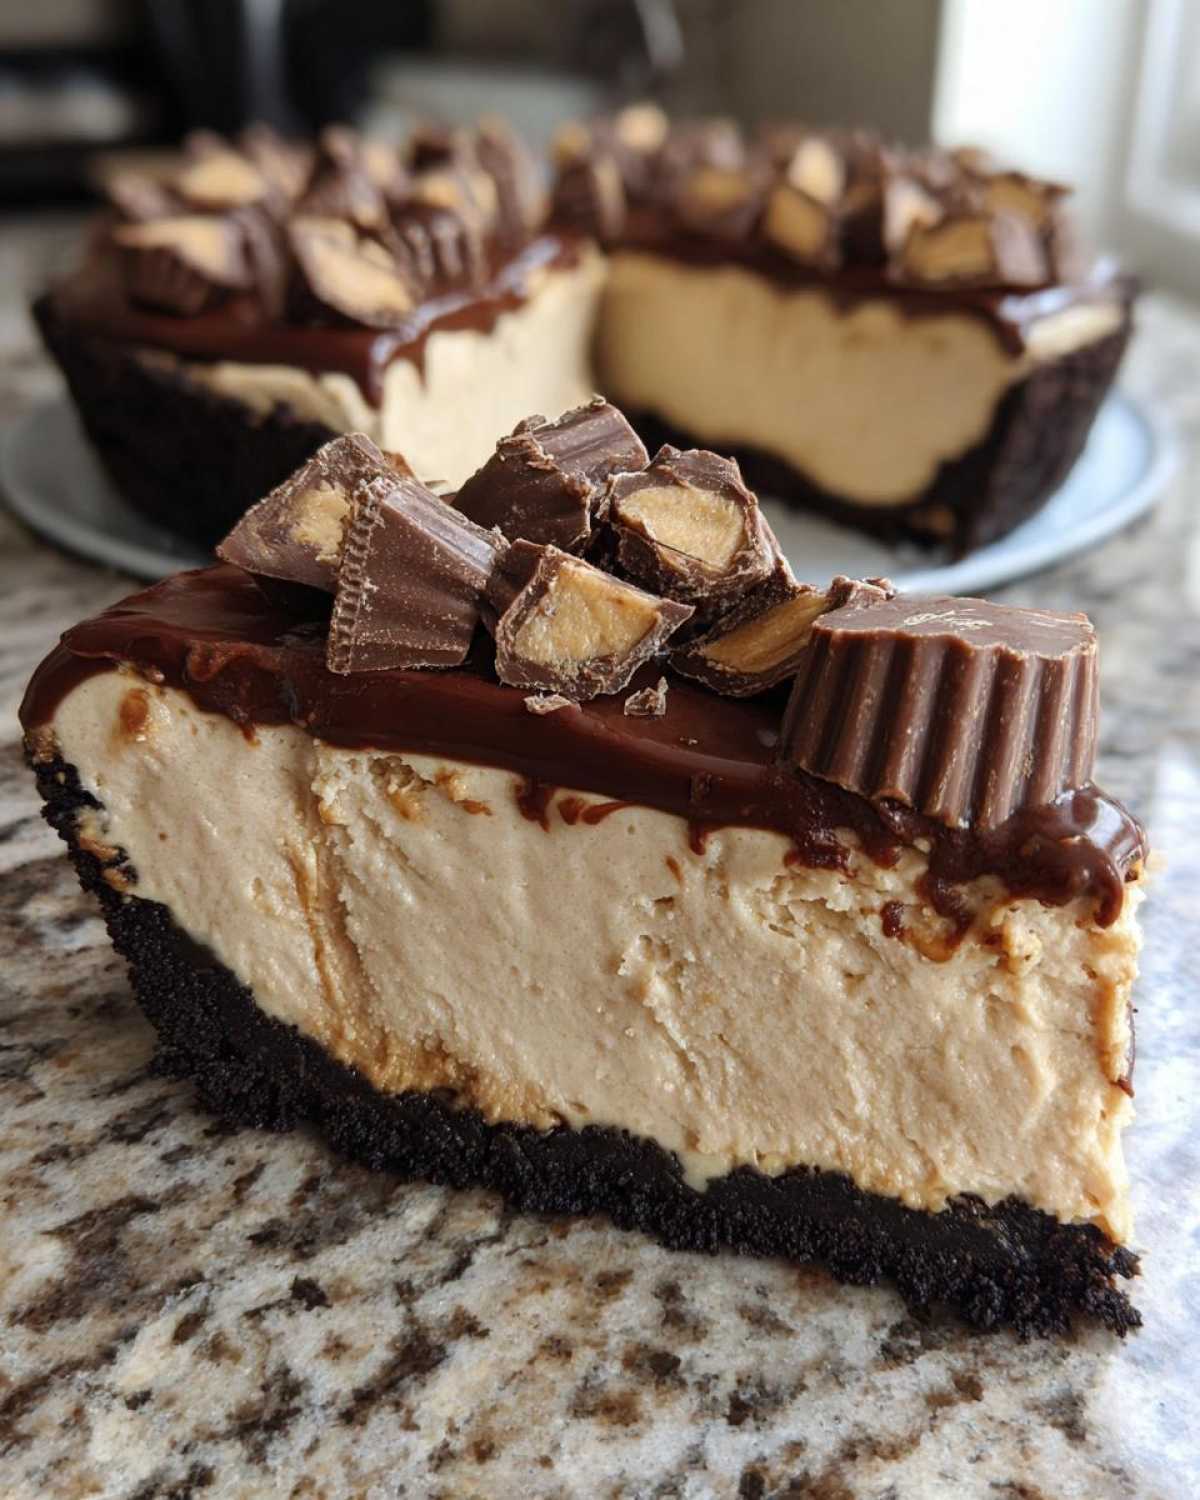
Stir in that quarter cup of heavy cream until you have a perfect, pourable ganache. Let it sit on the counter for about five minutes to cool down just a tiny bit so it doesn’t melt the lovely filling underneath. Now, pour it carefully over your chilled pie. If you’re using those mini peanut butter cups, sprinkle them on top right away before the ganache sets. Back into the fridge for just 30 more minutes before you dare slice into this masterpiece!
Expert Tips for the Best Peanut Butter Pie
You know, I’ve made this creamy peanut butter pie recipe dozens of times, especially when unexpected guests drop by, and I’ve picked up a few little tricks that really elevate it from just being a good dessert to being unforgettable. These aren’t major steps, but they are little adjustments that make a big difference in texture and presentation.
First off, let’s talk about firmness. If you live somewhere super hot, or if you just like your pie slices to stand up proud on the plate, you can adjust the filling slightly. Instead of folding in the pre-whipped topping—which is so easy—you can use a cold, firm alternative. If you substitute that 12-ounce tub of topping with one cup of very cold heavy cream, you can whip that cream right along with your cream cheese mixture until it forms stiff peaks!
It takes a little more effort with the electric mixer, but the resulting pie filling is denser and holds its beautiful shape even when you slice it. It’s my favorite trick for making sure it’s perfect for serving at large holiday gatherings.
Crust Substitutions for Your Peanut Butter Pie Recipe
As I mentioned when we were sneaking a peek at the ingredients, the graham cracker crust is classic—it has that wonderful little sandy texture that complements the smooth filling perfectly. But sometimes you just crave that deep, rich chocolate flavor!
If you want to switch things up, go right ahead and substitute your graham cracker crust with an Oreo cookie crust. Trust me, the dark chocolate cookie base works so well with the sweetness of the peanut butter. You can buy the pre-made Oreo crusts, or if you’re feeling ambitious, crush up about 24 Oreo cookies (filling and all!) and mix them with about six tablespoons of melted butter. Press that firmly into your pie plate and chill it for about 15 minutes before adding your filling. It makes the whole dessert feel a little more decadent, and honestly, it’s my favorite way to make an easy pie recipe feel fancy!
Make Ahead Desserts: Storing Your Peanut Butter Pie
One of the best features of this dessert, especially if you’re tackling major holiday baking schedules, is that this Peanut Butter Pie Recipe is wonderfully collaborative with your calendar. It absolutely thrives on being made ahead of time! In fact, I think the filling tastes even better the next day after it’s had a chance to truly marry all those peanut butter and vanilla flavors together.
You can easily get this done the night before you plan to serve it. Just follow all the steps—filling the crust, pouring the chocolate layer, and topping with the peanut butter cups—and then cover it securely in plastic wrap. That way, when the big meal is cooking, your only job is grabbing this out of the fridge!
And don’t worry about leftovers (though there rarely are any!). This pie keeps really well. You can cover it again after slicing, and it stays absolutely delicious in the refrigerator for up to four full days. That’s prime make ahead desserts territory right there, giving you room to breathe before your guests arrive. You can always tell folks that the texture is better the second day, too—it sounds extra professional!
Just remember that because it’s a no-bake treat, it needs to stay chilled. If you bring it out onto a warm patio for a summer party, try not to let it sit out for more than an hour or so, or that beautiful creamy texture might start to soften up too much. For best results, keep it cold until you slice it. If you ever need more tips on maintaining kitchen hygiene while storing leftovers, you can always check out our cookie policy for general guidance on site safety and trust!
Serving Suggestions for This Easy Pie Recipe
So, the pie is chilled, the chocolate topping is set, and you’re ready to serve this incredible easy pie recipe. While it stands perfectly well on its own—it’s literally a flavor explosion on a cracker crust—sometimes a little something extra just elevates the whole experience, doesn’t it?
I love keeping the presentation clean, but adding just one small contrasting element on the side of the plate makes it look like you spent hours fussing, which is my favorite kind of win. For starters, a simple dusting of unsweetened cocoa powder right before serving adds a sophisticated look and a tiny hint of bitterness to cut through the sweetness.
If you’re serving this right after a big meal, I adore pairing a slice with something bright. A few fresh raspberries or maybe even some thin slices of strawberry on the side really cuts through the richness of the peanut butter and cream cheese. It’s just a beautiful contrast in color and flavor!
And of course, for those of us who believe chocolate and peanut butter need even more friends, a small cup of really strong, hot coffee served alongside the slice is non-negotiable. That dark, hot brew alongside the cold, creamy pie? Perfection. No complicated sauces needed; this pie is already the star of the show!
Frequently Asked Questions About Peanut Butter Pie
I always get questions after people try this pie for the first time, which I take as the biggest compliment! Since this is truly my favorite no bake dessert to share, I figured I’d jot down the most common things folks want to know right here.
Can I use crunchy peanut butter instead of creamy in this recipe?
Oh, that’s a classic debate, isn’t it? You totally *can* use crunchy peanut butter if that’s what you have on hand or if you prefer that texture. However, I always stick to creamy for my peanut butter pie recipe. The goal here is ultra-smooth creaminess in that filling. The crunchy bits can sometimes make the filling feel grainy instead of totally luscious. If you use crunchy, just know you are prioritizing texture over that melt-in-your-mouth smoothness!
Since it’s a no-bake dessert, can I freeze this pie?
Yes, yes, you absolutely can freeze this! This is an absolute lifesaver when you need quick holiday dessert ideas. Once it’s completely set up—I mean, after you’ve added the chocolate topping and it’s chilled for at least 30 minutes—wrap it up tight in plastic wrap, maybe throw an extra layer of foil on it just to be safe. It freezes beautifully for up to a month. When you want to serve it, just pull it out the night before and let it thaw slowly in the fridge. It comes out perfect!
What if I don’t have whipped topping? Can I use Cool Whip or make my own stabilized cream?
That’s a great question about substitutions for the topping! I used the store-bought kind because it’s easy, but if you don’t have it, you have options. You can use heavy whipping cream and make your own stabilized whipped cream, which I actually mentioned in the tips section! You just need to whip one cup of very cold heavy cream until stiff peaks form. Fold that in gently just like you would the frozen stuff. It gives you a slightly lighter, less sticky filling, which I personally love for a decadent peanut butter dessert.
Why did my chocolate topping not set correctly on my pie?
If your chocolate topping stayed goopy and didn’t firm up, it’s almost always one of two things. First, did you let the ganache cool slightly before pouring it onto the chilled pie? Pouring hot chocolate onto a cold pie can keep the filling from setting in that top layer. The second reason might be that you didn’t use enough heavy cream, or maybe you didn’t let the whole pie chill long enough before adding the topping in the first place. Remember, every step of this easy pie recipe relies on that chill time!
Is this pie rich enough to serve for Thanksgiving?
Oh my stars, yes! This is one of the best easy Thanksgiving desserts because you can make it three days ahead of time and completely forget about it until dessert time. It’s rich, it’s indulgent, and it’s a wonderful change of pace from all the traditional pumpkin and pecan. When you serve slices of this incredible indulgent cream pie, people will seriously think you spent all day baking!
Nutritional Estimates for Your Peanut Butter Pie
Now, I know some of you are watching your sugar or counting macros, and I totally get that! But let’s be real—this is a decadent, special-occasion peanut butter pie, not a health food. I always tell people to enjoy things in moderation. These numbers are just estimates based on the standard ingredients listed above, so they might vary depending on the brand of peanut butter or crust you choose, but this gives you a general idea of what you’re digging into!
I always check these things for my own peace of mind, especially when planning portions for big gatherings. It helps me know what I need to balance out for the rest of the day, you know?
- Serving Size: 1 slice of this incredible pie!
- Calories: Around 450 (A solid afternoon treat!)
- Sugar: Approximately 35g
- Fat: About 30g
- Protein: A decent 10g boost
- Carbohydrates: Roughly 40g
We keep the sodium and cholesterol in check, but remember, anytime you’re using cream cheese and butter, you’re going to have some rich fats, and that’s what makes it a satisfying no bake dessert! These estimates are based on standard ingredient volumes, so think of them as a helpful guide rather than a strict scientific breakdown. Enjoy it first, worry about the stats second!
Share Your Experience Making This Peanut Butter Pie
Whew! Now that you’ve assembled your very own creamy, dreamy, no-bake peanut butter pie, I really, really want to hear about it! This is my absolute favorite recipe to share, and seeing how you all customize it just makes my day.
Did you stick to the classic chocolate ganache, or did you veer off and try something completely different? Maybe you added espresso powder to the cream cheese, or perhaps you drizzled caramel sauce over the top? Don’t keep those genius ideas to yourself!
Head down to the comments section below and let me know what you thought. Did it survive the night? Did it vanish the second you put it on the table? If you snapped a photo of your beautiful creation—especially if you went wild with those mini peanut butter cups—please tag me on social media! I love seeing this pie in kitchens all over the place.
If this recipe gave you a huge win for a quick dessert, I’d be so grateful if you could come back and leave a quick star rating. It helps other folks find this easy pie recipe, and it helps me know what to post next! For all the legal bits and pieces regarding site usage, make sure you check out our terms and conditions, but mostly, I just want to hear happy pie stories!
Happy baking—or, well, happy *no-baking*!
PrintNo-Bake Creamy Peanut Butter Pie

You can make this rich, creamy peanut butter pie without turning on your oven. It uses a simple cookie crust and a decadent filling.
- Prep Time: 20 min
- Cook Time: 5 min
- Total Time: 25 min
- Yield: 8 servings
- Category: Dessert
- Method: No-Bake
- Cuisine: American
- Diet: Vegetarian
Ingredients
- 1 pre-made 9-inch graham cracker crust
- 1 cup creamy peanut butter
- 8 ounces cream cheese, softened
- 1 cup powdered sugar
- 1 teaspoon vanilla extract
- 1 (12 ounce) container frozen whipped topping, thawed
- 1/2 cup milk chocolate chips
- 1 tablespoon butter
- 1/4 cup heavy cream
- Optional: 1/2 cup mini peanut butter cups for topping
Instructions
- In a large bowl, beat the softened cream cheese until smooth.
- Add the peanut butter, powdered sugar, and vanilla extract to the cream cheese. Beat until the mixture is fully combined and creamy.
- Gently fold in the thawed whipped topping until no streaks remain. Do not overmix.
- Spoon the peanut butter filling evenly into the graham cracker crust.
- Chill the pie in the refrigerator for at least 4 hours, or until firm.
- To make the topping, combine the chocolate chips and butter in a microwave-safe bowl. Microwave in 30-second intervals, stirring between each, until smooth.
- Stir the heavy cream into the melted chocolate mixture until you have a smooth ganache. Let it cool slightly.
- Pour the chocolate ganache over the chilled pie filling.
- If using, sprinkle the mini peanut butter cups over the top of the ganache.
- Return the pie to the refrigerator for another 30 minutes to set the topping before slicing and serving.
Notes
- You can substitute the graham cracker crust with an Oreo cookie crust for a chocolate base.
- For a firmer filling, use 1 cup of cold heavy cream instead of whipped topping and beat it until stiff peaks form before folding it in.
- This pie keeps well in the refrigerator for up to four days.
Nutrition
- Serving Size: 1 slice
- Calories: 450
- Sugar: 35
- Sodium: 320
- Fat: 30
- Saturated Fat: 10
- Unsaturated Fat: 20
- Trans Fat: 0
- Carbohydrates: 40
- Fiber: 2
- Protein: 10
- Cholesterol: 35