


Oh my goodness, are you ready for a baking secret that changed my life? Seriously, when Liam first started teaching me, I thought baking meant hours of complex balancing acts. But then… cake mix hacks! They are the absolute best invention for anyone who needs something beautiful *right now*. I am so excited to share these **red velvet cake mix cookies** with you. They are the ultimate shortcut to chewy, vibrant little drops of heaven. Trust me, even the girl who measured flour with a coffee mug (that was me!) can master these **red velvet cake mix cookies** in under 20 minutes total. We are talking just four ingredients for truly big flavor! If you love seeing behind the scenes of our kitchen journey, check out our main blog page for more stories!
Why These Red Velvet Cake Mix Cookies Are Your New Favorite Quick Dessert Hacks
If you’re anything like I was when I first started baking, you crave that big payoff without all the fuss. That is exactly why these **easy red velvet cookies** are going to change your weeknight baking game! They are the definition of fuss free baking. Honestly, even when I’m feeling overwhelmed, I know I can whip up a batch of these vibrant red velvet cake mix cookies and make our house smell amazing in minutes. Liam always says that consistency is key, but with this hack even a total beginner like I used to be can get these right every single time!
For more baking inspiration that’s quick and easy, take a peek at our apple strudel recipe—another favorite!
Achieving the Perfect Chewy Texture in Your Cake Mix Cookies Recipe
The huge difference here versus a scratch cookie recipe is the fat and eggs ratio. We aren’t creaming butter for five minutes like we do with fancy pound cakes! The oil (or melted butter, see below!) helps keep these incredibly soft, pushing them into the realm of moist red velvet treats. The real secret to that gooey, wonderful chew, though, is pulling them out when the centers still look just a tiny bit soft. Don’t wait until they look perfectly baked—trust me! That residual heat finishes the job beautifully.

Gathering Ingredients for Your 4 Ingredient Cookies
Okay, let’s talk about what you need to grab. This is the best part of these 4 ingredient cookies—it’s shockingly simple! I mean, it’s basically just dumping things into a bowl, which I love. I’ve listed out exactly what you need below, including the glorious optional add-in that takes these over the top for me.
- 1 box (15.25 oz) Red Velvet Cake Mix
- 1/2 cup vegetable oil
- 2 large eggs
- 1 cup white chocolate chips (optional add-in)
When I first started relying on mixes, I used whatever was on sale, but Liam gently nudged me toward using a brand I trusted for the cake mix. It truly makes a difference in the color and the overall flavor profile. It’s worth sticking to one you know works well! If you want to see another super simple recipe we love, you should definitely look at the directions for our easy 3-ingredient chocolate fudge.

Ingredient Notes and Substitution Ideas
There’s one main swap you should know about, and Liam has a strong opinion on it! If you want a richer, slightly deeper flavor profile, you can certainly use 1/2 cup of melted, unsalted butter instead of the vegetable oil. He says the butter brings out the cocoa notes in the red velvet mix better than a neutral oil does, giving the cookie a richer mouthfeel.
If you decide to use white chocolate chips, which I highly, highly recommend for that pop of white against the red—don’t skimp! We use a full cup in our batch to make sure there’s a chip in almost every bite. This is definitely where Liam lets me go a little wild!
Step-by-Step Instructions for Red Velvet Cake Mix Cookies
Okay, here’s where we bring this beauty together! Because this recipe is so straightforward, timing is everything to make sure we get that perfect texture. First things first: get your oven preheated to 350°F (175°C) and make sure your baking sheets are lined with parchment paper. That parchment is your best friend; it saves you from scraping dough off the pan later! Next, we mix the magic base, and then it’s straight into the oven. If you want that fun, snowy look, this is also the perfect time to roll your dough balls in powdered sugar for beautiful crinkle cookies from mix before they go onto the sheets. We move fast here!
If you need a main dish recipe that’s just as forgiving as these cookies, you must try our homemade lasagna—that recipe proves hearty meals don’t have to be complicated either.
Mixing the Dough: Avoiding Overmixing for Easy Red Velvet Cookies
When you combine the cake mix, oil, and eggs—stop mixing as soon as you don’t see any more dry streaks! I cannot stress this enough. When I first tried whipping everything up with the electric mixer on high, Liam gently stopped me. He explained that overmixing turns that beautiful, soft dough tough because you start developing the gluten in the flour. We want a tender, almost crumbly dough right before chilling or scooping, not something elastic. Just a few turns with a spoon is usually plenty to get it combined.
Baking Time and Setting Up Your Chewy Red Velvet Dessert
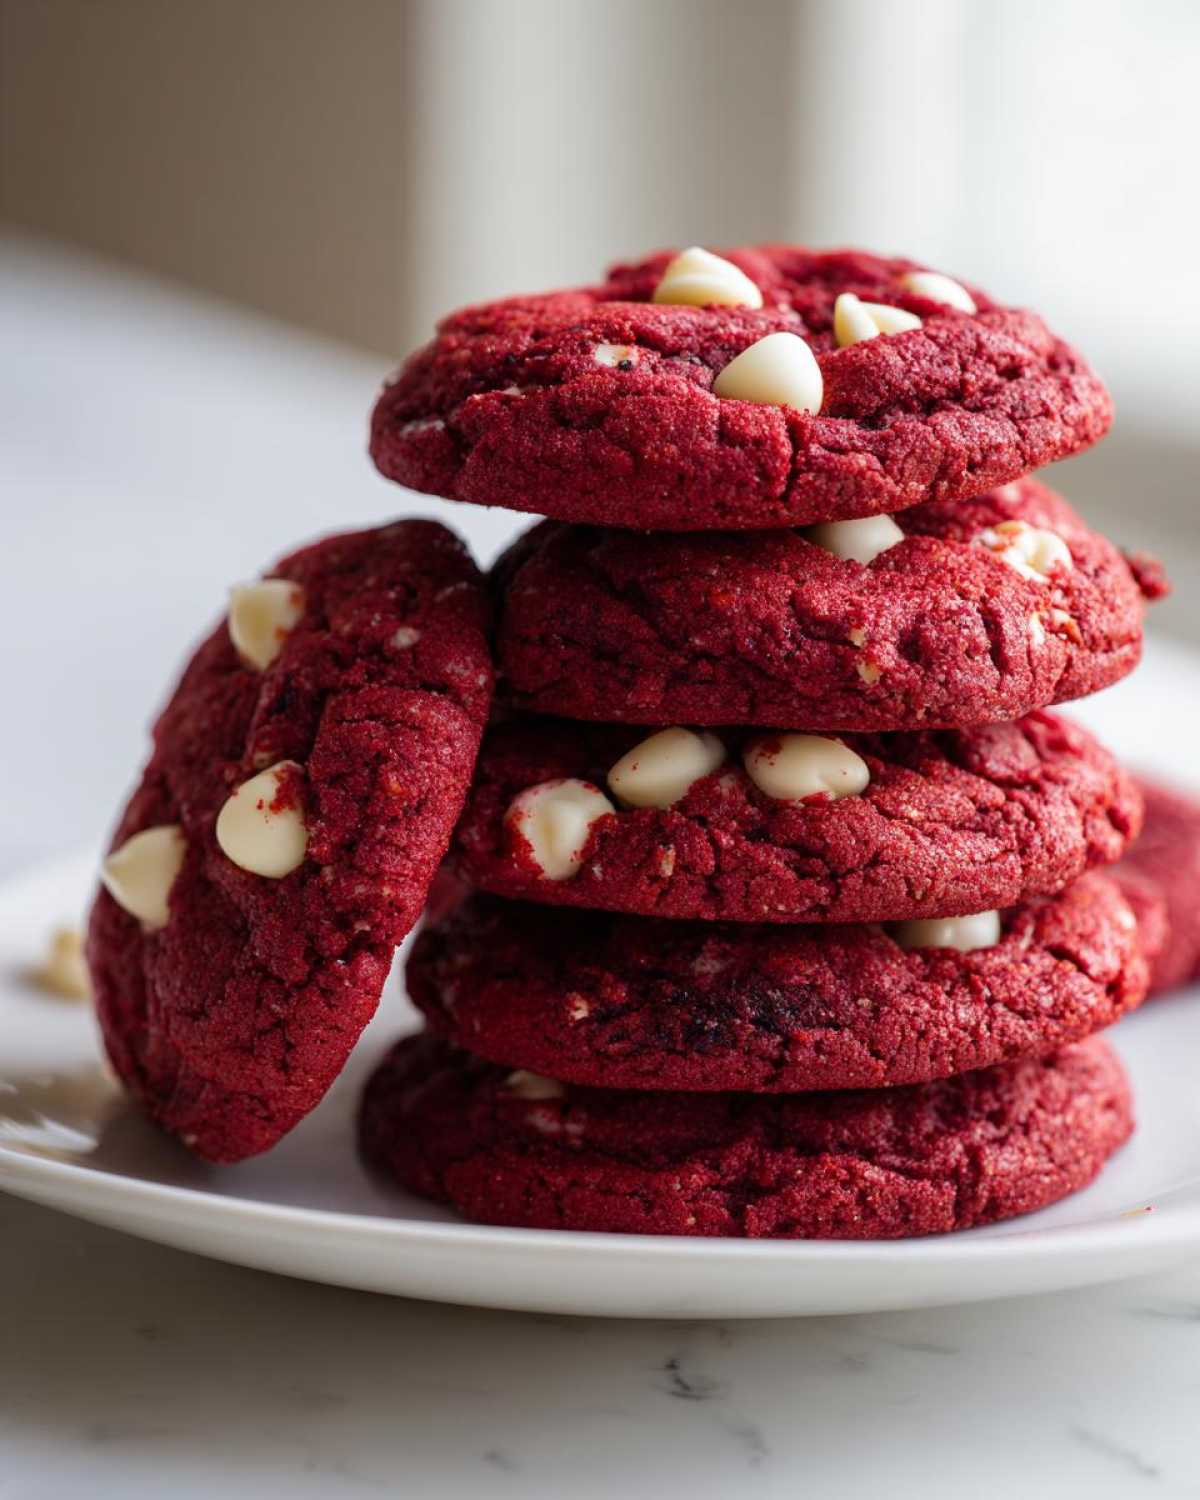
These cookies bake fast, typically between 8 and 10 minutes. Because we are aiming for that fantastic chewy red velvet dessert result, keep a close eye on them! You want the edges to look set and firm, but the very center should still look a little soft and maybe a touch underdone when you pull them out. This is the key to chewiness! Let them sit right there on that warm baking sheet for a full five minutes after they come out of the oven. This resting period finishes the baking process gently and lets them firm up just enough so they don’t fall apart when you move them to the cooling rack.
Tips for Success Making Best Cake Mix Cookies
Even though these are super easy, those little extra steps can really elevate batch of best cake mix cookies from good to amazing. My biggest tip, especially if you are planning on getting fancy with mix-ins or fillings, is to chill your dough! The original recipe notes mention this if you want to try that cream cheese frosting sandwich later on, but chilling helps every time.
If you chill the dough for about 30 minutes—or even an hour if you’re busy doing something else—it firms up nicely. This prevents the cookies from spreading too much in the oven, which keeps them thick and wonderfully chewy. Trust me, a little patience here means a perfect, thick cookie!
Also, be consistent with your scooping! I use a small cookie scoop (about a tablespoon size) because I want every single one of my red velvet cake mix cookies to bake evenly. If you have some tiny balls and some huge ones, the tiny ones burn while the large ones are still doughy in the middle. Keep them uniform!
If you want another tip on making a rich, creamy dessert without much fuss, you have to try our snickerdoodle cheesecake recipe—it’s heavenly!
Festive Variations for Your Red Velvet Cake Mix Cookies
What I love most about these cookies is how perfectly festive they already are! The color is just ideal for stunning Christmas cookie platters or as the centerpiece of any Valentine’s Day cookie ideas spread. They look so impressive but took practically no effort on my part—it’s a baker’s dream!
If you want to take them up another notch for a party, remember that note about the cream cheese filling? Seriously do this! Bake your cookies first, let them cool completely, and then just sandwich two together with a generous dollop of cream cheese frosting. It turns them into mini, decadent sandwich cookies. They disappear lightning fast, I promise you!
Making Red Velvet White Chocolate Chip Cookies
When you add those white chocolate chips, you want to treat them gently. This is where the folding comes in instead of mixing! If you dump them in and use the mixer, you’ll end up with pink dust instead of beautiful white chips contrasting against the red. Wait until the dough is just combined, then add the chips and use a sturdy spatula to **gently** fold them in until they are evenly spaced throughout the dough. It keeps the texture perfect!

Serving Suggestions for These Moist Red Velvet Treats
Now that you have these gorgeous, vibrant, and incredibly fast **moist red velvet treats**, how should you enjoy them? My absolute favorite pairing—the one Liam and I always reach for—is a big, tall glass of ice-cold milk. That classic contrast between the rich, slightly tangy cookie and the cold creaminess is just unbeatable.
But if you’re serving them after dinner, try setting a couple of these cookies next to a scoop of really good quality vanilla bean ice cream. It’s instant dessert perfection, and they look amazing like that on a little plate!
Of course, if you’re making these for your Christmas cookie platters, just pile them high! The color alone is enough to make any platter look special. They don’t even last long enough on the platter for me to worry about presentation for too long, though!
Storage and Reheating Instructions for Cake Mix Baking Recipes
Even though these cookies are made with a box mix, they are so moist that sometimes I worry they won’t last long enough to *need* storing! Ha! But seriously, if you do manage to save any of these incredible **red velvet cake mix cookies**, keep them airtight at room temperature. They stay perfectly soft and chewy like this for about four days. I know this because they usually disappear by day three, but I’ve tested it!
If you find they’ve hardened up just a touch because they sat out too long, don’t worry, Liam showed me a great trick. Pop just one cookie on a microwave-safe plate for about 10 seconds. It warms them right up and brings back that fresh-from-the-oven gooey texture instantly. Instant gratification, right?
For more tips on keeping baked goods fresh, you might enjoy reading about how to store our date nut bread!
Frequently Asked Questions About Easy Homemade Cookies
I know when you’re dealing with a super minimalist recipe like this, questions pop up! That’s totally normal, especially if you’re used to more traditional baking methods. Liam always says that asking questions is the first step to being truly TasteTaught. I’ve gathered a few things readers often ask once they try this recipe for easy homemade cookies, so we can get you baking with confidence!
If you ever have more questions after trying these, feel free to check out our general Snacks category or visit the resource I found mentioned, over at Kairi Recipes!
Can I use butter instead of oil in these red velvet cake mix cookies?
Yes, you absolutely can, and I actually encourage you to try it once! If you substitute the 1/2 cup of vegetable oil with 1/2 cup of melted, unsalted butter, you will notice a richer, deeper flavor. The trade-off is slight—melted butter can sometimes make cookies spread just a tiny bit more than oil when they bake, making them a fraction less thick, but the flavor payoff is gorgeous!
Why are my cake mix cookies flat?
If your beautiful dough balls turn into sad, flat pancakes in the oven, it nearly always comes down to two things! First, either your butter was too warm (if you used melted butter) or your fat was too liquidy. If you used oil, make sure it wasn’t hot! Second, and this relates back to what we discussed earlier, you might have overmixed the dough. Overmixing creates gluten, which releases all that trapped air, causing the structure to collapse sadly in the heat. Remember: Mix just until combined!
Sharing Your Quick Dessert Hacks
Wow, we made it! Now you have the absolute fastest, flashiest way to get incredible **red velvet cake mix cookies** on the table. I truly hope you love these; they are one of the first things Liam taught me that made me think, “Hey, maybe I *can* bake after all!”
I’m Clara, your chief taste-tester here at TasteTaught, and I’m dying to know what you think once you whip up a batch. Did you use the white chocolate chips? Did you go for the sandwich cookie option? Don’t be shy!
Please drop a comment below, let us know how these quick dessert hacks worked for you, and give the recipe a rating! Your feedback means the world to us and helps future bakers feel confident trying something new. If you ever want to reach out directly with questions or recipe ideas, you can always use our contact form!
Print4 Ingredient Red Velvet Cake Mix Cookies

You can make soft, chewy, and vibrant red velvet cookies fast using just a box of cake mix and three other simple ingredients. This is the perfect quick dessert hack for holidays or any time you need a fuss-free treat.
- Prep Time: 5 min
- Cook Time: 10 min
- Total Time: 15 min
- Yield: About 24 cookies
- Category: Dessert
- Method: Baking
- Cuisine: American
- Diet: Vegetarian
Ingredients
- 1 box (15.25 oz) Red Velvet Cake Mix
- 1/2 cup vegetable oil
- 2 large eggs
- 1 cup white chocolate chips (optional add-in)
Instructions
- Preheat your oven to 350°F (175°C). Line baking sheets with parchment paper.
- In a medium bowl, combine the entire box of red velvet cake mix, vegetable oil, and eggs. Mix with a spoon or electric mixer until just combined into a thick dough. Do not overmix.
- If using, gently fold in the white chocolate chips.
- Drop rounded tablespoons of dough onto the prepared baking sheets, spacing them about 2 inches apart. For a crinkle effect, you can lightly roll the dough balls in powdered sugar before placing them on the sheet.
- Bake for 8 to 10 minutes. The edges should look set, but the centers will still look slightly soft.
- Let the cookies cool on the baking sheet for 5 minutes before transferring them to a wire rack to cool completely. This helps them set into a chewy texture.
Notes
- For extra rich flavor, substitute the vegetable oil with 1/2 cup of melted, unsalted butter.
- If you want a cream cheese filling, chill the dough for 30 minutes before scooping. After baking, sandwich two cooled cookies together with a dollop of cream cheese frosting.
- These cookies are excellent for Valentine’s Day or Christmas cookie platters because of their bright color.
Nutrition
- Serving Size: 1 cookie
- Calories: 180
- Sugar: 18g
- Sodium: 150mg
- Fat: 10g
- Saturated Fat: 3g
- Unsaturated Fat: 7g
- Trans Fat: 0g
- Carbohydrates: 23g
- Fiber: 0g
- Protein: 2g
- Cholesterol: 20mg