

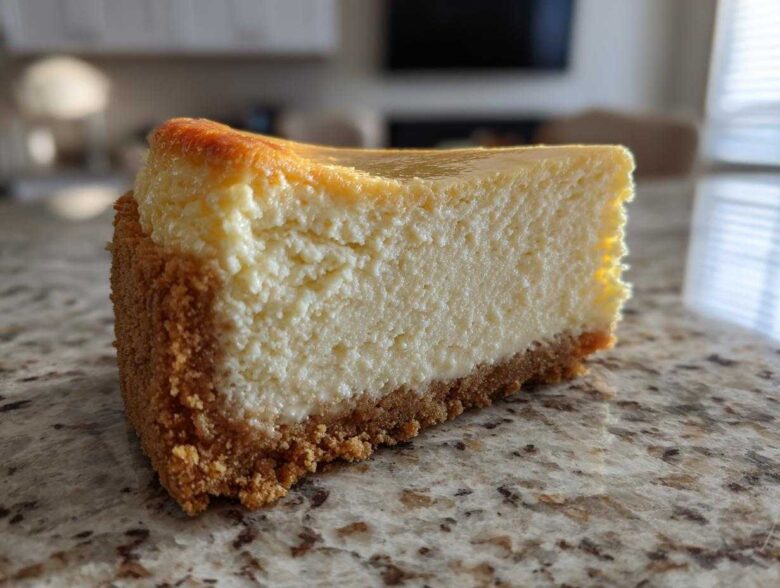
For years, I chased that perfect slice—the one that was tall enough to command attention but dense enough to need a fork, with a texture so velvety smooth it practically melted on contact! I tried all the shortcuts, and believe me, they all ended in sad, cracked, sunken messes. But I finally cracked the code, the absolute secret to making a show-stopping, **new york cheesecake** right in your own oven. This isn’t just another recipe; this is the blueprint for the Ultimate Tall and Creamy No-Fail New York Cheesecake.
Mastering this dessert felt like earning a culinary badge of honor! The good news? Achieving that signature dense, rich texture isn’t about luck; it’s genuinely simple once you follow a few non-negotiable steps regarding temperature and mixing. Forget the stress, we’re going all-in on that classic, luxurious experience people dream about when they think of New York!
Why This Is the Ultimate New York Cheesecake Recipe
What sets this recipe apart from every other wobbly, cracked dessert you’ve met? It’s all about delivering on the promise of an Authentic New York Cheesecake. We’re aiming high—literally! This version is designed to be a true Showstopper Dessert, giving you that textbook height you usually only see in professional displays. If you need to review our general site guidelines, you can check out our official disclaimer page.
The techniques I use here are specifically geared toward preventing the dreaded sinking and cracking. Trust me, I’ve learned the hard way what not to do! We focus intensely on creating a Velvety Cheesecake Filling that stays gorgeous and creamy right through to the final (chilled!) slice. This is achievable, I promise, just stick close to the ingredient temperatures.
Achieving the Signature Tall Cheesecake Recipe
Height comes from three things working together: the right amount of flour, which acts as a stabilizer, the perfect ratio of eggs, and—crucially—not over-beating the batter once those eggs are in. Plus, utilizing the water bath ensures the cake rises evenly without scorching the sides, helping lock in that impressive structure.
The Secret to Creamy Baked Cheesecake Texture
If you want the rich, Dense Cheesecake Dessert texture that defines this classic, you cannot rush the temperature prep. Every single dairy item—the cream cheese, the eggs, the sour cream—must be fully softened to room temperature. When they are perfectly tempered, they blend into a liquid silkiness, meaning you incorporate less air during mixing. Less air equals fewer bubbles, and fewer bubbles equals zero cracks!
Gathering Ingredients for Your Authentic New York Cheesecake
Okay, before we even turn on the mixer, we need to talk about what’s going into this masterpiece. When you’re aiming for a truly Authentic New York Cheesecake, you can’t cheat on the quality or the temperature of your stuff! This is where many home bakers stumble, so pay close attention here. We need distinct piles for the crust and the filling, and everything dairy related needs time to relax on the counter.
Think of these ingredients as the rock stars of the show; they all need to be at their peak performance. And please, I beg you, skip anything labeled low-fat. We need the full power of the cream cheese for that signature dense result. This recipe is for a Rich Cream Cheese Dessert, and that means going full-fat all the way!
For the Graham Cracker Crust Cheesecake Base
The crust sets the stage, and it needs to be buttery and crisp. You’ll need:
- 1 1/2 cups of graham cracker crumbs (make sure they are fine!)
- 1/4 cup of granulated sugar
- 6 tablespoons of unsalted butter, completely melted
Mix those three together until it looks like wet sand, then firmly press it into your prepared springform pan. Don’t be shy; press it hard so it doesn’t crumble when you slice it later.
For the Rich Cream Cheese Dessert Filling
This is the heavy hitter section! Remember, everything here has to be at room temperature—I mean *fully* soft, not just kinda soft. You’ll need:
- 4 (8 ounce) packages of full-fat cream cheese (yes, four blocks!)
- 1 1/2 cups granulated sugar
- 1/4 cup all-purpose flour (this helps stabilize things!)
- 1 teaspoon vanilla extract
- 1/4 teaspoon salt
- 4 large eggs, room temperature
- 1/2 cup sour cream, room temperature
The flour might seem weird in a cheesecake, but it’s a simple trick to help maintain that height and keep things smooth. The sour cream adds that necessary little tang to cut through all the richness, making every bite perfect.
Step by Step Cheesecake Preparation: Baking Techniques
Now for the fun part—turning those perfect ingredients into something truly magical! Following this Step by Step Cheesecake process exactly is what separates a good cheesecake from the kind people dream about. We need our oven preheated to 350 degrees F to start, but trust me, that temperature won’t last long, so be ready!
Crust Preparation and Initial Bake
First, you absolutely must wrap your 9-inch springform pan. I mean *tightly*. Use heavy-duty aluminum foil and wrap the bottom and sides completely. Not wrapping it well is the fastest way to get soggy crust when the water bath comes into play later! Mix your graham cracker crumbs, the 1/4 cup of sugar, and the melted butter until everything is uniform. Press that mixture firmly and evenly into the bottom of the pan. Don’t just sprinkle it; use the bottom of a measuring cup to pack it right down until it feels solid.
Bake that crust at 350 degrees F for exactly 10 minutes. Once that’s done, pull it out and let it cool just a bit while you get the filling ready. Immediately reduce your oven temperature down to 325 degrees F—this is our cheesecake baking temp!
Creating the Velvety Cheesecake Filling
This step is all about patience and smooth mixing. Take your room-temperature cream cheese and beat it with your mixer until it is absolutely smooth. I mean zero lumps remaining! Scrape down the sides of the bowl several times during this 3-minute process. Once it’s velvet, you can add the 1 1/2 cups of larger sugar amount and the flour. Mix this *just* until it comes together.
Now, the eggs. Don’t dump them in! Add your 4 eggs one at a time, and here’s the key: beat only until each egg is *just* incorporated. As soon as you see the last trace of yolk disappear, stop the mixer. Over-beating here is what whips in air and causes cracks later. Finally, mix in the sour cream until the whole batter looks flawlessly creamy.
Baking the New York Cheesecake with a Water Bath
Pour that gorgeous filling over your cooled crust. Gently tap the whole pan on the counter a few times to coax out any big air bubbles hiding underneath. Now, find a larger roasting pan. Place your foil-wrapped springform pan inside it. Get some hot water—I mean practically boiling—and carefully pour it into the roasting pan until the water comes halfway up the sides of your cheesecake pan. This water bath is your best friend for even cooking!
Bake at 325 degrees F for 60 to 75 minutes. You’re looking for the edges to feel set, but the very center (about a 2-inch circle) should still have a slight, subtle jiggle, like thick gelatin. The internal temperature is key, so don’t rely only on time. If you have any questions about oven placement or ingredient substitutions, feel free to drop us a line using the contact form!
The No Crack Cheesecake Cooling Process for Your New York Cheesecake
If you manage to nail the mixing and the water bath, congratulations! But listen close, because the cooling process is where we solidify our position as the masters of the No Crack Cheesecake. This isn’t a race; rushing the cooling is the number one reason people end up with that depressing sunken center. We have to transition this beauty gently from hot to cold, or the sudden temperature change makes the structure panic and collapse.
We use a sophisticated, two-stage cooling technique that Grandma swore by for all big bakes. First, the oven switch-off! Right when that center has that tiny wiggle, turn the oven off completely. Do not take the cake out yet! Prop the oven door open just a crack—about two inches wide. You can use a wooden spoon handle for this—I always use the handle of a wooden brush for good leverage.
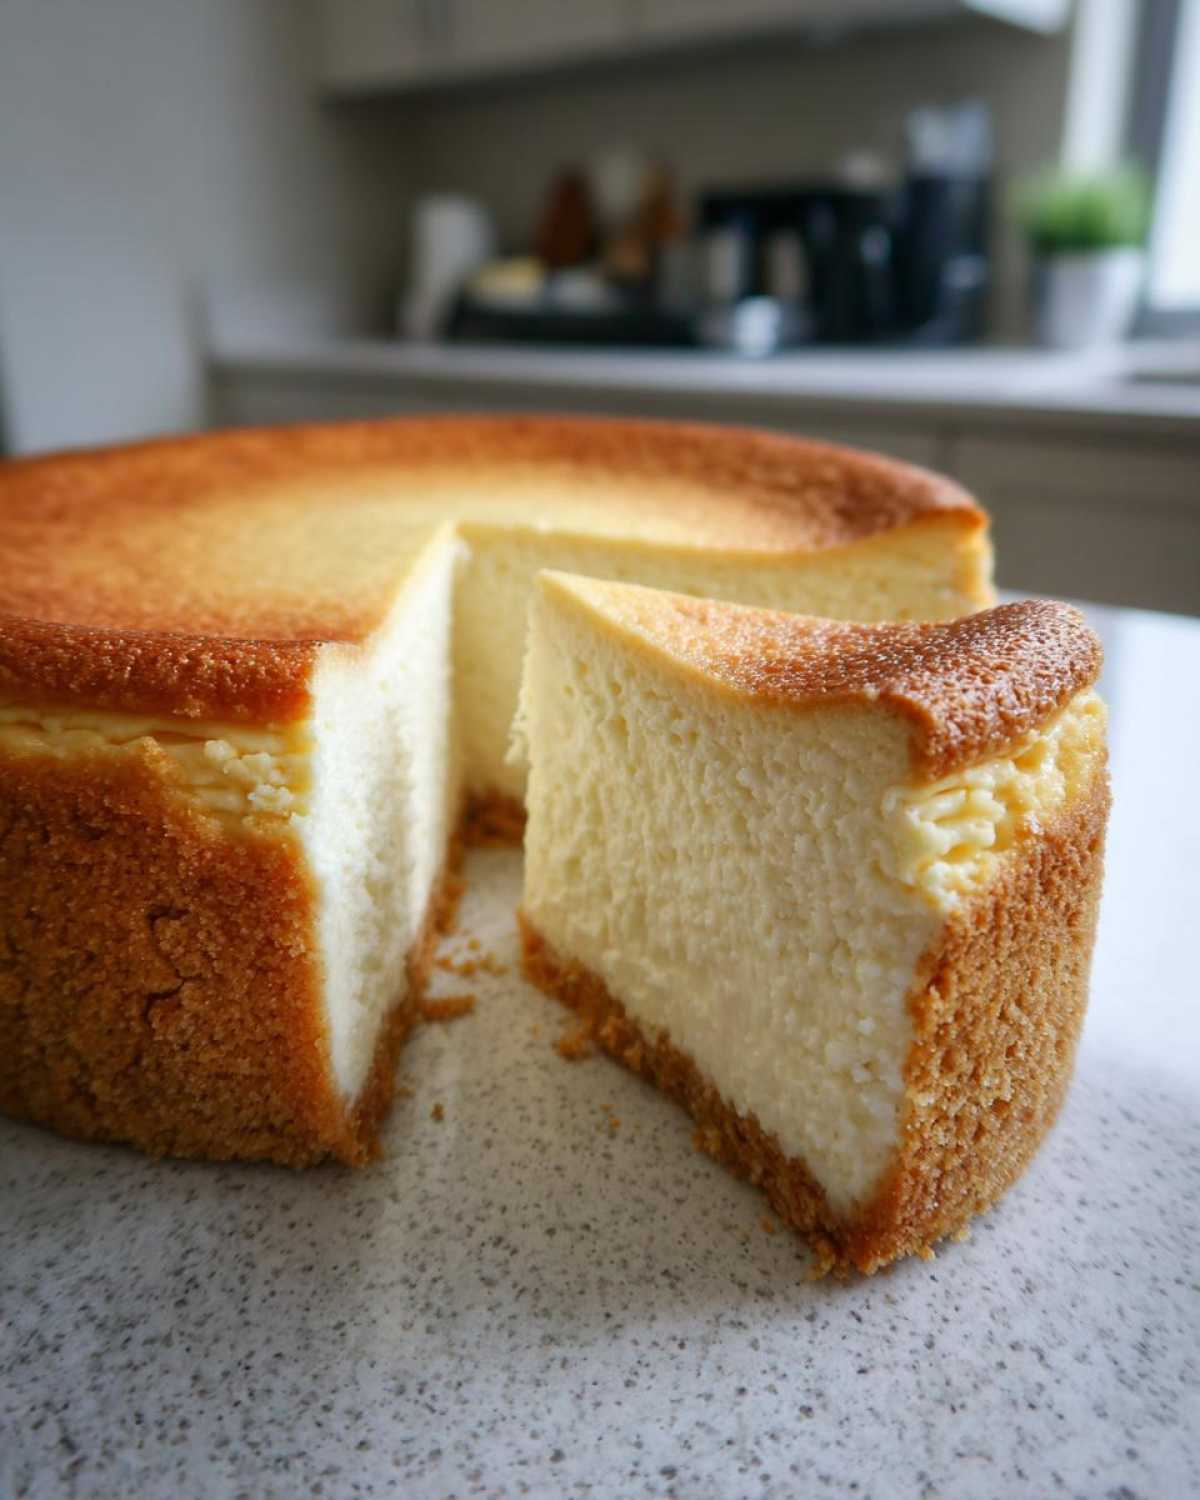
Leave your beautiful, gorgeous New York Cheesecake sitting in that cooling oven environment for a full hour. This slow, gradual temperature drop protects the rich dairy proteins and keeps everything perfectly level. After an hour, you can finally take it out of the water bath—carefully remove that foil—and set it on a wire rack to come to actual room temperature. Don’t even *think* about wrapping it or putting it in the fridge until it’s fully cool to the touch. Patience, friend, patience yields the perfect slice!
Ingredient Notes and Substitutions for Perfect Baking
I know sometimes we look in the pantry and realize we’re one egg short or the sour cream expired yesterday, but for this specific recipe, we must be sticklers about a couple of key items. Because this is designed to be a truly Dense Cheesecake Dessert, the structure relies heavily on what goes into it, and frankly, substitutions can dramatically ruin that signature texture we worked so hard for.
Think of it this way: every ingredient has a job. The tiny bit of flour we add isn’t for volume; it’s a crucial stabilizer that keeps the dairy mixture from separating when it heats up. The sour cream is there for that slight complexity and moisture barrier, making the final product less purely sweet and much more complex.
Temperature Matters for the Rich Cream Cheese Dessert
I cannot stress this enough: room temperature ingredients are non-negotiable if you want that flawless, smooth batter for your Rich Cream Cheese Dessert. If your cream cheese is cold, it lumps up no matter how long you beat it. Cold cream cheese forces you to over-beat the mixture trying to smooth out those hard chunks, and that’s how you introduce too much air. Air equals bubbles, and bubbles equal cracks!
So, take the cream cheese, eggs, and sour cream out at least two hours before you start mixing. I usually leave mine covered on the counter while I’m prepping the crust. When they are all soft and yielding, they merge together happily without any fight, resulting in that perfect, lump-free canvas ready for baking.
Serving Suggestions for Your Classic Cheesecake Recipe
This Classic Cheesecake Recipe is such a glorious, decadent dessert all on its own, isn’t it? Honestly, once you’ve gone through all the hard work of the water bath and the slow cooling, you don’t want to mask that incredible flavor! I always treat mine like the perfect backdrop for a special occasion because it really stands alone.
If you do feel like adding a little something extra, keep it simple. A scattering of gorgeous, fresh raspberries or sweet strawberries around the edge provides a wonderful color contrast and a little bit of necessary tartness. My other favorite trick is a thin, barely-sweetened cherry or strawberry glaze poured very lightly over the top right before chilling. That way, you get a little fruitiness without drowning the magnificent texture of your New York Cheesecake!
Storage and Reheating Instructions
Alright, you’ve done the hard part, and you deserve a break! But don’t spoil the magic now by storing this magnificent creation incorrectly. This New York Cheesecake needs time to truly solidify. You have to let it chill completely in the refrigerator—I’m talking a minimum of six hours, but honestly, overnight is when it hits peak performance.
When you’re ready to store leftovers, the key is to keep it from drying out or picking up smells from the fridge. You need a good seal! Once the cake has cooled down fully on the counter, cover the whole thing loosely with plastic wrap. If you have a cake carrier, even better! It needs to stay covered in the fridge. It keeps beautifully for about five days this way; the high-fat content does a great job of preserving that creamy texture.
Now, about reheating—we don’t really reheat cheesecake, do we? It’s meant to be served cold! But if you absolutely must bring a slice out of the fridge early, just let it sit on the counter for about 30 to 45 minutes before slicing and serving. This little bit of warming allows the flavors in that Rich Cream Cheese Dessert to open up just a bit. If you want to know more about the people behind these tips, check out our About Us page!
Frequently Asked Questions About Your New York Cheesecake
I know you might still have a few little panics bubbling up—that’s totally normal when tackling a big bake like this! Cheesecake can feel intimidating, but that’s why we’re here to iron out all the little wrinkles so you end up with the Best Cheesecake Ever. Ask away, I’ve got answers for the most common worries folks have when making their Homemade Cheesecake From Scratch.
Can I make this Homemade Cheesecake From Scratch without a water bath?
Oh, honey, please don’t try it! I know the setup seems like extra hassle, but for an Authentic New York Cheesecake that’s tall, perfectly baked on the sides, and supremely creamy, the water bath is non-negotiable. It’s not just a suggestion; it’s the main tool we use to control the environment, steaming the custard gently and preventing the edges from cooking too fast while the middle catches up. No water bath usually means uneven baking and a huge crack right down the middle, which we are trying to avoid!
What is the best way to get a perfectly smooth filling for this Baked Cheesecake Techniques?
This goes right back to the ingredient prep! The absolute best way to get that flawless, Velvety Cheesecake Filling is making sure your cream cheese, eggs, and sour cream are all sitting on the counter until they are truly room temperature—no excuses here! When they are soft, they blend beautifully with zero effort. Then, the real trick is the first step: beat that cream cheese by itself until it’s impossibly smooth, scraping down the sides every 30 seconds. And remember what I said about the eggs: add them one by one, and stop mixing the second they disappear. Never overmix once the eggs are in!
We want the structure to be solid and impressive, not airy and bubbly. If you want to review the terms you agree to by using this site, you can check out our Terms and Conditions.
Reader Feedback and Sharing Your Ultimate Cheesecake
Now the best part! You have successfully navigated the water bath, mastered the patience required for slow cooling, and now you have this incredible, towering slab of pure decadence cooling in your fridge. I am so proud of you for tackling this baking challenge!
When you finally slice into that gorgeously creamy center and take that first bite of your new york cheesecake, I really want to hear about it. Did it live up to the hype? Did your family gasp when you brought it to the table?
Please, do me a huge favor and come back here and leave a rating—if it’s the best one you’ve ever made, well, you know what to do: give it those five glorious stars! I thrive on hearing about your successes with this Ultimate Cheesecake. If you happen to snap a picture of your gorgeous slice, tag me on social media! I love seeing your creations!
If you have any lingering questions about cookie usage or privacy, you can review our Cookie Policy here. Happy baking, and enjoy every single rich, dense bite!
PrintUltimate Tall and Creamy No-Fail New York Cheesecake
A recipe for a classic, rich, dense, and creamy New York style cheesecake featuring a buttery graham cracker crust.
- Prep Time: 25 min
- Cook Time: 75 min
- Total Time: 100 min
- Yield: 12 servings
- Category: Dessert
- Method: Baking
- Cuisine: American
- Diet: Vegetarian
Ingredients
- 1 1/2 cups graham cracker crumbs
- 1/4 cup granulated sugar
- 6 tablespoons unsalted butter, melted
- 4 (8 ounce) packages full-fat cream cheese, softened to room temperature
- 1 1/2 cups granulated sugar
- 1/4 cup all-purpose flour
- 1 teaspoon vanilla extract
- 1/4 teaspoon salt
- 4 large eggs, room temperature
- 1/2 cup sour cream, room temperature
Instructions
- Preheat your oven to 350 degrees F. Wrap the outside of a 9-inch springform pan tightly in heavy-duty aluminum foil, covering the bottom and sides completely.
- Prepare the crust: Mix graham cracker crumbs, 1/4 cup sugar, and melted butter until combined. Press the mixture firmly and evenly into the bottom of the prepared springform pan. Bake for 10 minutes. Remove from oven and let cool slightly. Reduce oven temperature to 325 degrees F.
- Prepare the filling: In a large bowl, beat the softened cream cheese with an electric mixer until completely smooth, about 3 minutes. Scrape down the sides.
- Beat in 1 1/2 cups sugar and flour until just combined. Mix in vanilla extract and salt.
- Add eggs one at a time, beating only until each egg is incorporated. Do not overmix after adding eggs.
- Beat in the sour cream until the batter is smooth.
- Pour the filling over the cooled crust. Tap the pan gently on the counter a few times to release large air bubbles.
- Bake using a water bath: Place the foil-wrapped springform pan inside a larger roasting pan. Carefully pour hot water into the roasting pan until it reaches halfway up the sides of the springform pan.
- Bake for 60 to 75 minutes, or until the edges are set but the center still has a slight jiggle (about 2 inches wide).
- Turn off the oven. Prop the oven door open slightly (about 2 inches) and let the cheesecake cool inside the oven for 1 hour. This slow cooling prevents cracking.
- Remove the cheesecake from the water bath and foil. Let it cool completely on a wire rack.
- Chill the cheesecake in the refrigerator for at least 6 hours, or preferably overnight, before serving. Run a thin knife around the edge before releasing the springform side.
Notes
- Use room temperature ingredients for the cream cheese, eggs, and sour cream to ensure a smooth, lump-free filling.
- The water bath is essential for even cooking and maintaining moisture, which helps prevent cracks.
- Do not open the oven door during the first 45 minutes of baking.
- For the tallest cake, use a 9-inch springform pan and do not overmix the batter once the eggs are added.
Nutrition
- Serving Size: 1 slice
- Calories: 450
- Sugar: 35
- Sodium: 300
- Fat: 30
- Saturated Fat: 18
- Unsaturated Fat: 12
- Trans Fat: 0.5
- Carbohydrates: 38
- Fiber: 1
- Protein: 8
- Cholesterol: 120