

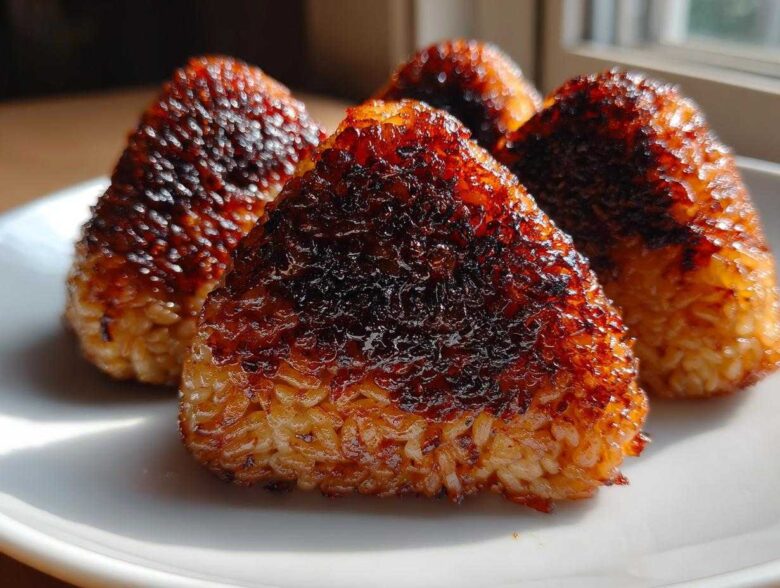
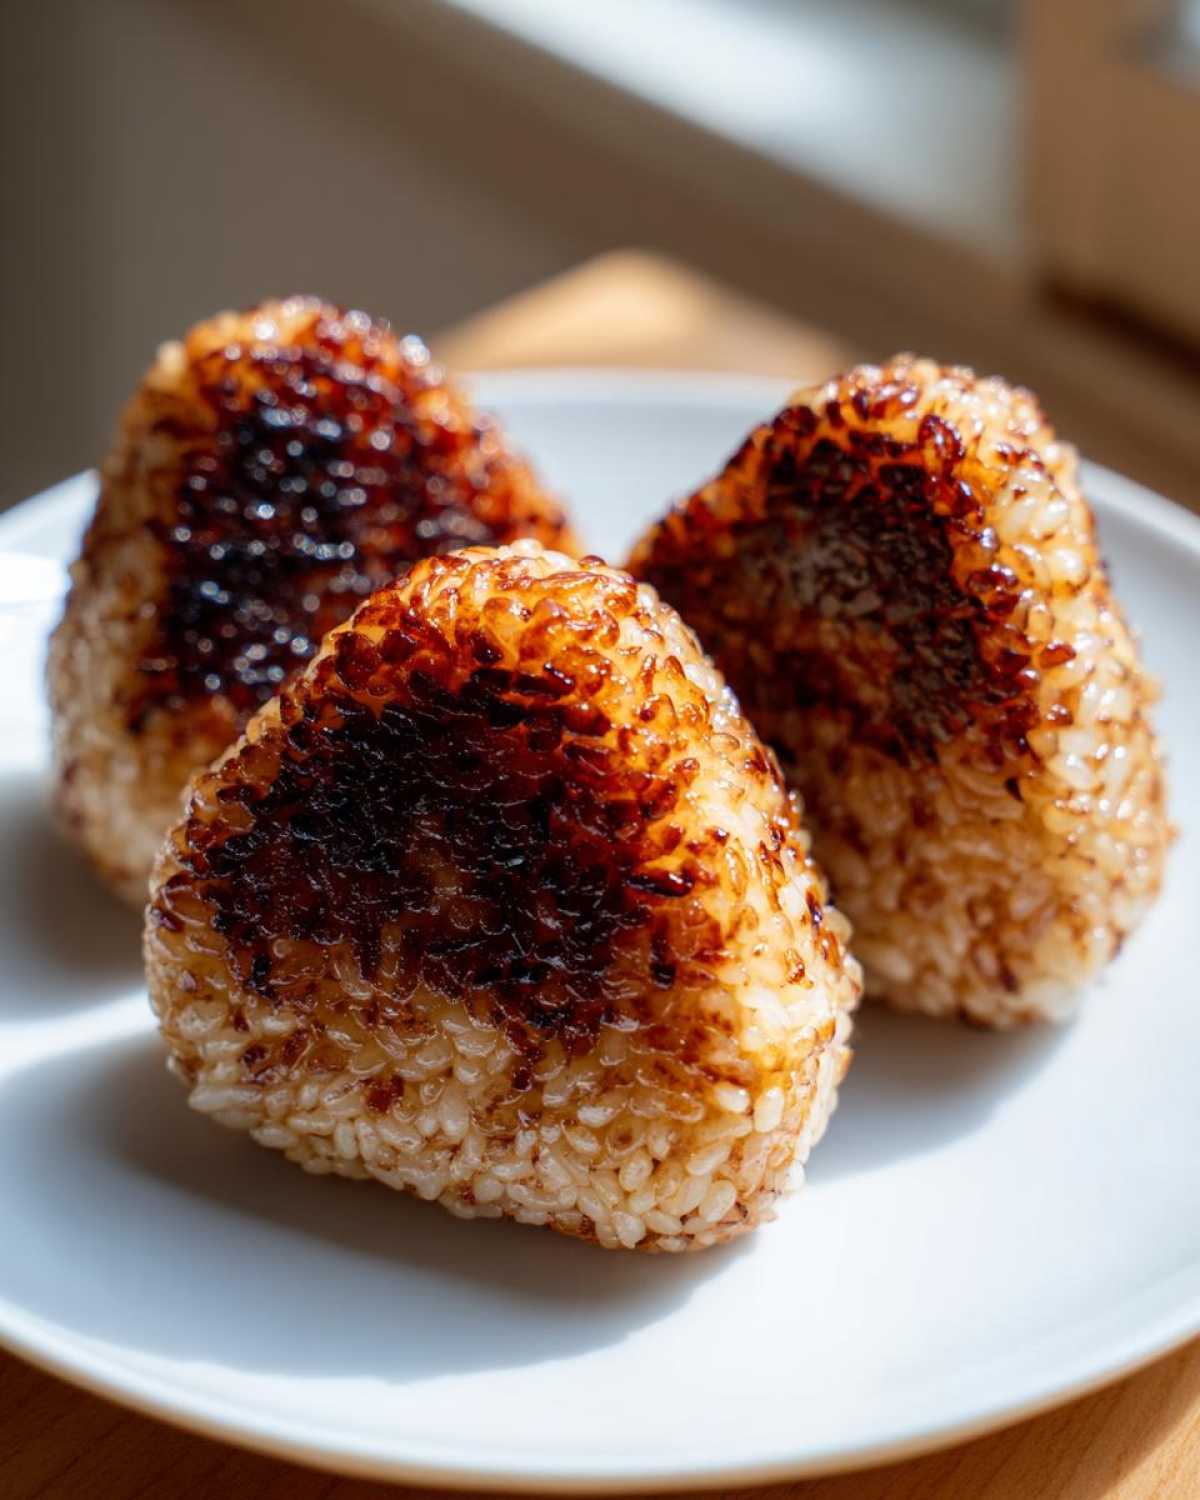
If you’re anything like I was when Liam first started teaching me—seeing the word “rice balls” and having no clue what you’re getting into—don’t worry! The world of molded rice snacks is huge, but sometimes you just need something quick, savory, and incredibly satisfying. Forget deep-frying; we’re going straight for that irresistible smoky crunch with Yaki Onigiri, or Grilled Japanese Rice Balls. These are so straightforward, they became my go-to comfort food fast! Once you master these easy homemade rice balls, you’ll be relying on this simple technique. Learning how to get that perfect sticky base is key, so make sure you’ve mastered your sticky rice recipe first! Watching that plain rice transform into a golden, soy-glazed delight makes me feel like a real kitchen pro, even though the steps are truly beginner-friendly. Trust me, once you master these easy homemade rice balls, you’ll be saying goodbye to complicated recipes for good.
Why You Will Love These Grilled Japanese Rice Balls
I know there are a million ways to make rice balls, and most of them involve deep-frying—hello, Arancini!—but those can feel heavy and frankly, messy. These Yaki Onigiri are my absolute favorite because they hit all the flavor notes without all the fuss. They are the ultimate quick lunch or midnight snack when I need something warm.
- Incredibly Fast: From warm rice to finished snack takes under 25 minutes total. Perfect for those quick lunch plans!
- Smoky, Savory Flavor: That soy glaze caramelizes right on the pan, giving you a beautiful salty, savory crunch you just can’t beat.
- They’re Grilled, Not Fried: We’re skipping the messy oil and getting incredible textural contrast just using a little bit of oil in a skillet. Goodbye, greasy rice balls!
- Simple Ingredients: You probably have everything needed for the glaze sitting in your pantry right now. Minimal shopping required for these flavor-packed rice balls.
- Great for Bento Boxes: Their firm, triangular shape holds up brilliantly, making them one of my favorite bento box ideas for packing lunches.
- Customizable Filling: While the glaze is the star, you can easily stuff these savory rice balls before you shape them.
Essential Ingredients for Perfect Yaki Onigiri Rice Balls
Okay, I’m going to be super specific here because, honestly, the rice itself is the most crucial part of any good rice ball recipe. You can’t just use any old leftover rice! Liam stressed this to me repeatedly when I was first learning how to make these savory rice balls. If the rice isn’t sticky enough, you’ll end up with crumbs scattering all over the pan, and that is just frustrating when you’re trying to shape a perfect triangle.
For the best results, you absolutely need Japanese short-grain rice. It cooks up plump and releases just the right amount of starch to hold everything together beautifully. If you need a refresher on getting that rice just right—seasoned, perfectly cooked, and ready for shaping—definitely check out my notes on a sticky rice recipe. Having that warm, slightly tacky base makes forming these delicious rice balls so much easier!
Here is what you need for a batch of about 6 to 8 of these incredible grilled rice balls:
- 3 cups cooked Japanese short-grain rice (It must be sticky rice!)
- 1/4 cup water (This is just for wetting your hands—life saver!)
- 2 tablespoons neutral oil (like canola or vegetable, for that light sear)
For the Savory Soy Glaze
This glaze is what turns a plain rice ball into Yaki Onigiri. It’s salty, a little sweet, and gets wonderfully caramelized when it hits the heat. Just whisk these together until that sugar melts away before you start shaping:
- 4 tablespoons soy sauce
- 2 tablespoons mirin (sweet rice wine)
- 1 teaspoon sugar
How to Make Yaki Onigiri: Step-by-Step Rice Balls Recipe
This process feels a little like magic because you’re taking something soft and turning it into something wonderfully crisp, all in one pan! Remember, the rice must still be warm when you start shaping your rice balls. If it cools too much, it won’t stick, and you’ll lose your shape. Liam always said, “Pat it with intention, Clara, but don’t squeeze the life out of it.” That’s the secret: firm enough to hold, gentle enough to keep that light, fluffy texture inside.
First, make sure you have your glaze ready—that’s Step Zero if you ask me! Then, get your shaping water nearby. We’re aiming for about 6 to 8 perfect little rice balls here, depending on how hungry we are!
Shaping and Preparing Your Rice Balls
This is where your hands do the work! Get a small bowl of water ready; dipping your hands often keeps the sticky rice from gluing itself to your skin. Scoop about half a cup of that warm rice into your palm. Now, gently—remember Liam’s advice—start pressing and molding it. You can go for a classic triangle shape or just a simple, firm round mound. They should be sturdy enough that they don’t look like they might fall apart when you pick them up.
Once shaped, get your non-stick skillet heating up over medium heat with just 2 tablespoons of oil. Carefully place each rice ball into the hot pan. We aren’t glazing yet! We need the crust first. Let them cook for about 3 to 4 minutes on the first side until they turn that lovely golden brown. Then, flip them over and do the same for the other side. We’re building the texture now, so don’t rush this initial sear!
Glazing and Achieving Crispy Rice Balls
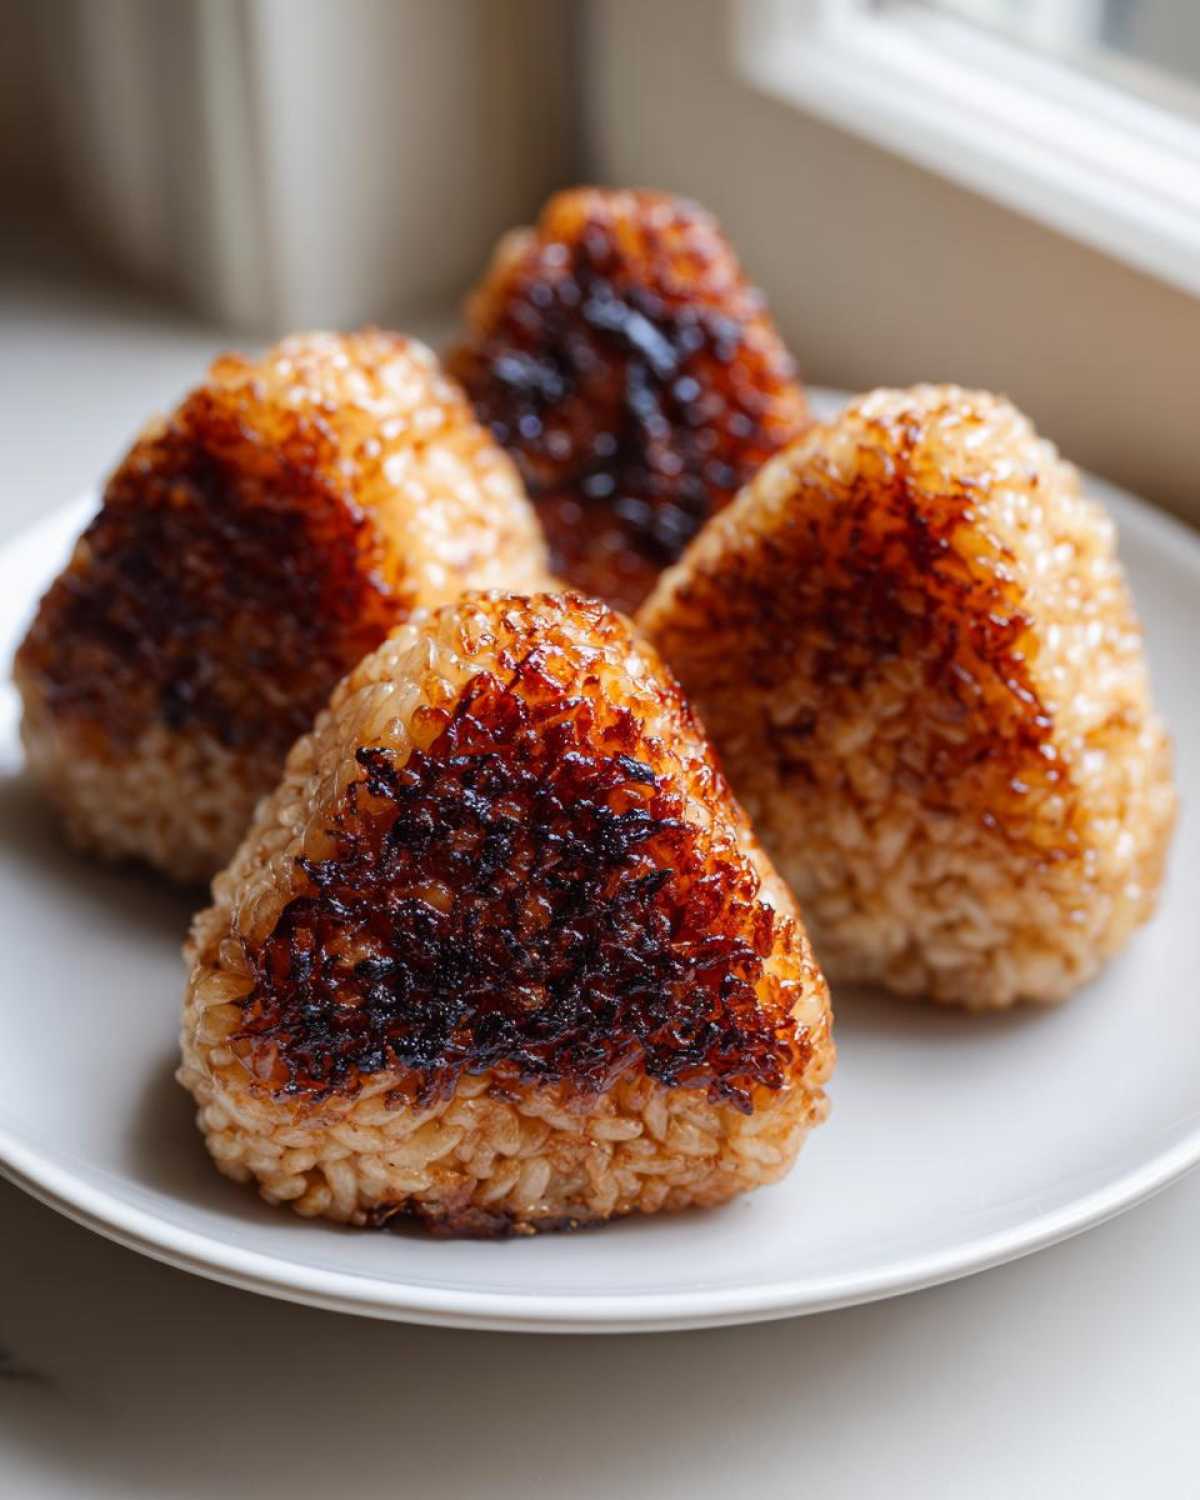
Now for the part that makes these Yaki Onigiri—the grilling and glazing! Once both sides of your rice balls have a nice golden crust, take your savory soy glaze mixture, which should be sitting right next to the stove, and brush it generously over the top flat side of the rice ball. Don’t be shy with the glaze; this is our flavor layer!
Flip the rice ball immediately and brush the second side. Let it cook for just 1 or 2 more minutes per side. You’ll see and smell that glorious caramelization happen as the soy sauce mixture cooks down and thickens onto the crust. That’s the *yaki*! When they smell toasted and look beautifully lacquered, they are completely done. Pull them off the heat and serve them up warm! If you’re looking for other great ideas to keep your cooking journey exciting, check out my latest kitchen adventures!
Tips for Success Making Homemade Rice Balls
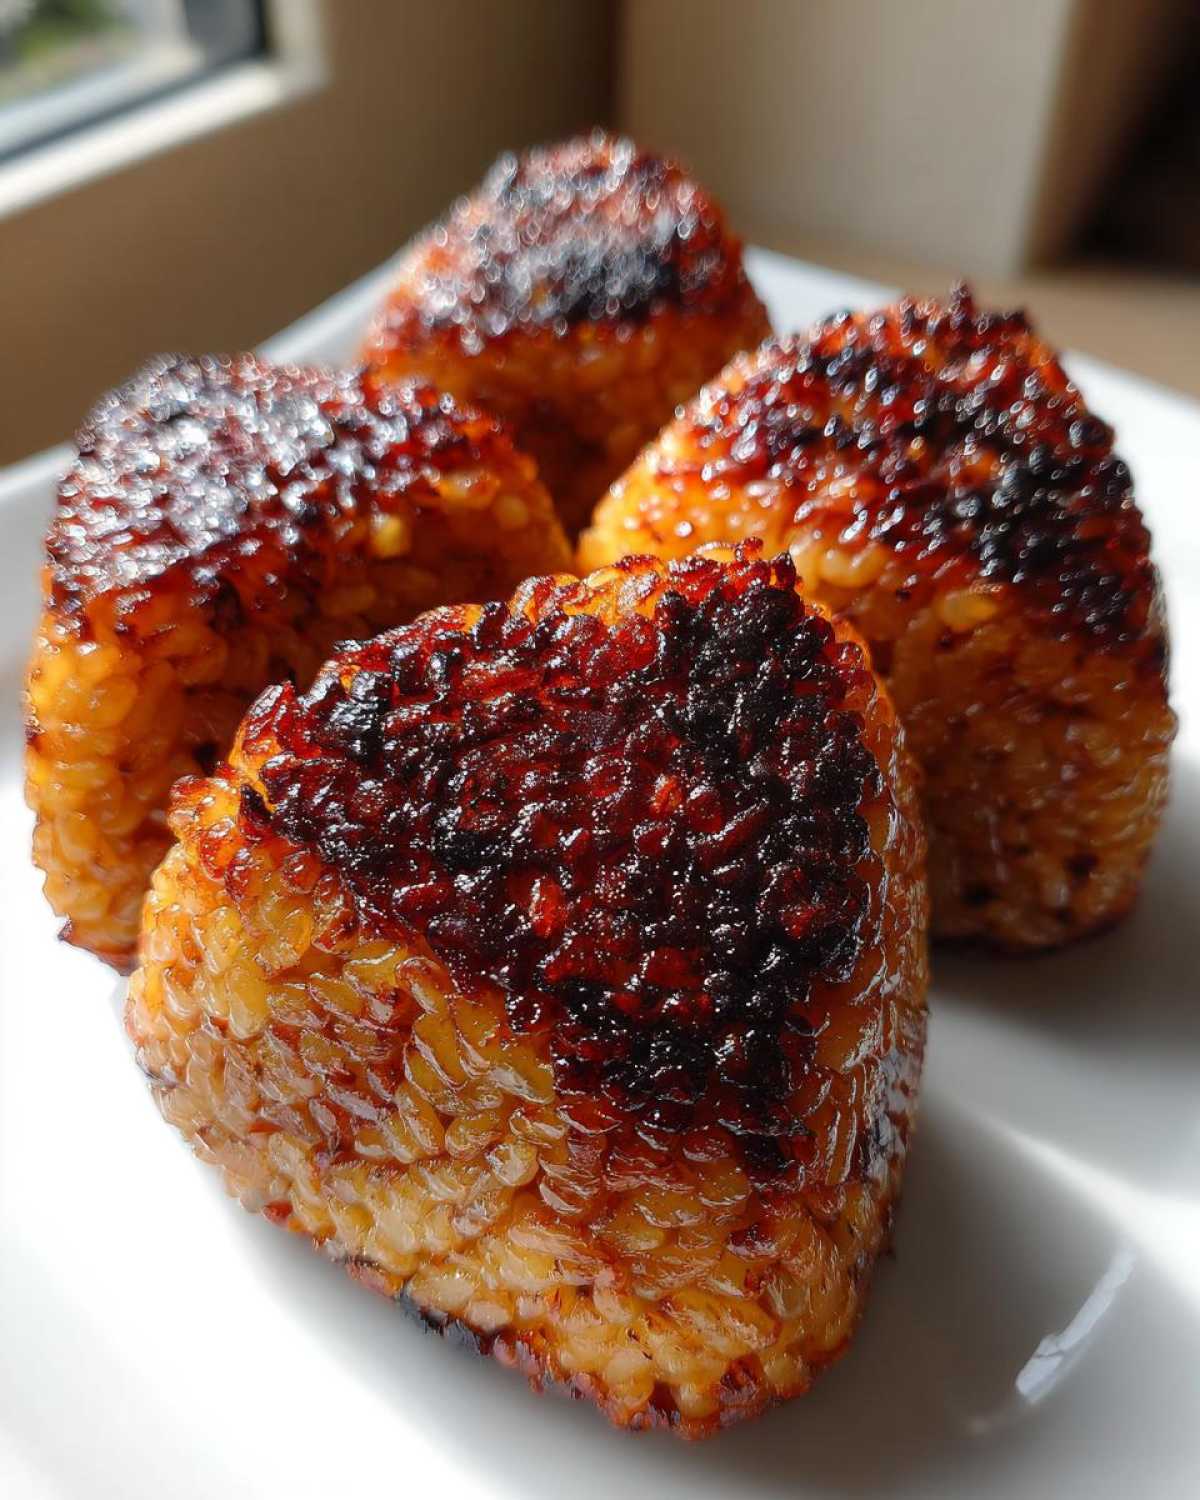
When I first started making these, I thought, “It’s just rice, how hard can it be?” Oh, I learned quickly! My first batch of rice balls stuck to everything—the counter, my hands, the pan—it was a complete disaster. Liam had to come in and calmly reminded me there were two things I was missing: warm rice and water for my hands. Those little things are non-negotiable when you’re dealing with sticky rice for these rice balls!
It’s all about texture management here. You need the rice warm so the starch is pliable, and you need wet hands so the rice doesn’t become your enemy. Following those two simple rules transformed my homemade rice balls from frustrating messes into the quick snack I rely on today. We want great flavor without the kitchen cleanup headache, right?
Ingredient Notes and Substitutions
Let’s talk ingredients because getting the right rice makes all the difference in whether your rice balls hold their shape or crumble apart! You absolutely want short-grain Japanese rice, sometimes labeled as sushi rice, because it has the highest starch content, which makes it wonderfully sticky when cooked. Please, do not try this with long-grain rice like Basmati or Jasmine—it just won’t stick!
What if you don’t have mirin for the glaze? That’s okay! Mirin adds a specific sweet complexity, but if you can’t find it, I have a go-to workaround that Liam taught me. Just mix 1 tablespoon of dry white wine (like a cheap Sauvignon Blanc—nothing fancy!) with 1 tablespoon of sugar. Whisk it well. It’s not exactly the same as true mirin, but it gives you that essential sweet counterpoint to the salty soy sauce. Another thing: people often ask if they can use Arborio rice since it’s used for risotto. Absolutely not! Arborio breaks down too much when cooked, and while it’s creamy, it won’t shape into firm, durable rice balls like the proper short-grain variety will.
For more inspiration on baking and making simple, comforting food that requires just a few swaps, you should take a peek at my easy no-bake dirt cake recipe—sometimes the simplest recipes are the most rewarding!
Serving Suggestions for Your Japanese Rice Balls
So, you’ve got these warm, perfectly grilled, savory rice balls ready to go. Now what? Because Yaki Onigiri are so beautifully simple and carry that fantastic soy flavor, they pair well with almost anything, making them the ultimate versatile snack or lunch component. Forget those heavy, fried rice balls; these are light enough to be added to almost any meal plan!
My favorite way to present them is definitely packed up for lunch. They are the absolute superstar of any bento box you put together. Seriously, if you’re looking for quick lunch rice ideas, this is it. They look amazing tucked next to some bright, crisp cucumber slices or maybe some pickled ginger.
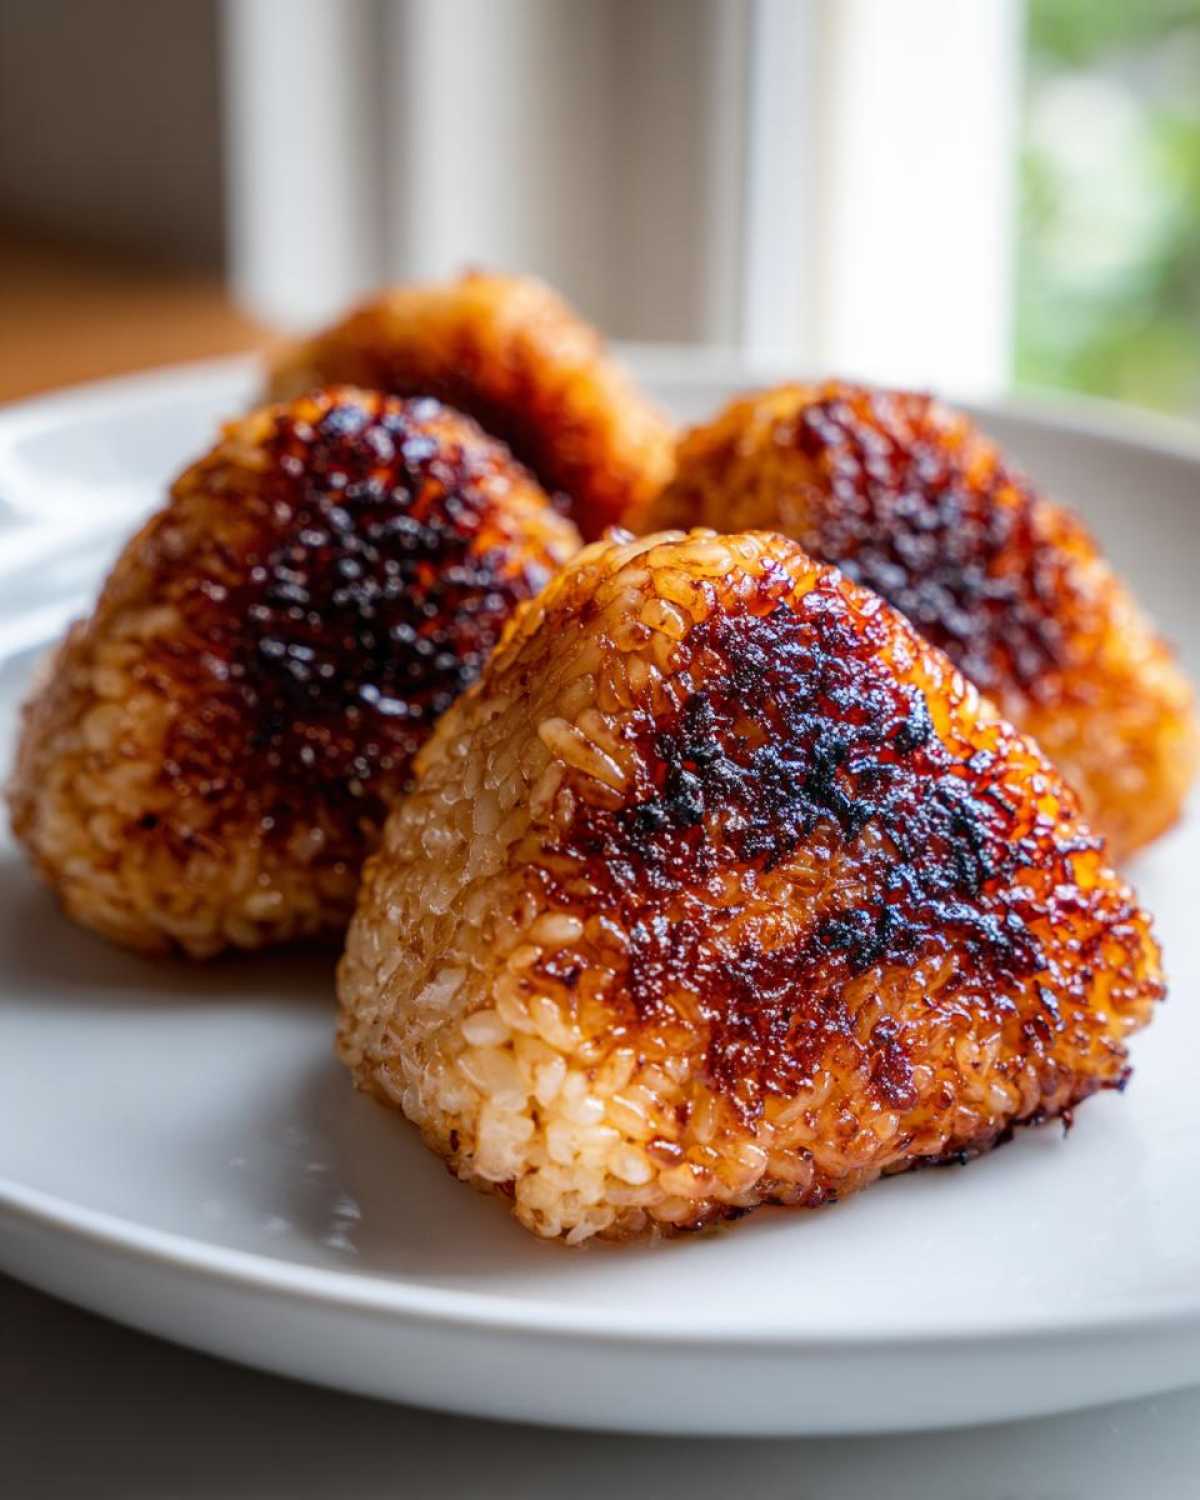
If you’re serving them right away as a fun appetizer before dinner, here are a few things that go just perfectly with that salty-sweet glaze:
- Simple Miso Soup: The warmth and savory depth of a light miso soup contrast beautifully with the crispy texture of the rice ball.
- Quick Pickled Veggies: I often make a quick batch of sweet and sour shredded carrots and daikon radish. The sharp acidity cuts right through the richness of the soy glaze.
- A Side of Edamame: Steamed edamame, sprinkled lightly with sea salt, is traditional, satisfying, and keeps the whole meal feeling light and healthy.
- Ramen Accompaniment: These are fantastic served on the side of a simple vegetable or chicken broth ramen. They soak up soup just enough to get soft and delicious without falling apart completely.
Honestly, sometimes I don’t even bother with sides! If I’ve added some salmon flakes right into the rice before shaping, one or two of these grilled rice balls is a perfectly balanced, standalone lunch. They really are satisfying comfort food molds!
Storage and Reheating Instructions for Rice Balls
Okay, let’s talk reality for a second. Are these Yaki Onigiri—these perfect, crispy rice balls—best fresh from the pan? Absolutely, 100%! The moment that glaze hits the heat and crisps up, it’s pure magic. But who has time to make a fresh batch *every* time they want a snack? Not me! So, yes, you can certainly store leftovers, but you have to handle them with care if you want that beautiful crust back.
I learned the hard way what *not* to do the day after I made my first large batch. I microwaved two of them because I was rushing. Folks, please trust me on this: **do not microwave your grilled rice balls.** They come out soggy, hot, and completely lose that satisfying texture we worked so hard to create. Microwaving is the death of a crispy exterior!
When storing these delicious savory rice balls, aim for airtight storage. You can pop them into a sealed container, maybe layering them slightly with parchment paper between layers so they don’t stick together. They’ll keep nicely in the fridge for about two to three days. They are still perfectly edible, but they will have softened up significantly.
The key is the reheat, and this is where you bring them back to life:
- Dry Skillet Method (Best): This is my preferred way to reheat these rice balls. Get a clean, non-stick skillet—no oil needed this time! Heat it over medium-low heat. Place the cold rice balls directly in the dry pan. Cook them slowly, turning them every couple of minutes. The dry heat slowly evaporates the internal moisture that softened overnight and re-crisps that exterior crust. This usually takes about 6 to 8 minutes total, but the patience is worth it!
- Oven/Toaster Oven Method: If you’re reheating a handful, the toaster oven is fantastic. Set it to about 350°F (175°C) and watch them closely for about 5 minutes. This method dries them out evenly and gives them a nice, all-over heat without getting soggy like a microwave would.
If you treat them right upon reheating, they taste almost as good as the first day! Storing snacks properly is just as important as the cooking technique, especially when seeking that satisfying crunch!
Frequently Asked Questions About Rice Balls
When you start making things like Yaki Onigiri, naturally you have questions! I know I did when learning how to make these simple rice balls for the first time. People often confuse the different global styles of rice balls, or they worry about the construction process. Don’t stress! Here are the top things I always get asked about these savory rice balls. If you’re looking for more simple, snackable recipe ideas that are nearly foolproof, check out all the great things we’ve made over on our snacks category!
Can I stuff these Yaki Onigiri rice balls?
Yes, absolutely you can! That’s one of the fun parts about making your own homemade rice balls. While the recipe here focuses on the crispy soy glaze exterior, you can easily make these stuffed rice balls. Remember when I talked about pressing firmly but gently? That’s key here. Before you fully seal your half-cup mound of rice, press a small dent into the center. Pop in a small amount of filling—some flaked grilled salmon, a tiny bit of cooked seasoned meat, or even a dollop of salty pickled plum (umeboshi). Then, carefully cover it back up with more rice and smooth out the shape. Since these are pan-fried and not submerged in hot oil like Arancini, your fillings should be mostly pre-cooked or shelf-stable. They are wonderful as a quick lunch rice ideas addition!
Can I bake these instead of pan-frying the rice balls?
I get why you’d ask about baking! It feels easier to pop something in the oven and walk away, right? However, for Yaki Onigiri, I really, really don’t recommend baking them as a substitute for brushing them with oil and pan-frying. The goal here is that intense, localized crisping and caramelization from direct contact with the hot pan surface. If you bake them, they tend to dry out completely before they get that golden, slightly charred crust we look for. They become dry rice mounds instead of crispy rice snacks. If you must avoid the pan, you could try broiling them very carefully, but the skillet method remains the best way to achieve that perfect texture for Japanese rice balls.
What is the difference between these rice balls and classic Italian Arancini?
This is the big one, and it comes down to technique and tradition! These Yaki Onigiri are Japanese rice balls that use sticky short-grain rice, are gently shaped, and then pan-fried (grilled) with a glaze. They stay relatively light; they’re a fantastic, savory rice ball side dish or light meal. The flavor comes mainly from that caramelized soy!
Italian Arancini are a whole different beast. They are built on a base of creamy risotto, often stuffed with rich ingredients like mozzarella cheese or meat ragu, then rolled in breadcrumbs, and then completely submerged in hot oil until they are deep-fried rice balls. They are decadent, crispy on the outside, and gooey on the inside. If you want pure, heavy comfort food, Arancini is your answer, but they don’t have the same simple preparation as our grilled rice balls. You can see a fantastic explanation of how to make those crispy wonders over at Savory Zen if you want to dive into that world next!
How long should the rice chill before I try to shape the rice balls?
Nobody wants to work with scorching hot rice when molding rice balls, but you also can’t use cold, hard rice. If you’re making these for a quick snack, aim for the rice to be warm enough that you can comfortably handle it without burning your fingers—think bathwater temperature, not scalding hot. If you’ve just cooked a fresh batch, let it sit uncovered for about 10 to 15 minutes stirring occasionally. This allows some excess steam to escape while keeping the starch pliable. If you’re worried about the rice going cold before you finish shaping, just set your bowl of rice near, but not directly on, a warm oven vent, or cover it with a clean kitchen towel to keep the heat trapped until you’re ready to dip your hands in water and start shaping!
Understanding Different Types of Rice Balls
When I first looked up recipes for what I called simply “rice balls,” I got completely overwhelmed! It turns out this simple shape belongs to a lot of different amazing cuisines, and they are all totally different in texture and flavor. It’s why I settled on teaching you Yaki Onigiri first, because they are the easiest to master for a quick snack. But because I want you to feel like you know the whole landscape of comfort food rice molds, let’s quickly talk about two of the other big players in the world of rice balls.
This knowledge really helps you decide what you’re in the mood for next! Are you looking for a light, savory bite, or are you ready for something rich and deep-fried? Understanding the difference ensures you get the texture you want!
For any future explorations into handheld finger food recipes, you might want to check out my super easy recipe for Bisquick sausage balls, too—they have a similar satisfying, grab-and-go quality!
The Difference Between Yaki Onigiri and Arancini
Remember how we just talked about this? Yaki Onigiri, the recipe you just mastered, uses sticky rice that is shaped and then pan-fried lightly with a soy glaze. They stay lighter; they’re a fantastic, savory rice ball side dish or light meal. The flavor comes mainly from that caramelized soy!
Italian Arancini are a whole different beast. They are built on a base of creamy risotto, often stuffed with rich ingredients like mozzarella cheese or meat ragu, then rolled in breadcrumbs, and then completely submerged in hot oil until they are deep-fried rice balls. They are decadent, crispy on the outside, and gooey on the inside. If you want pure, heavy comfort food, Arancini is your answer, but they don’t have the same simple preparation as our grilled rice balls. You can see a fantastic explanation of how to make those crispy wonders over at Savory Zen if you want to dive into that world next!
What About Korean Rice Balls?
Korean rice balls are another popular entry into the world of these molded rice snacks. They tend to use a short-grain rice similar to Onigiri, but the shaping and mixing are often different. Instead of being filled and sealed like an Arancini, or glazed on the outside like Yaki Onigiri, Korean rice balls usually have ingredients like seaweed flakes, sesame oil, and sometimes chopped vegetables or canned tuna mixed directly *into* the rice before shaping. They are shaped into spheres and are often easier to eat out of hand since they aren’t trying to achieve that hardened, crispy crust. They are known for being flavorful snack rice balls all on their own, relying on the seasoning within the rice rather than a glaze on the outside.
So there you have it: three types of popular rice balls, all completely different journeys from the stove to your plate. I’m glad we started with the simple, grilled Japanese version because it builds confidence!
Recipe Metrics and Nutritional Estimates
Liam always laughs because I usually just eyeball the nutrition facts. When we first started this blog, he insisted that for every recipe, we needed to offer some metric estimates, even if they are just rough guides. Since these Yaki Onigiri are so simple and rely mostly on rice and soy sauce, they are surprisingly light! Remember, though, these numbers are just my best guess based on the ingredients listed—they don’t account for variations in rice type or how much glaze you decide to brush on your homemade rice balls.
If you’re keeping track of things like calories for a quick lunch or comparing them to heavier, fried rice balls, these estimates should give you a good baseline:
- Serving Size: 1 rice ball (based on a yield of 6 substantial servings)
- Calories: 180
- Fat: 3g
- Saturated Fat: 0.5g
- Trans Fat: 0g
- Cholesterol: 0mg
- Carbohydrates: 35g
- Fiber: 1g
- Sugar: 4g (mostly from the mirin in the glaze)
- Sodium: 550mg (Soy sauce is salty, so watch your intake!)
- Protein: 4g
See? Pretty excellent for a crispy, savory snack rice ball! If you’re really watching your salt when making these, you can always swap out the regular soy sauce for a low-sodium version, but you might lose just a tiny bit of that deep flavor that makes the grilling worth it. I always advise people to stick to the recipe the first time, then tweak for health on the second batch!
PrintEasy Yaki Onigiri: Crispy Grilled Japanese Rice Balls

Learn how to make perfect Yaki Onigiri, which are savory grilled Japanese rice balls brushed with a soy glaze until they are crispy on the outside. These rice balls are simple to prepare and make a fantastic snack or bento box addition.
- Prep Time: 15 min
- Cook Time: 10 min
- Total Time: 25 min
- Yield: 6 servings
- Category: Snack
- Method: Pan-Frying
- Cuisine: Japanese
- Diet: Vegetarian
Ingredients
- 3 cups cooked Japanese short-grain rice (sticky rice)
- 1/4 cup water (for wetting hands)
- 2 tablespoons neutral oil (for pan-frying)
- For the Glaze:
- 4 tablespoons soy sauce
- 2 tablespoons mirin (sweet rice wine)
- 1 teaspoon sugar
Instructions
- Prepare the Rice: Ensure your short-grain rice is cooked and still warm. This warmth helps the rice stick together when shaping.
- Make the Glaze: In a small bowl, whisk together the soy sauce, mirin, and sugar until the sugar dissolves. Set this savory glaze aside.
- Shape the Rice Balls: Lightly wet your hands with water to prevent sticking. Scoop about 1/2 cup of warm rice into your palm. Gently press and shape the rice into a firm triangle or round ball shape. You should make about 6 to 8 rice balls.
- Prepare for Grilling: Heat the neutral oil in a non-stick skillet or frying pan over medium heat.
- Grill the Rice Balls: Carefully place the shaped rice balls into the hot pan. Cook for 3 to 4 minutes per side until the exterior turns golden brown and develops a slight crust.
- Glaze and Finish: Once the rice balls are golden on one side, brush the top surface generously with the prepared soy glaze. Flip the rice ball and brush the other side. Continue cooking for 1 to 2 minutes per side, allowing the glaze to caramelize slightly and create a crispy exterior.
- Serve: Remove the Yaki Onigiri from the pan. Serve immediately while warm as a delicious snack or part of your lunch.
Notes
- Use warm, freshly cooked rice for the best results; cold rice will not hold its shape well.
- If you do not have mirin, you can substitute it with 1 tablespoon of dry white wine mixed with 1 tablespoon of sugar, though the flavor profile will change slightly.
- For an extra layer of flavor, you can lightly press a small amount of umeboshi (pickled plum) or flaked salmon into the center before sealing the rice ball.
Nutrition
- Serving Size: 1 rice ball
- Calories: 180
- Sugar: 4
- Sodium: 550
- Fat: 3
- Saturated Fat: 0.5
- Unsaturated Fat: 2.5
- Trans Fat: 0
- Carbohydrates: 35
- Fiber: 1
- Protein: 4
- Cholesterol: 0