

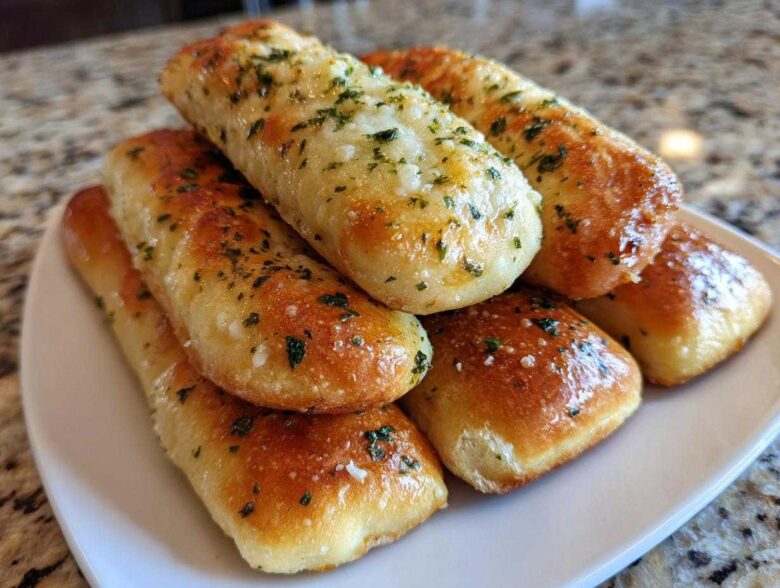
Honestly, sometimes you just need that warm, pillowy bread that tastes exactly like your favorite chain restaurant. I get it! We all crave those perfect, slightly sweet, ridiculously buttery breadsticks when we’re watching a movie or waiting for dinner salads. For years, I thought it was impossible to recreate that magic at home—the dough was always too tough or the topping too weak. But after way too many attempts, I finally nailed it. I have the ultimate, easy recipe right here for what I proudly call my olive garden breadsticks copycat version. These breadsticks are so soft and fluffy, and once you nail the dough texture, you will never go back to the frozen stuff again. Trust me, this recipe is a game-changer for any quick homemade bread!
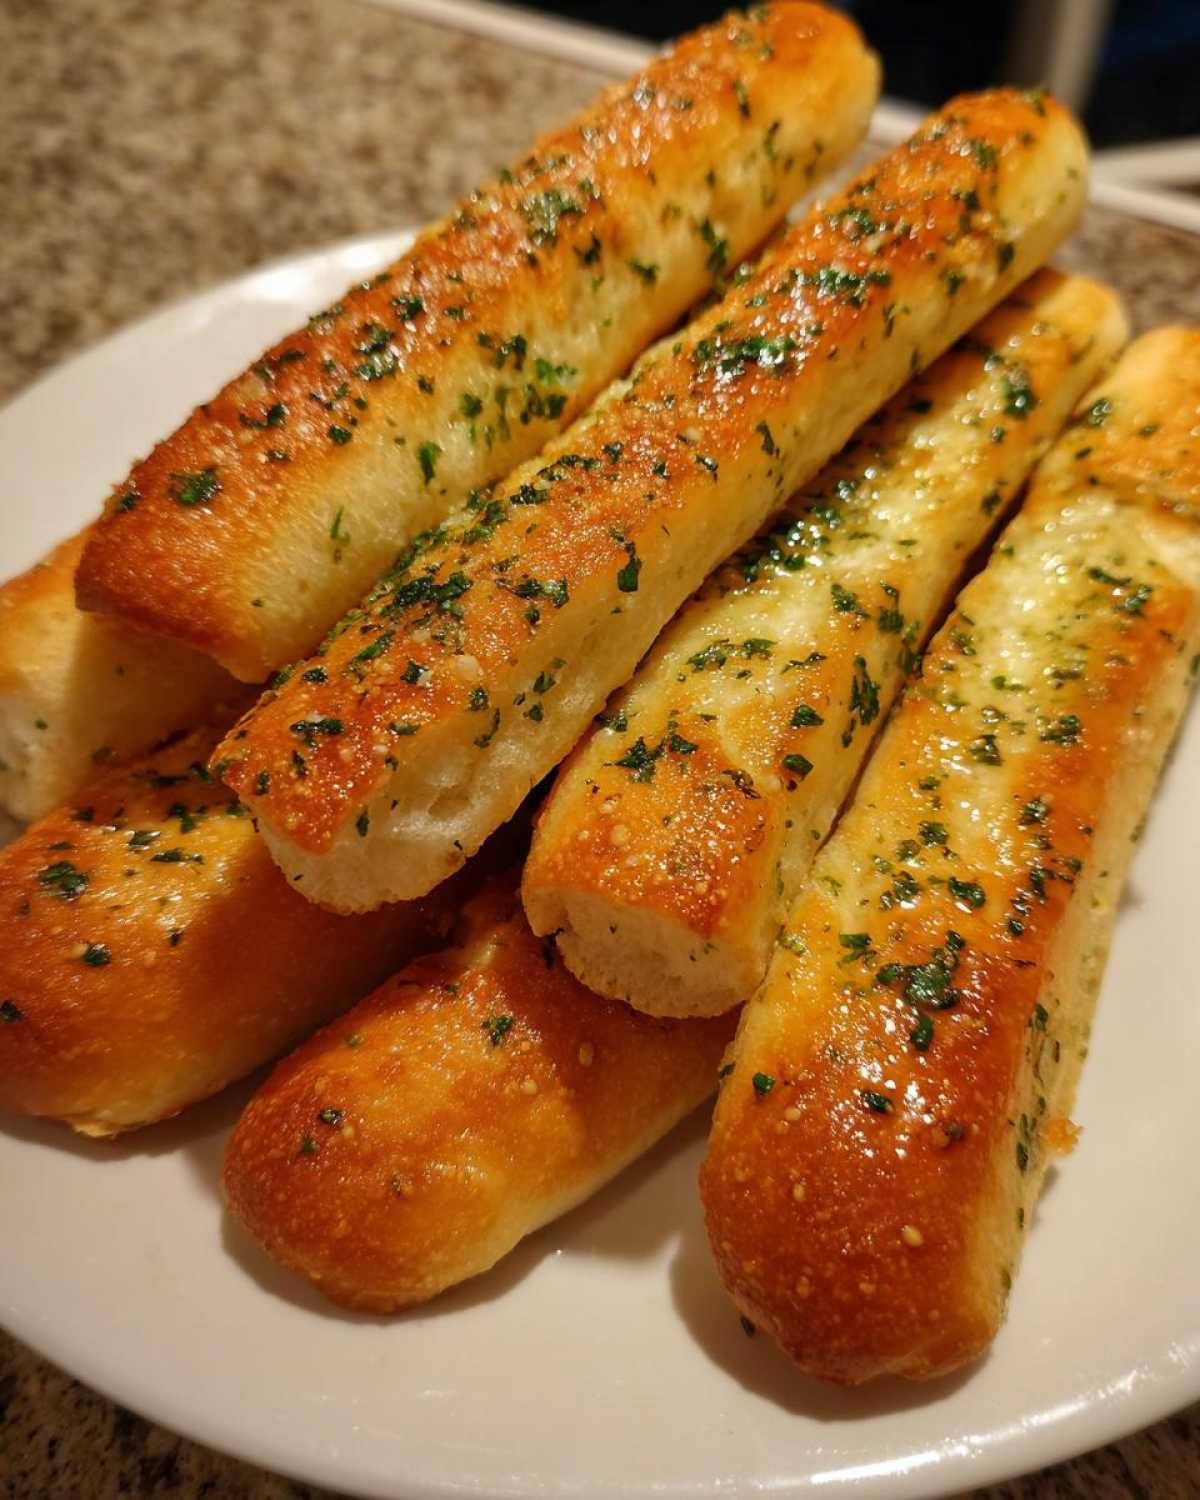
Why This is the Best Breadstick Recipe You Will Ever Make
Okay, so what sets these apart from every other recipe you’ve scrolled past? It’s all about that texture, friend. We aren’t making hard, chewy rolls here; we are aiming for the lightest, fluffiest pillows possible, soaked in pure flavor. I found exactly what makes the difference!
- These are genuinely soft and fluffy breadsticks—they practically melt the second they hit your mouth.
- The prep time is ridiculously fast, meaning you can have these on the table in just over an hour! That’s crucial for those weeknight scrambles.
- I promise these are better than restaurant breadsticks. That homemade garlic butter topping is just richer and fresher than anything you can get delivered.
- I’ve put my seal of approval on this recipe, and you can see why we think this is the absolute best breadstick recipe out there over on the About Us page!
Ingredients for Homemade Breadsticks
Look, measuring matters, especially when you don’t want dense hockey pucks instead of soft dinner rolls. Don’t skip the specifics here, especially with the water temperature—that’s the secret to waking up the lazy yeast! I always lay everything out before I start, just like I learned from my grandmother.
Dough Components for Soft and Fluffy Breadsticks
- 1 cup warm water (Make sure it’s between 105°F and 115°F, or it won’t wake up!)
- 2 1/4 teaspoons active dry yeast (That’s one standard packet, if you’re measuring that way).
- 1 tablespoon granulated sugar (This feeds the yeast, making those beautiful bubbles).
- 2 1/2 cups all-purpose flour, plus more for dusting (You’ll need that extra dusting when you roll it out, so have it ready!).
- 1 teaspoon salt (Don’t forget this, or they taste bland!).
- 2 tablespoons unsalted butter, melted (This gets mixed right into the dough for richness).
- 1 large egg, lightly beaten (This helps bind everything together perfectly).
Rich Garlic Butter Topping for Buttery Breadsticks
This is the grand finale, the whole reason you’re making these instead of opening a bag of chips. Get that 1/2 cup of butter ready to melt down!
- 1/2 cup unsalted butter, melted (We use a lot, and yes, you deserve it!).
- 2 teaspoons garlic powder (Get a good quality one; it makes a huge difference).
- 1 teaspoon dried parsley (For that beautiful green flecked look).
Step-by-Step Instructions for Quick Homemade Breadsticks
Now for the fun part! Even though this is a yeast dough, don’t let that scare you off. We keep the rise time short so you aren’t waiting half the day just for some side bread. I promise these steps flow really easily once you get your flour measured out. Just follow my lead here, and we’ll have incredible garlic breadsticks ready in no time.
Activating the Yeast and Mixing the Breadsticks Dough
First things first: we wake up the yeast! In a small bowl, mix your warm water, the yeast, and the sugar together. You absolutely have to make sure that water isn’t too hot—if it’s hotter than 115°F, it’ll kill your yeast, and then we’re making flatbread, not breadsticks! Let this mixture sit undisturbed for about 5 to 10 minutes. You want it super foamy on top, like the head on a freshly poured soda. Once it’s bubbly, move to the dry stuff. Whisk up your flour and salt in a big bowl, then pour in the yeast mix, the 2 tablespoons of melted butter, and that one beaten egg. Stir it all around until you end up with what looks like a messy, shaggy dough. That’s exactly what you want at this stage!
Kneading and First Rise for Perfect Breadsticks Texture
Time to get those hands dirty! Turn that shaggy mess out onto a counter dusted lightly with flour. You’re going to knead this dough firmly for about 5 to 7 minutes. It sounds like a long time, but you’re building the structure that makes these breadsticks so wonderfully soft later. Keep working it until it feels smooth and elastic when you poke it. After that, lightly oil a clean bowl, toss the dough around so it’s coated, cover it up tight, and put it somewhere warm. Let it rise for a full hour, or until it has totally doubled in size. If your kitchen is chilly, I sometimes turn my oven on for two minutes, turn it OFF, and sit the covered bowl inside—it creates the perfect little cozy proofing box!
Shaping, Baking, and Applying the Garlic Butter Topping
Once that dough has puffed up beautifully, give it a satisfying punch right in the middle to deflate it! Now, roll or pat it onto a baking sheet lined with parchment paper—we want a nice, even rectangle about a half-inch thick. Cut this into strips, about one inch wide, leaving a little space between each one. Slide them into the oven preheated to 400°F (200°C). Bake them for just 10 to 12 minutes until they are lightly golden. While they are baking, melt that remaining half-cup of butter and stir in the garlic powder and parsley. When those hot sticks come out, brush that amazing garlic butter topping over every single one generously. You can see the full disclaimer about baking times over here, just in case!
Tips for Success with Your Olive Garden Breadsticks Copycat Recipe
Look, I’ve made batches of these breadsticks that were just ‘fine,’ and then I’ve made batches that disappear before they even hit the dinner table. The difference lies in respecting the little details in the recipe card! These aren’t just suggestions; they are the secrets that turn standard baked dough into true restaurant-quality comfort food.
First, I have to tell you about the Parmesan addition—it’s a game-changer for the topping. For an extra punch of salty, savory flavor that takes these over the top, try adding about 1/4 cup of finely grated Parmesan cheese right into that melted butter mixture with the garlic powder. It melts right in and coats the sticks beautifully. You can also check out our Terms and Conditions for other ingredient sourcing tips if you’re curious about quality control.
Next up is the flour situation. While all-purpose works perfectly fine, if you want to level up the chewiness and make these feel more like traditional Italian breadsticks, swap out 1/2 cup of your all-purpose flour for bread flour. Bread flour has higher protein, which gives you that satisfying, slightly denser texture that holds up longer.
Finally, remember what I said about the kitchen being cold? If your dough is struggling to rise, don’t just leave it on the counter wondering. Use that trick of warming the oven slightly (OFF!) and giving the dough a cozy home. A happy yeast means light, airy buttery breadsticks, and nobody wants grumpy yeast!
Variations: Making Cheesy Breadsticks or Sheet Pan Breadsticks
Listen, I love these classic garlic breadsticks just as much as the next person, but sometimes you need to jazz things up a bit! That basic dough is like a little blank canvas, and it handles additions like a champ. If you didn’t get enough cheese in your life from the topping, we can integrate it directly into the mix, which is fantastic when you want something cheesy but still soft.
For instant gratification and maximum flavor, making cheesy breadsticks is super easy. After you brush on the garlic butter topping while the sticks are hot from the oven (that step is non-negotiable for flavor!), immediately sprinkle heavily with finely grated Parmesan or shredded mozzarella. The residual heat melts that cheese right into the butter grooves. If you want it baked-in cheesy, toss shredded sharp cheddar or Monterey Jack directly into the dough when you add the flour on Step 2. You might need an extra tablespoon of flour or milk to compensate, depending on how much cheese you pack in.
Now, if you’re making a huge batch for a party and don’t want to shape 30 individual strips, let’s talk about sheet pan breadsticks. This is my go-to when I want less fuss and quick cleanup. Instead of cutting the dough into strips before baking, roll it out into one large rectangle shape—maybe 10 by 14 inches—and keep it about 1/2 inch thick on that parchment-lined sheet. Bake it for the slightly longer time (watch carefully, maybe 15-18 minutes since it’s thicker). Once it comes out, brush on the garlic butter, and *then* cut it into strips with a pizza cutter while it’s still warm. It’s the perfect method for easy appetizers that feed a crowd!
Serving Suggestions for These Buttery Breadsticks
Honestly, these buttery breadsticks are so good you could just eat them standing over the sink in the kitchen, but since we are serving people (or, you know, being civilized), they deserve a proper meal to accompany them. They shine as the perfect, simple addition to practically any dinner.
The most obvious pairing, of course, is Italian night! They are fantastic dipped into a rich homemade marinara sauce, or they mop up every last drop of sauce from a hearty lasagna or baked ziti. If you’re making something lighter, like chicken piccata or shrimp scampi, these breadsticks are the ideal vehicle for scooping up any remaining delicious pan juices.
But don’t limit them to Italian fare! They work wonderfully alongside creamy soups, too. Think about dipping them into a hot bowl of tomato bisque or even a hearty French onion soup—the crisp, buttery outside breaks down just enough to be heavenly when dunked. For parties, I serve them simply on a big platter with a bowl of warm, good quality olive oil mixed with balsamic vinegar. They are the best appetizer to put out first because they disappear instantly!
Storage and Reheating Instructions for Leftover Breadsticks
Oh, you made too many? That’s never happened to me, but I hear it from other people! The worst thing you can do to these beautiful, soft breadsticks is stick them in the fridge. Seriously, don’t do it! That cold air drains all the moisture out, and you’re left with tiny, flavorless sticks of sadness, no matter how much butter you put on them initially. They were meant to be eaten fresh!
If you have a few left over, the best plan is to store them airtight at room temperature. A good plastic container or a zip-top bag works best. They usually stay truly perfect for at least a day this way, maybe two if your kitchen isn’t too humid. If you have a question about ingredient substitutions, feel free to send us a note on the Contact page!
Now, when it comes time to reheat them—and you absolutely should reheat them—we need to bring that glorious soft texture back. Here is the deal:
If you only have one or two sticks, the microwave will work in a pinch. Pop them in for about 10 to 15 seconds. Just watch them closely, because if you overdo it, they get rubbery super fast. Honestly, though, for the best results, we need the oven.
Preheat your oven (or toaster oven!) to 300°F (150°C). That low temperature is key—we want to gently warm the bread through, not re-bake it until it’s crunchy. Lay the breadsticks directly on the rack, or use a baking sheet if you prefer. Heat them for about 5 to 7 minutes. They come out piping hot, soft all the way to the center, and ready for another quick drizzle of melted butter if you’re feeling indulgent!
Frequently Asked Questions About Making Breadsticks
Okay, I know yeast baking can sometimes feel intimidating, especially when you’re trying to nail that perfect restaurant texture! We’ve all been there, wondering if the dough is supposed to feel sticky or if we accidentally killed the yeast with water that was just a tad too hot. Don’t worry one bit! These questions pop up all the time, and they’re important for getting those perfect homemade breadsticks.
Can I make these breadsticks ahead of time?
Yes, the short answer is yes, which is great for planning parties! What I love to do is complete Steps 1 through 4—you know, mixing the dough, kneading it, and letting it have its first rise until it’s doubled. Once it’s doubled, I just punch it down gently, coat the bowl with a little oil, cover it tightly with plastic wrap, and pop the whole thing in the fridge overnight. Yeast is slow and steady in the cold, so the flavor actually deepens a little. When you’re ready to bake the next day, just take the dough out, let it sit on the counter for about 30 minutes to warm up so it’s easier to handle, then roll it out, cut your strips, and proceed with baking as normal. Perfect for when you want quick homemade bread without the hour wait!
How do I ensure my homemade breadsticks stay soft and fluffy?
This is all about temperature management! If you want those soft and fluffy breadsticks that stay that way for hours, you have to hit them with the butter right when they come out of the oven. We’re talking seconds after they leave the 400°F heat. The hot dough drinks up that melted garlic butter, sealing in the moisture created during baking. The other huge thing is storage—never refrigerate these! Keep them in an airtight container at room temperature, and if you have to reheat them, use the oven method I described earlier (low and slow!) rather than the microwave, which can sometimes make them springy or tough.
What if I don’t have active dry yeast? Can I use instant yeast for these breadsticks?
Oh, that happens sometimes! You’re in the zone, ready to bake, and you realize you grabbed the wrong canister. Good news: yes, you absolutely can substitute instant yeast for active dry yeast in this recipe, and it actually makes things a tiny bit easier! Since instant yeast doesn’t need to be “proofed” separately, you can skip Step 1 entirely.
Just whisk your instant yeast right in with the flour and salt in Step 2. Then, mix in the warm water, melted butter, and egg. Make sure your water isn’t too hot—even instant yeast can get grumpy if it’s boiling! The dough might rise a little faster than the recipe suggests, so keep an eye on it. You might only need about 45 minutes for the rise instead of a full hour. If you decide to refrigerate the dough overnight, you might even skip the initial room temp warm-up, though I still recommend letting it sit on the counter for at least 20 minutes before you try to roll it out. You can read a little more about our recipe standards over on our Privacy Policy page if you’re curious about our testing process!
Nutritional Estimates for These Garlic Breadsticks
I always recommend that if you’re tracking macros or watching sodium, you weigh your finished batch and divide it by the number of servings you cut. These recipes are meant to be fun, but numbers help! The totals below are just an estimate based on how the recipe is written.
- Serving Size: 2 breadsticks (This is just a small handful!)
- Calories: 180
- Fat: 8g
- Saturated Fat: 4.5g
- Carbohydrates: 24g
- Protein: 4g
- Sugar: 1g
- Sodium: 250mg
- Cholesterol: 25mg
Please remember these are estimates! If you use more butter on top—and who wouldn’t?—those numbers are going up, haha! If you’re swapping out ingredients, definitely plug them into your favorite tracking app. You can check out our cookie information here for details on how we track site usage!
Nutritional Estimates for These Garlic Breadsticks
I always recommend that if you’re tracking macros or watching sodium, you weigh your finished batch and divide it by the number of servings you cut. These recipes are meant to be fun, but numbers help! The totals below are just an estimate based on how the recipe is written.
- Serving Size: 2 breadsticks (This is just a small handful!)
- Calories: 180
- Fat: 8g
- Saturated Fat: 4.5g
- Carbohydrates: 24g
- Protein: 4g
- Sugar: 1g
- Sodium: 250mg
- Cholesterol: 25mg
Please remember these are estimates! If you use more butter on top—and who wouldn’t?—those numbers are going up, haha! If you’re swapping out ingredients, definitely plug them into your favorite tracking app. You can check out our cookie information here for details on how we track site usage!
PrintCopycat Soft Garlic Breadsticks
Make soft, buttery breadsticks at home that taste like your favorite restaurant version, topped with a rich garlic butter glaze.
- Prep Time: 20 min
- Cook Time: 12 min
- Total Time: 1 hour 32 min
- Yield: 12 servings
- Category: Appetizer
- Method: Baking
- Cuisine: American
- Diet: Vegetarian
Ingredients
- 1 cup warm water (105-115°F)
- 2 1/4 teaspoons active dry yeast
- 1 tablespoon granulated sugar
- 2 1/2 cups all-purpose flour, plus more for dusting
- 1 teaspoon salt
- 2 tablespoons unsalted butter, melted
- 1 large egg, lightly beaten
- 1/2 cup unsalted butter, melted (for topping)
- 2 teaspoons garlic powder
- 1 teaspoon dried parsley
Instructions
- Combine the warm water, yeast, and sugar in a small bowl. Let stand for 5 to 10 minutes until foamy.
- In a large bowl, whisk together the flour and salt. Pour in the yeast mixture, 2 tablespoons of melted butter, and the beaten egg. Mix until a shaggy dough forms.
- Turn the dough out onto a lightly floured surface. Knead for 5 to 7 minutes until the dough is smooth and elastic.
- Place the dough in a lightly oiled bowl, turning to coat. Cover the bowl with plastic wrap and let it rise in a warm place for 1 hour, or until doubled in size.
- Preheat your oven to 400°F (200°C). Line a baking sheet with parchment paper.
- Punch down the risen dough gently. Roll or pat the dough out into a rectangle about 1/2 inch thick. Cut the dough into strips about 1 inch wide.
- Place the strips onto the prepared baking sheet, leaving a small space between them. Bake for 10 to 12 minutes, or until lightly golden brown.
- While the breadsticks bake, prepare the topping: Melt 1/2 cup butter in a small saucepan. Stir in the garlic powder and dried parsley.
- Remove the hot breadsticks from the oven. Brush the garlic butter mixture generously over the tops of the warm breadsticks. Serve immediately.
Notes
- For extra flavor, you can add 1/4 cup of grated Parmesan cheese to the melted butter topping.
- If your kitchen is cold, place the dough in the oven while it is off to help it rise faster.
- You can use bread flour instead of all-purpose flour for a slightly chewier texture.
Nutrition
- Serving Size: 2 breadsticks
- Calories: 180
- Sugar: 1
- Sodium: 250
- Fat: 8
- Saturated Fat: 4.5
- Unsaturated Fat: 3.5
- Trans Fat: 0
- Carbohydrates: 24
- Fiber: 1
- Protein: 4
- Cholesterol: 25