

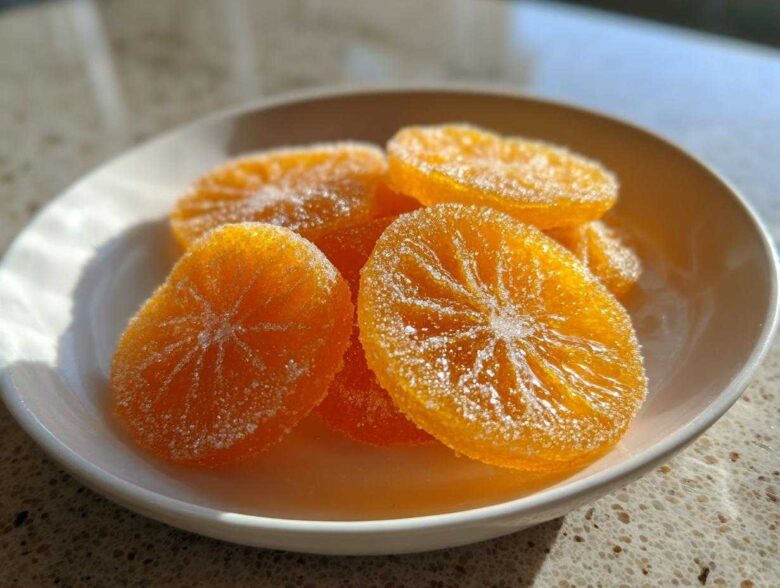
When I first started learning to cook with Liam, the idea of taking a humble orange and turning it into something dazzling felt completely out of reach. But trust me when I say that making candied orange slices is one of the kitchen projects that truly shows you what’s possible! We’re not just making a snack here; we’re transforming simple summer citrus into gorgeous, jewel-like candy. These sweet and tangy orange slices look incredibly gourmet, but they are surprisingly accessible. I remember showing Liam the first batch I made—they were sticky and uneven, but Liam just smiled and said, “You taught yourself the hard part, Clara.” Now that I’ve had years of practice, I can promise you this method is the key to making them perfect every single time. You can see a bit more about how Liam taught me to cook right here!
Why You Will Love Making Homemade Candied Orange Slices
I know what you’re thinking: drying fruit sounds like a long, boring process. But I promise you, the payoff here is huge! Once you see these shining on your counter, you’ll get why Liam loved this recipe so much. They are just stunning.
- They Glow! Seriously, these aren’t just oranges; they become these incredible, translucent jewels. They catch the light beautifully, making any plate you put them on look instantly gourmet.
- That Perfect Chew: Forget dried-out chips! We aim for a texture that’s delightfully chewy, melting slightly in your mouth but still giving you that satisfying bite.
- Sweet *and* Tangy: We hit that perfect balance. The sugar syrup mellows the harsh bitterness, but that bright citrus tang cuts right through, making them seriously addictive.
- Total Versatility: These aren’t just for snacking, although I definitely eat them straight from the cooling rack! They shine as an edible orange garnish on cheesecakes, or tucked onto a holiday charcuterie board.
Gathering Ingredients for Perfect Candied Orange Slices
Okay, let’s talk supplies! Making homemade candied orange slices is wonderful because the ingredient list is wonderfully short. We’re relying on really great citrus and simple pantry staples to do the heavy lifting here. Remember, when you only have a few things, their quality really matters, right? If you ever want to check out our general policies, you can read our Privacy Policy here.
- 3 large Navel or Blood Oranges (you want about 1.5 pounds total weight)
- 4 cups water, divided
- 4 cups granulated sugar, divided
- 1 tablespoon fresh lemon juice
I always make sure to have that extra water and sugar designated—you need the extra liquid for the blanching step to make sure we get rid of any harsh pithy flavor.
Ingredient Notes and Substitution Tips
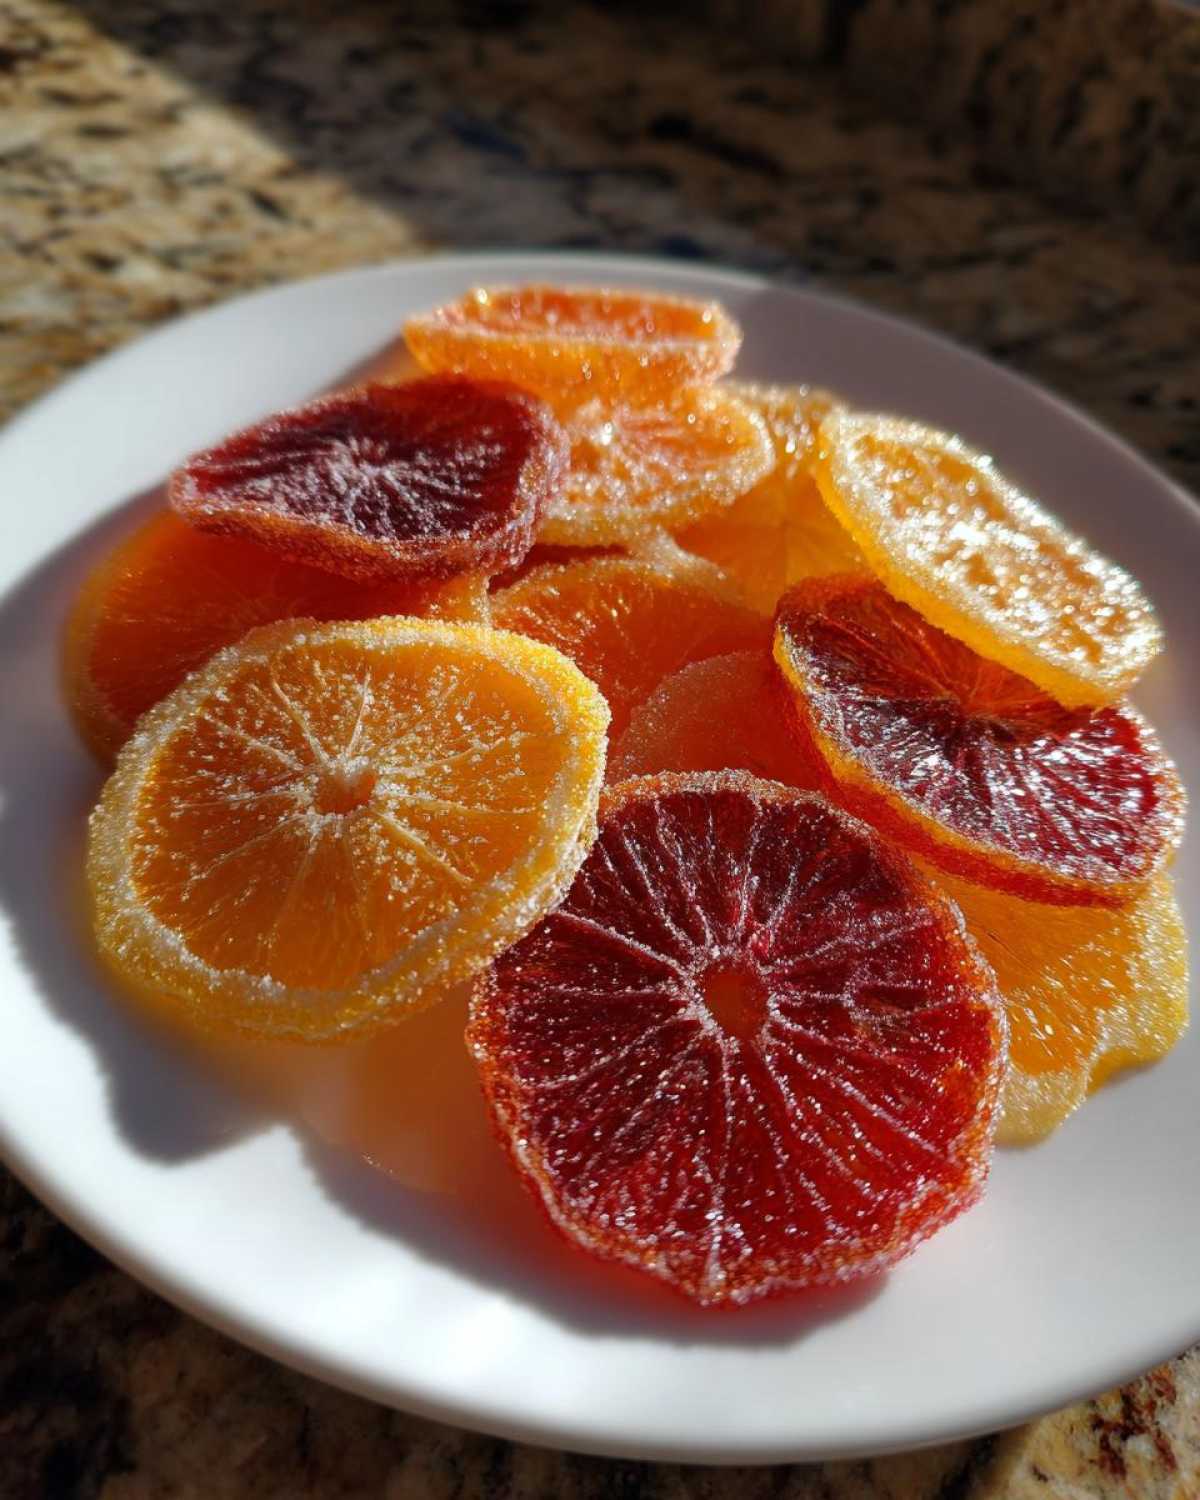
Choosing the right orange makes a big difference in the final look. I usually go for Navel oranges because they are so easy to find, but if you want that gorgeous ruby color for a show-stopping dessert, definitely spring for the Blood Oranges. They make for such an elegant garnish!
Now, about that lemon juice—this is something Liam taught me keeps everything stable and bright. It adds just a tiny bit of acid to balance out how overwhelmingly sweet this candy can get, and it helps the slices stay beautifully preserved.
And please, please, please save that leftover syrup once you’re done! I know it seems thick and sugary, but I pour mine into a jar, and it becomes the absolute best thing for sweetening iced tea or making a quick cocktail later in the week. It’s liquid gold, truly!
Step-by-Step: How to Make Candied Orange Slices
Alright, this is where the real magic happens! If you’ve ever felt overwhelmed starting a multi-step recipe, don’t worry. I’m here to walk you through it. When Liam first showed me this process, I kept checking the clock, convinced nothing was happening. But patience is the secret ingredient here. Just rinse your hands, put on some music, and let’s create some beautiful citrus candy. If you need to reach out with any cooking questions, you can always find our contact info here.
Preparing and Blanching the Orange Slices
First, we tackle the slicing. This needs to be as uniform as possible so all your slices cook evenly. I aim for about 1/8 inch thick—not paper thin, but definitely not chunky wedges either. Liam showed me how to use a steady hand and a sharp knife, making sure the slices came out looking almost identical. That consistency really helps them absorb the syrup evenly later on.
Next up is the blanching. This is a non-negotiable step if you want that perfect sweet and tangy flavor, not bitter rind! Put your slices in a pot, cover them with 2 cups of fresh water, bring it to a boil, and let them simmer for five minutes. Drain them really well. Seriously, shake out all that water. You are rinsing away the harshness before they even meet the sugar!
Simmering in Simple Syrup for Candied Orange Slices
Now we create the environment for beautiful candied orange slices. In that same pot, whisk together the 4 cups of sugar and 2 cups of water, plus that tablespoon of lemon juice, until the sugar dissolves completely over medium heat. Once it’s simmering nicely, gently slide in your blanched orange pieces.
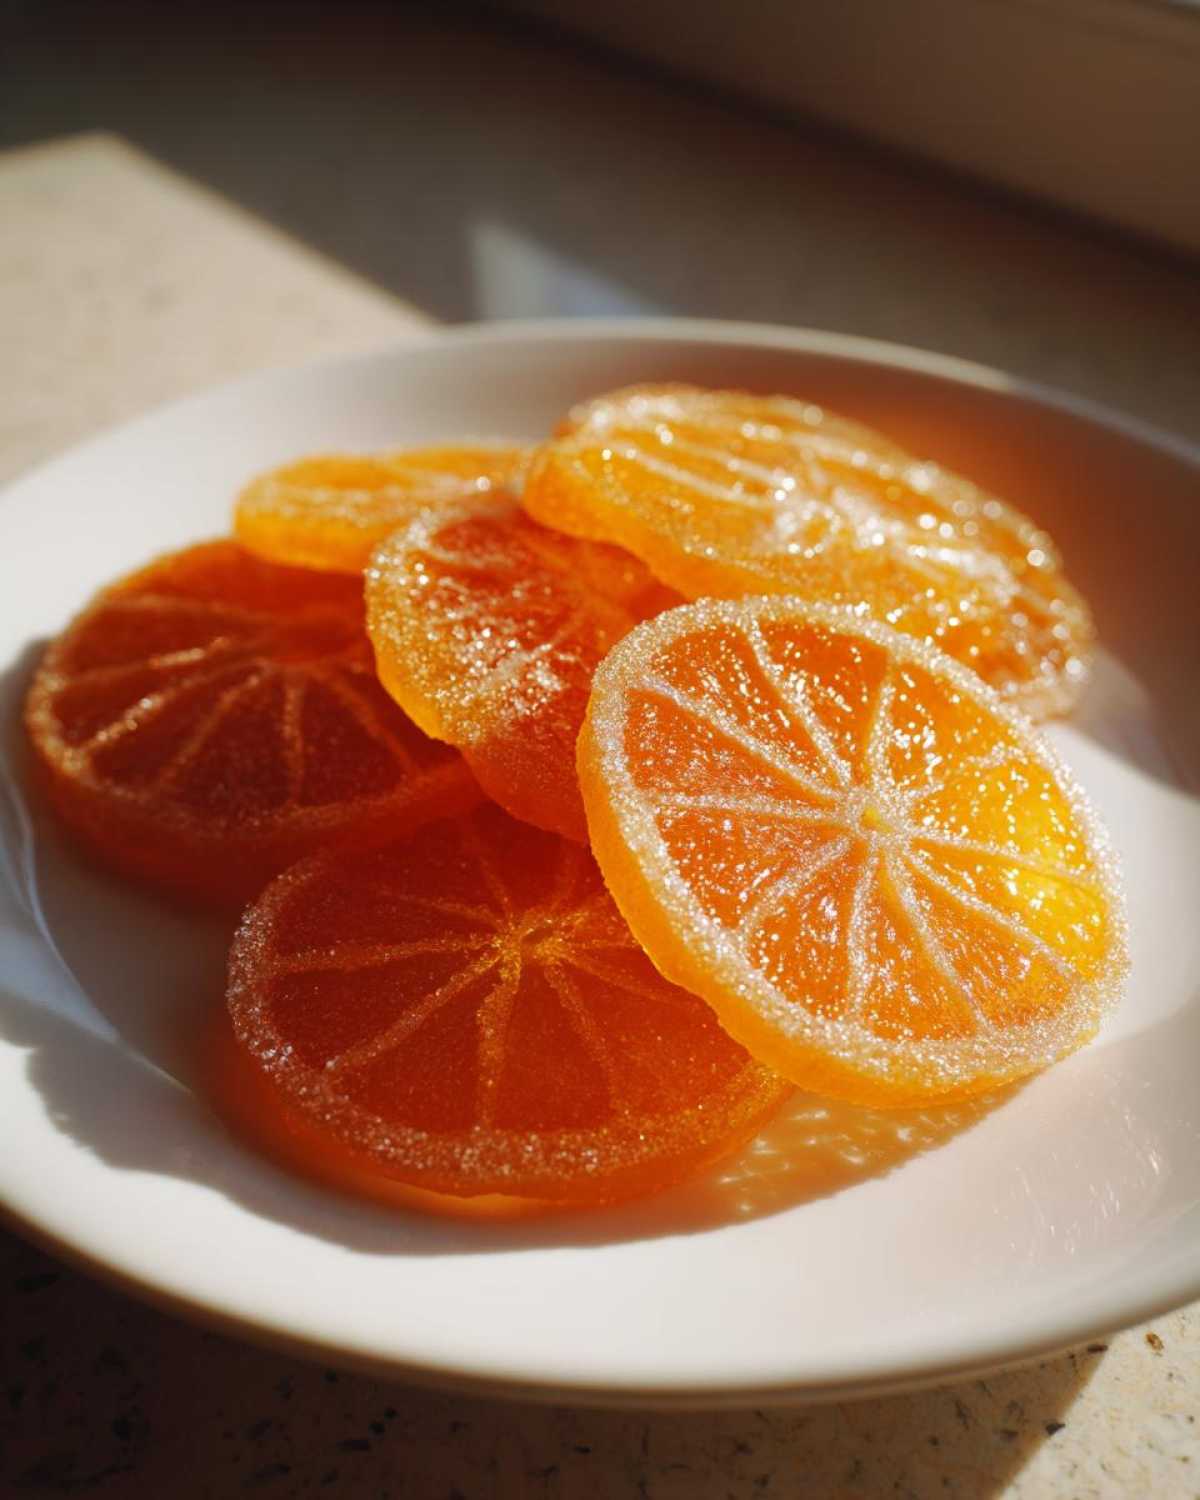
Keep the heat low—we want a lazy, lazy simmer here, nothing aggressive. Let them cook for about an hour to an hour and a half. The signal that they are ready for the next step isn’t firmness; it’s transparency! They should look glossy and translucent, like stained glass. But here’s the big secret: they come out even better if you turn the heat off and just let them soak in that warm syrup for at least four hours, or better yet, overnight. They absorb so much more sweetness this way!
Drying Methods for Chewy Candied Citrus
Once they’ve soaked up all that lovely syrup, gently fish them out and let the drips fall back into the pot. Now we dry them so we get that chewy texture we’re after. You have two solid options here.
The first is the oven method. Set your oven super low—I mean 175°F (80°C) low. Lay them in a single layer on a wire rack over a sheet pan, and bake for maybe 2 to 3 hours, flipping them halfway through. The goal is mostly dry, but still soft enough to bend a little bit when you touch them.
If you’re worried about turning the oven on, room temperature works too! Just leave them on the rack uncovered for one to two full days. Just check on them periodically!
Finishing Touches: Sugar Coating or Chocolate Dipped Candied Orange Slices
Okay, we’ve got our beautifully chewy citrus candy, and honestly, they are already perfect just as they are. But I love giving people options! These finishing touches take your candied orange slices from homemade deliciousness to absolute showstoppers. You can choose based on what you’re using them for!
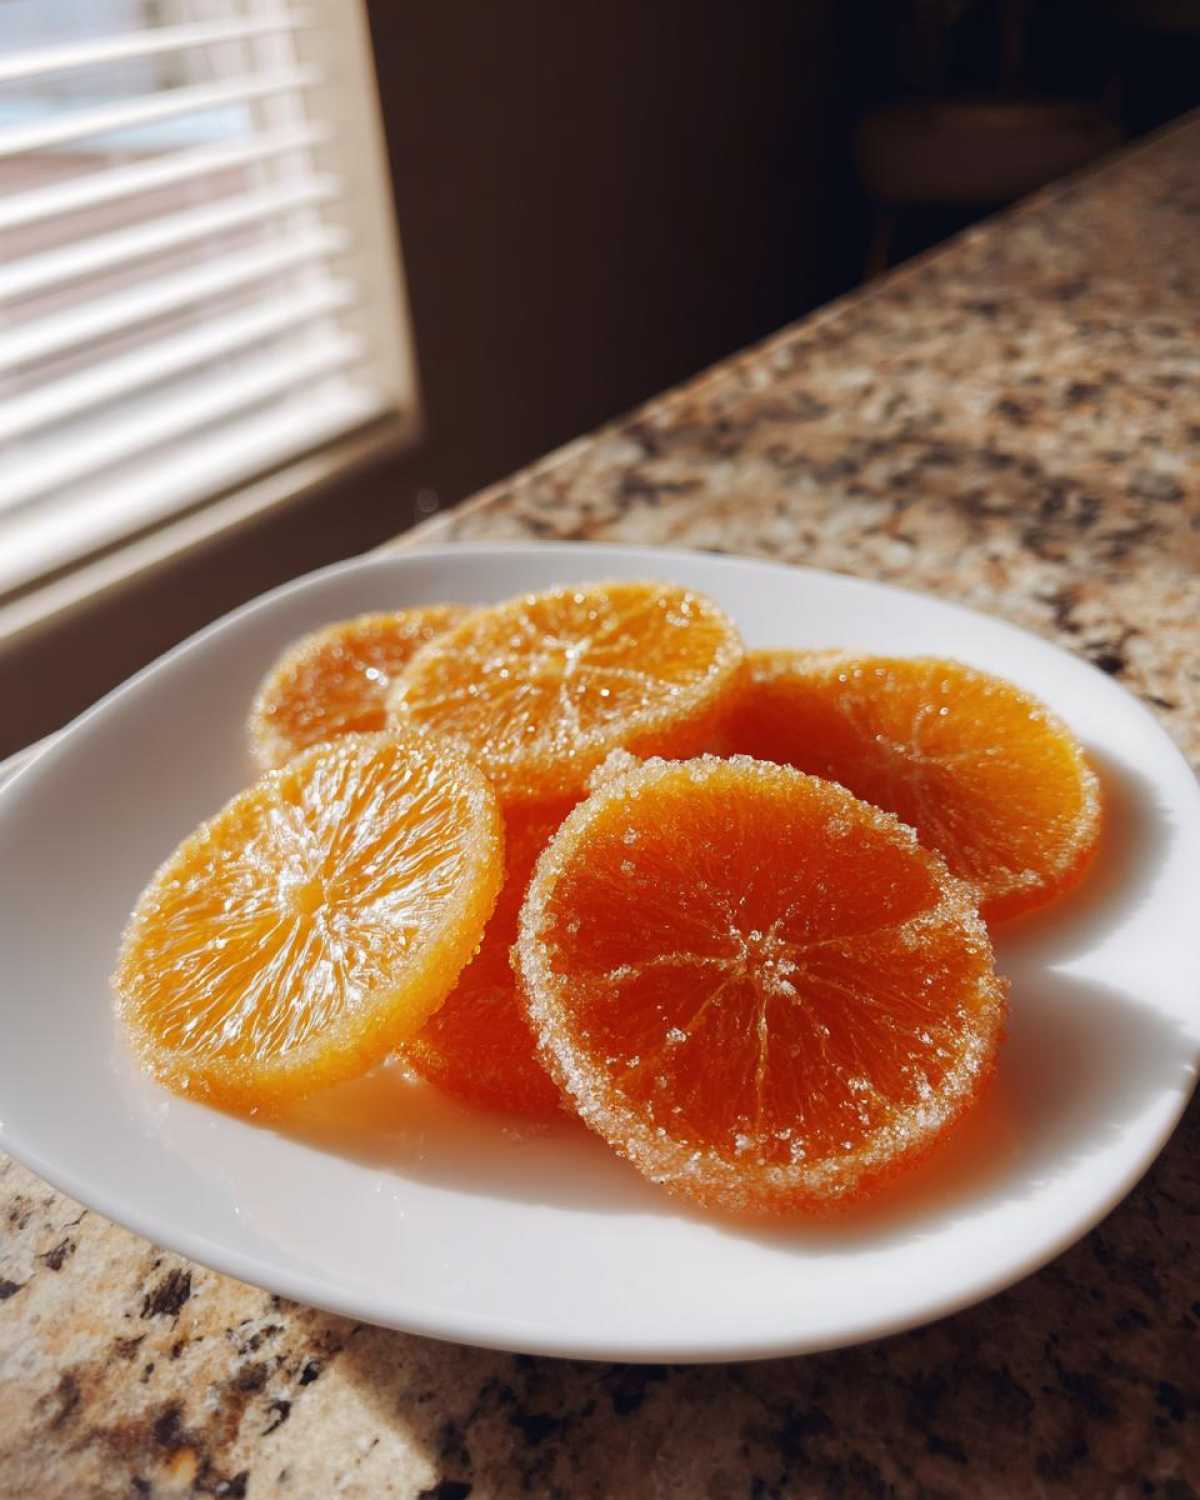
If you want that classic, sparkly look that screams holiday treat, you’ll want to give them a little roll in granulated sugar while they are still slightly warm from the oven or air drying. It gives them a lovely texture and a great grip. I just use a small bowl, toss them gently, and then lay them out again on parchment paper to set completely.
But if you want to go full gourmet—the kind of treat that makes everyone ask for the recipe—we have to talk about dipping them in chocolate! This is my favorite way to present them for gifting. You’ll need some good quality dark or milk chocolate. Melt it down slowly—I use a double boiler setup, but you can check out our chocolate melting tips if you want to try the slow cooker method, which is super easy!
Once your chocolate is smooth and glossy, carefully dip about half of each dried orange slice. You don’t want to overwhelm the citrus flavor, just give it a beautiful, rich contrast. Lay those dipped slices on parchment paper—this is key because they will stick instantly to anything else! If you want to take it over the top, sprinkle just a tiny pinch of flaky sea salt over the wet chocolate. The contrast between the sweet-tangy orange, the bitter chocolate, and the salty flake? Wow. That’s a winner right there.
Tips for Success When Making Candied Orange Slices
Even with a roadmap, sometimes things don’t go exactly as planned in the kitchen, right? That’s normal! When I was first mastering these beauties, I had a few batches turn into sticky messes or rock-hard discs. Liam always said that paying attention to the temperature and time was what separated the good attempts from the great ones. If you want to read some of my other quick lessons I’ve learned along the way, check out our main blog page!
Here are the things I learned the hard way that will make your candied orange slices absolutely fantastic on the first try:
- Don’t Rush the Soak: I know waiting feels like torture, especially after you’ve put in the work simmering them. But seriously, that overnight soak after cooking? That’s when the sugar moves deep into the pith where it needs to go. If you pull them out too early, the outside will be sweet, but the inside will still taste like bitter orange peel.
- Keep the Syrup Gentle: When you return the slices to the syrup to cook, you absolutely must keep the heat on the lowest setting. If you boil them too hard during that 90-minute simmer, the slices will tear apart easily. We want them turning glossy, not getting scrambled!
- Crystallization Control: If you notice sugar crystals forming on the sides of your pan while you are simmering, wipe them down with a wet pastry brush. If those stray crystals fall back into the syrup, they can sometimes encourage the entire batch to crystallize (get grainy). Just a little trick to keep things smooth!
- Go for the Color Show: For that truly gourmet orange dessert look that people always ask about, don’t stick just to Navel oranges! Try alternating with ruby red Blood Oranges or even Meyer lemons if you want a slightly tarter flavor mixed in. The resulting platter of mixed citrus looks stunning.
Storage and Keeping Your Sweet and Tangy Orange Slices Fresh
Once you’ve gone through all those steps—blanching, simmering, soaking, and drying—the last thing you want is to ruin your beautiful work by storing them incorrectly! I’ve definitely been guilty of tossing finished batches into the first container I found, only to have them turn sticky or lose their zing later on. If you want to make sure your hard work pays off, you need to treat these delicate candied orange slices right when putting them away.
The great news is that because we cooked these down in that sugar syrup, they are naturally preserved when dried properly! You don’t need the fridge, which is fantastic for freeing up space. Just make sure they are completely, totally dry before you seal them up. If there is any residual moisture, you risk them getting moldy or just overly sticky.
For general storage, grab any airtight container. A simple plastic container with a good snap-on lid or a nice glass jar works perfectly as long as you seal it tight. Keep them tucked away in a cool, dark cupboard. Stored this way, they should be absolutely fantastic for up to two weeks! That’s usually how long my batches last before Liam and I devour them.
But what happens if they get a little dry after a week or so? Sometimes the air in the house tries to steal all the moisture! Don’t panic. If your citrus candy starts feeling a little too stiff, you can bring it back to life easily. You can actually dunk your dried slices back into the leftover simple syrup—the syrup you saved from Step 5 of the recipe! Just a very quick dip, maybe 10 seconds per side, and then lay them back out on a clean piece of parchment paper for a few hours to dry just the surface again. They bounce right back to that perfect chewy texture!
Also, for reference on using our site, remember that by using our recipes, you agree to our Terms and Conditions, but cooking tips are always free!
Serving Suggestions for Your Homemade Citrus Candy Recipe
Now that you have a jar full of these stunning, shiny beauties, the fun really starts! I sometimes think making the candied orange slices is just practice for figuring out all the incredible ways you can actually use them. When Liam and I first made these, we just snacked on them, but they are so much more versatile!
Trust me, these little jewels elevate any simple dessert or platter you make. I always keep a batch ready because you never know when the moment will strike to add a little zing!
- The Ultimate Edible Orange Garnish: This is my number one use, especially when I’m baking for holidays or company. Forget those stiff, artificial-looking candies—these look so elegant. Place one right on top of a chocolate cheesecake, stick a few into the frosting swirls of a simple loaf cake, or drape them over a bundt cake. If you need inspiration for using them on cakes, check out our guide on how to prepare an orange slice recipe for cake decoration!
- Charcuterie Board Stars: If you’re putting together a cheese board, these need to be on it. Seriously. They pair *so* well with salty, aged cheeses like Parmesan or sharp cheddar. The way the bright, sweet orange cuts through the savory fat is just divine. Liam loves pairing them with brie and salty prosciutto.
- Cocktail Magic: Remember how I told you to save that leftover syrup? Well, the slices themselves can be your garnish! Skip the maraschino cherry next time you make a classic Old Fashioned or a Gin Rickey. A single, perfect, sugar-glazed orange slice perched on the rim makes that drink feel instantly sophisticated.
- Simple Snack Upgrade: Sometimes, you just want a winter citrus treat because you’re craving something bright. A handful of these is far better than reaching for processed candy. They feel wonderfully energizing and satisfyingly chewy.
- Gifting Handmade Goodies: Package them up in small cellophane bags, tie them with twine, and you have an instant, thoughtful holiday orange gift for your neighbors or teachers. People appreciate handmade things so much more than anything store-bought!
Frequently Asked Questions About DIY Orange Candy
I always get the same type of questions when I share this recipe, and that’s wonderful! It means you’re thinking seriously about making these, and I love that. It’s my job here at TasteTaught to make sure you don’t run into any pitfalls I stumbled over learning how to candy fruit at home myself. We want that perfect, chewy candied citrus every time!
Can I skip the blanching step in this easy citrus candy recipe?
Oh, please don’t! I know it seems like an extra bother—boiling the fruit only to immediately dump the water out—but that blanching step is your insurance policy against bitter candy. The white pith underneath the sweet skin holds onto a lot of the bitter oils. If you skip it, you will end up with sweet and tangy orange slices that have a sharp, unpleasant bite to them. Blanching softens that layer and washes away the harshness so only the sweet citrus flavor concentrates during the simmer.
What is the best way to use these as an edible orange garnish?
When you want to use these as an edible orange garnish, presentation is everything! If you’re decorating a cake, I suggest taking the slices that you *didn’t* coat in sugar or chocolate. You want that pure, translucent, jewel-like appearance so people can see the full cross-section of the orange. Arrange them overlapping slightly on top of buttercream or dark chocolate ganache. Because they are naturally sticky on the surface after drying, they usually sit quite nicely without sliding around, especially if you let them cool completely before placing them.
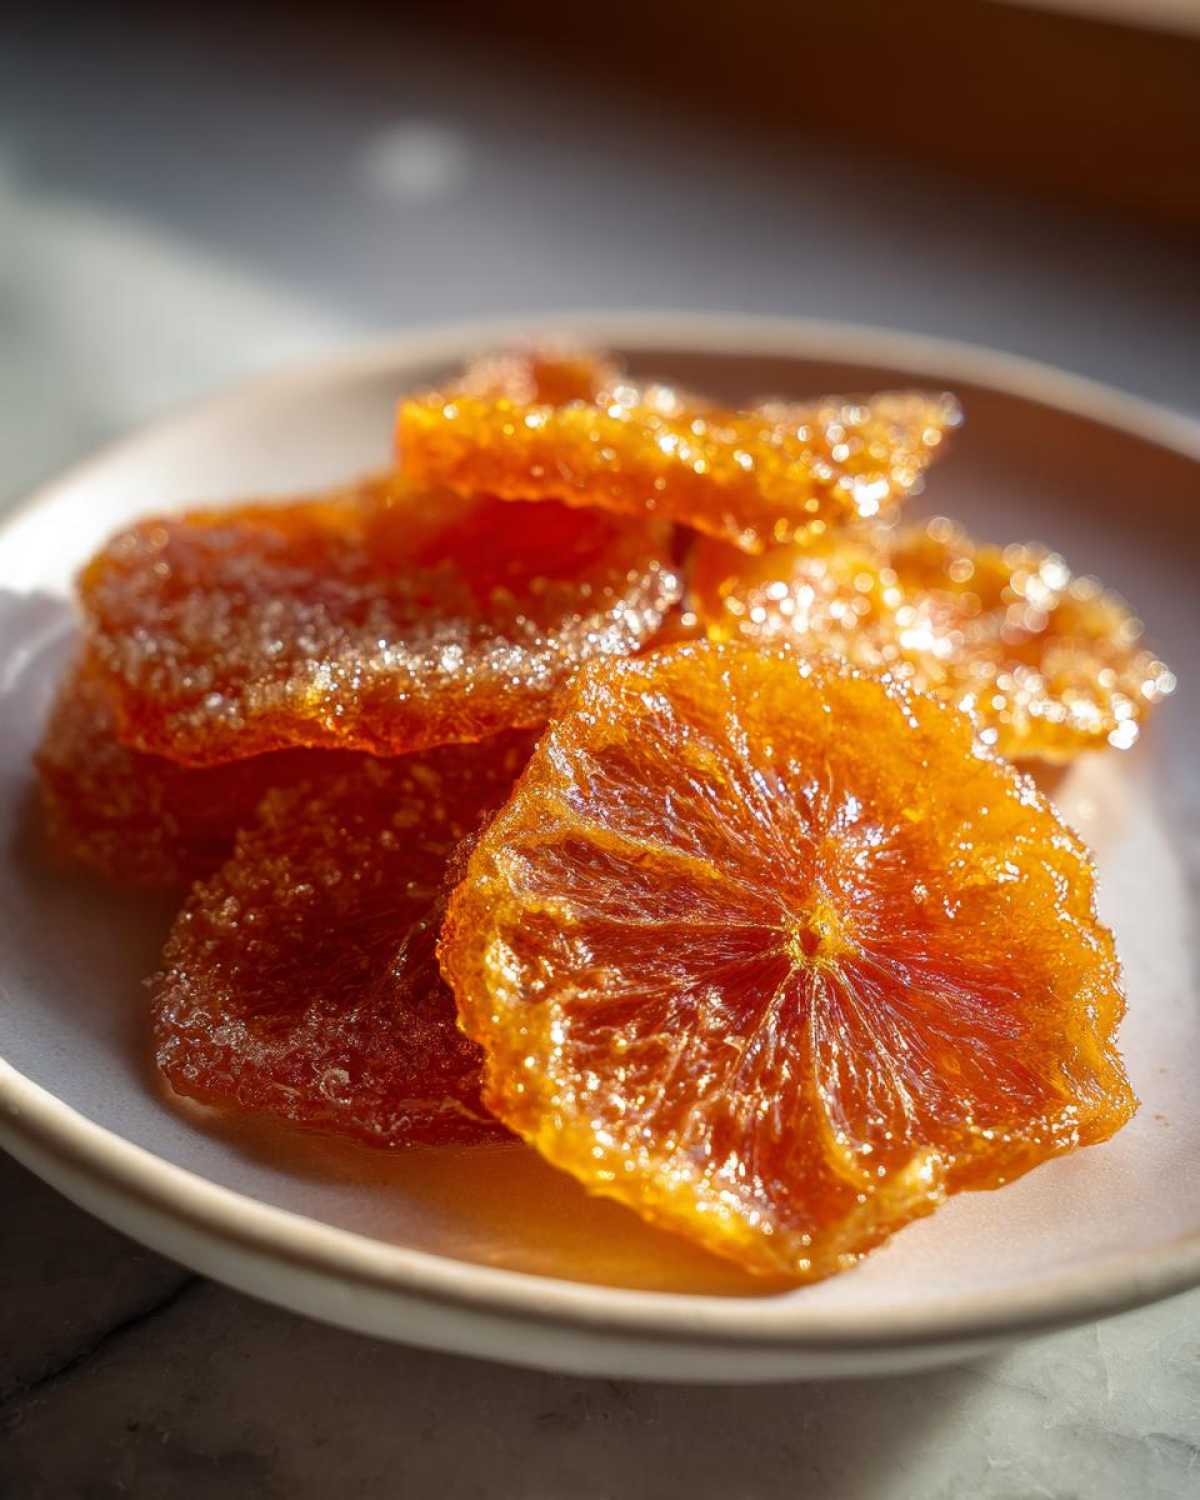
Also, remember that we mentioned using different colors? If you’re using these to decorate, mix in some candied grapefruit slices or maybe even candied lemon slices for a beautiful, varied look. It makes your dessert look like something they sell in a fancy bakery!
If you have any other questions about site usage or copyright, please check out our legal disclaimer, but rest assured, cooking advice is always here for you!
Estimated Nutritional Information
Okay, let’s talk numbers! I always include this section because while we’re focused on making something truly delicious and beautiful with these candied orange slices, I know how important labels can be. Liam reminds me that even though this is a treat, knowing what’s in it is good practice, which is why we try to be as transparent as possible about everything on the site, even our Cookie Policy!
Please remember that these values are just estimates based on the specific ingredients and proportions listed in the recipe. If you use Blood Oranges instead of Navel, or if you dip half of them in chocolate (which is highly recommended!), the numbers will shift a bit. These figures reflect two slices that have *not* been sugar-coated or dipped in chocolate.
- Serving Size: 2 slices
- Calories: 180
- Sugar: 42g (This is where that syrup goes, naturally!)
- Sodium: 2mg
- Fat: 0.2g
- Saturated Fat: 0g
- Unsaturated Fat: 0.1g
- Trans Fat: 0g
- Carbohydrates: 47g
- Fiber: 1g
- Protein: 0.5g
- Cholesterol: 0mg
So, as you can see, it’s definitely a sweet indulgence, but it’s made from real fruit, which makes me feel a little better about snacking on them all afternoon!
PrintThe Ultimate Guide to Perfect Homemade Candied Orange Slices: Sweet, Tangy, and Glossy

Learn how to make beautiful, jewel-like candied orange slices at home. This easy recipe results in sweet and tangy citrus candy, perfect for garnishing desserts, holiday platters, or giving as thoughtful edible gifts.
- Prep Time: 20 min
- Cook Time: 90 min
- Total Time: 4 hours 50 min
- Yield: About 3 dozen slices
- Category: Dessert
- Method: Simmering and Drying
- Cuisine: American
- Diet: Vegetarian
Ingredients
- 3 large Navel or Blood Oranges (about 1.5 lbs total)
- 4 cups water, divided
- 4 cups granulated sugar, divided
- 1 tablespoon fresh lemon juice
Instructions
- Prepare the Oranges: Wash the oranges well. Slice them thinly, about 1/8 inch thick. If you see seeds, remove them.
- Blanch the Slices: Place the orange slices in a medium saucepan. Cover them completely with 2 cups of water. Bring the water to a boil over medium-high heat. Once boiling, reduce heat and simmer for 5 minutes. Drain the slices completely in a colander. This step removes some of the bitterness.
- Make the Simple Syrup: In the same saucepan, combine the remaining 2 cups of water and 4 cups of sugar. Heat over medium heat, stirring until the sugar dissolves completely. Add the lemon juice.
- Simmer the Oranges: Add the blanched orange slices to the simmering syrup. Reduce the heat to low. You want a very gentle simmer. Cook for 1 to 1.5 hours, turning the slices occasionally. The slices are ready when they look translucent and slightly glossy.
- Cool and Soak: Remove the saucepan from the heat. Let the orange slices soak in the syrup for at least 4 hours, or preferably overnight, at room temperature. This allows them to fully absorb the sweetness.
- Drain the Slices: Remove the slices from the syrup using a slotted spoon or fork. Let excess syrup drip off briefly. Save the leftover syrup for cocktails or tea.
- Dry the Slices: You have two drying options. For a quick dry, place the slices in a single layer on a wire cooling rack set over a baking sheet. Bake in a very low oven (175°F or 80°C) for 2 to 3 hours, flipping halfway through, until they feel mostly dry but still slightly pliable. For air drying, leave them on the rack at room temperature for 24 to 48 hours until dry.
- Finish (Optional): If you want a sugar-coated finish, toss the slightly warm, dried slices in a small bowl of granulated sugar until coated. For chocolate dipped candied orange slices, melt dark or milk chocolate and dip half of each slice, letting them set on parchment paper.
Notes
- For a gourmet orange dessert look, try using Blood Oranges or Cara Cara oranges for natural color variation.
- The leftover simple syrup is excellent for sweetening iced tea or making simple syrup for cocktails.
- If you plan to use these as an edible orange garnish, skip the heavy sugar coating for a cleaner look.
- Store your finished candied orange slices in an airtight container at room temperature for up to two weeks.
Nutrition
- Serving Size: 2 slices
- Calories: 180
- Sugar: 42g
- Sodium: 2mg
- Fat: 0.2g
- Saturated Fat: 0g
- Unsaturated Fat: 0.1g
- Trans Fat: 0g
- Carbohydrates: 47g
- Fiber: 1g
- Protein: 0.5g
- Cholesterol: 0mg