

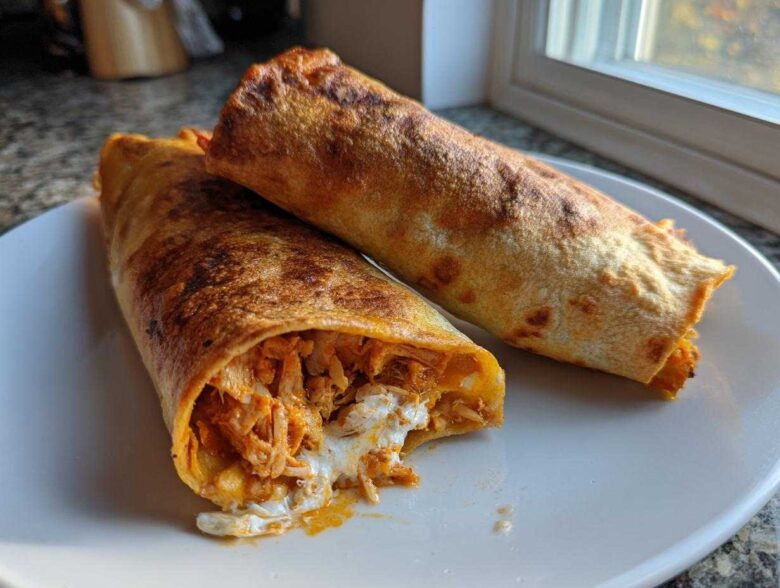
Oh, that craving, right? That deep, undeniable need for something crunchy, cheesy, and perfectly seasoned with that unmistakable Tex-Mex vibe, but you look at your counter and think, “There is zero chance I am deep frying anything tonight.” Me too! That’s exactly why Liam spent an afternoon proving to me that the oven can, in fact, create that magical crispiness we all want. It was a game-changer for our weeknight routines!
Today, I’m sharing the recipe that lets us hit that spot every time: our incredibly easy and surprisingly crispy Baked Chicken Chimichangas. We were totally inspired by those classic Chi-Chi’s style rolls, but honestly, these are much better for a quick Weeknight Mexican Dinner because cleanup is a dream. You get the golden shell, the juicy filling, and you don’t have oil spitting everywhere. Trust me, if I, Clara, can get them crispy this way, anyone can! You can check out more of our teaching moments and recipes over on our main blog page at our blog.
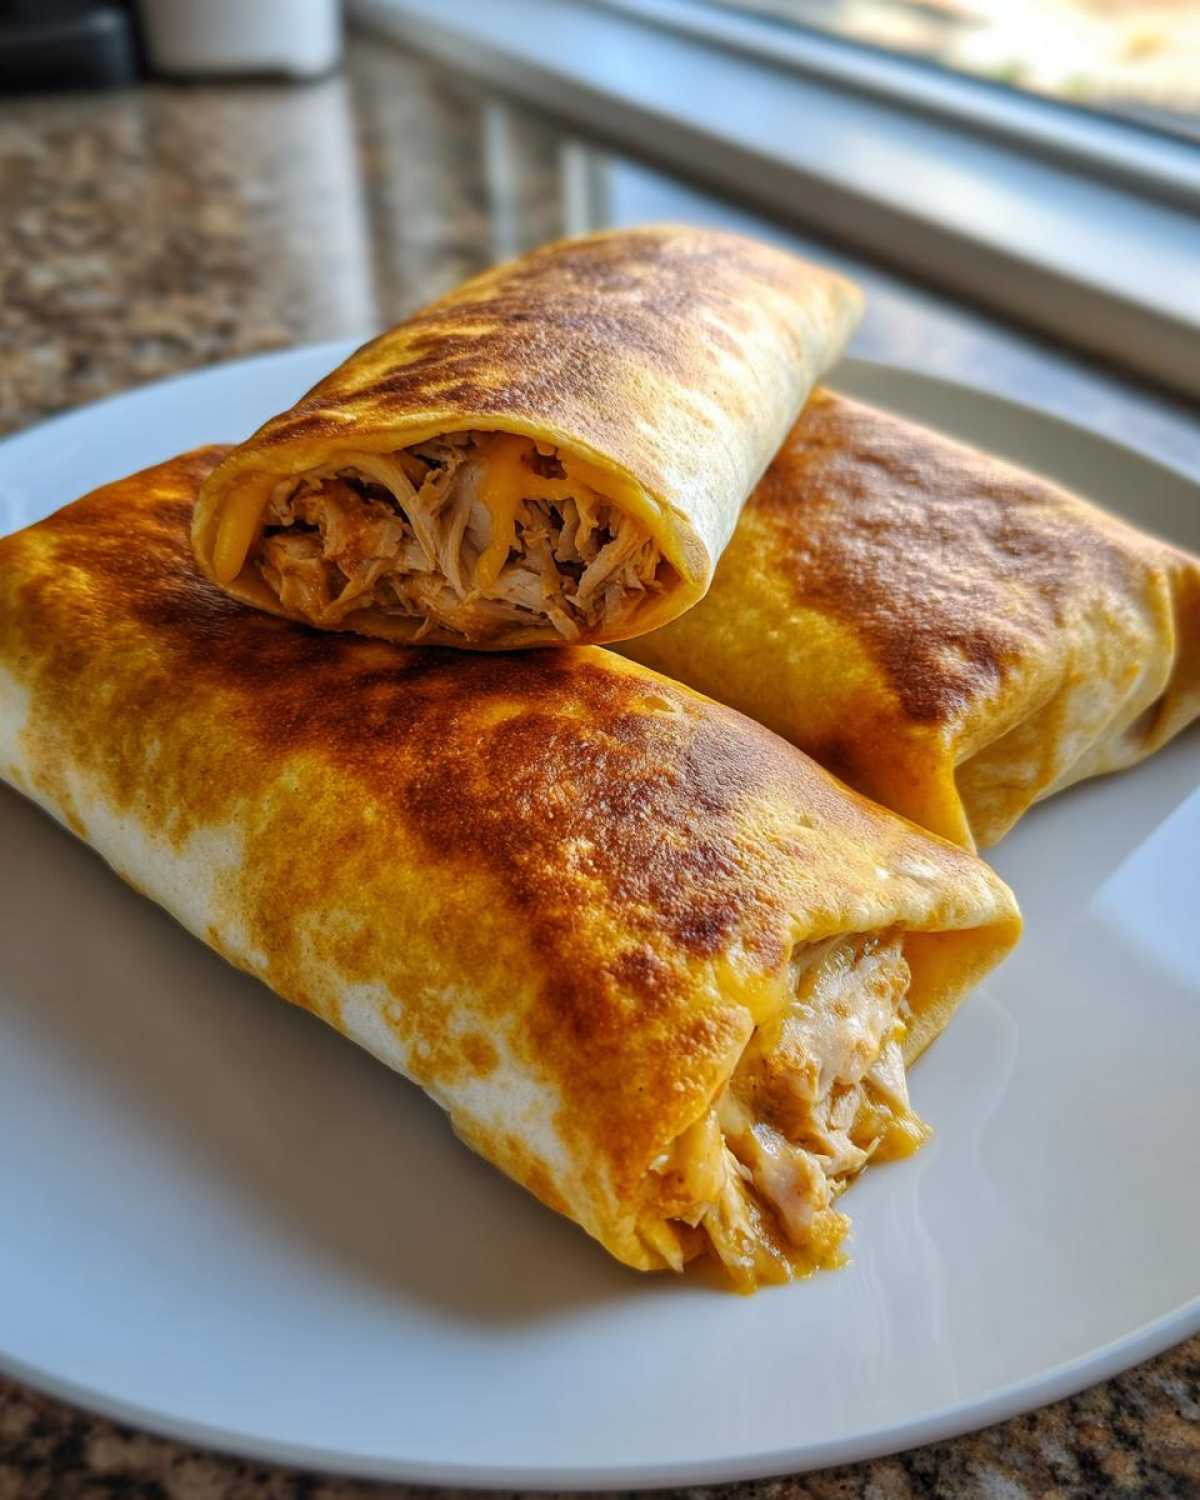
Why You Will Love These Easy Baked Chicken Chimichangas
It’s one thing for Liam to tell me something is good; it’s another when I actually taste how amazing it is, especially when it’s healthier! These Baked Chicken Chimichangas hit every single craving note without making me feel weighed down afterward. Seriously, they are winners.
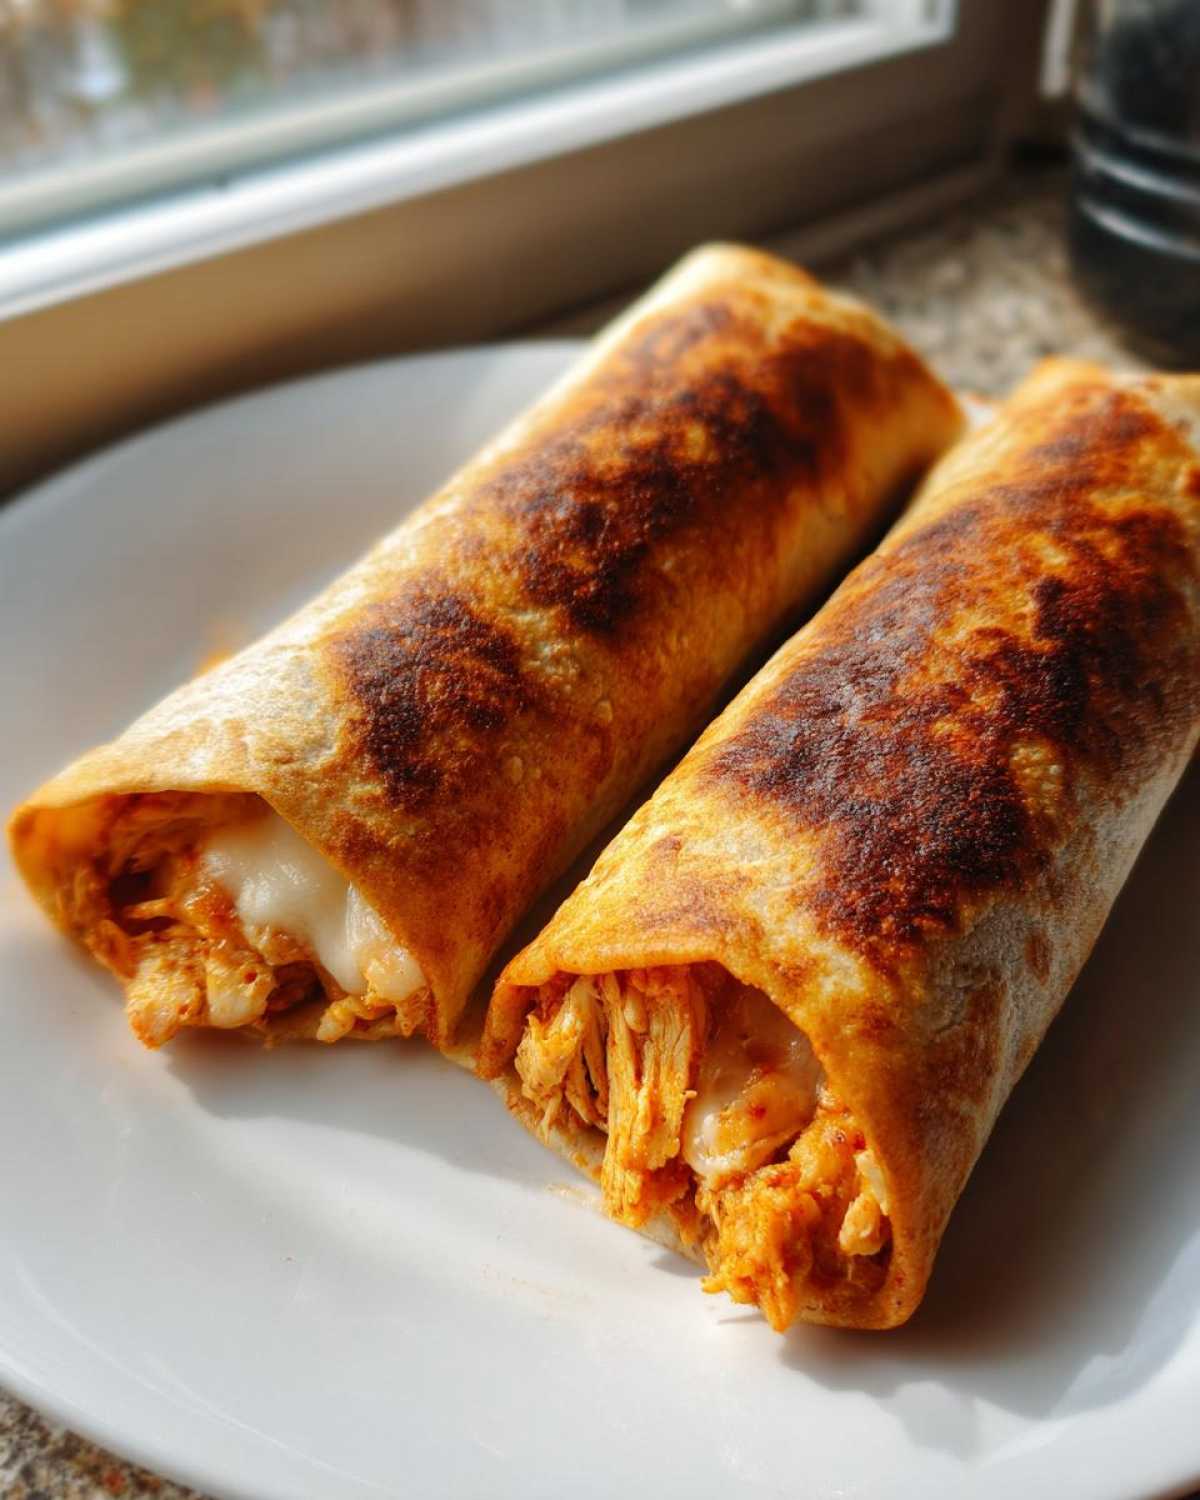
- Seriously Crispy Texture: I know, I know, they are baked! But trust me, with our brushing technique, you get that satisfying crunch that rivals any deep-fried version. It’s culinary magic, I promise!
- Light on Oil, Heavy on Flavor: We use just a quick brush of olive oil, which makes these a much more Healthy Chicken Chimichangas option. You get all the Tex-Mex punch with way less guilt.
- Super Quick Prep: You saw the times! If you start with leftover or rotisserie chicken, you can seriously have these rolled, brushed, and baking in under 20 minutes. Perfect for those nights when you need a Quick Chicken Recipe.
- Restaurant Vibe at Home: That seasoned filling and golden shell truly mimic the classic flavor profiles we all remember from the good old days of going out for Mexican food. Hello, Chi Chis Style Baked Chimichangas!
- Family Approved: My nephew usually turns his nose up at anything requiring utensils, but he devours these. They are filling, cheesy, and fun to eat, making them a total Family Favorite Mexican Food.
- Perfect for Cheese Dips: If you want to dunk these golden rolls into something creamy, go for it! This recipe pairs perfectly with our Quick Creamy Homemade Nacho Cheese—no judgment here!
Essential Ingredients for Crispy Baked Chimichangas Recipe
Okay, listen up! This recipe is a lifesaver because the ingredient list is so short, and it mostly relies on things I always keep stocked. Liam says the magic is in the seasoning proportions, but I say the magic is in not having to buy twelve random things every time we want Tex-Mex!
For the filling, we need that flavorful base. Make sure you have:
- 2 cups cooked, shredded chicken (Remember, using a rotisserie chicken here is the ultimate hack for making this one of our best Quick Chicken Recipes. Seriously, roast chicken is our secret weapon for fast dinners!)
- 1 teaspoon chili powder
- 1/2 teaspoon cumin
- 1/2 teaspoon garlic powder
- 1/4 teaspoon dried oregano
- 1/4 teaspoon salt
- 1/4 teaspoon black pepper
- 1/4 cup chicken broth or water (This is key so that the spices actually coat everything!)
- 1 cup shredded Monterey Jack or Mexican blend cheese (We like the mix—it melts beautifully.)
Then, for the rolling and crisping, make sure you have the essentials ready. You’ll want:
- 8 medium flour tortillas (The standard burrito size works best for tightly wrapping.)
- 2 tablespoons olive oil or melted butter, for brushing (This is the good stuff that turns them golden!)
- Cooking spray (Just for a little insurance on the pan.)
If you’re looking for ideas on how to get that shredded chicken cooked perfectly beforehand, we have a great recipe for slow-cooker pulled chicken you can prep ahead of time—it’s perfect for stocking up for meals like these! Check out that recipe right here.
The Secret to How to Make Baked Chimichangas Crispy
We all know the big question when we talk about oven versions: Will they turn out soft and sad? Absolutely not! Liam figured out early on that the key ingredient here isn’t in the filling; it’s in the exterior prep. To get that incredible, golden crunch reminiscent of the classic Chi-Chi’s style, you have to treat the outside of the tortilla like you mean it.
Don’t just spritz them! We need to brush them generously with olive oil or melted butter right before they hit the oven. This fat cooks out the moisture and creates that firm, crackly shell you’re after. And here’s the non-negotiable step for any great Baked Chicken Chimichangas: you must flip them halfway through baking! Flipping ensures both sides get fully exposed to the heat, turning them evenly golden brown. If you want more tips on getting crispy results without the mess, check out this guide here. Learning this technique made me stop missing the fryer entirely! Don’t forget to have some creamy dip ready, like our bisquick sausage balls if that’s what you had planned, because these are great for dipping!
Prepping the Tortillas for Perfect Texture
If you try to roll a cold, stiff flour tortilla, you are going to end up with jagged, ripped edges, and the filling will just ooze out. Oops! Liam taught me that you need to warm those tortillas up just enough so they become utterly pliable. About 15 seconds in the microwave (stacked, covered with a paper towel) is usually perfect. This stretchiness allows you to fold and roll them super tightly without any cracks appearing. Tight rolling equals a stable roll that stays shut!
Step-by-Step Instructions for Oven Baked Chicken Chimichangas
Alright, this is where the fun really starts! Once those shells are warm and ready to go, we assemble these amazing Oven Baked Chicken Chimichangas. First things first: make sure that oven is cranked to 400°F (200°C) and you’ve lightly greased your baking sheet. Don’t skip the prep! Getting the filling right and rolling them tightly are the secrets to a successful bake. If you’re looking for even more easy dinner inspiration, you can check out our easy puff pastry apple strudel recipe—it’s a totally different flavor profile, but just as easy!
Mixing the Flavorful Shredded Chicken Filling
Grab a medium bowl and toss in your shredded chicken. Now, add all those spices: chili powder, cumin, garlic powder, oregano, salt, and pepper. Mix it around so every piece of chicken gets coated in that amazing flavor. Next, add that little splash of broth or water. This step stops the filling from being too dry and helps the seasonings really cling. I always give it a proper taste test right here before rolling. If it needs more zing, now is the time to add it! We don’t want the filling to be swimming in liquid, just evenly coated and moist.
Rolling and Sealing Your Chimichangas
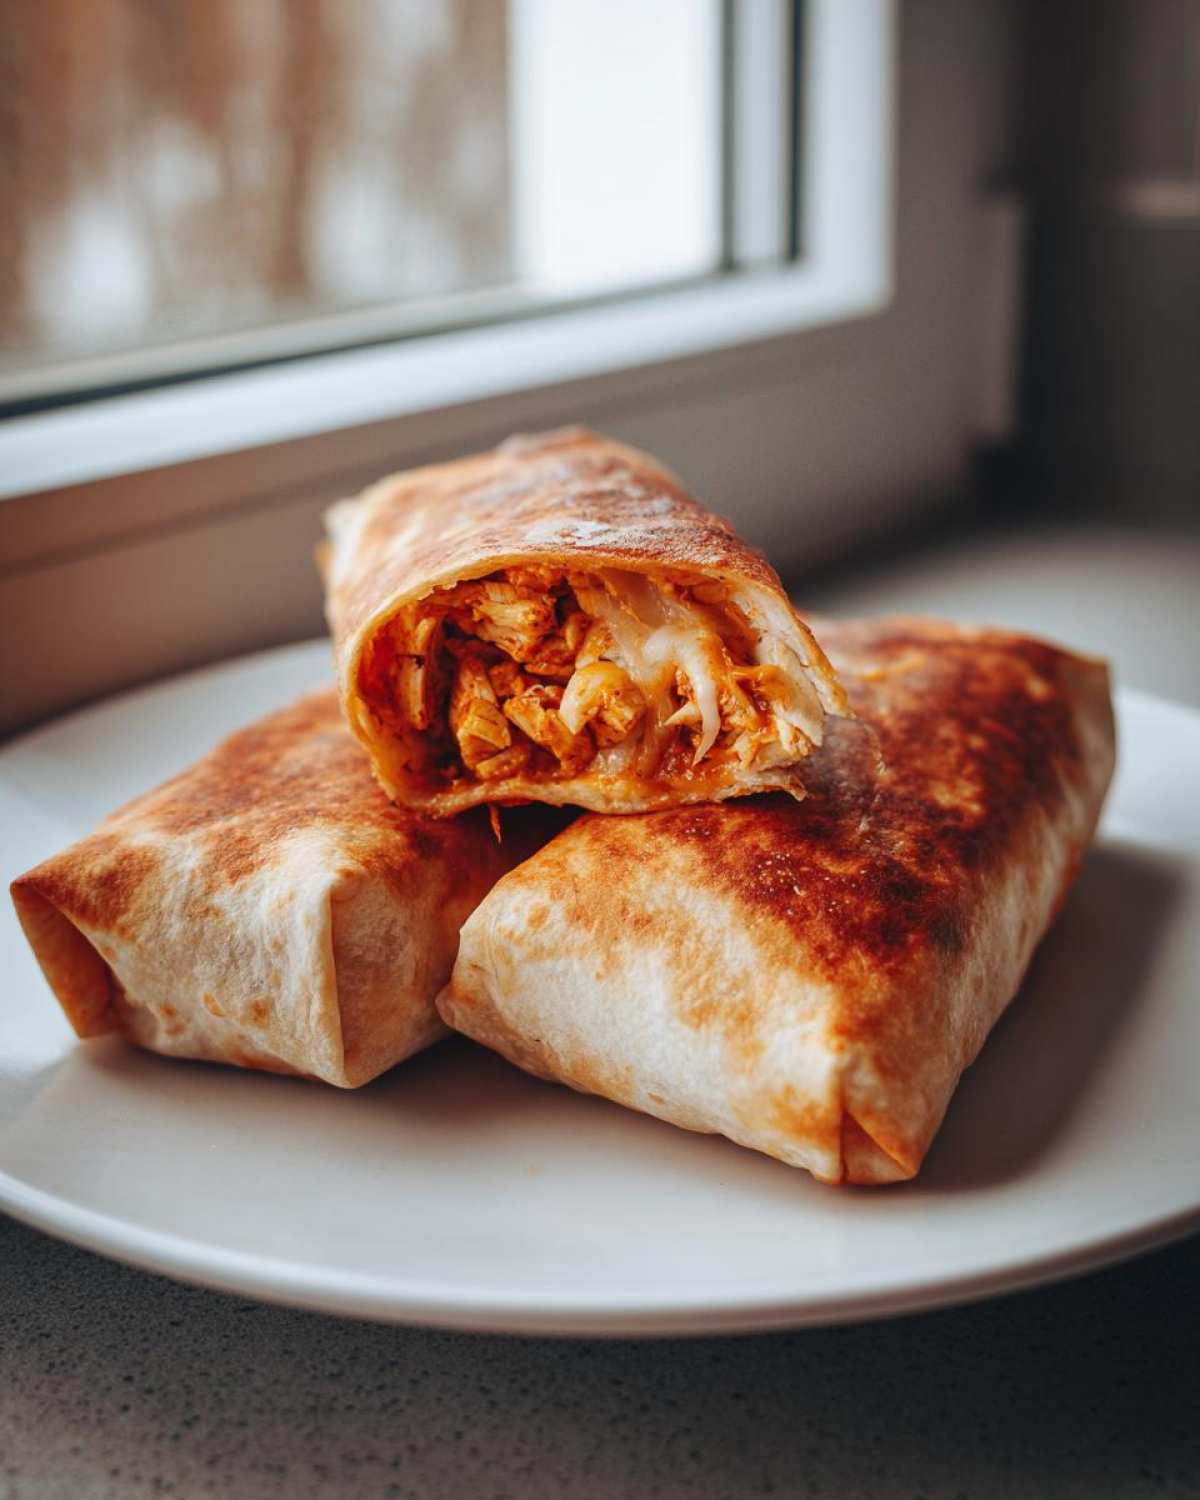
Take one of your warmed tortillas. Put about a quarter cup of that seasoned chicken mixture right in the center, and follow that up with a sprinkle of cheese—not too much, or it will try to escape! The technique is key here for keeping everything tucked in. First, fold those two opposite sides inward, right over the filling, like you’re tucking in the ends of a letter. Then, starting from the bottom edge, roll it up really tightly, just like a standard burrito. Place it seam-side down on that greased pan. A tight roll equals a beautifully golden exterior later! For more dependable Tex-Mex ideas, check out the tips over here.
Serving Suggestions for Your Family Favorite Mexican Food
We are so close to digging in! But let’s be real—a chimichanga isn’t complete until it’s absolutely loaded with toppings. Since these Baked Chicken Chimichangas are already a lighter option, we don’t have to hold back on the creamy, zesty stuff we love. These are absolutely a Family Favorite Mexican Food because everyone gets to customize their own plate!
Liam usually goes for a scoop of guacamole and a hearty dollop of sour cream. Me? I need heat! A good salsa is mandatory. If you want something really bright to cut through that cheesy filling, you have to try the sauce we made for taco night—it’s a 5-minute cilantro lime sauce, and it is honestly divine drizzled over the top.
Here are my must-haves:
- Salsa (Pico de gallo always tastes the freshest!)
- Sour Cream or Plain Greek Yogurt (For cooling down the spice!)
- Guacamole or fresh avocado slices
- Shredded lettuce (For that extra bit of crunch)
- A sprinkle of fresh cilantro
Honestly, you can serve them right out of the oven with a side salad, or piled high on a platter for game day. No matter how you serve them, they disappear fast!
Storage and Reheating Instructions for Less Oil Chimichangas Recipe
One of the best things about making these Baked Chicken Chimichangas is that they are just as good the next day! Seriously, they are fantastic for meal prep because they were baked and not fried, meaning they don’t get quite as soggy overnight. If you end up with leftovers—which I doubt you will, since these are so addictive—you’ll want to store them properly to keep that crunch potential alive.
Once they are completely cooled down, pop them into an airtight container. You can usually keep them in the fridge for about three or four days. Don’t worry about covering them too tightly, since the baking process made them less oily to begin with, but you want to seal the air out to keep them fresh.
Now, the reheating part is where a lot of people go wrong! If you toss a leftover chimichanga in the microwave, you will instantly lose all the hard work we put into brushing them with oil. It turns them soft and sad, and nobody wants that!
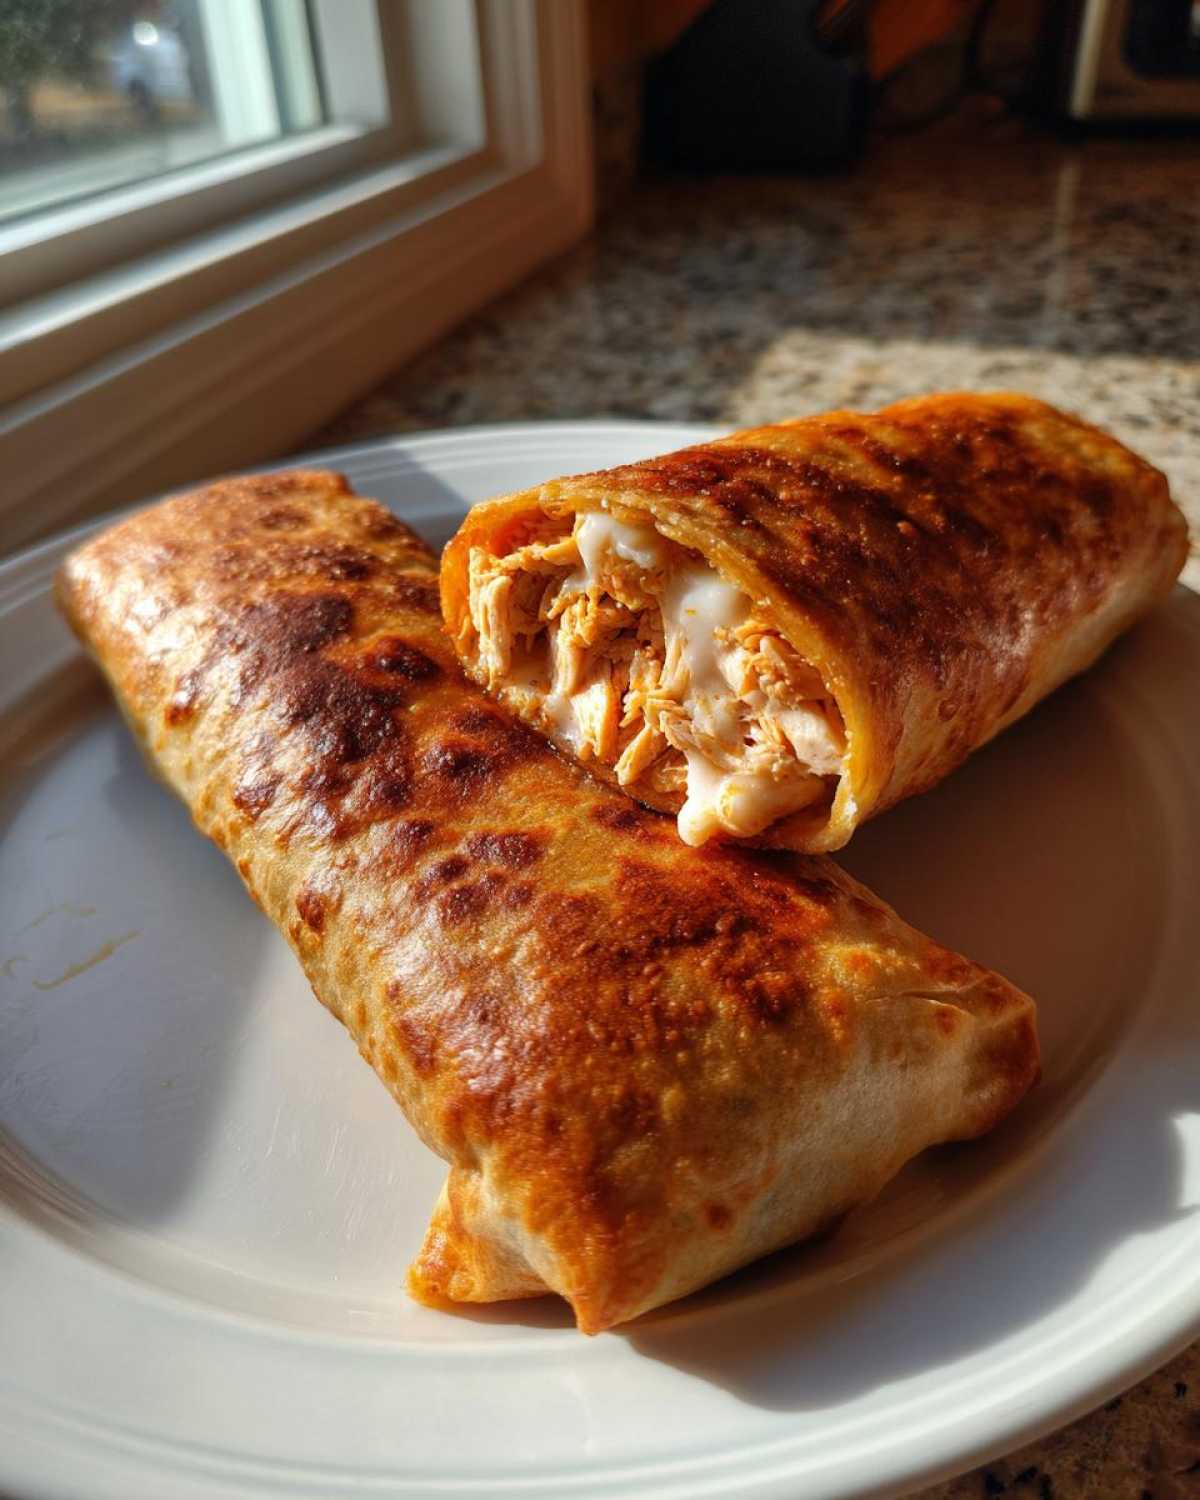
To bring back that glorious, golden, crispy texture, you need dry heat. The oven is my first choice—just set it to 350°F (175°C) and bake them for about 8 to 10 minutes until they heat through and crisp up again. If you have an air fryer, even better! They get amazing in there for about 5 minutes at 375°F (190°C). Seriously, it’s the best way to enjoy your second-day Less Oil Chimichangas Recipe.
If you’re looking for another great recipe you can prep ahead of time, you absolutely have to check out our recipe for Easy Crescent Roll Apple Dumplings later. They reheat just as perfectly!
Frequently Asked Questions About Baked Chicken Chimichangas
I know you probably have a million questions once you see how simple the recipe is! That’s the fun part about cooking with Liam—he always says preparation leads to confidence. When people ask me about swapping ingredients or if they hold up well, I love sharing what we learned while testing these out for our rotation of Tex Mex Dinner Ideas. Here are some of the questions I get asked the most when folks try making my Crispy Baked Chimichangas Recipe.
We’ve gotten pretty good at streamlining this process, and you can find more of our favorite casserole-style recipes like our Easy Tamale Pie if you want another crowd-pleaser!
Can I use corn tortillas instead of flour for these Baked Chicken Chimichangas?
Oh, that’s a tricky one! I really wouldn’t recommend it for this recipe, especially if you are going for that beautiful, tight roll we talked about. Corn tortillas are just too brittle when they get warmed up; they tend to crack and split right when you try to fold the sides in. You’ll end up with filling leaking everywhere instead of those perfectly sealed Shredded Chicken Mexican Rolls. Stick to the standard medium or burrito-sized flour tortillas for the best structure. We need that flexibility so the tortilla holds tight during baking!
Can I make this a Guilt Free Chimichangas recipe using chicken breast?
Absolutely! We often use chicken breast because it’s lean, which definitely keeps this aligned with a Healthy Chicken Chimichangas plan. However, chicken breast is way drier than dark meat, so you have to compensate! When I use breast meat, I’m usually a little more generous with that 1/4 cup of broth we added for moisture. And here’s my extra Clara tip: if the mixture still seems crumbly, stir in just one spoonful of sour cream or cream cheese. It melts right in and keeps everything creamy inside while still being a much Healthier Twist on the Classic.
If you want to see how another kitchen handled the crispiness test, check out Elise’s tips on getting that perfect texture here! I love seeing how other cooks tackle the same challenges.
Nutritional Estimates for This Recipe
I always feel a *little* bit better about eating these golden, crispy rolls after I look at the numbers, even though they taste totally indulgent! Liam always reminds me that since we’re baking them instead of deep frying, we slash out a huge amount of unnecessary fat. It’s nice knowing we can treat ourselves to this Family Favorite Mexican Food without completely derailing the week.
Remember, these numbers are based on dividing the entire recipe yield (8 chimichangas) into 8 equal servings. Also, if you load yours up with a mountain of sour cream or extra guacamole, those numbers will definitely change! Always remember, this is just an estimate based on the ingredients we used, so treat it as a helpful guide.
- Serving Size: 1 chimichanga
- Calories: 320
- Fat: 14g
- Saturated Fat: 6g
- Trans Fat: 0g
- Carbohydrates: 30g
- Fiber: 2g
- Sugar: 2g
- Protein: 19g
- Sodium: 450mg
- Cholesterol: 55mg
If you are looking for other simple recipes that taste amazing but keep the numbers friendly, you should definitely check out our recipe for Easy 3-Ingredient Chocolate Fudge. That one is surprisingly low-calorie for how decadent it tastes!
Share Your Experience Making These Baked Chicken Chimichangas
We’ve covered the seasoning, the rolling technique, and exactly how to get that perfect golden crunch on these Baked Chicken Chimichangas, and honestly, I hope you’re rushing to the kitchen right now! But here’s the important part for me: I want to hear from you!
Cooking is always better when you share it, right? Did you try the butter brush method? Did you manage to hold back on the sour cream? Tell me everything in the comments below! I obsessively read every single comment, especially when people rave about how surprisingly crispy their Oven Baked Chicken Chimichangas turned out.
If you absolutely loved this recipe and it’s officially joining your rotation of Weeknight Mexican Dinner staples, please give it a star rating right below this section. It really helps other folks who are maybe still on the fence about ditching their deep fryer know they are in good hands!
And please, if you snap a picture of your golden, cheesy rolls—maybe piled high with toppings—tag us on social media! Liam loves seeing real people enjoying the food we create. If you have any last-minute questions or just want to share a win, you can always reach out to us directly through the Contact Page. Happy baking, everyone!
PrintEasy & Crispy Baked Chicken Chimichangas (Chi-Chi’s Style Inspired)

You can make restaurant-quality chicken chimichangas at home without deep frying. This easy baked chicken chimichangas recipe gives you a satisfyingly crispy shell and a flavorful, seasoned shredded chicken filling perfect for a weeknight Mexican dinner.
- Prep Time: 15 min
- Cook Time: 27 min
- Total Time: 42 min
- Yield: 8 servings
- Category: Dinner
- Method: Baking
- Cuisine: Tex-Mex
- Diet: Vegetarian
Ingredients
- 2 cups cooked, shredded chicken
- 1 teaspoon chili powder
- 1/2 teaspoon cumin
- 1/2 teaspoon garlic powder
- 1/4 teaspoon dried oregano
- 1/4 teaspoon salt
- 1/4 teaspoon black pepper
- 1/4 cup chicken broth or water
- 1 cup shredded Monterey Jack or Mexican blend cheese
- 8 medium flour tortillas (burrito size)
- 2 tablespoons olive oil or melted butter, for brushing
- Cooking spray
Instructions
- Preheat your oven to 400°F (200°C). Lightly grease a baking sheet or spray it with cooking spray.
- In a medium bowl, combine the shredded chicken, chili powder, cumin, garlic powder, oregano, salt, and pepper. Mix well.
- Add the chicken broth or water to the chicken mixture and stir until the seasoning is evenly distributed and the filling is moist, but not wet.
- Warm the tortillas briefly in the microwave (about 15-20 seconds) to make them pliable and prevent tearing.
- Place about 1/4 cup of the seasoned chicken mixture and a sprinkle of cheese down the center of each warm tortilla.
- Fold the sides of the tortilla inward over the filling, then tightly roll the tortilla up from the bottom to create a sealed cylinder, similar to a burrito. Place the chimichanga seam-side down on the prepared baking sheet. Repeat with the remaining tortillas.
- Lightly brush the tops and sides of the rolled chimichangas with olive oil or melted butter. This helps them get golden and crispy.
- Bake for 12 to 15 minutes, then carefully flip the chimichangas over. Brush the second side lightly with any remaining oil.
- Bake for another 10 to 12 minutes, or until the tortillas are golden brown and crispy.
- Serve immediately with your favorite toppings like salsa, sour cream, or guacamole.
Notes
- To get that Chi-Chi’s style crispiness without frying, make sure you brush the tortillas generously with oil before baking.
- If your shredded chicken is very dry, add a tablespoon of cream cheese or sour cream to the filling mixture for extra moisture and flavor.
- For a faster weeknight meal, use pre-cooked rotisserie chicken for the shredded chicken base.
Nutrition
- Serving Size: 1 chimichanga
- Calories: 320
- Sugar: 2
- Sodium: 450
- Fat: 14
- Saturated Fat: 6
- Unsaturated Fat: 8
- Trans Fat: 0
- Carbohydrates: 30
- Fiber: 2
- Protein: 19
- Cholesterol: 55