

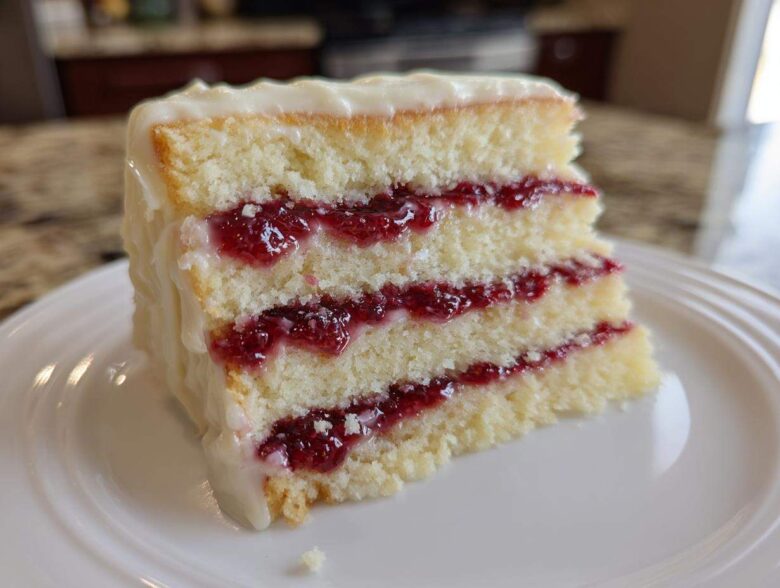
When you need a cake that truly stops the conversation the moment it hits the table, you know you need to pull out all the stops. For my first really ambitious bake after Liam started teaching me the basics, we tackled something breathtakingly elegant: the **white chocolate raspberry cake**. Seriously, this isn’t just a dessert; it’s a celebration centerpiece! I remember being so nervous about making something this beautiful, but Liam, bless his patient heart, just stood right there and walked me through every technical step—from getting the batter texture just right to pouring a perfect ganache. It took that steady guidance, the kind we share over on the About Us page, to turn my beginner anxiety into this gorgeous, layered reality. Trust me, you’re going to feel like a pastry chef when you’re done!
Why This White Chocolate Raspberry Cake Is Your Next Showstopper Dessert
I can see you hovering over this recipe, wondering if you really have what it takes to make something this decadent at home. The answer is a huge YES! Liam always told me that the best baking comes from understanding *why* certain things work, and this cake proves it. It’s one of those truly special gourmet cake recipes that looks like it took days.
- You get the ultimate baking tips for moist cakes right here, ensuring zero dry crumbs.
- It nails the perfect sweet and tart cake combinations—the white chocolate is rich, but the raspberries cut right through it.
- Honestly, it’s gorgeous! The creamy ganache finish makes it fit for any huge milestone celebration.
- It tastes luxurious but the steps are totally manageable, even if you’re new to layer cakes.
If you want something that truly wows your friends and family, this is the one to bookmark!
Gathering Ingredients for Your White Chocolate Raspberry Cake
Okay, you’ve decided to tackle this beauty, which is fantastic news! Making an impressive **white chocolate raspberry cake** relies almost entirely on using high-quality components paired with precise measurements. Liam always drills into me that for cakes, especially rich ones like this, temperature matters. So please—and I mean this lovingly—make sure your butter, eggs, and milk are all sitting out on the counter getting room temperature before you even think about turning the mixer on. That makes such a difference in creating a smooth, emulsified batter!
We need three distinct sets of items for this journey: the cake structure itself, the bright, tart filling to cut the sweetness, and that luxurious white chocolate coating. Don’t skimp on the white chocolate for the ganache—it’s worth spending a little extra for the good stuff, trust me!
For the Moist White Chocolate Cake Layers
Here’s what you need to gather for the fluffy, tender cake structure. Remember, temperature is key here!
- 1 3/4 cups all-purpose flour
- 1 3/4 cups granulated sugar
- 1 tablespoon baking powder
- 1/2 teaspoon salt
- 1 cup unsalted butter, softened (room temperature!)
- 4 large eggs, room temperature
- 1 cup whole milk (room temperature!)
- 1 teaspoon vanilla extract
- 1/2 cup white chocolate chips, melted and slightly cooled
For the Tart Raspberry Filling Recipes
This filling is what keeps the cake from feeling too heavy. You can use fresh or frozen raspberries here for maximum flavor. If you are looking for other ways to incorporate fruit, check out some of my favorites on the Lemon Meringue Pie page!
- 1 1/2 cups fresh or frozen raspberries
- 1/4 cup granulated sugar
- 1 tablespoon cornstarch
- 1/2 cup water
Quick tip here: When using cornstarch for thickening, make sure to whisk it into the cold water *before* adding it to the heat, or you’ll end up with little white clumps, which nobody wants in their beautiful cake filling.
For the Silky White Chocolate Ganache
This is the grand finale! Good quality white chocolate really shines here because it’s the dominant flavor in the frosting.
- 12 ounces high-quality white chocolate, chopped
- 1 cup heavy cream
- 1/4 cup powdered sugar (only needed if you whip it into buttercream later)
Step-by-Step Instructions for the White Chocolate Raspberry Cake
Alright, deep breath! This is where the magic happens, turning those beautiful ingredients into the most incredible **white chocolate raspberry cake** you’ve ever made. We are breaking this down into three main parts: baking the layers, making that vibrant filling, and then putting it all together so it looks professional. I promise you, if you follow along slowly, you’ll nail this huge culinary achievement. Liam always reminds me that rushing the assembly is the quickest way to get a messy cake, so take your time!
Baking the Moist White Chocolate Cake Layers
Follow these steps carefully to get those perfectly tender layers. Remember what I said about the room-temperature ingredients? This part relies on that!
- First things first: get your oven humming at 350°F (175°C) right away. While it heats up, grease and flour three 8-inch round cake pans. Don’t forget to line the bottoms with parchment paper—this is my non-stick insurance policy!
- In a big bowl, just whisk together your dry basics: the flour, the 1 3/4 cups of sugar, baking powder, and salt.
- Now for the fun part that Liam showed me: Add the softened butter to the dry mix. Beat it on low speed. You want it to look like coarse, wet sand. This friction is key to building texture later!
- In a separate bowl, quickly whisk your room-temp eggs, milk, and vanilla until they look happy and combined.
- Slowly drizzle that wet mix into the dry mix while the mixer runs on medium speed. Stop mixing the second it comes together. Seriously, do not overmix here, or we’ll lose that moist texture we worked so hard for!
- Gently fold in those slightly cooled white chocolate chips. I mean really gently—we’re just incorporating them, not whipping them again!
- Divide that luxurious batter equally between your three prepared pans.
- Bake for about 28 to 32 minutes. You’re looking for a toothpick to come out clean, which means the cake layers are done! Let them chill out in their pans for 10 minutes before turning them out onto a wire rack to cool completely. They must be totally cool before filling!
Creating the Perfect Raspberry Filling Recipes
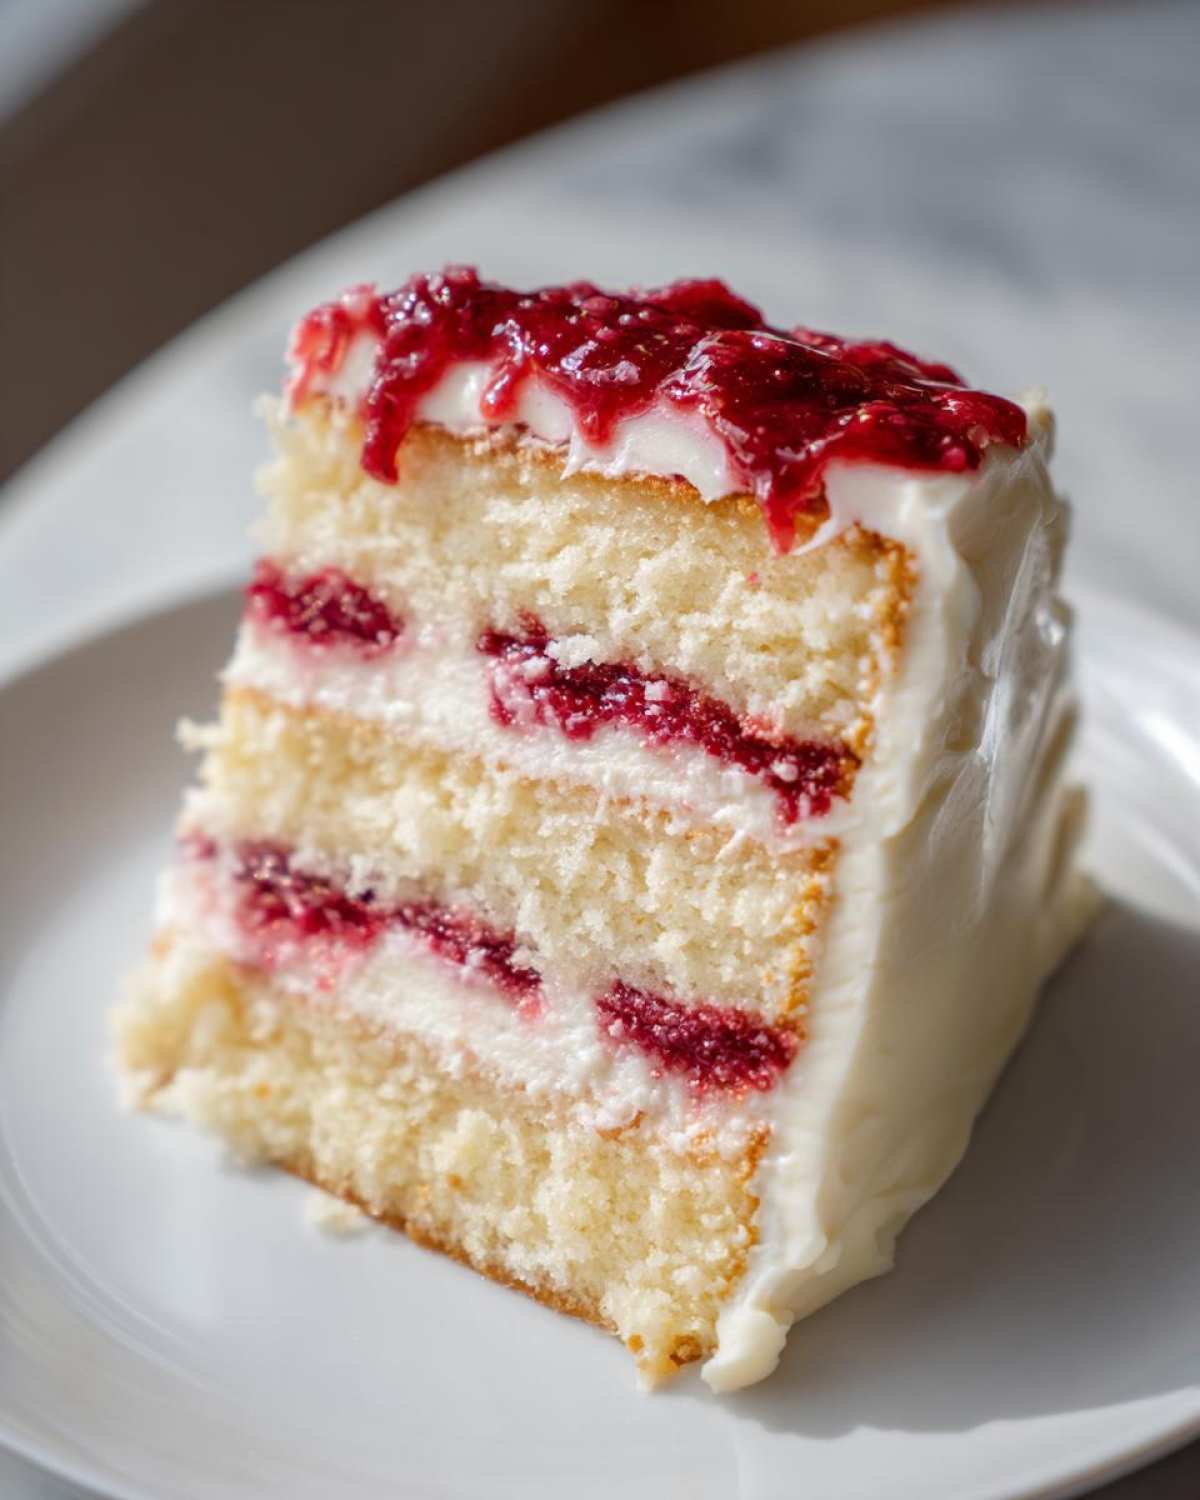
This step adds that necessary tartness that keeps the **white chocolate raspberry cake** from being too sickly sweet. It smells amazing while it cooks!
- We are making a simple compote. Grab a small saucepan and toss in your raspberries, the 1/4 cup of sugar, the cornstarch, and the water.
- Cook this over medium heat. You need to stir constantly, or the cornstarch will settle and burn on the bottom. After about 5 to 7 minutes, it should look glossy and thick.
- Take it off the heat and let it cool down completely. This is non-negotiable! If you put warm filling on a cool cake, the filling melts and oozes out everywhere when you try to stack it. We want that tart flavor locked in and firm!
Mastering the White Chocolate Ganache Tutorial
The ganache is what makes this cake feel so incredibly gourmet. Getting the right texture here lets you frost like a pro, which is a great trick I learned for all my baking tips for moist cakes!
- Chop your white chocolate finely and set it in a heatproof bowl.
- Head the heavy cream on the stove until it *just* starts to simmer around the edges—don’t let it boil hard!
- Pour that hot cream over your chopped white chocolate. Now, Liam says this is important: walk away. Seriously, let it just sit there, undisturbed, for five full minutes. This lets the heat slowly melt the chocolate evenly.
- After five minutes, whisk it slowly, starting in the middle until it turns into a silky, glorious glaze.
- This glaze will be thin at first. You have to let it cool down at room temperature until it thickens up nicely to a spreadable consistency. If you try to frost immediately, it will just run off the sides. If you wait too long and it gets rock hard, just pop it over a double boiler for thirty seconds to soften it up again. See? Easy!
Assembling Your White Chocolate Raspberry Cake
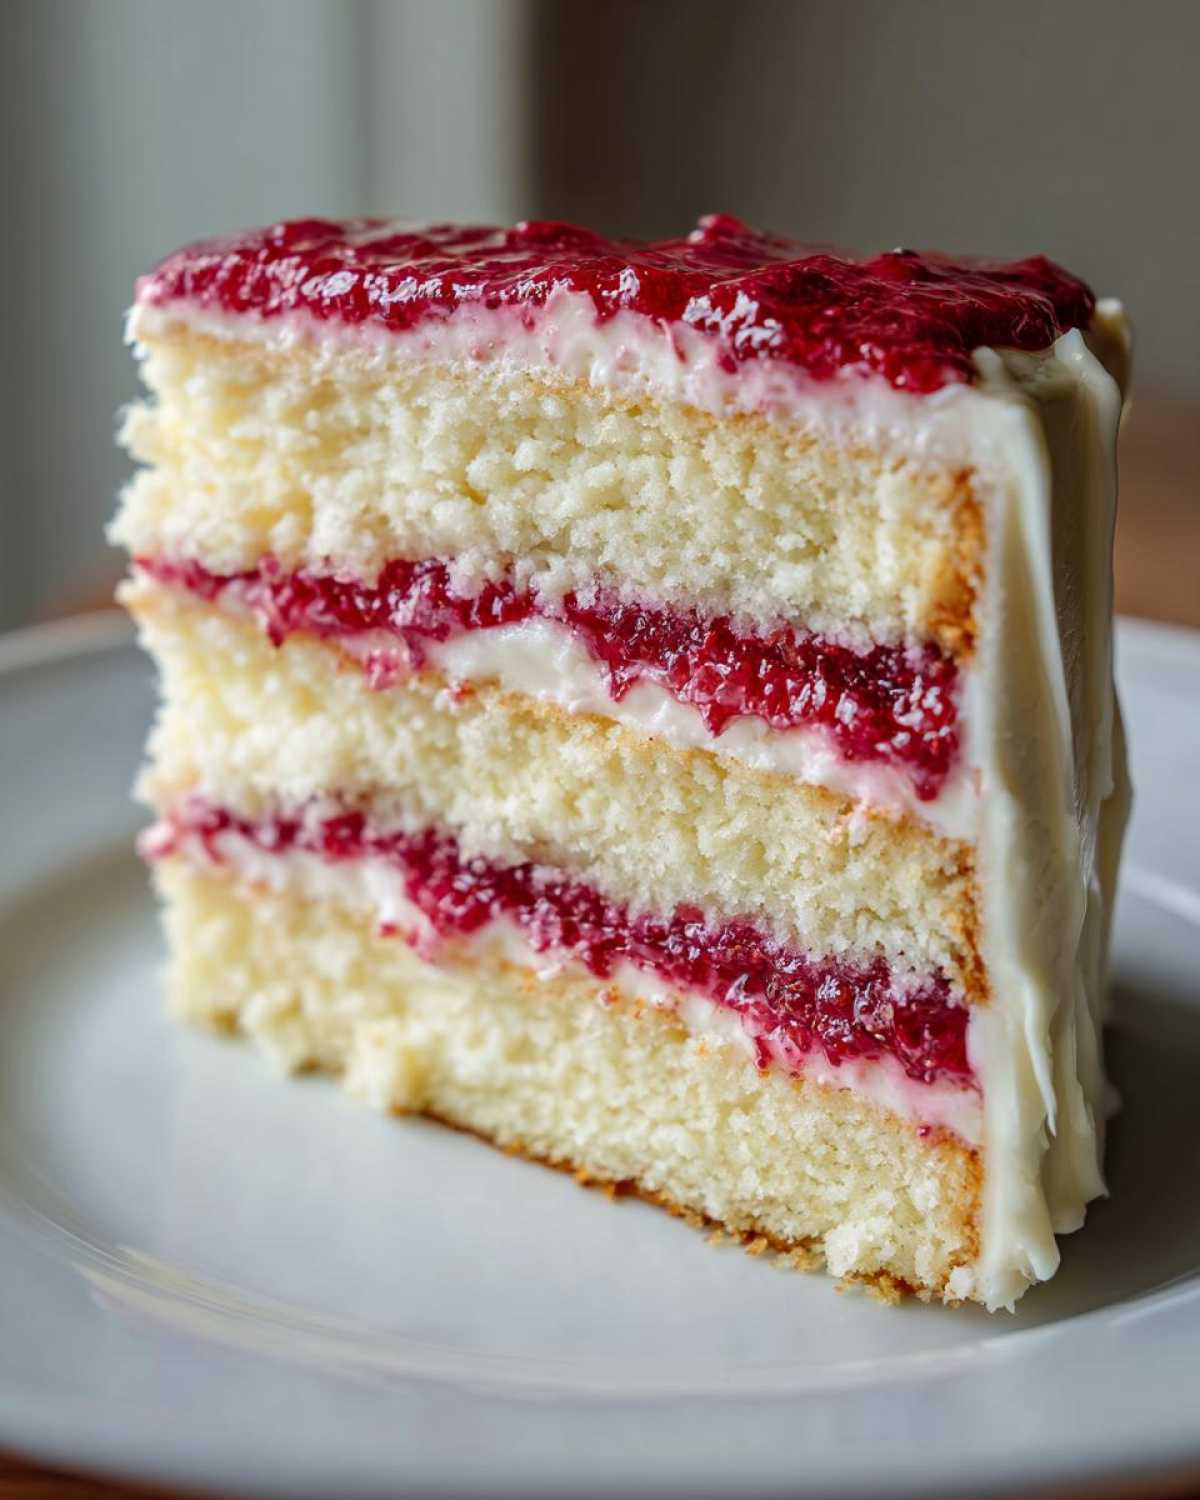
Time to stack this beauty up! Layering takes patience, but the result offers that perfect height and look for a true celebration dessert.
- Put your first cooled cake layer down on your serving plate.
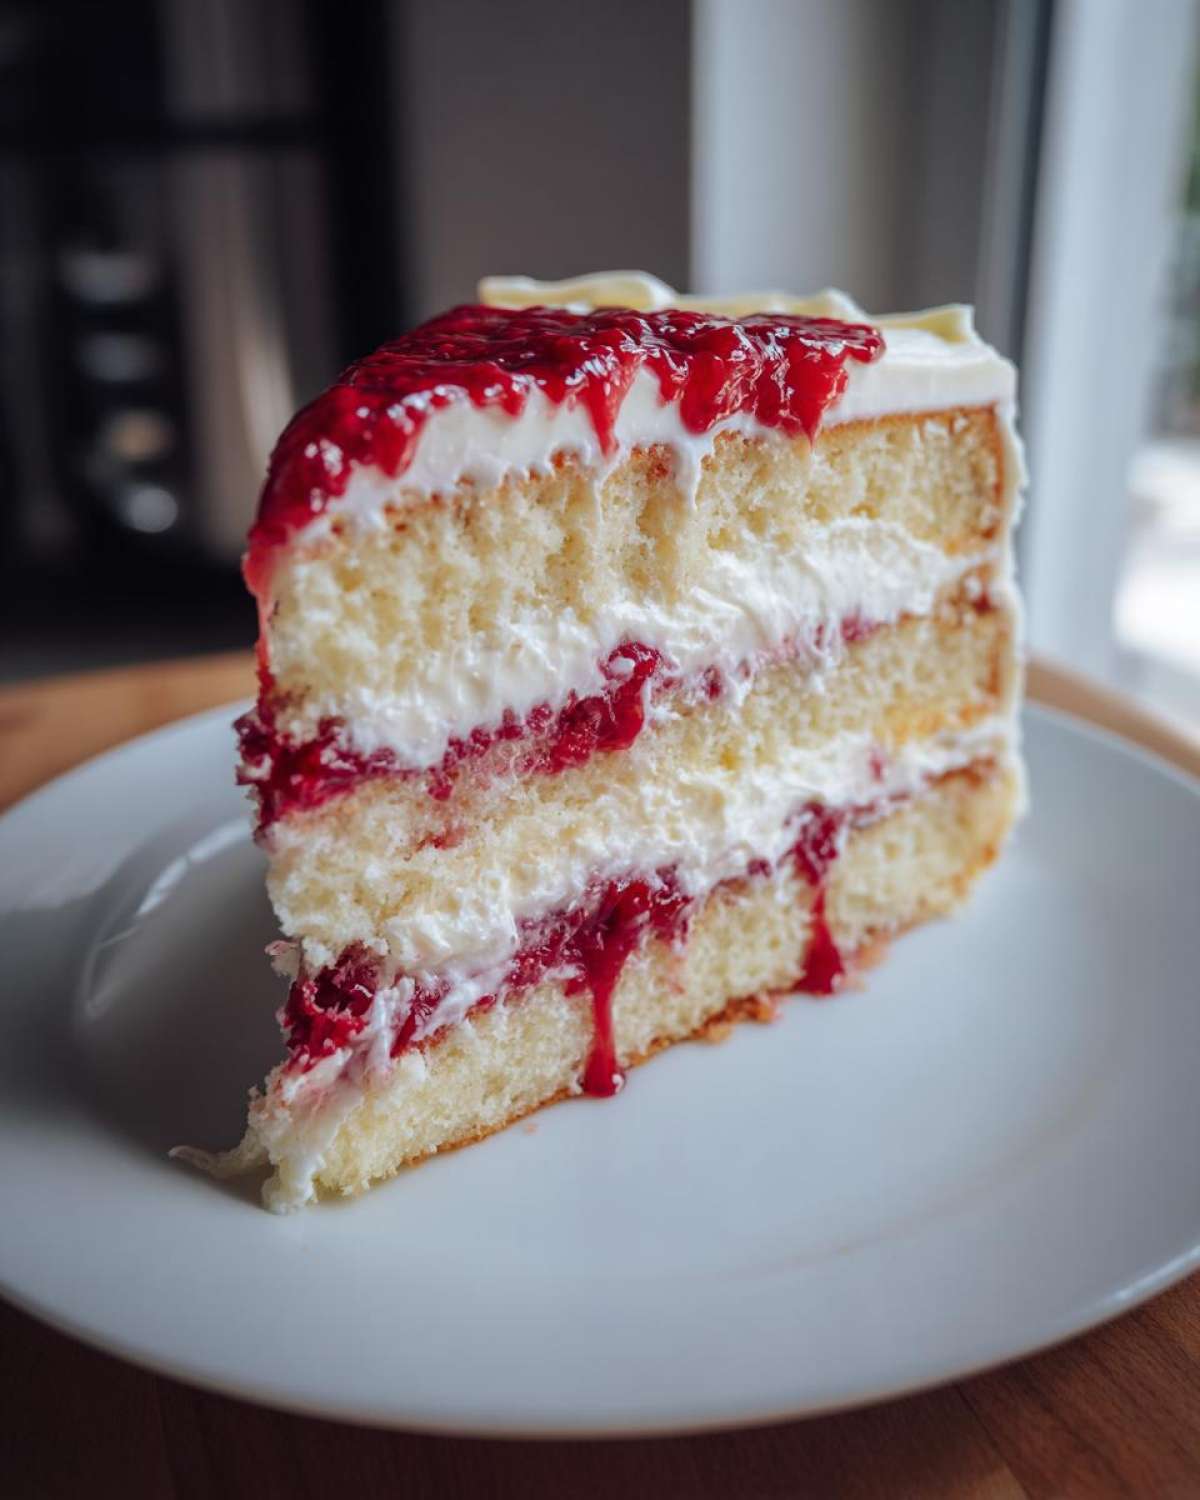
- Gently spread all of that perfectly cooled raspberry filling evenly over this first layer.
- Carefully place the second cake layer on top of the filling.
- Now, spread a nice, thin layer of your thickened white chocolate ganache over the top of the second layer. This acts like glue and holds the third piece steady.
- Place your final cake layer on top.
- Use the rest of that amazing ganache to cover the entire cake—top and sides. If you want a lighter finish, you can whip that cooled ganache with 1/4 cup of powdered sugar to turn it into a fluffy frosting, just like some of those other ideas online!
- Step 13 is vital: Chill the whole thing for at least 30 minutes before trying to slice it. This sets up the filling and the frosting so you get beautiful, clean slices for serving!
Tips for Success When Making a White Chocolate Raspberry Cake
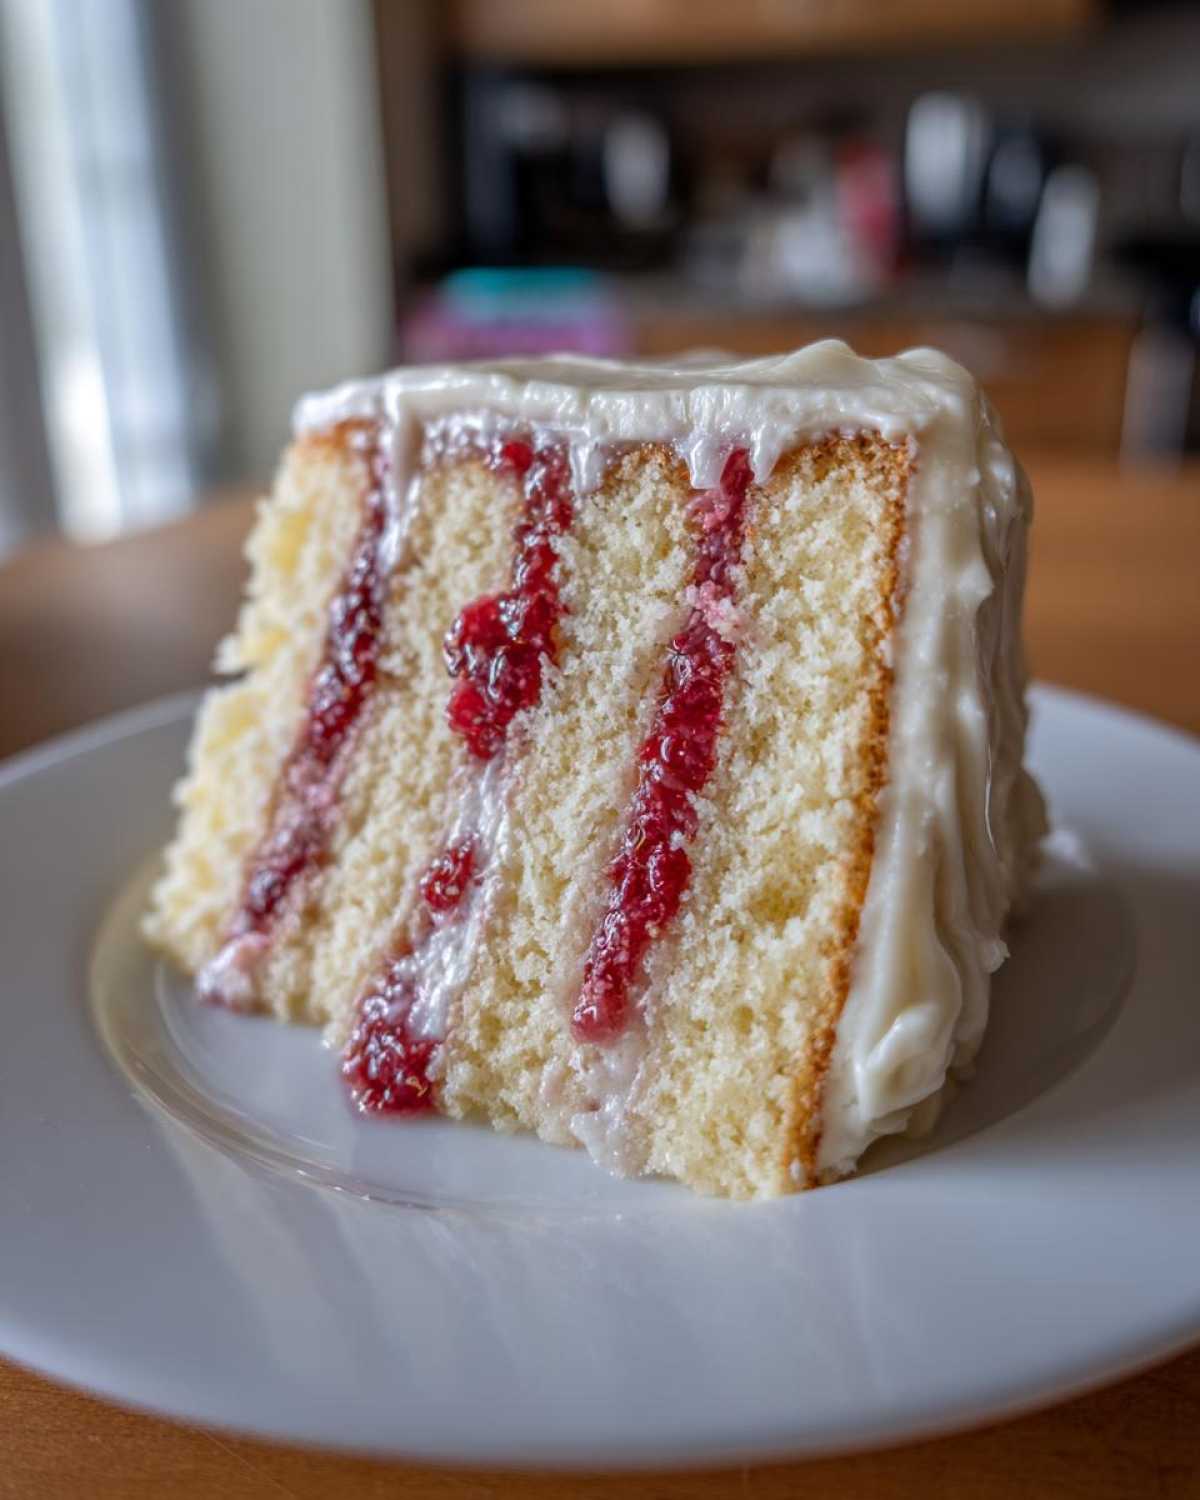
As Liam always emphasizes, baking is science, but the best results need a little heart thrown in! Since we want you to have the *best* experience making this **white chocolate raspberry cake**, I wanted to pull out a few pointers from my recipe notes that really helped me nail the texture and flavor profile.
First off, stick to room temperature milk, eggs, and butter. It honestly does wonders for creating one of those famously moist white chocolate cake layers. Also, for the filling—if you want that berry flavor to really sing against the white chocolate, try gently folding in about a quarter cup of fresh, uncooked raspberries *after* the cooked compote has cooled down completely.
And about that white chocolate ganache? Go for the good stuff. Using chocolate that contains real cocoa butter ensures that smooth texture you are aiming for in this showstopper dessert. If it gets too stiff while you’re frosting, don’t panic! Just warm it gently over a double boiler or in short bursts in the microwave until it’s spreadable again.
Variations: Making Your White Chocolate Raspberry Dream Cake Recipe Your Own
I know sometimes you see a recipe and immediately think, “How can I tweak this for next week?” Liam and I totally encourage that mixing and matching! This recipe is a fantastic base, but you can certainly adapt it. Several people have mentioned making this into a proper White Chocolate Raspberry Dream Cake, and that usually means boosting the richness or playing with the frosting!
If the smooth, dense nature of the ganache feels too heavy for your taste, you can absolutely switch gears and whip up a **White Chocolate Buttercream Frosting**. You just need to let the chocolate ganache cool significantly—almost to room temperature—and then beat it with some powdered sugar and maybe a splash of vanilla until it’s light and fluffy. It’s less intense than the pure ganache coating, but wonderfully creamy.
Also, if you don’t feel like doing three separate layers, no sweat! You could totally use this batter to make a **Copycat Bundt Cake Recipe**. Just mix the cake batter as directed and pour it into a greased and floured Bundt pan. You might need to add 10 to 15 minutes to the baking time, so just keep an eye on it. Instead of layering, you just pour that lovely ganache right over the top when it cools!
Storage & Reheating Instructions for Your Elegant Desserts
Okay, you’ve made this stunning creation, and now comes the hardest part: saving some for later! This **white chocolate raspberry cake** is one of those elegant desserts that definitely needs proper care to keep its structure and moisture.
Because we have that lovely, perishable raspberry filling tucked inside, you absolutely must store this cake in the refrigerator. I recommend covering it loosely with a cake dome or even aluminum foil, but make sure the foil isn’t touching the ganache, or you’ll smudge all your hard work! If you stored it in an airtight container, the cake might get a little moist from trapped humidity, so loose covering is best.
It keeps beautifully like this for about three days. Any longer than that, and the fresh raspberries in the filling might start to weep a bit, but honestly, this cake never lasts that long in our house!
Now, here’s the crucial bit when you want to serve it again: don’t try slicing it right out of the fridge. The ganache will be hard as a rock, and the cake layers might feel dense. You need to gently let it warm up a touch. Take the cake out of the refrigerator about 45 minutes to an hour before you plan to serve it. Letting it sit on the counter—still loosely covered—allows the textures to soften up just right. The ganache will regain a lovely, slightly soft sheath, and the cake layers will taste much more tender. It’s all about bringing those flavors back to life without melting the whole thing!
Frequently Asked Questions About White Chocolate Cake Recipes
I always have a million questions when I try a new, fancy recipe, and since you’re making something this gorgeous, I bet you do too! Liam and I compiled the most common things people ask us when they try out this **white chocolate raspberry cake**. Don’t worry; we keep the answers simple and practical!
Can I make the components of this white chocolate raspberry cake ahead of time?
Yes, absolutely! This is my secret to surviving big party days. You can bake and completely cool the cake layers a day ahead. They store perfectly wrapped tightly in plastic wrap at room temperature. The raspberry filling should also be made a day early and kept covered in the fridge. The ganache, however, is best made the day you plan to assemble or frost the cake. If you try to store the finished cake overnight *after* frosting, the moisture transfer can sometimes make the layers stick to the frosting a bit weirdly during storage. If you must make the ganache early, just keep it in a slightly warm spot so it stays soft, or gently reheat it later.
I’m worried the white chocolate will be too sweet; what’s a good substitution for the ganache?
That’s a super valid concern! White chocolate is naturally sweet, right? When I want something a little lighter for the outside, I follow the suggestion I mentioned earlier: turn that cooled ganache into a **White Chocolate Buttercream Frosting**. You just beat the cooled, thick ganache with powdered sugar, which lightens the texture and cuts some of the syrupy sweetness, making it perfect for piping flowers on top! Or, if you really want to lean into the tart side, you could substitute a portion of the white chocolate melting wafers with a high-quality cream cheese frosting, just like some folks do for an even tangier finish. Liam loves the pure ganache, but I often prefer mixing it up!
How can I make sure my cake layers stay incredibly moist?
Moisture, moisture, moisture! That’s what separates a good cake from a great one. Beyond using room-temperature ingredients, which we covered, make sure you don’t bake them a single minute too long! As soon as that toothpick comes out mostly clean—even if it seems just a *tiny* bit damp—pull them out. They finish cooking on the hot pan outside the oven. Also, remember that if you have any leftover raspberry filling, brushing a little of that tart juice mixture onto the layers before you frost can give them an extra flavor boost and moisture punch. You can find tons more tips on keeping cakes tender over on our main blog page!
Can I use different berries instead of raspberries? What about lemon?
Oh, you absolutely can play with the fruit! This flavor combination is known to be successful with other tart fruits. If you want to try something different after you’ve mastered this version, try swapping the raspberries entirely for a bright lemon curd filling. That provides an incredible sweet and tart cake combination with the white chocolate. Strawberries work well too, but they are sweeter than raspberries, so you might want to slightly increase the amount of sugar in the filling call to balance that out. Just test your filling mixture before you cool it down!
Estimated Nutritional Data for This White Chocolate Raspberry Cake
I won’t bore you with complex calculations, because honestly, when you’re making a showstopper like this, we’re not exactly aiming for “low-calorie”! These numbers are just estimates based on dividing the whole cake into 10 even slices, so keep that serving size in mind. If you end up cutting bigger pieces for the dessert lovers in your life, these numbers will naturally go up!
- Serving Size: 1 slice
- Calories: 450
- Sugar: 45g
- Sodium: 250mg
- Fat: 25g
- Saturated Fat: 15g
- Unsaturated Fat: 10g
- Trans Fat: 0.5g
- Carbohydrates: 55g
- Fiber: 2g
- Protein: 6g
- Cholesterol: 100mg
Just remember, these are guidelines based on the ingredients listed. The quality of your white chocolate makes a big difference in the fat content, so choose wisely!
Share Your White Chocolate Raspberry Cake Creations
I truly hope you give this recipe a try! When Liam and I started TasteTaught, we did it so beginners like me could feel confident tackling these amazing, elegant bakes. Seeing your successes keeps us going!
If you try this decadent cake, please, please drop a rating below using the stars—it helps other bakers know what’s up! And if you post a picture on Instagram or Facebook, tag us! We absolutely love seeing how you styled your **white chocolate raspberry cake** and what celebrations you made it for. If you need to send us a quick note about a substitution or have a question that didn’t make it into the FAQ, you can always reach out through our Contact Page. We read every single message and appreciate you joining our cooking conversation!
Estimated Nutritional Data for This White Chocolate Raspberry Cake
I won’t bore you with complex calculations, because honestly, when you’re making a showstopper like this, we’re not exactly aiming for “low-calorie”! These numbers are just estimates based on dividing the whole cake into 10 even slices, so keep that serving size in mind. If you end up cutting bigger pieces for the dessert lovers in your life, these numbers will naturally go up!
- Serving Size: 1 slice
- Calories: 450
- Sugar: 45g
- Sodium: 250mg
- Fat: 25g
- Saturated Fat: 15g
- Unsaturated Fat: 10g
- Trans Fat: 0.5g
- Carbohydrates: 55g
- Fiber: 2g
- Protein: 6g
- Cholesterol: 100mg
Just remember, these are guidelines based on the ingredients listed. The quality of your white chocolate makes a big difference in the fat content, so choose wisely!
Share Your White Chocolate Raspberry Cake Creations
I truly hope you give this recipe a try! When Liam and I started TasteTaught, we did it so beginners like me could feel confident tackling these amazing, elegant bakes. Seeing your successes keeps us going!
If you try this decadent cake, please, please drop a rating below using the stars—it helps other bakers know what’s up! And if you post a picture on Instagram or Facebook, tag us! We absolutely love seeing how you styled your **white chocolate raspberry cake** and what celebrations you made it for. If you need to send us a quick note about a substitution or have a question that didn’t make it into the FAQ, you can always reach out through our Contact Page. We read every single message and appreciate you joining our cooking conversation!
PrintDecadent White Chocolate Raspberry Layer Cake with Silky Ganache

You will love this moist, elegant White Chocolate Raspberry Cake. It combines sweet white chocolate cake layers with tart raspberry filling and a smooth white chocolate ganache, making it a showstopper dessert for any celebration.
- Prep Time: 35 min
- Cook Time: 35 min
- Total Time: 70 min
- Yield: 10 servings
- Category: Dessert
- Method: Baking
- Cuisine: American
- Diet: Vegetarian
Ingredients
- 1 3/4 cups all-purpose flour
- 1 3/4 cups granulated sugar
- 1 tablespoon baking powder
- 1/2 teaspoon salt
- 1 cup unsalted butter, softened
- 4 large eggs, room temperature
- 1 cup whole milk
- 1 teaspoon vanilla extract
- 1/2 cup white chocolate chips, melted and slightly cooled
- 1 1/2 cups fresh or frozen raspberries (for filling)
- 1/4 cup granulated sugar (for filling)
- 1 tablespoon cornstarch (for filling)
- 1/2 cup water (for filling)
- 12 ounces high-quality white chocolate, chopped (for ganache)
- 1 cup heavy cream (for ganache)
- 1/4 cup powdered sugar (for frosting, optional addition to buttercream)
Instructions
- Preheat your oven to 350°F (175°C). Grease and flour three 8-inch round cake pans. Line the bottoms with parchment paper.
- In a large bowl, whisk together the flour, 1 3/4 cups granulated sugar, baking powder, and salt.
- Add the softened butter to the dry ingredients. Beat with an electric mixer on low speed until the mixture resembles coarse sand.
- In a separate bowl, whisk together the milk, eggs, and vanilla extract until combined.
- Gradually add the wet ingredients to the dry ingredients, mixing on medium speed until just combined. Do not overmix.
- Gently fold in the melted and slightly cooled white chocolate chips until incorporated.
- Divide the batter evenly among the prepared cake pans. Bake for 28 to 32 minutes, or until a toothpick inserted into the center comes out clean.
- Let the cakes cool in the pans for 10 minutes before inverting them onto a wire rack to cool completely.
- Prepare the raspberry filling: In a small saucepan, combine the raspberries, 1/4 cup sugar, cornstarch, and water. Cook over medium heat, stirring constantly, until the mixture thickens, about 5 to 7 minutes. Remove from heat and let it cool completely.
- Prepare the white chocolate ganache: Place the chopped white chocolate in a heatproof bowl. Heat the heavy cream in a small saucepan until it just begins to simmer around the edges. Pour the hot cream over the white chocolate. Let it sit undisturbed for 5 minutes, then whisk until completely smooth. Let the ganache cool and thicken at room temperature until it reaches a spreadable consistency.
- Assemble the cake: Place one cooled cake layer on a serving plate. Spread a layer of the cooled raspberry filling over the cake. Top with the second cake layer. Spread a thin layer of ganache over the second layer. Top with the final cake layer.
- Frost the entire cake with the thickened white chocolate ganache. If you prefer a lighter frosting, you can whip the cooled ganache with powdered sugar to create a white chocolate buttercream.
- Chill the cake for at least 30 minutes before slicing to allow the layers and frosting to set firmly.
Notes
- For the moistest cake, make sure your eggs and milk are at room temperature before mixing the batter.
- If you want a stronger raspberry flavor in the filling, gently fold in 1/4 cup of fresh raspberries after the compote has cooled.
- To achieve a very smooth ganache, use high-quality white chocolate that contains cocoa butter.
- If your ganache becomes too stiff, warm it slightly over a double boiler or in short bursts in the microwave until it is spreadable again.
Nutrition
- Serving Size: 1 slice
- Calories: 450
- Sugar: 45g
- Sodium: 250mg
- Fat: 25g
- Saturated Fat: 15g
- Unsaturated Fat: 10g
- Trans Fat: 0.5g
- Carbohydrates: 55g
- Fiber: 2g
- Protein: 6g
- Cholesterol: 100mg