

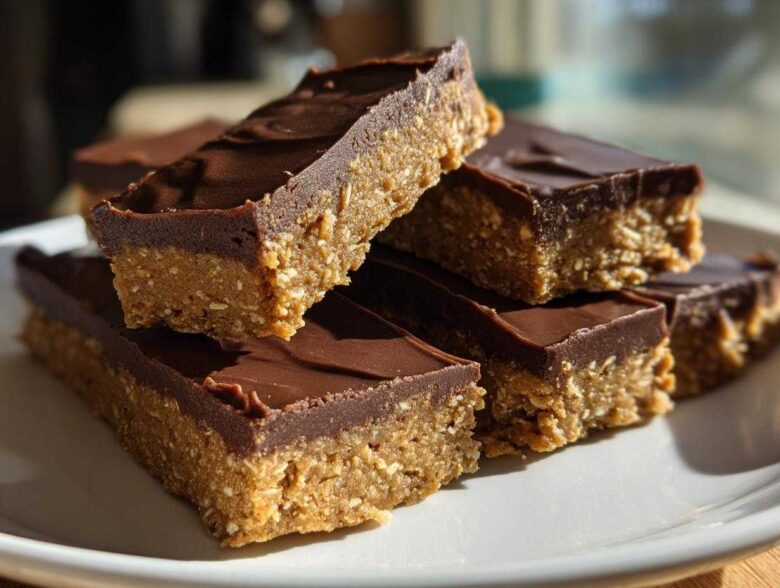
Honestly, are you tired of those rock-hard, chalky store-bought protein bars that cost a fortune? I certainly was! Every time I grabbed one hoping for a quick energy boost after a workout, I felt like I was chewing on flavored cardboard. That’s why I spent ages tweaking and testing until I landed on what I firmly believe is the absolute best recipe for homemade protein bars you’ll ever try. These are completely no-bake and require only five simple ingredients, which is my favorite part! I developed this specific recipe for my own routine because I needed convenient, delicious protein bars for quick protein snacks that actually tasted like a treat, not a chore.
Trust me, once you make these peanut butter chocolate beauties, you won’t look back. They are chewy, satisfying, and keep me fueled all afternoon. Check out the process over on our general ‘About Us’ page if you want to know more about my kitchen philosophy!
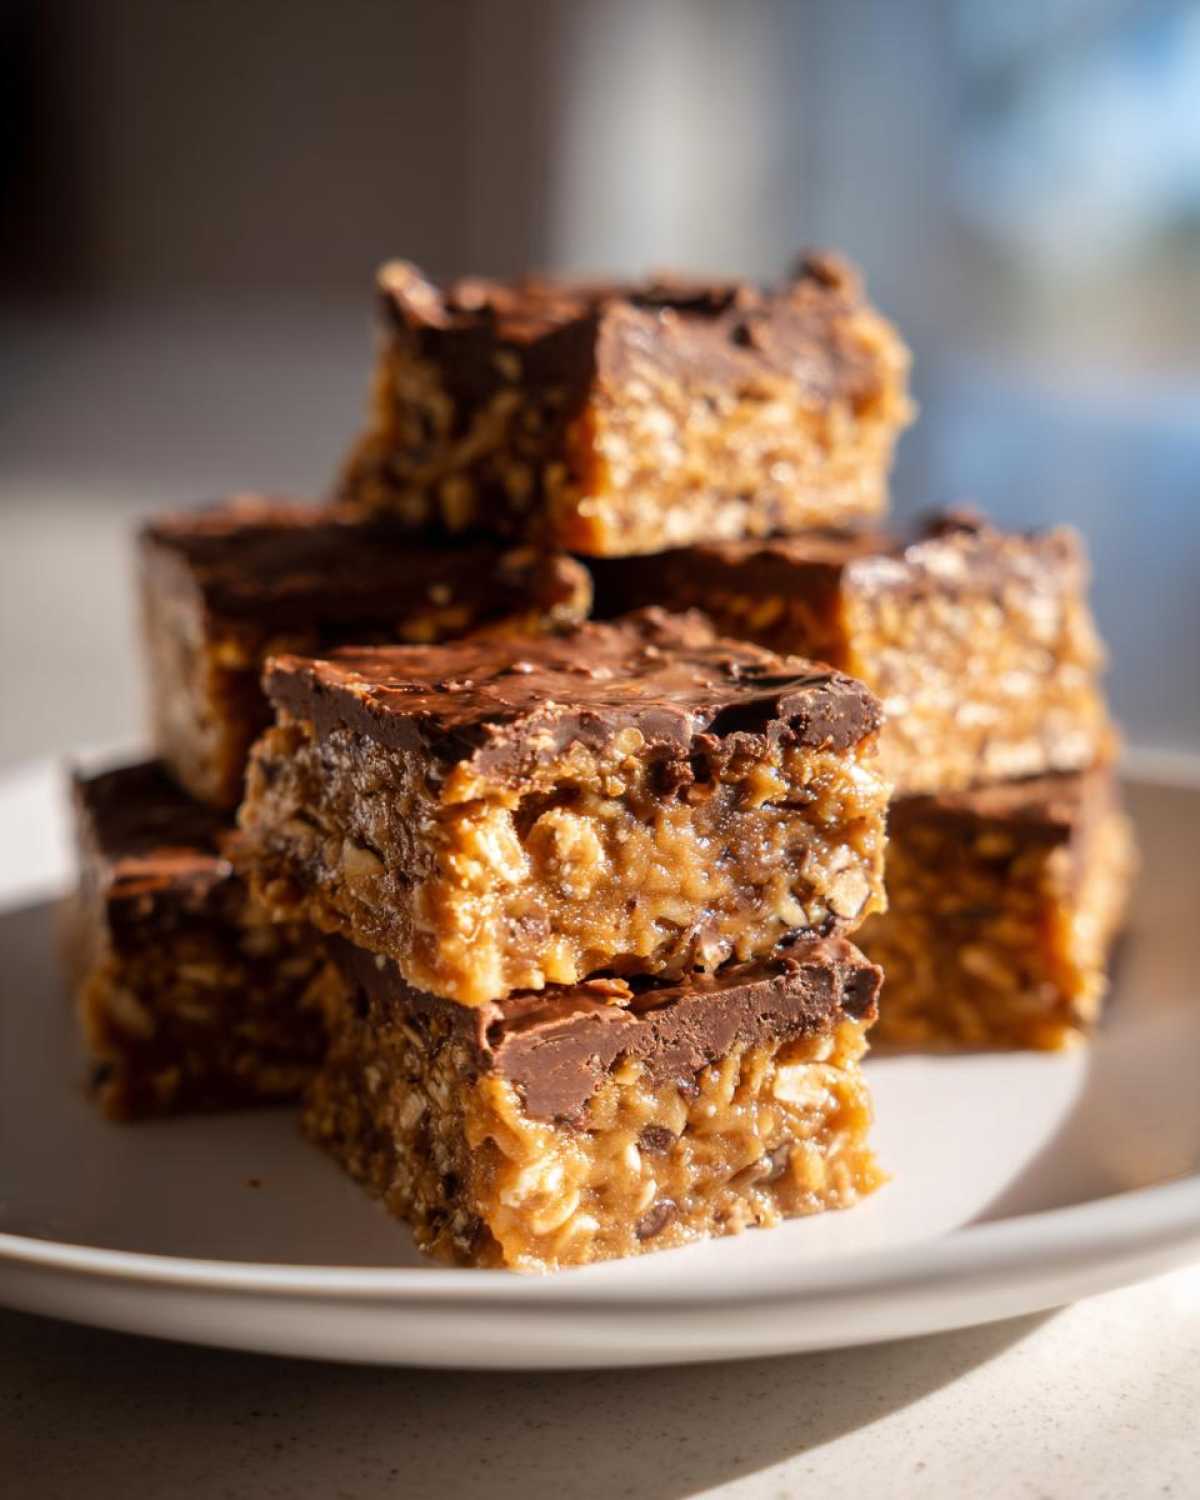
Why This is the Best Recipe for Homemade Protein Bars (Easy Protein Bar Recipe)
Look, making your own homemade protein bars saves cash, and trust me, it lets you skip all the weird stabilizers they cram into the packaged stuff. This is hands-down the easiest recipe to master, making it the perfect easy protein bar recipe for busy weeks. My goal was to give you maximum satisfaction with minimum effort—no dirtying up pans or waiting forever for an oven!
You get complete control over the quality, and you can make a whole week’s worth of fuel in about ten minutes of actual work. That’s why I love this specific batch so much.
The Appeal of No Bake Protein Bars
The fact that these are no bake protein bars is everything! Baking sometimes dries things out or encourages ingredients to separate weirdly. Since we skip the heat, we lock in all that awesome moisture from the peanut butter and syrup. This results in truly chewy protein bars that snap together perfectly when you press them into the pan.
It keeps the texture soft, which is just heavenly when you are looking for a quick, satisfying hit of protein!
Essential Simple Protein Bar Ingredients for Your Protein Bars
Okay, let’s talk shop. The beauty and brilliance of these protein bars is that we only need five core components. That’s it! No long grocery lists, no hunting down obscure items—just the essentials needed to build a fantastic, high-protein snack. Seriously, when you see how few things you need, I think you’ll run to the kitchen immediately. Having simple protein bar ingredients on hand is the key to consistency!
Here is exactly what you need for this batch of protein bars. We need precision here, so be sure you grab the right versions of these items:
- One cup of good old rolled oats—not the instant kind! We need the structure they give us.
- Half a cup of natural peanut butter. Make sure it’s the kind where the oil doesn’t separate wildly, or at least stir it perfectly first!
- Half a cup of your favorite protein powder. I used vanilla, but unflavored works wonders too.
- A quarter cup of honey or maple syrup—this is our binding agent and sweetener.
- And finally, a quarter cup of dark chocolate chips because, well, life needs chocolate!
Ingredient Notes and Substitution Options
This is where we make sure everyone can enjoy these treats! If you’re keeping things strictly plant-based, ditch the honey and use maple syrup instead; that makes these perfect vegan protein bars recipes friendly. And when it comes to the protein powder—I stick to whey concentrate most days—but if you need a dairy-free option, any quality plant-based powder will work just fine in this ratio. Remember, the powder dictates so much of the final taste, so use one you actually like licking off your fingers!
If you are aiming for keto protein bars homemade, this specific recipe won’t quite work because of the oats and sweetener, but I have another keto recipe coming soon—stay tuned! For these simpler bars, just ensure that whatever binding agent you choose (honey/maple) is thoroughly mixed in so it coats everything evenly.
Step-by-Step Instructions for No Bake Protein Bars
Alright, this is where the magic happens! Since these are protein bars and not baked goods, the technique is more about mixing and chilling than actual cooking. We’re moving fast, but we can’t rush the texture, so pay close attention to mixing thoroughly.
- First thing’s first: prep that pan! Grab an 8×8 inch baking pan, but don’t just use it bare. Line it completely with parchment paper, making sure you leave a little bit hanging over the sides. These overhangs are your lifesavers later when you need to lift the whole slab out in one piece—don’t skip this part!
- Now for the mixing bowl. Dump in your rolled oats, protein powder, the peanut butter, and your sweetener (honey or maple syrup). I usually start by stirring this with a sturdy wooden spoon. It’s going to look crumbly and sad at first, but keep going!
- Keep mixing until you have a thick, unified dough. This might take a minute or three. If you notice it’s way too crumbly and won’t hold its shape when you squeeze a bit in your hand, don’t panic! Just add water or milk, one teaspoon at a time, until it finally holds together nicely. It should feel thick and slightly tacky, but not wet.
- Time to press! Scrape that dense dough into your prepared pan. You need to pack this down *firmly*. Use a metal spatula or the bottom of a flat drinking glass to really compress it into the corners and make sure the surface is even. We want these bars to be solid!
- Sprinkle those lovely dark chocolate chips right over the top of the pressed dough. Give them a very gentle press down; you don’t want to dig them all the way in, just enough so they stay put when you slice it later.
- The waiting game begins now. Pop the whole pan into the refrigerator. They need at least two full hours to chill and firm up properly. If you’re in a real rush, yeah, you can try the freezer for 30 minutes, but two hours in the fridge is truly the sweet spot.
- Once they are rock solid, use those parchment paper handles to lift the entire block out onto a cutting board. Then, slice them into 10 equal rectangles. Voilà! You have amazing protein bars!
Achieving the Perfect Peanut Butter Chocolate Protein Bars Texture
The secret sauce to fantastic chewy protein bars is careful mixing—especially avoiding over-mixing once that liquid binder is in there. If you mix it until it’s perfectly smooth and silky right away, you risk developing too much gluten from the oats, and you’ll end up with hard little bricks instead of chewy goodness. You actually want it to look a little shaggy when you first combine those dry ingredients and the peanut butter.
When you’re pressing the dough into the pan (Step 4), this is where you apply the muscle. Packing it tight is what prevents crumbling later. My favorite hack? Wet your hands slightly before you start pressing the dough down. The slight moisture stops the mixture from sticking to you, allowing you to get a truly dense, even surface. Remember, this density is what makes them sturdy enough to pack for any protein bars for workout session!
Tips for Success When Making Protein Bars for Workout Fuel
Even with only five ingredients, a few little hiccups can make your protein bars fall apart later, and we absolutely can’t have that right before a big lift! The number one mistake I see people make is not packing the base tightly enough in the pan. When you think you’ve pressed it firm enough, really give it one more squeeze. A loose base equals crumbling bars, especially when they get cold.
Also, be mindful of your protein powder. If it’s super absorbent, you might need that extra teaspoon of liquid mentioned in the instructions. Better too sticky than too dry, seriously! If you find they are just *too* soft straight from the fridge, try my little secret: pop them in the freezer for about 20 minutes before you plan to eat them. That flash chill makes them perfectly firm and even easier to handle as protein bars for workout fuel!
Meal Prep Snacks: Storing and Keeping Your Protein Bars Fresh
The best part about these protein bars? They are glorious meal prep snacks! You can whip up a batch on Sunday, and they are ready to grab straight from the fridge all week long—no sad desk lunches here. Since these are packed with natural fats from the peanut butter, they hold up incredibly well without needing any fancy preservatives.
Here’s the golden rule for keeping them perfect: store the bars in a truly airtight container. I lay down a piece of parchment or wax paper at the bottom, stack the bars in a single layer (or two very careful layers), and then seal it up tight. You want them stored in the refrigerator, and they should stay perfectly fresh and chewy for up to one full week.
Now, don’t forget that chill time we discussed earlier. When they come straight out of the fridge, they are often rock hard because the peanut butter and binding syrup firm up completely. You have options here. If you want them *really* firm for carrying around—great, eat them right away! But if they are too hard for your liking, just let them sit on the counter for about 15 minutes before you dig in. That little bit of warming up brings back the amazing chewy texture we worked so hard to create. This makes them ideal make ahead protein snacks!
If you’re ever worried about sharing them outside the house, always check out our general disclaimer page for any specific ingredient concerns, though these simple bars are usually very easy to manage!
Frequently Asked Questions About Protein Bars
Can I make these specific peanut butter chocolate bars vegan?
Oh yes, you absolutely can! If you look back in the ingredient notes, you’ll see I mentioned this specifically. To make these into perfect vegan protein bars recipes, you just need to make one easy swap: use maple syrup instead of honey, and make sure you are using a plant-based protein powder. That usually does the trick! They firm up just as well, and the flavor is still amazing.
What if I want a lower-carb bar? Can I make keto protein bars using this?
That’s a great question, because those added oats and the honey definitely bump up the carb count here. To be honest, this specific exact recipe isn’t the best foundation for keto protein bars homemade because oats are a primary ingredient for binding. To go true keto, you’d need to swap the oats for almond flour and use a keto-friendly liquid sweetener instead of honey. It’s a whole different recipe focus, but I am working on a dedicated low-carb version for you!
I don’t have that much peanut butter; can I use almond butter or another nut butter?
You can definitely swap it out! Almond butter works beautifully and gives the protein bars a slightly different, nuttier flavor profile. Sunflower seed butter is also a great option if you have a nut allergy, or if you are just trying to mix up your flavor game. Just make sure whatever nut or seed butter you use is the natural, stir-able kind. The texture relies on that creamy, smooth consistency.
What happens if I skip the chocolate chips?
Nothing bad happens at all! If you skip the chocolate chips, you immediately cut down on a little bit of extra sugar and fat, and you’ve got yourself a perfect four-ingredient bar. These become excellent, straightforward quick protein snacks that way. They might be slightly less ‘dessert-like’ but functionally they are just as good for fueling up!
Why are my finished protein bars so hard and crumbly?
If your bars are crumbling, 99% of the time it means your dough wasn’t mixed wet enough, or you didn’t press it firmly enough into the pan—remember I said you need to put some muscle into Step 4! If it’s too dry, you need to add that extra teaspoon of water or milk during the mixing phase. Dry ingredients soak up way more moisture than you think they will when you’re making these no bake wonders!
Estimated Nutritional Breakdown for These High Protein Treats
I know if you’re relying on these for your daily fuel, you want to know exactly what you’re putting into your body. These high protein treats are fantastic because they are packed with good stuff to keep you going! Remember, because we are making them at home with ingredients we choose, the exact numbers can wobble a little bit depending on whether your peanut butter is natural or conventional, or if your protein powder has added sweeteners.
But generally speaking, here is the estimated nutritional breakdown when cut into 10 perfect bars, based on the standard ingredients list. I try to keep things simple and clean!
- Serving Size: 1 bar
- Calories: 220
- Protein: 15g (That’s the good stuff!)
- Fat: 12g
- Saturated Fat: 3g
- Unsaturated Fat: 9g
- Trans Fat: 0g
- Carbohydrates: 20g
- Fiber: 3g
- Sugar: 10g
- Cholesterol: 0mg (Another win for using natural ingredients!)
So, you get a generous 15 grams of protein in every single square! I always see these numbers as a great balance—enough complex carbs from the oats to give you sustained energy, plenty of fat for satisfaction, and that big protein punch for muscle recovery. Just remember, these figures are my best estimate for these protein bars; your specific brand choices might fudge the numbers slightly, so take them as a very reliable guideline!
Share Your Favorite Protein Bar Ideas
Whew! Now that you’ve got the absolute best base recipe for protein bars under your belt, I’d love to hear what you think! Did you follow the peanut butter chocolate route, or did you get creative with your mix-ins? Maybe you swapped the oats for puffed rice or added some shredded coconut for texture—tell me all the delicious ways you adapted this simple framework when you made your own batch of homemade protein bars!
Jump down into the comments below and give this recipe a quick rating if you loved how easy and satisfying these quick protein snacks turned out. If you have any brilliant flavor combinations for the next batch, please share them! We are always looking for exciting new protein bar ideas to try out next time. And hey, if you ever need to reach out directly with a specific baking question that wasn’t answered here, feel free to drop us a line on the Contact Page. Happy snacking!
PrintNo-Bake 5-Ingredient Peanut Butter Chocolate Protein Bars
Make simple, chewy, no-bake protein bars using only five ingredients. These are perfect for quick snacks or meal prep.
- Prep Time: 10 min
- Cook Time: 0 min
- Total Time: 2 hr 10 min
- Yield: 10 bars
- Category: Snack
- Method: No Bake
- Cuisine: American
- Diet: Vegetarian
Ingredients
- 1 cup rolled oats
- 1/2 cup natural peanut butter
- 1/2 cup whey or plant-based protein powder (vanilla or unflavored)
- 1/4 cup honey or maple syrup
- 1/4 cup dark chocolate chips
Instructions
- Line an 8×8 inch baking pan with parchment paper, leaving an overhang on the sides for easy removal.
- In a medium bowl, combine the rolled oats, protein powder, peanut butter, and honey or maple syrup.
- Mix the ingredients thoroughly until a thick, uniform dough forms. If the mixture is too dry, add one teaspoon of water or milk at a time until it holds together.
- Press the dough evenly into the prepared pan. Use a spatula or the bottom of a glass to pack it down firmly.
- Sprinkle the chocolate chips over the top and gently press them into the dough.
- Place the pan in the refrigerator for at least 2 hours, or until firm.
- Lift the bars out using the parchment paper overhang and cut into 10 equal rectangles.
Notes
- For a vegan option, use maple syrup instead of honey and a plant-based protein powder.
- If you prefer a firmer bar, chill them in the freezer for 30 minutes before cutting.
- Store the finished bars in an airtight container in the refrigerator for up to one week.
Nutrition
- Serving Size: 1 bar
- Calories: 220
- Sugar: 10
- Sodium: 80
- Fat: 12
- Saturated Fat: 3
- Unsaturated Fat: 9
- Trans Fat: 0
- Carbohydrates: 20
- Fiber: 3
- Protein: 15
- Cholesterol: 0