

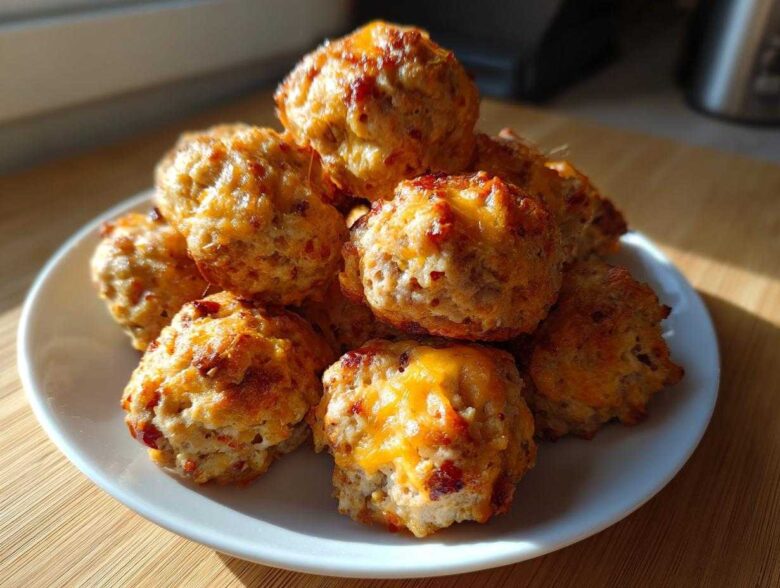
When game day rolls around, or when unexpected guests show up right before a big potluck, you need a miracle. Trust me, I’ve been there! Forget fussy appetizers that need ten different steps. My absolute go-to secret weapon is this classic, totally foolproof recipe for bisquick sausage balls. They are cheesy, savory, and honestly taste like they took you all day, even though they only use three simple ingredients. I used to stress for hours trying to impress people, but these buttery, Southern-style bites are always the first thing to disappear. Seriously, they are the ultimate easy party food! You can learn more about my no-fuss philosophy over at our little corner of the internet.
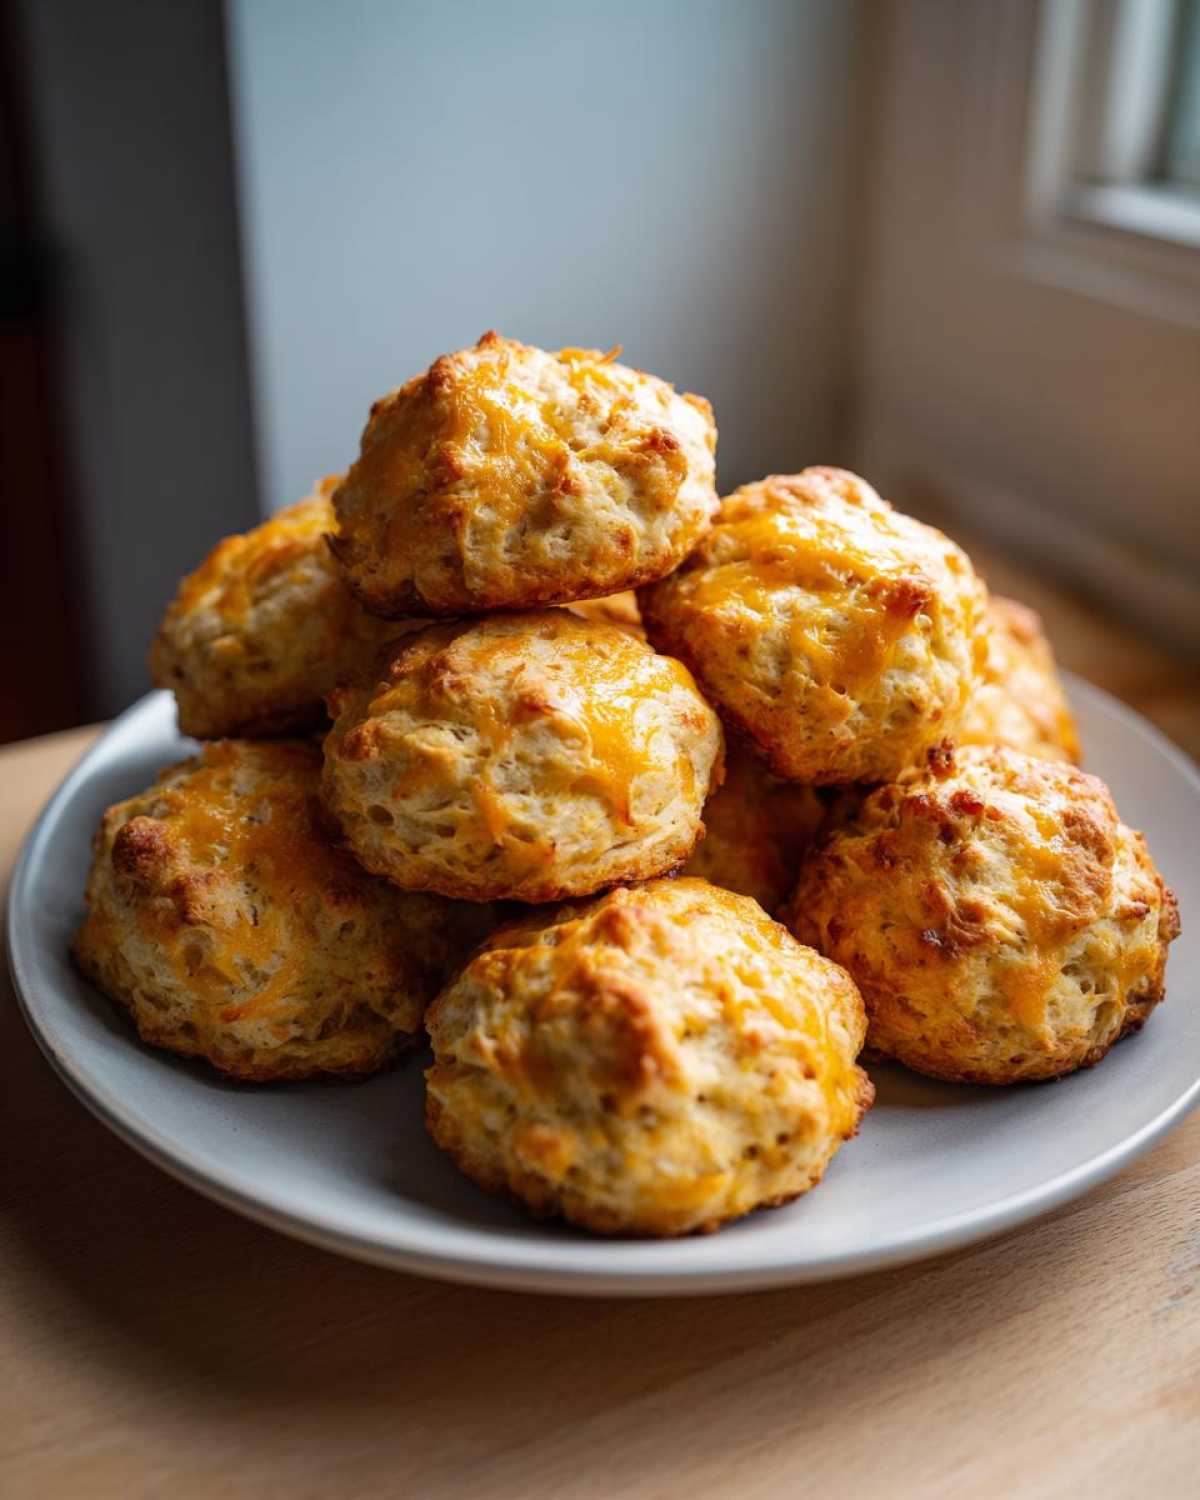
Why This Classic Recipe Makes the Best bisquick Sausage Balls (3-Ingredient Magic)
People always ask me, “What’s the secret?” And honestly, it’s the simplicity! This isn’t some fussy recipe that requires sour cream, eggs, or onion powder. It works because the ratio of sausage fat, the binding power of Bisquick, and the sharp flavor of good cheddar cheese create something magical. These are the quintessential Classic Cheese and Sausage Balls you remember from every potluck.
We aren’t reinventing the wheel here; we are just perfecting the wheel that already works! It’s the easiest 3 Ingredient Appetizer you’ll ever whip up, making it perfect for those nights when you need something amazing fast.
Key Benefits of Making bisquick Sausage Balls
- They come together in literally 10 minutes of mixing time—no chill time needed!
- Minimal cleanup! You only dirty one big bowl for the main mix.
- They are the ultimate crowd-pleaser, meaning you never have to worry about leftovers.
- They transition perfectly from breakfast to late-night munchies; our family loves them as Game Day Snacks.
Gathering Ingredients for Perfect bisquick Sausage Balls
Okay, let’s talk ingredients because, even though there are only three, the quality really shines through here. When you’re making something this simple, you can’t hide behind a long list of spices! For the absolute best results in these bisquick sausage balls, you need to be thoughtful about your choices.
Here’s the holy trinity we’re working with:
- One pound of bulk pork sausage—and I mean *bulk*. Make sure you get it out of the casing first, or slice the casing open and squeeze it out before mixing.
- One cup of Bisquick baking mix. This is non-negotiable; it’s the magic binder!
- One cup of shredded sharp cheddar cheese. Sharp is key here; it cuts through the richness of the sausage perfectly.
That’s it! It’s so fast, which is why I’ll take these over anything complicated every single time.
Ingredient Clarity and Sourcing Tips
Let’s break down why these specific items matter so much. First off, the sausage. You can use mild, or you can go hot if you like a real kick—I usually stick to mild for parties just in case. But whatever you pick, make sure it’s good quality! That fat renders out and keeps our little bites tender.
For the cheese, please, please use sharp cheddar and grate it yourself if you can! The pre-shredded stuff has anti-caking agents that can sometimes make your delicious Cheesy Sausage Bites lose that beautiful, gooey texture we are aiming for. You want that cheese to melt beautifully around the sausage and Bizquick while baking.
And Bisquick? It’s designed to give you that slight lift and tenderness we love in a savory treat. It’s what gives these the perfect texture so they aren’t too dense. It truly is a staple if you want Quick Mix Bisquick Recipes that impress!
Step-by-Step Instructions for Easy Sausage Balls Recipe
Now that we have our perfect ingredients ready to go, it’s time for the easy part—the assembly! Remember what I always say: baking is science, but mixing is all about feel. This is where we treat this mixture gently; otherwise, you’ll end up with dense hockey pucks instead of fluffy bisquick sausage balls. We aren’t here for hockey pucks!
First things first: get that oven fired up to 350 degrees Fahrenheit. I like to line my baking sheet with parchment paper—it saves my life and makes cleanup a breeze. If you don’t have parchment, just lightly grease that pan, okay? You’ll hear me mention this again over at my important disclaimer page, because pan prep is key!
Mixing and Rolling Your bisquick Sausage Balls
In your big bowl, toss in that sausage, the Bisquick, and the cheddar cheese. Now, here’s the crucial technique. You need to mix this with your hands, really getting in there, but you stop the second everything is just barely incorporated. If you overmix, you activate too much gluten in the Bisquick, and that’s when things get tough. A few streaks of flour are totally fine! You want it to feel a little sticky and messy.
Once mixed, just start rolling! Aim for about one-inch balls—think slightly smaller than a golf ball. Consistency matters so they all bake at the same rate. Don’t sweat it if your hands get a little messy; that’s just evidence you’re doing it right!
Baking Time and Draining Excess Grease
Place those perfectly rolled beauties on your prepared sheet, leaving about an inch between them because they will spread just a tiny bit. Pop them in that 350°F oven for 15 to 20 minutes. You’re looking for a gorgeous golden brown color on top and for them to be cooked all the way through.
Right when they come out, they’ll be glistening with fat—that’s normal! Carefully transfer them using a slotted spoon or tongs onto a plate lined with paper towels. Let them drain for just a minute or two. This step is vital for keeping your Easy Sausage Balls Recipe from having a soggy, greasy bottom. Serve them warm, and watch them vanish!
Tips for Success Making Crowd Pleasing Snacks with Your bisquick Sausage Balls
Even though this is the easiest recipe in the world, I’ve made a few mistakes over the years that I don’t want you to repeat! It’s all about managing the fat content and making sure you don’t rush the process right at the beginning. Seriously, these are such great Savory Breakfast Treats, but they are even better when they come out tender and perfectly textured.
My number one technical tip is letting your sausage sit out for about 15 minutes before you start mixing. Cold sausage fights you every step of the way, and you end up kneading it too much just to get the cheese and Bisquick worked in. Room temperature sausage mixes beautifully and quickly, which helps you avoid over-mixing—that’s the enemy when it comes to tender bisquick sausage balls.
Also, trust your eyes more than the clock! If your oven runs hot, 15 minutes might do it. If it runs cool, you might need the full 20. You are looking for a nice, consistent golden brown on top, not dark brown or burnt looking edges. Nobody wants a dry Easy Bake Snack Idea when they expect cheesy goodness!
Variations for Your Cheesy Sausage Bites
While this recipe stands perfectly fine on its own, I love tinkering just a little bit to keep things interesting, especially when I’m making a huge batch for a big event. You don’t need tons of extra ingredients to elevate these Cheesy Sausage Bites!
My absolute favorite little addition is just a half teaspoon of dry mustard powder mixed right in with the dry ingredients. It doesn’t make them taste like mustard, I promise, but it really wakes up the flavor of the sharp cheddar. If you prefer a little deeper, savory umami note, add just a small dash of Worcestershire sauce right into the sausage when you start mixing it up.
You can even switch up the cheese! While I adore sharp cheddar, sometimes I use half sharp cheddar and half Monterey Jack. That extra white cheese gives you that super satisfying, stringy pull when someone bites into one of these glorious things. It’s all about finding your perfect mix while staying true to the three-ingredient core!
Make Ahead Appetizers: Storing and Freezing bisquick Sausage Balls
This is probably my favorite feature of these bisquick sausage balls! Since they are such a hit at parties, I nearly always have to make them ahead of time, or freeze leftovers because I baked double the batch (because who doesn’t want leftovers?). This recipe is perfect for planning ahead, which is why it’s such a dream for holiday hosting.
If you want to prep the mix ahead of time, it’s super easy. You can mix everything up—the sausage, the Bisquick, and the cheese—just like normal. Roll them into balls, place them on a cookie sheet lined with parchment, and then pop the whole sheet right into the fridge. This gives you a wonderful head start for any upcoming Party Food Appetizers!
I let them chill in the fridge for about an hour until they firm up a bit. Then, you can pop them into an airtight container or freezer bag. Storing the dough like this means you can keep them refrigerated for up to 24 hours before you need to toss them in the oven. They might bake just a minute or two longer since they start out cold, so keep an eye on them.
Now, let’s talk about making them truly Freezer Friendly Sausage Balls. My expert advice? Bake them first! Freezing them baked is always the way to go for the absolute best texture when you reheat them.
Once your sausage balls are completely cooled after baking, lay them out on a baking sheet again and flash-freeze them for an hour or so. This keeps them from clumping together in the freezer bag. After that hour, toss them all into a heavy-duty freezer bag. They hold up beautifully for about three months—talk about having Make Ahead Appetizers ready on demand!
When you’re ready to serve your Savory Breakfast Treats or party snacks, just pull out what you need. You don’t even need to thaw them completely. Just lay them on a baking sheet and reheat them back in the oven at 350 degrees for about 10 to 15 minutes, or until they are hot all the way through. They come out tasting almost exactly like they were just made!
Serving Suggestions for Southern Sausage Balls
Part of the fun of these classic Southern Sausage Balls is figuring out the perfect way to serve them up! Yes, they are amazing all by themselves—hot out of the oven, maybe with a napkin to dab off that last bit of grease—but you can definitely dress them up a little bit if you want them to feel extra special.
When I serve these as appetizers for a big crowd, especially during the holidays or for big football games, I always put out a little dipping station. It’s simple, but people go wild for it! My favorite pairing is a small bowl of pure maple syrup. Don’t knock it till you try it; the salty, savory sausage mixed with that sweet maple syrup is addictive. It turns our simple bisquick sausage balls into something totally elevated.
Another great option, especially if you’re serving them later in the morning, is honey mustard. Just a basic, slightly spicy honey mustard sauce is fantastic for these Cheesy Sausage Bites. It adds a little tanginess that cuts through the fat perfectly.
If you decide to make these for a savory brunch—and you absolutely should, they make fantastic Breakfast Sausage Balls—just serve them right alongside some scrambled eggs and maybe a fruit salad. They replace the need for making actual sausage patties because they bring all that flavor in one little bite. Since they’re so sturdy, they hold up really well on a brunch buffet, too. No matter how you bring them to the table, trust me, these are going to be the first snack gone!
Frequently Asked Questions About bisquick Sausage Balls
I know when I try a brand new recipe, especially a favorite like this one, a few questions always pop into my head. Don’t worry if you’re wondering about substitutions or how to keep them tasting fresh the next day! We want these to be reliable, so let’s clear up any confusion about making these foolproof bisquick sausage balls.
Can I use a different type of cheese in these bisquick Sausage Balls?
You absolutely can switch up the cheese, but I have to tell you, sharp cheddar is my absolute favorite because its robust flavor really stands up to the savory pork sausage. It offers that perfect balance so your bites aren’t just fatty!
If you want something that gives you an amazing, gooey melted cheese pull—perfect for your leftover Cheesy Sausage Bites—try substituting half of the cheddar with Monterey Jack. It melts like a dream! Just try to avoid cheeses that are very high in moisture, like fresh mozzarella, unless you leave them out to dry a bit first, because extra water can sometimes make the dough a little soft.
What is the best way to reheat leftover bisquick Sausage Balls?
This is such an important question because nobody wants to eat a cold, slightly heavy sausage ball the next day! My biggest advice for reheating is to skip the microwave if you can. The microwave heats them too fast and turns that lovely texture crumbly and tough.
The best way, hands down, is back in the oven! Preheat your oven to a nice brisk 350 degrees Fahrenheit. Lay your leftovers out on a parchment-lined baking sheet—don’t pile them up, give them space so the heat can circulate. Bake them for just 5 to 10 minutes, depending on how many you’re reheating, until they are hot all the way through and the outside gets that delightful little crispy edge back. They taste almost freshly baked this way!
If you’re making a huge batch for a gathering and need to keep them warm for hours, I often use a crockpot set on the “warm” setting. Stir them gently every 20 minutes or so. This keeps them piping hot without drying them out, making them perfect throughout those long Game Day Snacks sessions. You can find more ways to connect with us and ask questions over at the contact page!
Nutritional Estimates for This Easy Sausage Balls Recipe
Okay, let’s talk fuel for a minute. I always want to keep things light and easy for my guests, and while these bisquick sausage balls are definitely a richer snack, they aren’t as heavy as you might think, especially when you use leaner sausage! I pulled the estimates based on using standard 80/20 bulk pork sausage because that’s what I naturally reach for.
Remember that these numbers are ballpark figures! The health profile of your sausage—whether it’s hot, mild, or lean—will change things quite a bit, as will the specific brand of Bisquick you use. This is just a guide so you can see what you’re working with when you serve up these wonderful Cheesy Sausage Bites.
Here’s a general guide per single, one-inch sausage ball:
- Serving Size: 1 ball
- Calories: 105
- Fat: 8g
- Saturated Fat: 3g
- Carbohydrates: 3g
- Protein: 6g
- Sugar: 0.5g
See? Pretty good for a satisfying snack! They pack a nice protein punch to keep you full through the game or appetizer hour. Because we aren’t adding a ton of sugary sauces or extra high-fat ingredients, they stay relatively controlled, which makes them great for almost any gathering. We are keeping things honest here on the blog, and I always want to be upfront about what you’re serving!
For complete transparency on how we run this site and use information, you can always pop over and check out our privacy policy. But rest assured, when it comes to my kitchen, I always advise that taste comes first, and these Easy Sausage Balls Recipe bites definitely pass the taste test!
Share Your Favorite Party Food Appetizers
Well, friend, that’s it! You’ve got all the secrets now to make the absolute best, most reliable batch of bisquick sausage balls that will disappear faster than you can say “one more.” This recipe is a staple in my kitchen, and I truly hope it becomes one in yours too!
Now, this is where you step in! I want to know what you think. If you make these savory treats for your next gathering, please come back and let me know how they went! Did you go spicy with the sausage? Did you use a dipping sauce? Did your family devour them as Party Food Appetizers?
Taking a moment to rate the recipe—even if it’s just giving it five shiny stars—really helps me know what recipes you all love and want to see more of. Plus, if you snap a picture of your perfectly golden-brown batch, I’d love to see how you served them up!
Remember, sharing great food is sharing love, and these little bites are packed with both. If you have any final questions about substitutions or troubleshooting your Easy Sausage Balls Recipe, you can always drop us a line over at the contact page! Happy baking, and I can’t wait to hear about your success!
PrintThe Best 3-Ingredient Classic Bisquick Sausage Balls

Make these simple, cheesy sausage balls using only three ingredients. This easy recipe is perfect for game day, parties, or a savory breakfast treat.
- Prep Time: 10 min
- Cook Time: 20 min
- Total Time: 30 min
- Yield: About 24 balls
- Category: Appetizer
- Method: Baking
- Cuisine: American
- Diet: Low Fat
Ingredients
- 1 pound bulk pork sausage
- 1 cup Bisquick baking mix
- 1 cup shredded sharp cheddar cheese
Instructions
- Preheat your oven to 350 degrees Fahrenheit. Lightly grease a baking sheet.
- In a large bowl, combine the bulk sausage, Bisquick mix, and shredded cheddar cheese. Mix the ingredients thoroughly with your hands until they are just combined. Do not overmix.
- Roll the mixture into small balls, about 1 inch in diameter. Place the balls on the prepared baking sheet, leaving about 1 inch between them.
- Bake for 15 to 20 minutes, or until the sausage balls are golden brown and cooked through.
- Drain any excess grease on paper towels before serving warm.
Notes
- You can prepare the dough ahead of time, roll the balls, and store them covered in the refrigerator for up to 24 hours before baking.
- These sausage balls freeze well after baking. Cool them completely, place them in a freezer-safe bag, and freeze for up to 3 months. Reheat in a 350 degree oven until warm.
- Use mild or hot sausage depending on your preference for spice.
Nutrition
- Serving Size: 1 ball
- Calories: 105
- Sugar: 0.5
- Sodium: 280
- Fat: 8
- Saturated Fat: 3
- Unsaturated Fat: 5
- Trans Fat: 0
- Carbohydrates: 3
- Fiber: 0.1
- Protein: 6
- Cholesterol: 25