

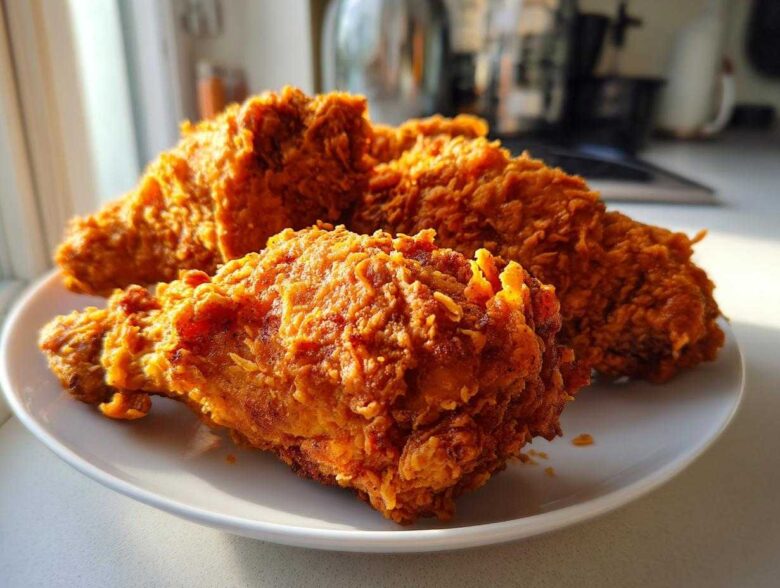
Listen to me, because I’ve chased the dream of perfect poultry my entire life, and I’m here to tell you: stop settling for soggy chicken! Getting that shatteringly crisp exterior that locks in all the moisture is not some unattainable restaurant secret. It’s possible right on your stovetop. This recipe for the ultimate Crispy Buttermilk Southern Fried Chicken is the one that finally made my family stop asking where I bought my fried chicken. We’re talking about a tender interior that practically melts, tucked beneath a golden, craggy crust that crackles when you press it. Trust me, after years of trial and error—and one memorable grease splatter incident I’d rather not revisit—I finally nailed this classic family favorite.
We’re not just making chicken here; we are making the centerpiece of an Ultimate Comfort Food night. If you are ready for the crunch, let’s get started on this fantastic version of homemade fried chicken.
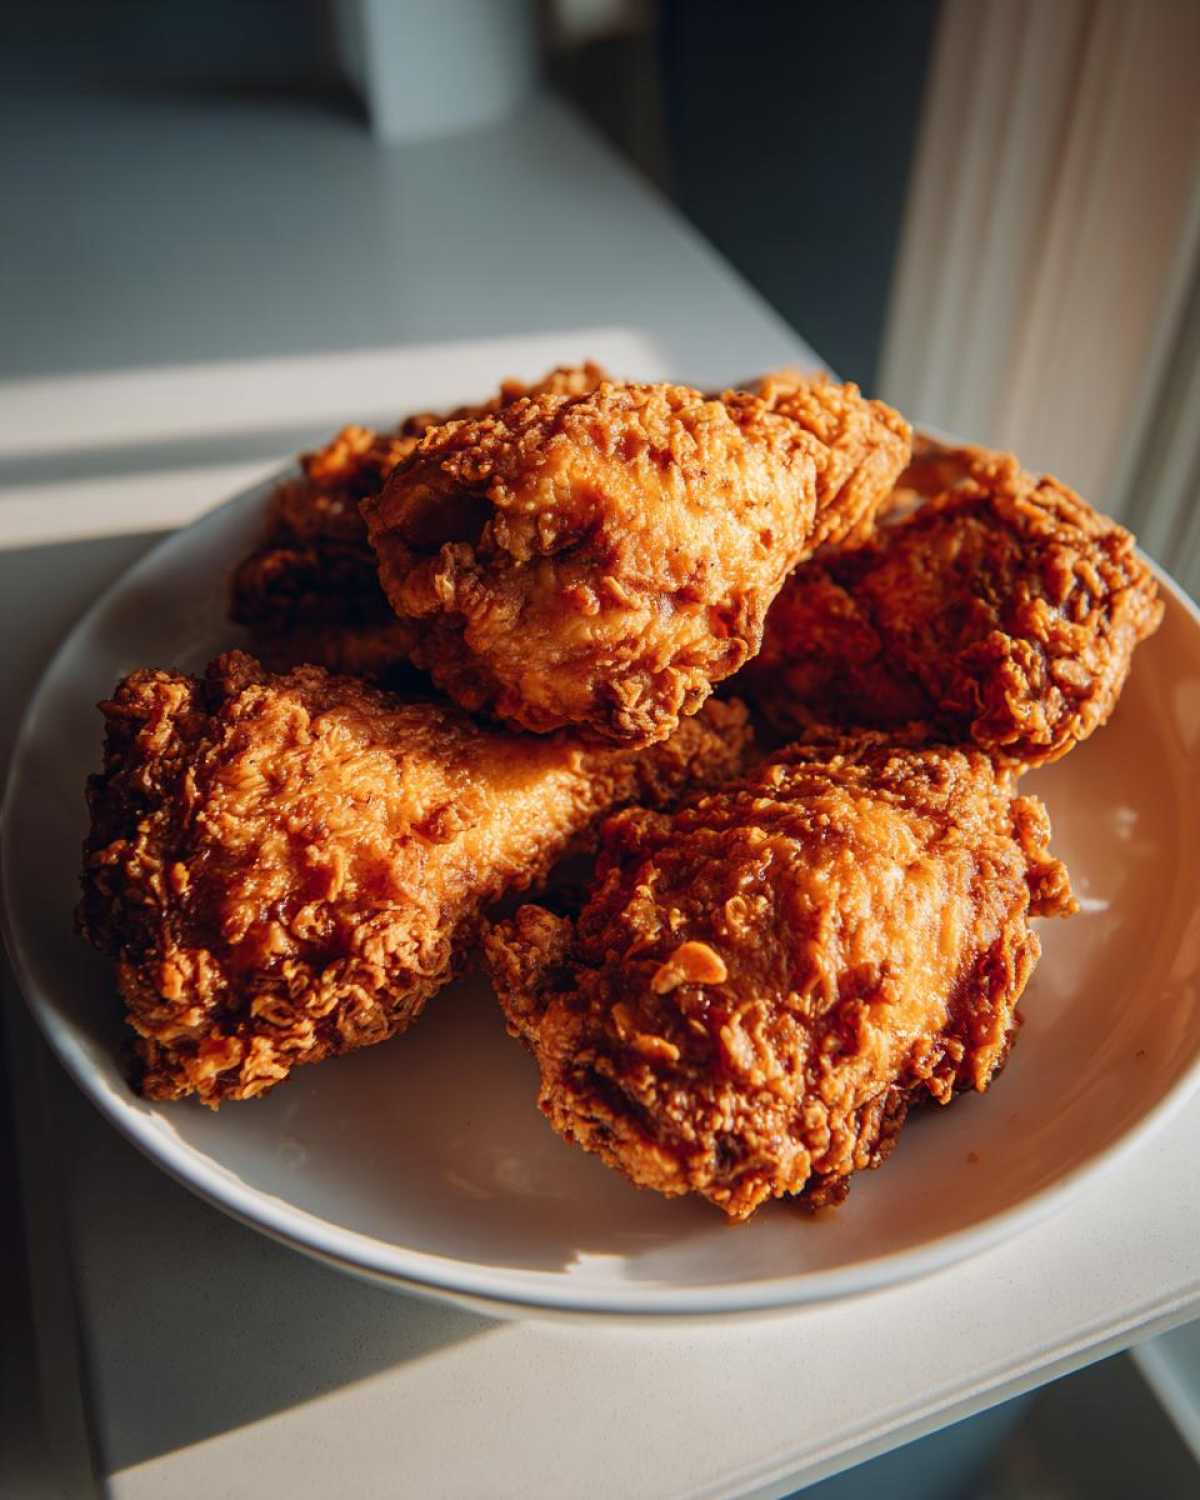
Why This Buttermilk Fried Chicken Recipe Works (The Secrets to the Best Fried Chicken Recipe)
Folks always ask me what separates my batch from theirs, and honestly, it all starts with the soak. That buttermilk marinade isn’t just about adding tang; it’s pure magic for tenderizing! The mild acid in the buttermilk slightly breaks down the proteins in the chicken—that’s why you get such a phenomenal, juicy chicken dinner every single time. It guarantees that even the thickest thighs stay impossibly moist during frying.
But moisture is only half the battle, right? You need that texture! This is hands-down the best fried chicken recipe because we marry the tender meat with a crust that refuses to quit. My one piece of upfront advice? Don’t skimp on the marinating time. Four hours is minimum, but overnight? That’s when the real transformation happens in the fridge. That soak sets the foundation for the whole experience.
Achieving the Ultimate Crunchy Chicken Coating
Now let’s talk about that crown jewel: the coating! This is where we ensure that signature crackle crust on our fried chicken. The secret weapon hiding in that flour mixture is cornstarch. It prevents the flour from absorbing too much oil while simultaneously creating those tiny, jagged edges that turn incredibly crunchy when they hit the hot fat. If you really want to cheat your way to perfection, try the double-dip method—flour, quick dip back into the wet marinade, and then back into the flour. It builds thickness like nothing else!
Ingredients for Ultimate Crispy Fried Chicken
Okay, let’s talk specifics. A perfect dish needs perfect components, right? And luckily, this southern fried chicken recipe uses stuff you probably have in your pantry already, with the exception being a good, solid carton of buttermilk. That’s the backbone here, so don’t try to substitute it with regular milk; we need that acidity!
Here’s what you’ll need for about four hungry people:
- 4 lbs chicken pieces (thighs and drumsticks recommended—they stay juiciest!), cut small if you’re using whole breasts.
- 2 cups buttermilk—the thicker the better!
- 1 tablespoon hot sauce (I use Frank’s, but use whatever you love for a little sneaky heat).
- 2 teaspoons salt
- 1 teaspoon black pepper
- 1 teaspoon paprika (sweet, not smoked, for classic color)
- 1 teaspoon garlic powder
- 1 teaspoon onion powder
- 2 cups all-purpose flour
- 1/2 cup cornstarch (Don’t skip this—it’s key for that crunch!)
- 1 teaspoon cayenne pepper (optional, only if you like that spicy kick!)
- Vegetable oil or shortening, enough to fill your skillet about 1.5 to 2 inches deep for frying.
See? Simple! The buttermilk and hot sauce are the dynamic duo that starts the amazing flavor journey right at the beginning. Everything else builds on that perfect, tangy base.
Preparation Steps for Perfect Homemade Fried Chicken
Now that we have our lineup of ingredients, let’s get into the actual workflow for this amazing homemade fried chicken. The single most important thing you have to do is commit to time. Remember I mentioned that buttermilk marinade? We need the chicken pieces—I usually stick to sturdy legs and thighs for consistency—to swim happily in that mixture (buttermilk plus hot sauce, remember?). Cover that bowl up tight and tuck it away in the fridge. I swear, if you can manage it, letting it go overnight is your secret weapon for the most tender meat. A minimum of four hours will work if you are desperate, but the longer, the better for this classic fried chicken.
While that magic is happening in the cold, we prep our flour dredge. This is everything that sticks to the outside and turns into that perfect golden brown chicken.
Mixing the Flour Dredge for Maximum Adhesion
Grab yourself a nice, wide dish. We’re mixing together the flour, the cornstarch (don’t forget that crunch-maker!), the salt, and all those lovely little powders—garlic, onion, and the paprika for color. Give that a really good whisking until it looks totally uniform. You don’t want any clumps of just salt or just cayenne sitting in there.
Once your marinating time is up, you’ll pull the chicken straight from the buttermilk bath. Let the thick excess drip off—you don’t want to wipe it—and then start dredging. Push that coating into every nook and cranny! Seriously press it on there. Here’s the crucial tip that separates the serious cooks from the rest: once fully coated, put the pieces onto a clean wire rack and just let them sit on the counter for about 15 minutes before they go into the oil. This rest time lets that coating basically cement itself to the chicken, which prevents it from flaking off and leaving you with bald spots when you fry!
Deep Fried Chicken Technique: Mastering Oil Temperature
Alright, deep breaths! This is the moment of truth for our deep fried chicken. The difference between stellar, golden brown chicken and greasy, sad chicken almost always comes down to one thing: oil temperature. You absolutely must use a thermometer here. I’m not kidding around about this; guessing leads to sorrow!
We want that oil heated up to about 325 degrees Fahrenheit to start. As soon as you drop in those flour-coated pieces, the temperature is going to dip—that’s normal because the cold chicken steals the heat. Your job is to keep it hovering happily between 300 and 335 degrees. If it drops much lower than 300, the crust gets soggy drinking up oil instead of crisping up. If it shoots too high, you end up with raw chicken inside a burnt shell, which is just tragic.
Don’t try to crowd your skillet. Seriously, just do 3 or 4 pieces at a time depending on how big your pan is. Overcrowding drops the temperature too fast! Once they’re in, let them cook undisturbed for about 6 to 8 minutes per side. You’re looking for that deep, beautiful golden brown, and trust me, if the temperature is right, the inside will cook through perfectly to 165°F just as the outside gets shatteringly crisp!
Tips for Success When Making Southern Fried Chicken
We’ve nailed the prep, and we’ve mastered the deep-fry dance, but let’s chat about troubleshooting, because even the best Southern cooking can have hiccups! My biggest piece of advice for anyone trying this is to respect the thermometer. If you’re trying to rush things and crank the heat up too high, you are going to end up with a beautiful golden brown chicken color on the outside that’s still blush-pink and cold in the middle. That’s a fail in my book!
Remember that double-dip trick I mentioned for extra crunch? It’s worth doing if you have the time. It just adds an extra layer of craggy flour that really helps seal in that moisture. If you follow the heat guidance, you’ll hit the safe 165°F internal temperature right when the outside is perfectly dark and crisp. No one wants undercooked chicken, ever.
Managing Heat for Perfectly Cooked Fried Chicken
Let’s zoom in on the temperature one last time. If you see the oil smoking, you’ve gone way too high! Pull the heat back immediately—the crust will burn before the inside reaches that crucial 165 degrees Fahrenheit. On the flip side, if your oil temperature drops into the 280s, the crust stops hardening and starts soaking up oil like a sponge. That’s how you get greasy chicken instead of that incredible, crisp texture we are aiming for. Constant, gentle adjustment of the heat is the key to success after every batch goes in.
Serving Suggestions for Your Classic Chicken Dinner
Whew! You did it! You’ve pulled that perfectly golden brown chicken out of the oil, and now you have to figure out what to serve it with. This amazing result deserves the best table treatment possible. Because this is such rich, savory comfort food, you actually want sides that are bright or creamy to cut through that deliciousness.
My absolute favorite way to serve this is as part of a massive spread. Think creamy, fluffy mashed potatoes with gravy, or maybe a bright, crisp vinegar-based coleslaw. Honestly, nothing beats dunking a bite of that crunchy chicken coating into cool coleslaw—it’s the perfect contrast of hot and cold, crunchy and soft.
And you absolutely cannot forget the bread. Fluffy buttermilk biscuits are non-negotiable in my house. You tear one open, slather it with butter, and maybe even use those biscuits as a base for a leftover chicken sandwich the next day. If you’ve made this far, you deserve a truly epic plate!
Storage and Reheating Instructions for Crispy Fried Chicken
Listen, if you have glorious leftovers of this fried chicken—and I bet you do because it’s so good—you have to store it right. Resist the urge to put that hot chicken straight into the fridge in a sealed container; that steam turns everything soggy fast. Let it cool down almost completely on a paper towel-lined plate first.
When it’s time to eat the next day, the microwave is your enemy! To bring back that spectacular crunch, you absolutely must use the oven or an air fryer. Set your oven to about 375°F and let it warm up. Pop the pieces on a wire rack over a baking sheet for about ten minutes. That allows the heat to penetrate while drying out the coating again, resurrecting that perfectly crisp crust!
Frequently Asked Questions About Making Fried Chicken
I know you might still have a few burning questions—I certainly did when I was learning! Cooking with hot oil can feel intimidating, but once you understand these key points, you’ll feel like an expert preparing this easy weeknight chicken.
What if I don’t have buttermilk for the marinade?
Don’t stress! If you’re in a pinch and can’t run to the store, you can make a substitute. Take 2 cups of regular milk—whole milk works best—and stir in 2 tablespoons of white vinegar or lemon juice. Let that sit on the counter for about 5 or 10 minutes until it looks slightly curdled. That acidic mixture mimics buttermilk perfectly and will still give you a tender result for your juicy chicken dinner.
Can I successfully bake this for an ‘easier’ dinner?
You *can* bake it, but be warned: this recipe is specifically engineered for that deep-fried crunch! If you try to bake it, you won’t get the same thick, aggressive crust. If you must bake, spray the coated chicken generously with oil or cooking spray and bake on a wire rack at 400°F until done. It will be closer to roasted chicken than true crunchy chicken coating.
How can I adapt this to make Copycat Fried Chicken (less spicy)?
To make a taste profile geared toward something like copycat fried chicken, just skip the cayenne pepper in the dredge mixture entirely! The base seasoning—salt, pepper, garlic, onion—is very classic. You can also reduce the hot sauce in the buttermilk down to just a half teaspoon or omit it entirely, and still end up with amazing flavor.
Is it safe to use chicken fried chicken (CFC) instead of standard fried chicken?
That’s a different animal! Chicken fried chicken (or country fried chicken) is typically dredged in flour, pan-fried, and then smothered in gravy—it’s not meant to be heavily battered or deep-fried like this buttermilk recipe. This recipe is for that classic, intensely crispy, stand-alone piece of classic chicken dinner perfection.
Nutritional Estimates for This Family Favorite Chicken
I always like to give a little heads-up about what’s in this amazing batch of chicken, even though deep frying means we’re definitely leaning into comfort food territory! Nutrition is just an estimate, of course. How much oil soaks in really changes the final count, but it gives you a rough idea of what you’re diving into when you sit down for this unbelievable family favorite chicken.
Based on the full recipe ingredients divided into four servings, here is what we are looking at per serving:
- Serving Size: 1 piece
- Calories: 450
- Fat: 28g (with 8g saturated)
- Carbohydrates: 18g
- Protein: 30g
- Sugar: 2g
- Sodium: 650mg
A quick note on trustworthiness: these figures are calculated based on the raw ingredients listed and don’t account for brand variations or just how much delicious, crispy coating ends up staying on the plate versus in your belly! If you cut back on the oil or use very lean cuts, those numbers will shift. But when it tastes this good, I try not to worry too much about the exact math!
PrintUltimate Crispy Buttermilk Southern Fried Chicken

A recipe for classic Southern fried chicken using a buttermilk marinade to ensure a juicy interior and a thick, crunchy, golden crust.
- Prep Time: 20 min
- Cook Time: 35 min
- Total Time: 55 min
- Yield: 4 servings
- Category: Dinner
- Method: Deep Frying
- Cuisine: American Southern
- Diet: Low Lactose
Ingredients
- 4 lbs chicken pieces (thighs and drumsticks recommended)
- 2 cups buttermilk
- 1 tablespoon hot sauce
- 2 teaspoons salt
- 1 teaspoon black pepper
- 1 teaspoon paprika
- 1 teaspoon garlic powder
- 1 teaspoon onion powder
- 2 cups all-purpose flour
- 1/2 cup cornstarch
- 1 teaspoon cayenne pepper (optional, for heat)
- Vegetable oil or shortening, for frying
Instructions
- Place the chicken pieces in a large bowl. Pour the buttermilk over the chicken and stir in the hot sauce. Cover the bowl and refrigerate for at least 4 hours, or preferably overnight.
- In a shallow dish, whisk together the flour, cornstarch, salt, black pepper, paprika, garlic powder, onion powder, and cayenne pepper, if using. This is your dredging mixture.
- Remove the chicken from the buttermilk, letting excess drip off, but do not wipe it dry.
- Dredge each piece of chicken thoroughly in the flour mixture, pressing the coating onto the chicken to create a thick layer. Place the coated chicken on a wire rack set over a baking sheet. Let the chicken rest for 15 minutes before frying; this helps the crust adhere.
- Pour enough vegetable oil or shortening into a deep, heavy-bottomed skillet or Dutch oven to reach a depth of about 1.5 to 2 inches. Heat the oil to 325 degrees Fahrenheit (160 degrees Celsius). Use a thermometer to monitor the temperature.
- Carefully place 3 or 4 pieces of chicken into the hot oil, ensuring you do not overcrowd the pan, which lowers the oil temperature.
- Fry the chicken for about 6 to 8 minutes per side, turning carefully with tongs, until the internal temperature reaches 165 degrees Fahrenheit (74 degrees Celsius) and the crust is deep golden brown and crispy. Adjust the heat as needed to maintain the oil temperature.
- Remove the cooked chicken from the oil and place it on a clean wire rack set over paper towels to drain excess oil. Allow the chicken to rest for a few minutes before serving.
Notes
- For extra crispiness, you can double-dip the chicken: dredge in flour, dip briefly back into the buttermilk, and then dredge again in the flour mixture.
- Maintain the oil temperature between 300°F and 335°F for the best results. If the oil is too cool, the chicken absorbs too much grease; if too hot, the outside burns before the inside cooks.
- If you are frying larger pieces like breasts, you may need to finish them in a 300°F oven for 10 minutes after frying to guarantee they are cooked through.
Nutrition
- Serving Size: 1 piece
- Calories: 450
- Sugar: 2
- Sodium: 650
- Fat: 28
- Saturated Fat: 8
- Unsaturated Fat: 20
- Trans Fat: 0
- Carbohydrates: 18
- Fiber: 1
- Protein: 30
- Cholesterol: 100