

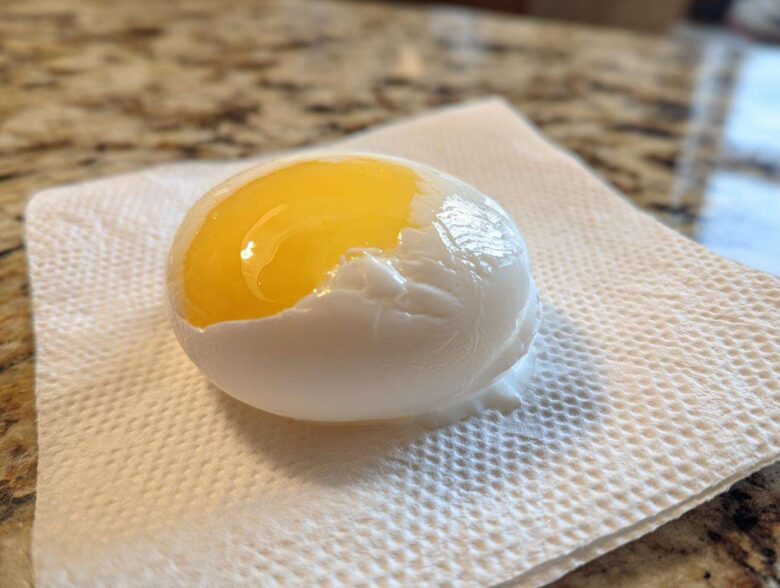
Okay, let’s talk about the one kitchen skill that makes people break out in a cold sweat: poaching eggs. I know, I’ve been there! My early attempts at making perfect poached eggs looked more like sad, stringy clouds floating in panic across the water. If you’ve accidentally created something closer to egg drop soup instead of that beautiful, tight white wrapping a golden, runny yolk, don’t you worry one bit. That fear stops today!
I spent nearly a year experimenting with every trick I could find—vinegar, no vinegar, fancy gadgets, you name it. My goal was simple: to create a truly foolproof method where you get those lovely, plump eggs every single time. I finally cracked the code, and it really boils down to two small things you need to master. Once you nail this technique, those fancy brunch plates you see online? You’ll be making them every Saturday. Get ready, because we are about to conquer the world of stovetop egg poaching!
Why Mastering How to Poach an Egg is Essential for Great Brunch Ideas with Eggs
Honestly, learning how to poach an egg is what separates the weekend cook from the brunch legend. It feels intimidating, I get it, but achieving those perfect poached eggs unlocks so many doors in the kitchen! Suddenly, simple meals feel gourmet. You go from making toast to making an event.
This skill is the backbone for so many incredible, healthy egg breakfast dishes that don’t involve you wrestling with a frying pan. Think about it: you get that gorgeous, custardy yolk that spills out perfectly over everything it touches. It’s mandatory for the ultimate Eggs Benedict, it elevates basic avocado toast, and it makes simple bowls feel restaurant-worthy. Once you master this, you’ll be looking for excuses to use them. Trust me, mastering this one technique massively expands your repertoire for all your favorite brunch ideas with eggs!
Essential Tools and Ingredient Quality for Foolproof Poached Eggs
Before we even think about heating the water, we need to talk supplies and ingredients, because this is where 90% of the battle is won. You don’t need a dozen fancy gadgets, but you do need the right components ready to go. Grab a wide, shallow pan—it gives the egg room to settle without bumping into the sides. You absolutely need a slotted spoon for lifting them out gently, and honestly, ditch the idea of cracking the egg straight into the water; crack it into a little ramekin or small bowl first. This is crucial for control!
Speaking of control, I have a little secret I learned from my grandmother about managing the egg white itself. You know how sometimes the white gets watery and stringy, making a mess? If you take your egg and gently strain it over a fine-mesh sieve for about 30 seconds before you drop it in the water, you catch that super thin, watery outer white. What’s left is the thick, strong white that clings beautifully to the yolk. It makes the resulting poached eggs look incredible!
The Importance of Fresh Eggs for Perfect Poached Eggs
This is rule number one, folks. If you take away only one piece of wisdom from this guide, let it be this: use the freshest eggs you can find. Why? It’s all chemistry! When an egg gets older, the albumen—that’s the clear white part—thins out. A thin white just spreads when it hits the water, creating those messy ‘angel wings’ we hate. But a super fresh egg has a thick, tight white that stays right where it belongs around the yolk. This is the key difference between a beautiful, plump egg and a failure. For perfect poached eggs, always prioritize freshness!
The Ultimate Stovetop Egg Poaching Technique for Poached Eggs
Alright, now for the main event! This is the classic stovetop egg poaching method that just works, provided you keep the excitement slightly under control. When I first tried the whirlpool trick, I got so enthusiastic stirring the water that I ended up sloshing hot water all over my counter. Oops! You want a gentle swirl, not a hurricane. A slow vortex helps gently wrap the white around that delicate yolk, giving you that gorgeous, compact shape. Trust me, once you see that white gather right up, you’ll feel like you’ve won the breakfast lottery!
Water Temperature and Vinegar: Secrets to Poached Eggs
The temperature of your water is everything! Forget a rolling boil; that’s the enemy. A rolling boil is too aggressive and will tear the egg apart before it sets. You want a gentle simmer. That means tiny, almost lazy bubbles forming on the bottom of the pan—when you look closely, you should be able to see them, but the surface should look relatively calm. If you see big waves, turn the heat down immediately!
Now, let’s talk vinegar. I know some purists swear you don’t need it, and if your eggs are super fresh, you might get away with it. But if you’re nervous or using eggs that aren’t absolute farm-fresh, use the vinegar! A teaspoon of white vinegar in the water helps the protein in the egg white set faster and firmer. It’s like a little insurance policy against messy poached eggs. The good news is that you can barely taste it, especially since we aren’t using gallons of it.
Step-by-Step Guide to Poached Eggs with Runny Yolks
This process is fast, so have everything ready to go! Fill your pan with about three inches of water, heat it to that gentle simmer, and add your vinegar if you’re using it. Now, take your egg—remember we cracked it into that little bowl?—and gently swirl the water into that slow vortex.
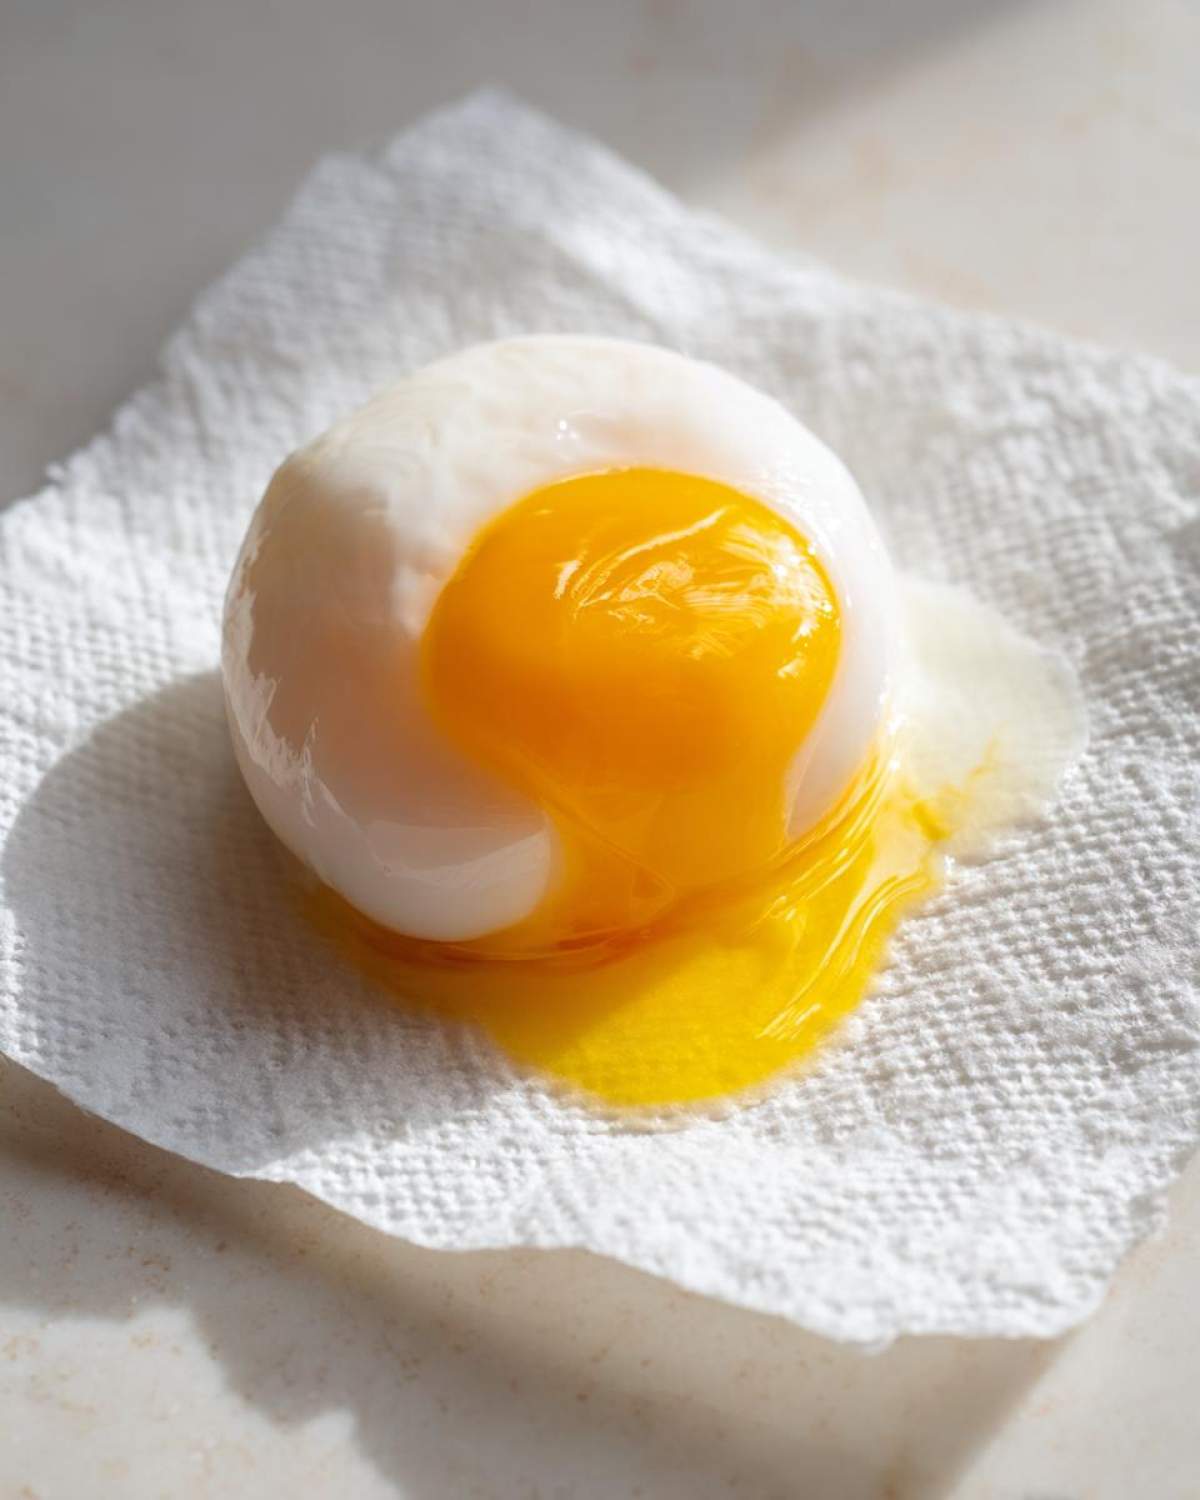
Slide the egg right into the center of that swirl. It should start hugging the yolk immediately! Let it cook undisturbed. If you are aiming for those glorious, **runny yolk eggs** that ooze perfectly, set a timer for three to four minutes. Five minutes gives you a slightly firmer yolk, which I still love for dipping toast soldiers. Once the timer goes off, use your slotted spoon to lift it out carefully. Give it a gentle poke on the white—it should feel firm, like soft Jell-O. Place it on a paper towel to drain, and boom, you have a picture-perfect egg!
Easy Egg Poaching Technique: Alternative Methods for Poached Eggs
Okay, I love my tried-and-true stovetop swirling method, but let’s be real—sometimes you’re looking for an easy egg poaching technique, or maybe you just only own one tiny saucepan! That’s why I want to show you a couple of alternative methods for making your **poached eggs**. Don’t feel bad about using helpers; these are fantastic ways to get a perfectly cooked shell around that liquid gold for your breakfast egg recipes when time is short or your stovetop is already full of bacon!
We’re going to look at the oven method—great for making a batch all at once—and the microwave method, which is almost laughably fast, provided you follow one very important safety rule. Showing you these different ways to tackle how to poach an egg just proves that there’s more than one right way to get that runny yolk!
Quick Microwave Poached Egg Secrets
Listen up, because this one is so quick you might burn your toast waiting for it to cook! The microwave is surprisingly effective, but you have to be careful not to turn your egg into a tiny, exploding pressure cooker. First, you need a microwave-safe bowl—a ramekin works best—filled halfway with water, just covering the eventual egg. Add a tiny splash of vinegar if you want that extra set. Now, crack your egg gently into the water.
Here is the absolute non-negotiable step: Take a toothpick or the tip of a sharp knife and gently pierce the yolk membrane once, just once! If you skip this, the steam inside the yolk builds up, and trust me, your microwave will not thank you. Pop it in for about 45 seconds on high power. Check it. If the white isn’t set, give it another 10 seconds. The egg should lift right out with a slotted spoon, and you’ll have surprisingly decent results for minimal effort!
Tips for Success When Making Poached Eggs
You’ve mastered the swirl, you’ve picked the freshest eggs, but what happens when things still go a little sideways? That’s where these extra bits of wisdom come in handy. Even the best chefs have days where the egg white decides to go rogue! These little troubleshooting tricks are the final layer of defense for your breakfast peace of mind, making them essential cooking tips for eggs that I rely on constantly.
If you find your whites spreading out despite your best efforts—especially if you skipped straining them—don’t panic and throw the whole pan out! If the spread is minimal, just use your slotted spoon to gently guide the excess wisps back toward the center while the egg is cooking. Give it a gentle nudge! It works wonders to clean up the edges.
Another major hurdle is cooking for more than one person. Poaching eggs takes concentration, and dropping four eggs in at once will drop the water temperature too fast and cause them all to merge into one giant egg blob. My rule is to only cook one or, at absolute maximum, two eggs at a time. If you are making brunch for the family, keep the first batch warm! Once you scoop the perfectly cooked eggs out, drop them into a bowl of warm (not hot!) water while you work on the next batch. This keeps them safe and perfectly ready to serve.
Finally, remember that chilling your eggs slightly before poaching can also help them hold their shape better. Some cooks will actually drop their eggs into an ice bath for about 60 seconds before bringing them to the simmer. It shocks the white into tightening up a bit, which helps against spreading. It sounds fussy, but for those times you really need that professional look, it’s a neat kitchen trick worth remembering!
Serving Suggestions: What to Eat with Poached Eggs
You did it! You have gorgeous, plump poached eggs sitting on your paper towel, yolks ready to burst. So, what do we do with this little masterpiece? This is where the fun really begins because perfectly poached eggs elevate almost any simple dish into something truly special. Forget the boring scrambled eggs; we are talking elegance on a plate!
The most obvious pairing, of course, is the timeless classic, but don’t stop there! My personal favorite way to enjoy them right now is atop toasted sourdough smeared with smashed avocado and a heavy sprinkle of red pepper flakes. It’s ridiculously simple, totally customizable, and easily one of the best healthy egg breakfast options out there. The creamy yolk blends with the avocado just so. Another great idea is simply serving two eggs over sautéed spinach or kale with a little sprinkle of flaky salt. It’s quick, nutritious, and tastes amazing.
How to Make Eggs Benedict Using Your Perfectly Poached Eggs
If you’re going to go all out for brunch, you have to go for Eggs Benedict. Once you have your perfect eggs, the rest is just assembly! You’ll start with a toasted English muffin, then lay down a slice of Canadian bacon or even smoked salmon if you want to switch it up. Next, gently place your freshly poached egg right on top of that!
Now for the grand finale: Hollandaise sauce! If you’re making the sauce from scratch, make sure it’s warm but not hot before you pour it over. You want that blanket of creamy, rich sauce to cascade down the sides, gently mingling with the runny yolk as it hits the muffin. It truly is the pinnacle of breakfast luxury, and honestly, the whole recipe hinges on how well you executed the poached eggs!
Storing and Reheating Poached Eggs
Look, sometimes life is too busy for a proper 7-minute egg process every morning. I totally get it! Meal prepping is a lifesaver, and yes, you absolutely can make your poached eggs ahead of time. This little bit of planning means you still get that gourmet runny yolk without any stress!
The trick here is to cook them *just* under done. For stovetop poaching, cook them for about 3 minutes, or until the white is mostly set but the yolk is still seriously liquid. I always shock them immediately! As soon as they come out of the hot water, I plunge them straight into a bowl of ice water. This stops the cooking process dead in its tracks and helps hold that perfect shape. Let them chill there for a minute or two, and then you can carefully lift them out.
For storage, you absolutely must keep them separate. Don’t shove them all in one container together, or you’ll end up with one giant, sticky egg ball in the morning. I pop the cooled eggs into a sealed, airtight container lined with a damp paper towel. Stored like this in the fridge, they hold up really well for about two to three days. You’d be amazed how perfectly they keep!
Now, for reheating—this is vital! You can’t just microwave them; they get rubbery and sad. The absolute best way is a warm water bath. Gently heat some water on the stove until it’s piping hot but not simmering. Take your eggs out of the fridge about 15 minutes before you want to eat them to take the chill off. Then, drop them carefully into that hot water for about 30 to 60 seconds. They heat through gently, the white firms up just a touch, and that yolk turns back into molten gold. Perfect for dropping right onto your toast!
Frequently Asked Questions About Poached Eggs
Can I poach eggs without vinegar or salt?
Yes, you absolutely can skip both! Salt doesn’t actually do much for the setting of the white, so that’s an easy omission if you’re watching sodium. The vinegar is for coagulation insurance, remember? If you skip it, you need to put all your focus on two other things: the absolute freshest eggs you can find and making sure your water is only at a gentle simmer—no more frantic bubbling! When the temperature is perfect and the egg white is thick and viscous, it will hold together beautifully on its own.
What is the best temperature for poaching eggs?
This is such a great question because temperature is everything! You want the water to be hot enough to cook the white quickly but gentle enough not to thrash the egg around. Ideally, you are aiming for somewhere between 180 to 190 degrees Fahrenheit, or between 82 and 88 degrees Celsius. If you don’t have a thermometer, just trust my visual cue: those tiny little bubbles forming on the bottom of the pan, but the surface is barely trembling. If you see big columns of bubbles breaking the surface, it’s too hot! Turn that dial down a tiny bit.
Why do my poached eggs look stringy?
Ah, the dreaded stringiness! Nine times out of ten, this boils down to one thing: egg age. As I mentioned earlier, when an egg gets older, that really thin outer layer of the egg white breaks down and becomes watery. When you drop that weak, watery white into the hot water, it separates from the main, thick egg white and just floats around cooking into those horrible little wisps. If you want to stop this, go back to that strainer trick! Give your cracked egg a quick trip through a fine-mesh sieve before it ever sees the water. That catches the thin part, and you are left with the beautiful, muscular white that holds its shape perfectly around that golden yolk. You can check out our privacy policy if you want to know more about our kitchen philosophy!
Share Your Success with This Recipe
Okay, you’ve done the work! You’ve conquered the simmer, you’ve mastered the swirl, and you’ve got runny yolks sitting pretty on your plate. Now, I really want to know how it went for you!
This isn’t just about following steps; it’s about building confidence in your kitchen, and seeing your success is what keeps me excited about sharing recipes here. Did you stick with the classic stovetop method? Or did you try those microwave secrets I mentioned? Don’t be shy—jump down into the comments below and let me know! I absolutely love hearing about how you customized things or which method felt the most foolproof for you.
If you managed to snap a photo of your beautiful, wobbly, perfect **poached eggs**, please tag us on social media! Seeing those golden yolks burst the way they should makes my whole week. Seriously, sharing your results helps build this community where we all learn together. And if you found this guide helpful, give the recipe a quick star rating right below this section! I promise, every rating helps other nervous cooks gain the confidence to try poached eggs for the very first time. Happy cooking, and I can’t wait to see what you whip up!
PrintThe Ultimate Guide: How to Poach an Egg Perfectly Every Time
Learn simple, reliable methods for poaching eggs on the stovetop, achieving set whites and runny yolks consistently.
- Prep Time: 2 min
- Cook Time: 5 min
- Total Time: 7 min
- Yield: 1 serving
- Category: Breakfast
- Method: Stovetop Poaching
- Cuisine: American
- Diet: Low Fat
Ingredients
- 2 large fresh eggs
- 4 cups water
- 1 teaspoon white vinegar (optional)
- Pinch of salt
Instructions
- Fill a wide, shallow pan with about 3 inches of water. Add the vinegar if you are using it. Heat the water until it reaches a gentle simmer; you should see small bubbles forming on the bottom of the pan, but the water should not be boiling rapidly.
- Crack one egg into a small bowl or ramekin. This makes transferring the egg easier.
- Use a spoon to gently stir the simmering water to create a slow vortex or whirlpool in the center of the pan.
- Carefully slide the egg from the bowl into the center of the swirling water. The swirling motion helps gather the white around the yolk.
- Cook the egg for 3 to 4 minutes for a runny yolk, or 5 minutes for a slightly firmer yolk. Do not stir the water while the egg cooks.
- Use a slotted spoon to carefully remove the egg from the water. Gently touch the white to check for firmness.
- Place the poached egg on a plate lined with a paper towel to drain excess water. Repeat the process for additional eggs, cooking them one or two at a time to maintain water temperature.
Notes
- Use the freshest eggs possible; older eggs have thinner whites that spread out more in the water.
- If you skip the vinegar, make sure your water is just barely simmering, not boiling.
- To avoid a messy white, you can strain the egg through a fine-mesh sieve first to remove the very thin, watery part of the white.
Nutrition
- Serving Size: 1 egg
- Calories: 72
- Sugar: 0.6
- Sodium: 71
- Fat: 4.8
- Saturated Fat: 1.6
- Unsaturated Fat: 3.2
- Trans Fat: 0
- Carbohydrates: 0.4
- Fiber: 0
- Protein: 6.3
- Cholesterol: 186