

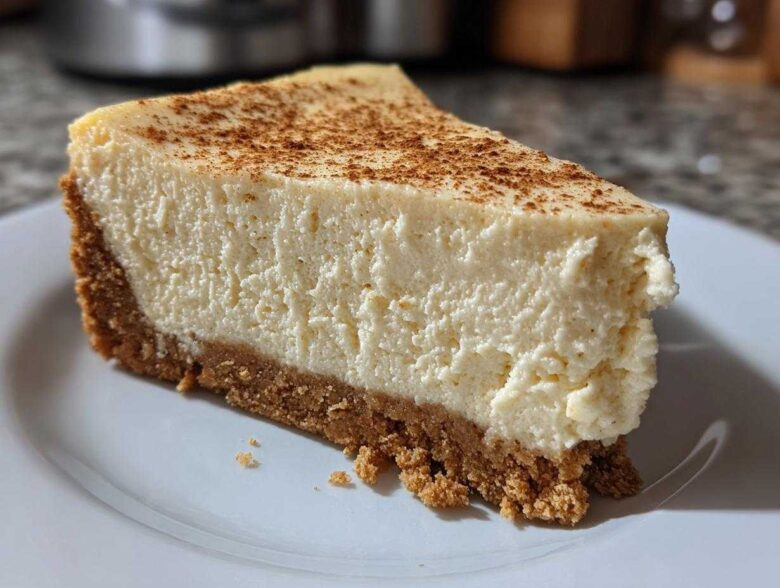
Oh, the holidays! I swear, the smell of nutmeg and spice just instantly puts me into full-on festive mode. If you’re looking for that show-stopping centerpiece for your Christmas dessert table—something that screams comfort and luxury—you absolutely have to stop scrolling right now. This creamy baked eggnog cheesecake recipe is non-negotiable in my house once the weather turns chilly.
Honestly, I tried making five different holiday cheesecakes one year before landing on this one. We nearly cried over how perfectly rich and smooth it turned out. It’s genuinely the most requested dessert at our family gatherings now, which tells you everything you need to know about its classic flavor profile and incredible texture. Trust me, you bake this once, and you’re set for every Christmas thereafter!
If you want to know more about the folks behind these tried-and-true recipes, you can always check out our story here, but let’s get back to the magic you can create in your own kitchen.
Why This is the Best Eggnog Cheesecake Recipe for Your Holiday Table
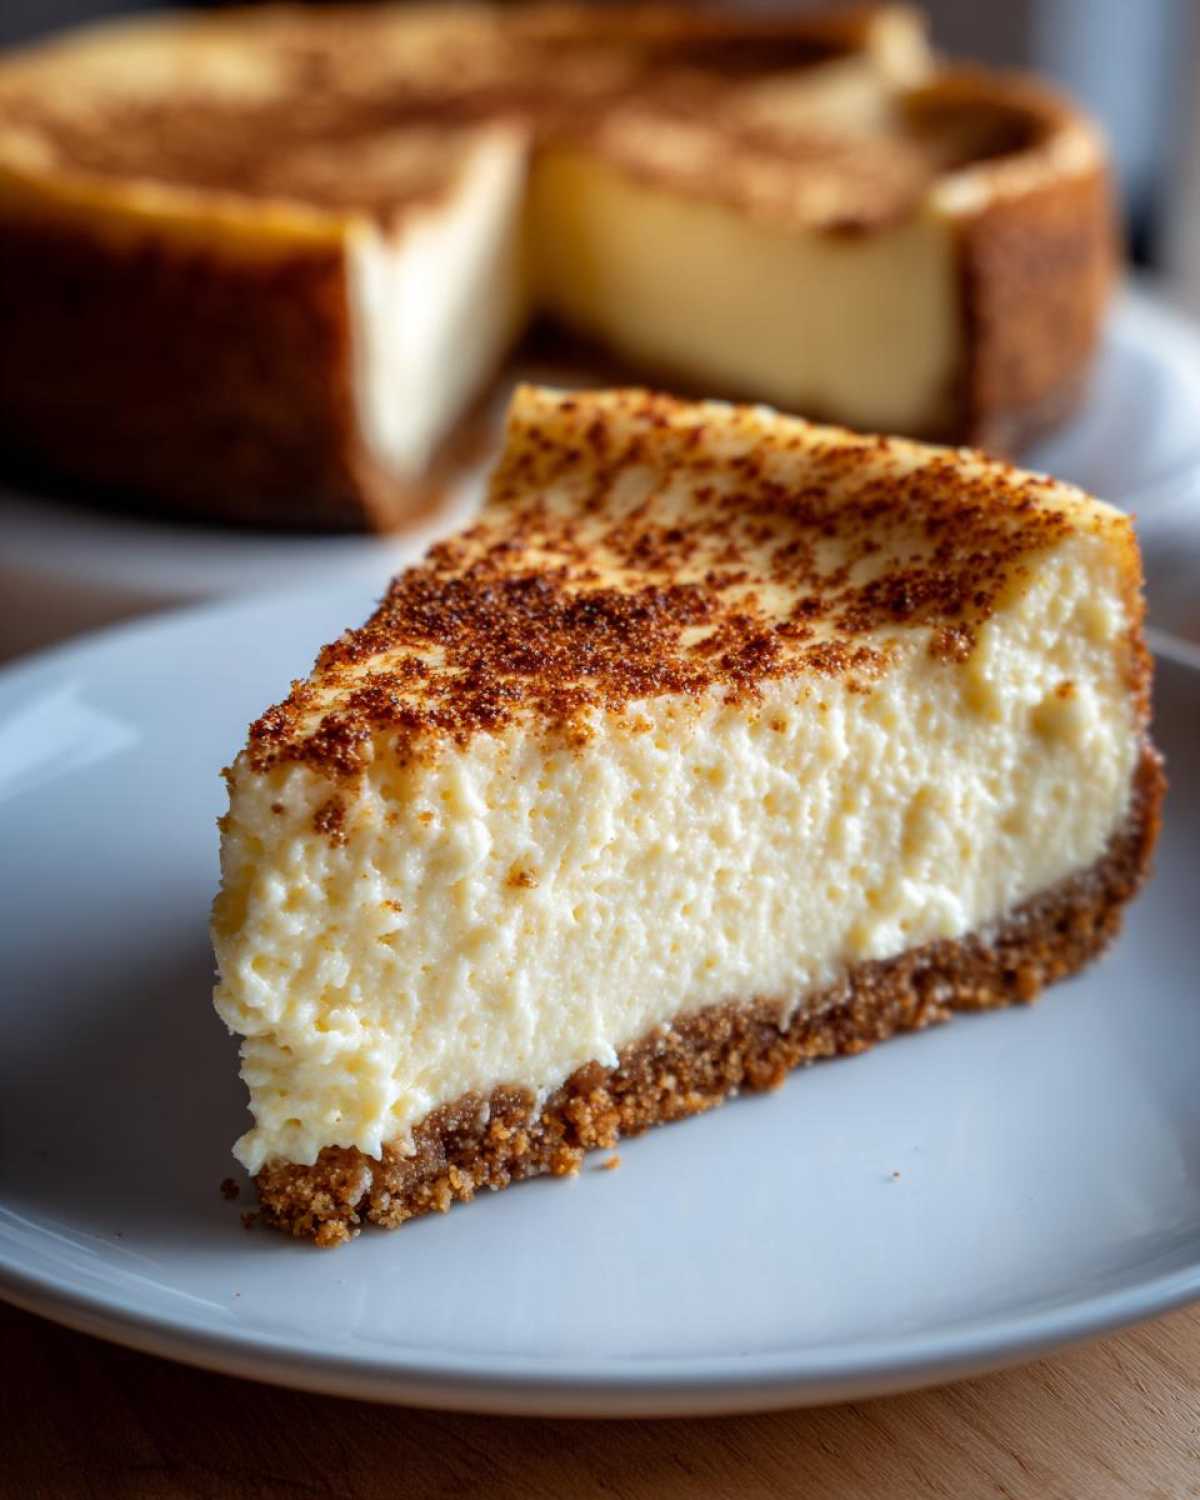
Forget those wimpy, grainy cheesecakes you’ve tried before! This recipe delivers on its promise. It’s that incredibly rich, velvety, creamy eggnog dessert that melts on your tongue. It truly stands out among the usual decadent Christmas desserts you see floating around.
- It has that deep, warm spice profile—all the best parts of eggnog captured in a cheesecake!
- The texture is spot-on: dense enough to feel substantial but impossibly smooth.
- It’s perfect for making ahead, which saves your sanity on Christmas morning!
Texture and Flavor Profile of Our Eggnog Cheesecake Recipe
The secret weapon for that unbelievable texture is keeping the oven temperature low and using a water bath—seriously, don’t skip that step! That steam bath ensures the cheesecake bakes evenly, preventing those hard, dry edges. We’re aiming for that perfect, smooth and creamy cheesecake experience every single time, and the gentle heat of the water bath locks in all that moisture and eggnog goodness.
Quick Facts: Prep, Cook, and Yield for This Eggnog Cheesecake Recipe
I know you’re busy planning your holiday menus, so here are the stats so you can fit this beauty in perfectly. It’s really not that bad for the payoff!
- Prep Time: About 25 minutes of active work.
- Cook Time: Roughly 75 minutes in that water bath.
- Total Time: You need about 1 hour 40 minutes of active hands-on and oven time.
- Yield: This recipe makes a beautiful 9-inch cake, serving 12 generous slices.
Gathering Ingredients for Your Eggnog Cheesecake Recipe
Okay, before we even think about soaking pans or turning on the oven, we need to talk supplies. Look, the success of any eggnog cheesecake recipe hinges on the quality of your starting materials. Especially with cheesecake, temperature is everything! You absolutely must remember to let that cream cheese and those eggs sit out on the counter for at least an hour. If they are ice cold when you mix them, you’ll end up with lumps, and nobody wants a lumpy holiday dessert!
I always make sure I have high-quality, store-bought eggnog on hand. Since eggnog is the star here, don’t skimp on what you buy—get the good stuff, the kind you actually drink! Let’s grab everything else we need so we can get this party started.
Crust Components for the Eggnog Cheesecake Recipe
We’re keeping the crust simple and spiced, which melts perfectly under the rich filling. Gather these items right now:
- 1 1/2 cups graham cracker crumbs — make sure they’re finely crushed.
- 1/4 cup granulated sugar — just plain white sugar for the base.
- 6 tablespoons unsalted butter, melted — that’s the glue that holds the base together.
Filling Ingredients for the Creamy Eggnog Cheesecake Recipe
Now for the heavy hitters! This is where we capture all that fantastic, creamy holiday flavor. Don’t substitute the fat content here; it’s what keeps this dessert so luxurious.
- 3 (8 ounce) packages cream cheese, softened — remember, room temperature is mandatory!
- 1 1/2 cups granulated sugar — yes, it needs this much to balance the tang.
- 1 teaspoon vanilla extract — the good stuff works best here.
- 1/2 teaspoon ground nutmeg — this is crucial for that authentic *eggnog* flavor!
- 1/4 teaspoon ground cinnamon — just a little warmth.
- 4 large eggs — also at room temperature.
- 1 cup eggnog — use your favorite store-bought brand here; it does all the heavy lifting!
- 1/4 cup heavy cream — for extra richness in this dreamy eggnog dessert.
And don’t forget those optional toppings for serving: a swirl of fresh whipped cream and maybe a final, generous dusting of nutmeg right before you slice into this beauty!
Step-by-Step Guide: How to Make This Eggnog Cheesecake Recipe
Okay, deep breaths! I know that baking a full cheesecake sounds scary, but honestly, learning exactly how to make eggnog cheesecake using this method is idiot-proof, provided you follow the timing.
The key is organization—read everything first, and watch your oven like a hawk during that slow cooling period. This process is designed to give you the absolute silkiest texture possible for your holiday treat.
Preparing the Cheesecake Crust and Preheating
First things first, grab your 9-inch springform pan and wrap the outside bottom and sides completely, super tightly, with several layers of heavy-duty aluminum foil. We are creating a waterproof seal for the water bath, so don’t skimp here!
Next, get your oven preheated to 325 degrees Fahrenheit. While that warms up, mix your crust ingredients: the graham cracker crumbs, the 1/4 cup of sugar, and the 6 tablespoons of melted butter. Press that mixture down firmly into the bottom of your prepared pan. Pop it into the oven for a quick 10 minutes to set up. If you’re looking for that extra kick, this is when you’d add that extra half teaspoon of cinnamon for a real cheesecake with spiced crust!
Mixing the Smooth Eggnog Cheesecake Filling
Time to make the filling smooth! Grab your room-temperature blocks of cream cheese and beat them until they are genuinely lump-free and creamy. Then, slowly beat in the 1 1/2 cups of sugar, the nutmeg, cinnamon, and vanilla extract until everything is just combined and looks pale.
Now, seriously pay attention: Add those 4 eggs one at a time. You only want to mix enough to incorporate the yolk and whites before adding the next one. Overmixing eggs introduces too much air, which leads to cracking later! Finally, gently stir in the cup of eggnog and the 1/4 cup of heavy cream until you have one beautiful, homogenous batter. Pour this right over your slightly cooled crust.
Baking and Cooling the Eggnog Cheesecake Recipe Perfectly
This is the crucial part for that perfect finish. Set the foil-wrapped springform pan inside a larger roasting pan. Carefully pour hot water into the roasting pan until it comes halfway up the sides of the cheesecake pan—that’s the water bath! Bake this entire setup for about 60 to 75 minutes. You know it’s done when the edges look solid, but the center still has a little jiggle, like gelatin.
The cooling ritual is where we earn our stripes! Turn the oven OFF, but leave the cheesecake inside with the door cracked open just a tiny bit. Let it sit in that residual heat for a full hour—seriously, an hour is non-negotiable for preventing a sudden collapse. After that hour, take it out of the water bath, remove the foil, and let it cool completely on a wire rack. Once it’s room temperature, cover it gently and slide it into the fridge for at least 6 hours, but overnight is my advice for the best flavor!
Don’t forget to check out our disclaimer before you start using high heat in the oven!
Tips for a Flawless Eggnog Cheesecake Recipe
Now that you have the recipe down, I want to share a few little kitchen secrets I learned the hard way—mostly involving cracked tops and watery bottoms! Trust me, cheesecake baking is all about managing moisture and temperature. If you follow these tricks, you’ll walk away with the most rich winter dessert imaginable.
Ingredient Temperature and Mixing Technique
I can’t stress this enough: Room temperature is your best friend! If your cream cheese is only slightly soft, you’ll end up spending forever mixing, trying to beat out the lumps. And when you start beating that cold cream cheese, you’re beating air into it, right?
Here’s the trick: Once you add those eggs—which should *also* be room temp—absolutely stop scraping down the sides of the bowl every thirty seconds. Think about it: you just beat the air in there during the creaming stage. If you keep scraping down the sides once the eggs are in, you are kicking that air right back out! That air expansion is mostly what makes the top crack, so just gently stir until incorporated, and leave the sides alone. It’s all about gentle incorporation from that point on.
Mastering the Water Bath for Your Festive Cheesecake Tutorial
Look, the water bath (or *bain marie*) isn’t just for show, it’s the cheat code for baking a perfect cheesecake. It keeps the oven environment humid, which slows down the cooking process right around the edges, allowing the center to catch up without going overdone. If the edges cook too fast, they shrink and pull away, causing a giant canyon right down the middle of your beautiful festive cheesecake tutorial.
My biggest rookie mistake was thinking one layer of foil was enough. Nope! Always use at least two, maybe even three, thick layers of heavy-duty foil wrapped snugly around the bottom and sides of your springform pan. You want that protective cocoon to survive the water bath submerged. Double-check that seal just before placing it into that roasting pan full of hot water. A little leak means sad, soggy crust, and nobody wants that!
Serving Suggestions for Your Rich Winter Desserts
Once this amazing cheesecake has chilled itself silly overnight—which it absolutely needs to do—it’s time to make it gorgeous! Since this is such a rich dessert, you don’t need a lot of fuss on top. I always follow the original plan and top the whole thing with freshly whipped cream right before cutting. Then, take a small shaker and dust every slice with a pop of fresh ground nutmeg. That smell! It just solidifies that this is one of the very best holiday cheesecake recipes you’ll ever tackle.
If you want to elevate it for a true centerpiece moment, try scattering some sugared cranberries around the base of the cake plate. They give you a nice tart contrast to the creamy sweetness. It’s simple, sophisticated, and screams Christmas!
Storage and Make Ahead Holiday Treats Advice
One of the biggest gifts this eggnog cheesecake recipe gives you is that it’s truly one of the very best make ahead holiday treats out there. In fact, I insist you don’t even think about digging in until it’s had a full night to chill. That long rest in the cold allows the cream cheese structure to set up properly and lets all those lovely nutmeg and eggnog spices really marry together.
When you’re ready to stash it away, make sure the cake is completely cool first. Then, you’ll need to cover it very well. I usually put the cake, still in the springform pan, on a flat tray and cover the whole thing loosely with plastic wrap. You want to avoid direct contact with the plastic wrap on the top surface, especially if you added whipped cream topping!
It keeps beautifully in the refrigerator for up to four or five good days. If you need to store it longer, you can freeze it! Just make sure to remove the springform ring—and any soft topping like whipped cream—before wrapping the whole thing securely in two layers of plastic wrap and then a layer of aluminum foil. It thaws perfectly overnight in the fridge, ready for another day of enjoying those leftovers. I always love peeking at my half-eaten cheesecake the day after Christmas; it tastes even better!
If you’re keeping track of your favorite recipes, make sure to add this one to your collection so you can find it easily next year!
Frequently Asked Questions About This Eggnog Cheesecake Recipe
I always get so many questions right around the holidays once people spot this gorgeous cheesecake! Baking is all about troubleshooting, so let’s tackle the common hurdles right now so you can feel totally confident stepping up to bake this for your guests.
Can I skip the water bath when making this easy baked cheesecake?
Oh honey, please don’t! If you are trying to make an easy baked cheesecake and you want it to look like the ones in the magazines, the water bath isn’t optional, it’s mandatory! I know it seems like an extra messy step, but that steam is what keeps the oven gentle and humid. Without it, your edges cook way too fast, and you end up with a huge crack right down the middle because the top sets before the inside finishes baking. That water bath is the number one trick for getting that beautifully smooth and creamy cheesecake texture you want.
What if I don’t have eggnog? Can I substitute it in this nutmeg dessert recipe?
If you are dead set on making this today and you are totally out of eggnog, you *can* technically substitute it, but I’m warning you: it changes the whole profile of this specific nutmeg dessert recipe. The recipe relies on the specific blend of dairy, sugar, and spices coming from the eggnog.
If you absolutely must substitute, try mixing 3/4 cup of whole milk with 1/4 cup of heavy cream, and then adding an extra 1/4 teaspoon of nutmeg and a tiny pinch of cloves—enough to mimic the flavor. But honestly? It won’t have that signature richness of a true eggnog cheesecake recipe! Buy the eggnog; it’s worth it for this bake!
Is this recipe better than a no bake eggnog cheesecake?
That’s a fun debate! If you need something done in thirty minutes with zero oven time, then sure, a no-bake version is great for a quick fix. But if you are aiming for that truly decadent, rich, and classic holiday feel, the baked version wins every single time. The baked version gets that slight tanginess from the cooked dairy, firm structure from the eggs, and it just feels more elegant on the table. For the ultimate holiday cheesecake recipes experience, you have to bake it!
If you need to get in touch with me regarding measurements or substitutions, feel free to send a note through the contact page!
Nutritional Estimates for One Serving of Eggnog Cheesecake
Listen, this is cheesecake—it’s a holiday indulgence, not a health food! If you’re tracking things, here are the general numbers I pulled based on the standard ingredients list. Remember, this is just an estimate for one slice of a 12-slice yield cake, so treat it as a guideline, not gospel!
- Serving Size: 1 slice
- Calories: Around 450
- Sugar: 35g
- Total Fat: 30g (about 18g saturated)
- Carbohydrates: 38g
- Protein: 8g
Enjoy it guilt-free because you made it yourself with festive cheer!
Share Your Holiday Baking Success
Now it’s your turn! I poured my heart into making sure this eggnog cheesecake recipe turned out perfectly for you, and I’m dying to see your results! Once you’ve let it chill overnight and you finally slice into that beautiful, spiced crust, please come back below and let me know how it went.
Did you top it with extra nutmeg? Did everyone ask for the recipe? Drop a star rating and leave me a comment detailing your experience making this festive dessert. Tag me on social media when you post those gorgeous pictures—I love seeing all your holiday baking triumphs!
Don’t forget to peek at our privacy policy and terms and conditions while you’re here!
Nutritional Estimates for One Serving of Eggnog Cheesecake
Listen, this is cheesecake—it’s a holiday indulgence, not a health food! If you’re tracking things, here are the general numbers I pulled based on the standard ingredients list. Remember, this is just an estimate for one slice of a 12-slice yield cake, so treat it as a guideline, not gospel!
- Serving Size: 1 slice
- Calories: Around 450
- Sugar: 35g
- Total Fat: 30g (about 18g saturated)
- Carbohydrates: 38g
- Protein: 8g
Enjoy it guilt-free because you made it yourself with festive cheer! If you want to bookmark this page for later reference, you can always check out our official terms and conditions before you go.
Share Your Holiday Baking Success
Now it’s your turn! I poured my heart into making sure this eggnog cheesecake recipe turned out perfectly for you, and I’m dying to see your results! Once you’ve let it chill overnight and you finally slice into that beautiful, spiced crust, please come back below and let me know how it went.
Did you top it with extra nutmeg? Did everyone ask for the recipe? Drop a star rating and leave me a comment detailing your experience making this festive dessert. Tag me on social media when you post those gorgeous pictures—I love seeing all your holiday baking triumphs!
Don’t forget to peek at our privacy policy before you head out!
PrintCreamy Eggnog Cheesecake Recipe
A recipe for a rich, creamy baked cheesecake flavored with classic eggnog spices, perfect for holiday gatherings.
- Prep Time: 25 min
- Cook Time: 75 min
- Total Time: 100 min
- Yield: 12 servings
- Category: Dessert
- Method: Baking
- Cuisine: American
- Diet: Vegetarian
Ingredients
- 1 1/2 cups graham cracker crumbs
- 1/4 cup granulated sugar
- 6 tablespoons unsalted butter, melted
- 3 (8 ounce) packages cream cheese, softened
- 1 1/2 cups granulated sugar
- 1 teaspoon vanilla extract
- 1/2 teaspoon ground nutmeg
- 1/4 teaspoon ground cinnamon
- 4 large eggs
- 1 cup eggnog
- 1/4 cup heavy cream
- Whipped cream and extra nutmeg for topping (optional)
Instructions
- Preheat your oven to 325 degrees Fahrenheit. Wrap the outside of a 9-inch springform pan tightly with heavy-duty aluminum foil.
- Prepare the crust: Mix graham cracker crumbs, 1/4 cup sugar, and melted butter in a bowl. Press the mixture firmly into the bottom of the prepared springform pan. Bake for 10 minutes. Remove from the oven and let it cool slightly.
- Prepare the filling: In a large bowl, beat the softened cream cheese until smooth. Gradually beat in 1 1/2 cups sugar, vanilla extract, nutmeg, and cinnamon until combined.
- Beat in the eggs one at a time, mixing just until each egg is incorporated. Do not overmix.
- Gently stir in the eggnog and heavy cream until the batter is smooth.
- Pour the filling over the cooled crust in the springform pan.
- Place the foil-wrapped springform pan into a larger roasting pan. Carefully pour hot water into the roasting pan until the water reaches halfway up the sides of the springform pan (this creates a water bath).
- Bake for 60 to 75 minutes, or until the edges are set but the center still jiggles slightly when gently nudged.
- Turn off the oven, crack the oven door open slightly, and let the cheesecake cool inside the oven for 1 hour.
- Remove the cheesecake from the water bath and foil. Cool completely on a wire rack.
- Chill the cheesecake in the refrigerator for at least 6 hours, or preferably overnight, before serving.
- Top with whipped cream and a dusting of nutmeg before slicing.
Notes
- For a smoother texture, let the cream cheese and eggs come to room temperature before mixing.
- If you prefer a spiced crust, add 1/2 teaspoon of ground cinnamon to the crust mixture.
- Make this dessert ahead of time; it tastes better after chilling overnight.
Nutrition
- Serving Size: 1 slice
- Calories: 450
- Sugar: 35g
- Sodium: 300mg
- Fat: 30g
- Saturated Fat: 18g
- Unsaturated Fat: 12g
- Trans Fat: 0.5g
- Carbohydrates: 38g
- Fiber: 1g
- Protein: 8g
- Cholesterol: 150mg