

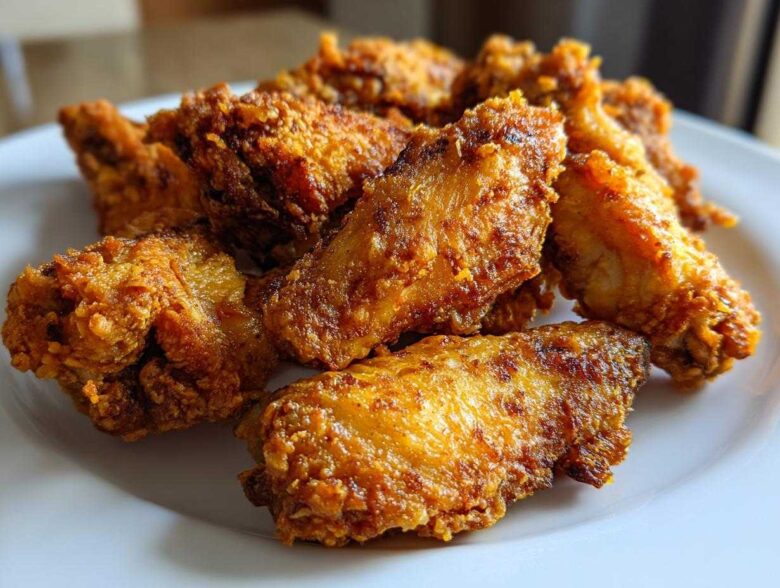
Oh, the disappointment! You pull wings out of the oven, expecting that glorious shattering crunch, and what you get is… sad, floppy, steamed chicken skin. I spent years wrestling with this situation! I tried everything—rinsing, thawing, leaving them out for days—until I finally cracked the code for truly crispy baked chicken wings. Stop running for the deep fryer! My secret is using a simple household ingredient that totally changes the game. I’m telling you, learning this one trick guaranteed me juicy interiors and the crispest crust imaginable using just my regular oven.
Why This is the Best Recipe for Crispy Baked Chicken Wings (No Fry Required)
I have to admit, I used to think you needed a vat of bubbling oil to get wings that truly snapped when you bit into them. That’s just not true anymore! The reason this method knocks those traditional dry-rub attempts out of the park is all about the baking powder—that’s our secret weapon. This magic dust works like a little chemical helper; it raises the pH level on the chicken’s skin.
What does that pH change do, you ask? It helps break down skin proteins super efficiently, drying out that layer so it gets brittle and golden brown instead of steaming itself into mush. You get the absolutely desirable Juicy Baked Wings inside because the outside seals in all that moisture while it crisps.
It’s a game-changer, especially if you’re trying to avoid frying or just want something easier for a weeknight. Trust me, after you see these results, you’ll never go back to the old way. I always say, if you’re going to eat wings, they better be worth it! If you have any questions about ingredient sourcing or substitutions, check out my general cooking disclaimer right here. We are aiming high for that crunch!
Achieving Crunchy Chicken Wings Recipe Texture
When you bake wings the standard way, you often end up with that thin, slightly chewy layer that just doesn’t satisfy. With the baking powder doing its work on the skin, we eliminate that sad texture entirely. This is how you get that satisfying acoustic crunch everyone chases. It’s truly the best way to deliver a Crunchy Chicken Wings Recipe without a single drop of added oil.
Ingredients for Perfectly Cooked Oven Wings
Okay, let’s talk about what you need to pull off these incredible wings. Honestly, the ingredient list is super short, which I love for a Tuesday night! We are relying mostly on technique here, but the right components make all the difference. Since we aren’t deep-frying, everything is about preparing that skin perfectly before it hits the heat.
You’ll need about three pounds of wings, separated beautifully into flats and drumettes—that way they cook evenly. Then, the star of the show: baking powder. You’ll also just need some basic salt, pepper, garlic powder, and if you like a little kick, a tiny pinch of cayenne. That’s it! Simple spices let that amazing crispy texture shine right through.
Ingredient Notes and Substitutions for Crispy Baked Chicken Wings
The baking powder is non-negotiable, but listen closely: you absolutely must use aluminum-free baking powder if you can find it. Regular baking powder can sometimes leave behind a slight metallic, soapy taste, and we want pure, delicious chicken flavor! If you only have the regular stuff, you can use it, but I highly recommend seeking out the aluminum-free to get that clean taste.
For the wings themselves, try to use wings that aren’t swimming in excess moisture. Whether you buy flats and drumettes separated, or break down whole wings yourself, consistency matters. We season them generously with salt and pepper—don’t be shy—because remember, they aren’t swimming in sauce yet. The baking powder does the heavy lifting for crispiness, but the simple dry rub seasons the meat perfectly. This is the true secret to achieving those crispy baked chicken wings everyone raves about.
How To Make Crispy Wings In Oven: Step-by-Step Instructions
Alright, listen up! This is where the magic—and the slight bit of elbow grease—happens. Getting the perfect result for crispy baked chicken wings is 99% preparation. If you skip the drying step, you might as well go order pizza instead, because you won’t get the crackle you deserve. I always get my oven screaming hot first, which is key to waking up the baking powder coating.
You need a baking sheet, but more importantly, you need a wire rack that sits on top of that sheet. This design is absolutely crucial so that air can circulate completely around the underside of every single wing. If the wings just sit directly on the metal, the bottoms get soggy while the tops dry out. This method ensures even cooking and that perfect all-around crunch we’re aiming for. Once you have your setup, you just toss everything together and bake, but the timing changes halfway through!
The Crucial Prep Work for Crispy Baked Chicken Wings
Seriously, before you even look at the oven, grab a huge stack of paper towels. I mean it—you have to pat those wings until they feel genuinely dry to the touch. If there is any residual moisture clinging to the skin, that moisture turns to steam and ruins your beautiful crust. Get in there and press firmly! Once they are bone-dry, toss them in that baking powder seasoning mix until they look dusty and lightly coated. This whole setup for your Oven Baked Chicken Wings ensures heat hits every surface evenly.
Baking Sequence for Golden Brown Chicken Wings
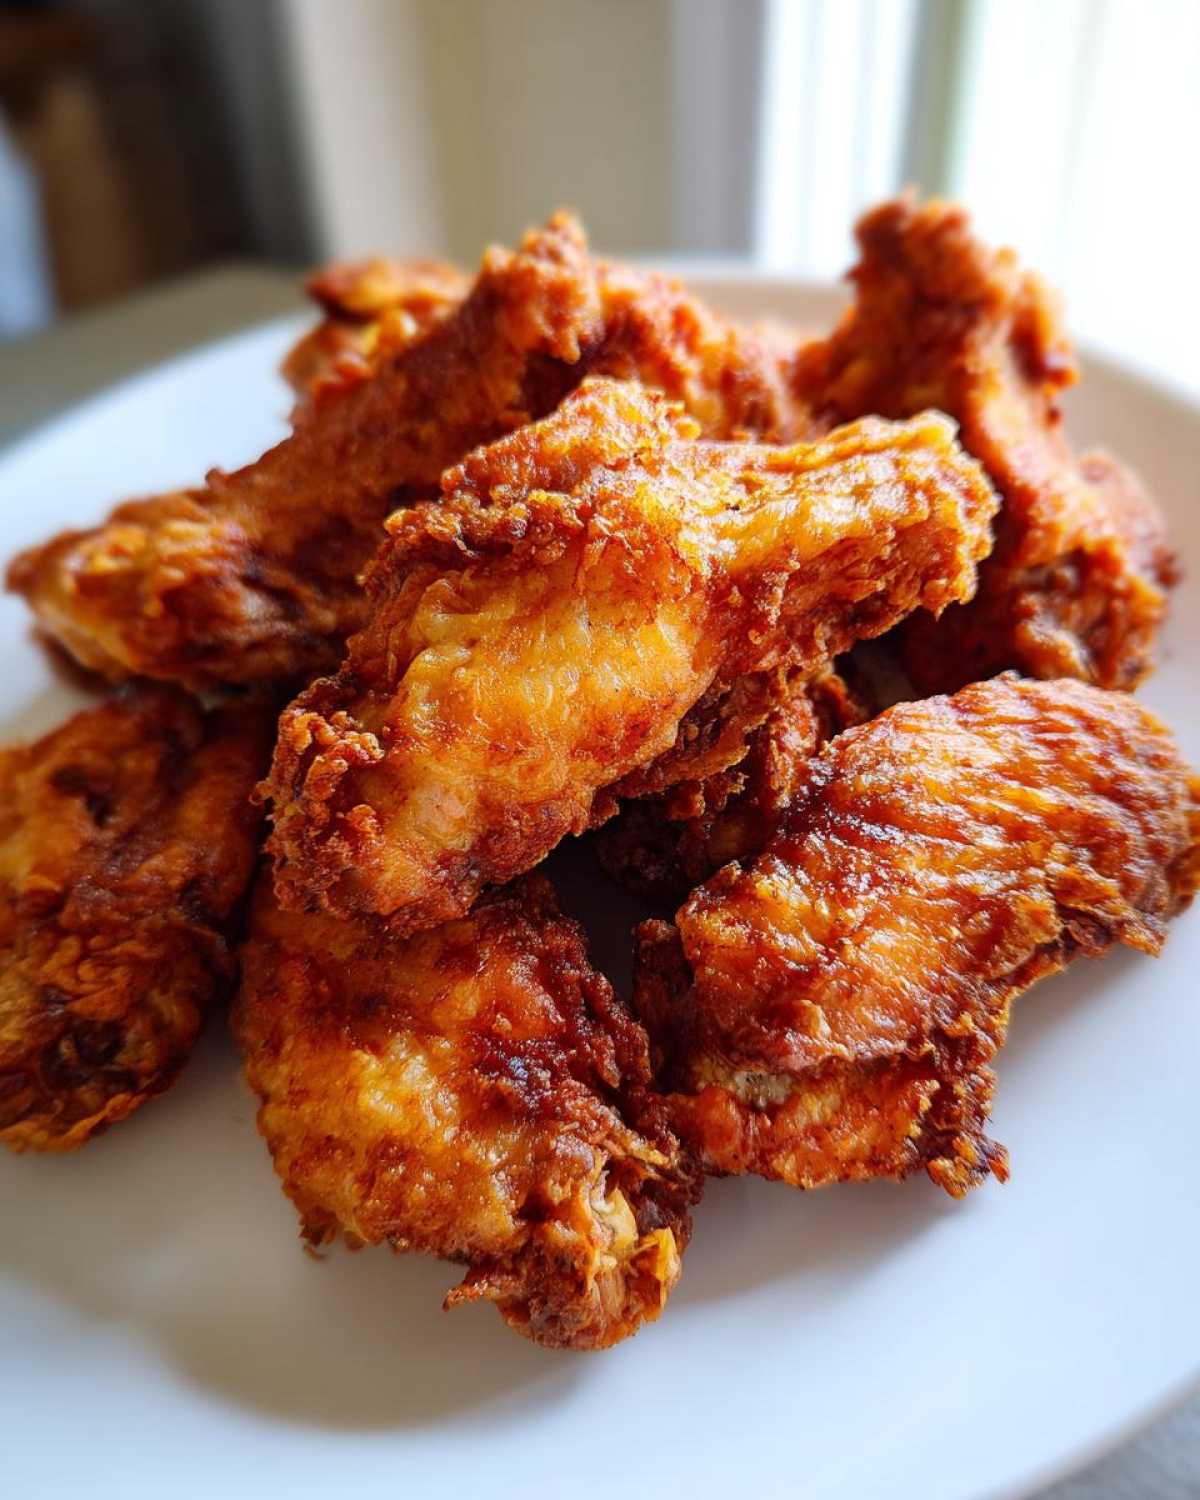
Here’s the two-step temperature dance: Start hot at 425 degrees F for twenty minutes. This initial blast of heat sets the crust. After those twenty minutes, you must take them out—carefully—and flip every single wing over. Then, drop the temperature down to 400 degrees F for another 20 to 25 minutes. This lower temperature allows the inside to cook through gently and the outside to keep developing that deep, beautiful color. Don’t panic if they look done early; you want them deeply colored to be truly crunchy!
If you need any troubleshooting advice while you’re in the middle of baking, like maybe your rack shifted or you realized you forgot something, please feel free to reach out via my contact page here. I live for getting these recipes perfected for you!
Tips for Success with Your Easy Oven Chicken Wings
Even with the perfect recipe, sometimes things can go a little sideways, right? I’ve learned a few non-negotiables over the years to guarantee that maximum crispiness every single time you make these crispy baked chicken wings. First off, don’t overcrowd the rack! If the wings are touching, they steam each other, and that’s a one-way ticket to flabby skin city. Give them space to breathe; air circulation is your best friend here.
Also, when it comes to serving, precision is key if you plan on introducing sauce. Because these wings are so dry and crunchy on the surface, they absorb sauce incredibly fast. If you want them to stay crunchy during the big game, only sauce them right before they hit the serving platter. Toss them gently in your favorite glaze—I’ve got some fantastic dry rub ideas you can check out here—and serve immediately!
Finally, never let them cool down completely on the rack after baking. Pull them off as soon as they look done and let them sit on a cutting board for just a minute or two before tossing or serving. This little pause lets the residual heat settle, giving you a perfect, shatteringly crispy baked chicken wings experience.
Serving Suggestions for Game Day Chicken Wings
Since these wings come out of the oven seasoned perfectly but plain—ready for whatever flavor explosion you have planned—we need to talk about the best ways to finish them off! This recipe is designed to be totally versatile, making them the perfect foundation for any great spread, whether you’re hosting a huge party or just having a casual weeknight meal. Everyone expects amazing flavor when they see Party Wing Recipes coming out, and these deliver!
You can stick with the simple salt/garlic/pepper mix if you prefer them dry, or you can toss them in a slightly sticky BBQ glaze, a spicy buffalo sauce, or even a tangy lemon pepper mixture. The crispiness holds up so much better than deep-fried wings when sauce is introduced, which is honestly a huge win for everyone.
Best Baked Wings Recipe Pairing Ideas
When it comes to serving these beauties, the sides are almost as important as the wings themselves! Nobody wants to just eat wings; they need something cool and crunchy to balance all that savory spice. You absolutely have to have a classic blue cheese or ranch dipping sauce ready. Celery and carrot sticks are non-negotiable for dipping and refreshing your palate between bites. For something heartier, a simple, cool potato salad or a light slaw works great alongside these.
Storage and Reheating Instructions for Crispy Baked Chicken Wings
Okay, let’s be real. Sometimes you don’t eat all three pounds of wings in one sitting! And that’s fine, but you have to store them right if you want that amazing texture back later. If you know you have leftovers, this is my biggest piece of advice: Do NOT toss them in sauce before you refrigerate them! The sauce just marinates into the skin overnight, and you lose all that hard-earned crispiness you worked for.
Store any leftover wings in a single layer inside an airtight container. If you want them to last more than a day, you might consider putting a paper towel in the bottom just to wick up any condensation that forms. Then, when you’re ready for round two of amazing crispy baked chicken wings, forget the microwave—it turns them rubbery.
The key to revival is dry heat! Pop them back onto a wire rack set over a baking sheet, just like we did before. Heat your oven up to 375 degrees Fahrenheit. Bake for about 8 to 10 minutes. If you have an air fryer, even better—five minutes at 350 should bring that crunch right back to life. Enjoy those leftovers!
Frequently Asked Questions About No Fry Chicken Wings
I know when you’re looking for the perfect wing recipe, you probably have a few running questions swirling around. It’s smart to check! I’m happy to clear up any confusion about making these incredibly crunchy wings in your home oven. Don’t hesitate to ask more; I want you to succeed!
Can I use baking powder on bone-in wings?
Oh, absolutely yes! Whether you have flats or drumettes—we call those baked bone-in wings for easy reference—this baking powder trick works the same magic on both. Sometimes the drumettes take just a few extra minutes because they are a bit meatier, but because we are using the wire rack setup, the skin gets equally dry and crisp all the way around. It’s fantastic for whichever shape you prefer!
Is this a Healthy Fried Chicken Alternative?
That’s one of the main reasons I fell in love with this recipe! Compared to deep-frying, where the chicken absorbs a ton of extra fat from the oil, this method uses almost no added fat besides what naturally renders off the chicken skin itself. If you’re looking for a lighter option for your Game Day Chicken Wings that doesn’t sacrifice texture, this is certainly your best bet for a healthier alternative.
What if my crispy baked chicken wings are not fully cooked?
First thing: don’t panic! It happens, especially if your oven runs a little cool or you didn’t cut the wings evenly. The safest way to check is with a meat thermometer—you want the internal temperature of the thickest part of the wing to hit 165 degrees Fahrenheit (that’s 74 Celsius). If they look great on the outside but aren’t quite there thermally, just pop them back into the oven, but drop the heat down to 400 degrees. Let them cook for another 5 to 10 minutes until that thermometer tells you they are ready to eat. That’s how you guarantee safe, perfect crispy baked chicken wings!
If you’re ever looking for official guidelines or have policy questions about the site, you can review our terms over at the Terms and Conditions page.
Nutritional Information for Simple Spiced Chicken Wings
Now, I know some of you are counting macros or just curious about what you’re eating, even when it comes to something fun like wings! Here is a quick breakdown of the estimated nutrition for about four wings, based on the standard recipe preparation. Keep in mind, these numbers change drastically depending on how much salt you add or what kind of sauce you slather on later!
For a serving size of four wings (un-sauced), you’re looking at around 250 calories with 26 grams of protein. That’s pretty solid for an appetizer! Fats come in around 15g, keeping saturated fat low, and they are naturally zero-carb. For full transparency, you can see all the details, including sodium and cholesterol counts, on my official recipe policy page. I always recommend tracking ingredients on your end for the most accurate picture, though!
Share Your Perfectly Cooked Oven Wings Experience
Now that you have mastered the dry-rub technique and achieved impossibly crunchy results, I really want to know what you think! Achieving those perfect crispy baked chicken wings in the oven is such a huge win, and I love seeing you all succeed by skipping the deep fryer.
Did you try the two-stage baking approach? How did your wings look after that initial high-heat blast? Drop a comment below and let me know your favorite sauce or dry rub combination that you used once they came off that cooling rack. It helps everyone else tremendously to hear what worked for you!
Please rate this recipe using the star system below—it really helps other cooks find this game-changing method. And if you took a picture of your beautiful, golden brown, crunchy masterpieces, I’d love to see them! Tag me on social media so I can swoon over your success. We’re all about sharing the kitchen wins here, so let me know how your easy oven chicken wings turned out!
If you want to review how we handle site content and data usage policies, you can take a peek at our GDPR compliance statement anytime!
PrintUltimate Extra Crispy Baked Chicken Wings

Make incredibly crispy, juicy chicken wings in your oven without deep frying, using baking powder for the best texture.
- Prep Time: 10 min
- Cook Time: 45 min
- Total Time: 55 min
- Yield: 4 servings
- Category: Appetizer
- Method: Baking
- Cuisine: American
- Diet: Low Fat
Ingredients
- 3 lbs chicken wings, separated into flats and drumettes
- 1 tablespoon baking powder (aluminum-free preferred)
- 1 teaspoon salt
- 1/2 teaspoon black pepper
- 1/2 teaspoon garlic powder
- 1/4 teaspoon cayenne pepper (optional)
Instructions
- Preheat your oven to 425 degrees Fahrenheit (220 degrees Celsius). Line a large baking sheet with aluminum foil for easy cleanup, and place a wire rack on top of the foil.
- Pat the chicken wings completely dry using paper towels. This step is crucial for crispiness.
- In a large bowl, combine the baking powder, salt, pepper, garlic powder, and cayenne pepper.
- Add the dried chicken wings to the bowl and toss thoroughly until every piece is evenly coated with the baking powder mixture.
- Arrange the coated wings in a single layer on the wire rack, ensuring there is space between each wing for air circulation.
- Bake for 20 minutes.
- Flip the wings over. Reduce the oven temperature to 400 degrees Fahrenheit (200 degrees Celsius).
- Bake for another 20 to 25 minutes, or until the wings are deeply golden brown and very crispy.
- Remove from the oven and serve immediately with your favorite sauce or dry rub.
Notes
- Do not skip drying the wings thoroughly; excess moisture prevents crisping.
- Use a wire rack to allow heat to circulate around the entire wing, preventing soggy bottoms.
- If you plan to toss the wings in sauce, do so immediately after removing them from the oven and serve right away to maintain maximum crunch.
Nutrition
- Serving Size: 4 wings
- Calories: 250
- Sugar: 0
- Sodium: 350
- Fat: 15
- Saturated Fat: 4
- Unsaturated Fat: 11
- Trans Fat: 0
- Carbohydrates: 1
- Fiber: 0
- Protein: 26
- Cholesterol: 90