

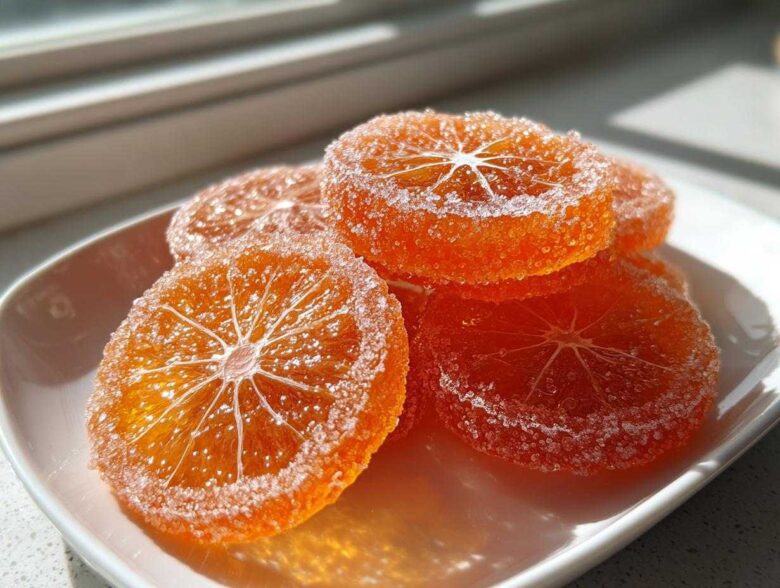
Oh my gosh, are you ready for something totally magical that smells like sunshine? Seriously, forget those sad, slightly bitter things you sometimes see in stores. When you make your own, you realize what they’re supposed to be! I keep telling friends that making homemade treats is the best way to instantly elevate any gathering, and these *candied orange slices* are my absolute secret weapon.
This recipe is proof that you don’t need a dozen fancy ingredients to create something gourmet. We are just using oranges, sugar, and water, but the process—the slow simmer—transforms them into glossy, chewy jewels. Trust me on this: the first time I made a batch of these for a Christmas cheeseboard, people asked where I bought them! They look so impressive used as a gourmet orange garnish for cakes, but honestly, they disappear fastest when just piled up on a plate for snacking.
Why You’ll Love This Candied Orange Slices Recipe
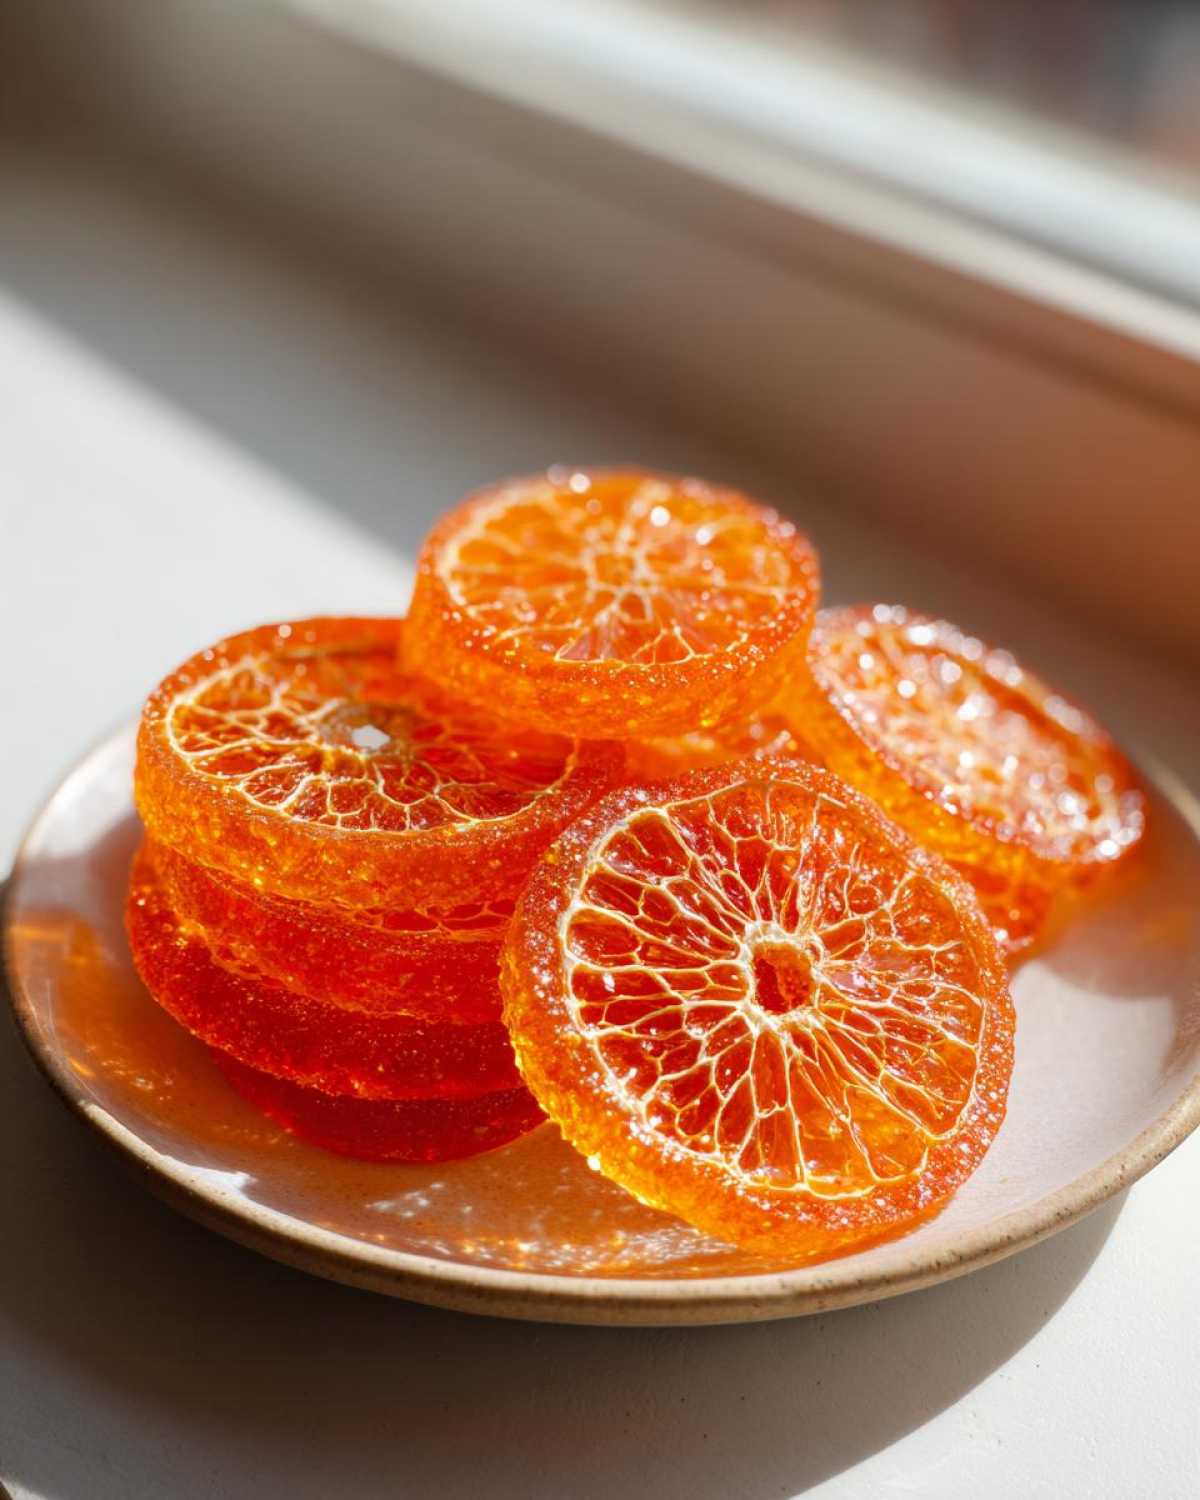
Making these is incredibly straightforward. It might feel like a long cook time, but the hands-on prep is so minimal—you’re mostly just waiting for magic to happen! You get these gorgeous, *bright citrus snack recipes* that are somehow both tangy and intensely sweet. If you’ve been searching for a simple way to create edible decorations that taste incredible, this is it. These become such satisfyingly *sweet chewy orange treats*!
Quick Benefits Summary
- Prep time is under 15 minutes of actual work—mostly just washing and slicing!
- The texture is absolutely perfect: totally translucent and delightfully chewy.
- They are super versatile—great for snacking or making fancy desserts pop.
- You get a ton of flavor from just three basic ingredients.
- They look almost professional, even if you’re a beginner!
Essential Ingredients for Perfect Candied Orange Slices
When you look at the ingredient list for this *candied orange slices recipe*, you might be surprised how short it is! And that’s exactly the point. I really believe the best homemade citrus candy comes from not messing with simple things too much. We aren’t using any weird stabilizers or extracts here; we are just focusing on good oranges meeting sweet sugar.
I always make sure my oranges are very fresh because they are the star of the show. You want them firm to hold up to the simmering process. Don’t worry; you don’t need specialty items—just the basics! This clarity is what makes the finished product so pure and delicious, giving you fantastic results every time you try *how to make candied oranges*.
Ingredient List for Candied Orange Slices Recipe
Here is exactly what you need. Measure everything carefully when you get to the syrup stage, please! That ratio is what guarantees that lovely, *translucent dried orange slices* texture we are aiming for:
- 2 large navel oranges
- 4 cups water
- 4 cups granulated sugar
Step-by-Step Guide: How to Make Candied Oranges
Okay, this is where the real fun begins! Don’t let the simmering process intimidate you; the trick to knowing *how to make candied oranges* successfully is just patience. We need to treat these slices gently as we infuse them with sugar. Following these steps exactly will ensure your final product is a showstopper, not a spongy mess. Pay close attention to the blanching stage—it separates the okay slices from the truly spectacular ones! If you need to revisit our policies while you bake, feel free to check out our disclaimer!
Preparing and Blanching the Orange Slices
First things first, wash those oranges until they squeak! Then, grab a sharp knife and slice them very thinly—I aim for about 1/8 inch thick. Try not to cut off the ends until you’ve sliced a few rounds, so you have something to hold onto. You’ll want to discard the very ends of the orange. Now, for the critical anti-bitterness step: place all your slices in a pot, cover them entirely with tap water, and bring it to a rolling boil. Let them simmer for exactly 15 minutes, then drain all that water away. This first boil is essential because it softens the rind just slightly and washes out that sharp, bitter pithy flavor. It’s the secret to a clean, bright taste!
Simmering in Simple Syrup Oranges Recipe
Next, we introduce the sugar! Return those blanched slices to the clean saucepan. Add 4 cups of fresh water and all 4 cups of your granulated sugar. Stir that gently over medium-high heat until you see all that sugar completely dissolve. Once it’s dissolved, you drop the heat way down—we need a lazy, gentle simmer now. This is the *simple syrup oranges recipe* stage. You should let them bubble very lightly for at least an hour, maybe up to an hour and a half. As they cook, you’ll notice them transforming right before your eyes!
Achieving Translucent Dried Orange Slices
How do you know they’re ready? You’ll see them get shiny and see-through! The pulp will look almost jelly-like and fully penetrated by the syrup. Use tongs or a slotted spoon—be gentle; they’re delicate now—and lift the slices out one by one. Lay them on a wire rack that has a baking sheet underneath it to catch any drips. Make sure every piece is sitting in a single layer; if they overlap, they’ll stick together and won’t dry correctly. This single layer application is what creates those beautiful, uniform *translucent dried orange slices*.
Drying Time for Sweet Chewy Orange Treats
This is the hardest part because they smell so good right out of the syrup! They need to dry completely at room temperature. I usually leave mine on the rack for a full 24 hours, but 12 hours is the absolute minimum. You want them to feel dry to the touch—not wet or sticky—but still have a little give when you gently squeeze them. That perfect balance is what gives you those *sweet chewy orange treats*. If you rush this drying time, they’ll just clump up into one giant orange mess!
Tips for Success with Candied Orange Slices
I’ve learned a few little tricks over the years that really take a good batch of these slices and make them unbeatable. This is what helps you nail the *best orange candy recipe* every time you try it. The most important thing is letting go of the syrup when you think they are done!
Maximizing Flavor and Texture
Don’t you dare throw away that leftover syrup! Seriously, save every bit of that beautiful, thick liquid. I pour whatever’s left into a jar and keep it in the fridge. It’s amazing for sweetening iced tea or adding a little zing to a simple vodka tonic. It makes whatever you put it in taste instantly more sophisticated.
If you taste-tested a slice as soon as it came out of the pot and thought, “Nope, still not chewy enough,” I have a backup plan for you. Instead of waiting two full days for them to air dry, you can pop them into the oven! Set your oven to a very low 200 degrees Fahrenheit. Lay them on the rack just like you did when draining them, and let them bake for about an hour. Keep checking them, though! This low heat gives them a nice firmness and really speeds up the drying process for those who are impatient, like me sometimes. Just be sure to call me at contact if you have any questions about the timing!
Variations: Chocolate Dipped Orange Slices
Okay, once you’ve got those gorgeous, *translucent dried orange slices*, it’s time to take them to the absolute next level! If you’re looking for a showstopper dessert garnish or just a really fancy treat, you have to try dipping them in chocolate. This is where they transition from a lovely *bright citrus snack* to something totally decadent.
You MUST wait until they are bone dry before attempting this. If there is any moisture left, the chocolate will seize up, and you’ll just end up with a gritty mess—and honestly, who has time for that disappointment? Once they’re fully dried after that long night on the rack, melt about six ounces of your favorite chocolate. I usually go with dark chocolate since the bitterness plays so nicely against the sweet orange, but milk chocolate is divine too!
Dip about half of each cooled, dry slice into that melted goodness. Let the excess drip off for a second, then place it right back onto fresh parchment paper or that same wire rack. Let those sit undisturbed until the chocolate has completely hardened. They turn into amazing *chocolate dipped orange slices* and make the most beautiful edible decorations for holiday platters!
Serving Suggestions for Gourmet Orange Garnish for Cakes
Once you’ve mastered the art of making these *candied orange slices*, you realize they’re too pretty to just eat standing over the counter! They become an instant upgrade for anything you serve. If you’re done with snacking, start thinking like a pastry chef. These look absolutely stunning arranged on top of a cheesecake or nestled around the base of a frosted layer cake. They immediately give that vibe of a fancy bakery or a *gourmet orange garnish for cakes*.
I recently used them on a simple olive oil cake for Thanksgiving, and the citrus just cut through the richness perfectly. Also, don’t forget drinks! They make the most elegant *cocktail garnish citrus slices* you’ve ever seen. Just slide one onto the rim of a fancy glass. They last forever, so you can make a big batch ahead of time, and they look gorgeous packed into a little jar as a DIY *sweet orange candy gift idea* during the holidays!
Storage and Gifting for Holiday Candied Fruit
Once you’ve gone through all the patient simmering and drying, you want to make sure these beauties last! Storing your beautiful homemade *holiday candied fruit* is simple, but you have to follow one major rule: keep them dry! Humidity is the enemy of candied oranges; it makes them go soft and sticky again almost instantly.
The best place for them is a clean, completely dry, airtight container. I usually layer them between sheets of parchment paper just to be extra safe, especially if I’ve made a huge batch. They actually hold up beautifully at room temperature, so you don’t need to worry about fridge space for these *sweet orange candy gift ideas*! If they are dried correctly—really, truly dry—they should stay fantastic for several weeks, easily covering all your holiday needs.
If you’re packing them up to give away, presentation matters! Pop them into small cellophane bags tied with pretty ribbon, or use small tins. It’s such a thoughtful gift because it tastes homemade and luxe. Just make sure whatever container you use is sealed tight before you hand it over. Remember, while these are delightful, they are still a simple syrup treat, so keeping moisture out is key. If you ever have questions about how we handle data here, feel free to review the terms and conditions!
Frequently Asked Questions About Candied Orange Slices
You’ve made it through the whole guide! That’s fantastic. Sometimes, even with the best instructions, little questions pop up when you’re actually in the kitchen with your oranges bubbling away. Don’t stress! Here are the things I get asked most often when people try out this *easy homemade citrus candy* recipe for the first time.
Can I use other citrus fruits for this recipe?
Absolutely, yes! This recipe is brilliant because it works really well with other fruits, too. You can try it with thin lemon slices or even slightly thicker grapefruit slices. Just keep this little baking secret in mind: different fruits have different thicknesses. If the fruit is much thicker than an orange, you might need to increase that initial blanching time slightly.
Why are my candied orange slices still sticky?
Ugh, sticky slices are the worst, aren’t they? Nine times out of ten, it just means they haven’t dried long enough. Remember, even if they feel dry on top, the center might still be holding onto some syrup moisture. If you’ve let them sit out for a full 24 hours and they still feel tacky, you can gently put them on a rack in your oven set to its absolute lowest temperature—maybe 175°F—just to coax that last bit of moisture out for about 30 minutes. Keep an eye on them so they don’t start to crisp up too much!
What is the difference between candied fruit and preserved orange peels recipe?
That’s a great question because they sound so similar! When we talk about the *preserved orange peels recipe*, usually people are talking about peels that are kept soft and moist in a heavy syrup or sometimes preserved in alcohol for very long-term storage. Our goal for these *candied orange slices* is different; we want a dry, slightly stiff, and chewy texture that allows us to decorate cakes or dip them in chocolate without everything melting or melting into each other. So, while the base ingredient is similar, the final drying process here is what makes them distinctly a chewy snack rather than a preserved item.
Nutritional Estimates for This Citrus Dessert Recipe
Now, I’m not a nutritionist by any stretch of the imagination—I’m a cook who loves throwing butter into things! But since we are talking about a full-on *citrus dessert recipe*, I always like to give you a general idea of what you are working with nutritionally, just in case you’re tracking anything.
Please remember these numbers are just estimates based on my calculation for one single candied slice. Since these are mostly sugar, you’ll see that reflected, but hey, that’s the fun of making candy, right? It’s a treat, not a daily staple! We put a lot of care into making sure this recipe is the *best orange candy recipe*, and even with all that sugar, the pure orange flavor still shines through.
Here’s the breakdown for one slice, assuming 30 slices total yielded from the batch:
- Serving Size: 1 slice
- Calories: 85
- Sugar: 21g (Wowzers, I know! But it’s that sugar doing all the preserving work!)
- Fat: 0g
- Protein: 0g
- Carbohydrates: 22g
We want to keep these sweets stored correctly, so if you ever need to check our privacy rules regarding any data, you can look at our privacy policy. Now go enjoy one of those gorgeous, sweet orange rounds!
Share Your Tangy Sweet Orange Rounds Experience
Well, that’s it! You’ve mastered the art of making beautiful, glossy, and perfectly chewy *candied orange slices*. I really, truly hope you love them as much as my family does. Now, the best part of sharing a recipe is hearing how it worked out for you!
I would absolutely adore it if you tried these *tangy sweet orange rounds* and came back here to leave a rating. Tell me what you thought! Did you eat them plain? Did you dunk them in dark chocolate? Maybe you used them as that perfect *cocktail garnish citrus slices* I mentioned?
Don’t be shy about sharing pictures! Tag me on social media—I get such a kick out of seeing your finished products. It’s one thing for me to make them in my kitchen, but seeing you create these gorgeous things using a family-style recipe is the best part of all of this!
If you have tweaks or substitutions that really worked for you—maybe you used dark brown sugar instead of white for a deeper molasses note—please leave that in the comments too. We all learn from each other! Happy baking, and thanks for letting me share something so delicious with you. If you ever have questions about how we handle data here, just check our GDPR compliance statement!
PrintEasy & Glossy Candied Orange Slices

Learn how to make simple, glossy candied orange slices using only oranges, sugar, and water. These treats are perfect for snacking, decorating desserts, or dipping in chocolate.
- Prep Time: 15 min
- Cook Time: 90 min
- Total Time: 105 min
- Yield: About 30 slices
- Category: Dessert
- Method: Simmering
- Cuisine: American
- Diet: Vegetarian
Ingredients
- 2 large navel oranges
- 4 cups water
- 4 cups granulated sugar
Instructions
- Wash the oranges well. Slice the oranges thinly, about 1/8 inch thick. Discard the ends.
- Place the orange slices in a large saucepan. Cover them completely with water. Bring the water to a boil, then reduce heat and simmer for 15 minutes. Drain the water completely. This step removes bitterness.
- Return the blanched orange slices to the saucepan. Add 4 cups of fresh water and 4 cups of sugar.
- Bring the mixture to a boil over medium-high heat, stirring until the sugar dissolves.
- Reduce the heat to low and maintain a gentle simmer. Cook the slices for 1 to 1.5 hours, turning them occasionally. The slices will become translucent when done.
- Carefully remove the slices from the syrup using a slotted spoon or tongs. Place them in a single layer on a wire rack set over a baking sheet.
- Let the slices dry at room temperature for at least 12 to 24 hours until they feel dry to the touch and are slightly chewy.
- If you want to dip them in chocolate, allow them to dry completely before dipping.
Notes
- For a more intense flavor, reserve some of the leftover syrup and use it to sweeten tea or cocktails.
- If you want a firmer texture, you can bake the slices on the rack at 200 degrees Fahrenheit for about 1 hour after draining, checking frequently.
- To make chocolate dipped orange slices, melt 6 ounces of dark or milk chocolate. Dip half of each dried slice into the chocolate and place it back on the wire rack until the chocolate sets.
Nutrition
- Serving Size: 1 slice
- Calories: 85
- Sugar: 21
- Sodium: 1
- Fat: 0
- Saturated Fat: 0
- Unsaturated Fat: 0
- Trans Fat: 0
- Carbohydrates: 22
- Fiber: 1
- Protein: 0
- Cholesterol: 0