

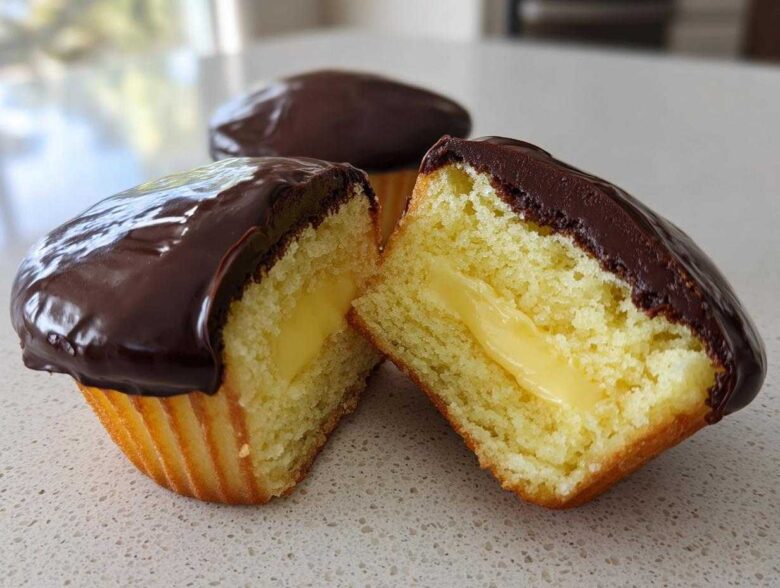
Oh my goodness, I live for a good dessert mashup! When you take something famously delicious, like a giant classic pie, and shrink it down into a perfect, handheld treat? That’s my kind of baking challenge. I’m so excited to share my absolute favorite creation that perfectly captures that nostalgic flavor profile: these incredible boston cream pie cupcakes. When I was first learning to bake—remember, I was completely lost back then—the idea of making something that looked like it came from a fancy patisserie felt impossible. But trust me, Liam showed me the steps, and now I can tell you, these aren’t just cupcakes; they are truly gourmet cupcakes that you can absolutely nail right in your own kitchen. It’s vanilla cake, creamy filling, and shiny chocolate, all meant for you! Click here to see the final result!
Why These Boston Cream Pie Cupcakes Are Your Next Favorite Sweet Treats
You deserve a showstopper dessert that doesn’t require a whole afternoon, and that’s what this recipe delivers. I promise you won’t be disappointed when you see how simple it is to achieve amazing bakery results. We’ve perfected the balance here!
- The cake base is an unbelievably moist vanilla cake that never dries out. Seriously!
- That filling? It’s silky smooth pastry cream filling that tastes way better than anything from a box.
- No slicing needed! Having them as individual dessert portions makes serving at parties a total breeze.
We’ve tested this so you don’t have to. Check out all our baking adventures on the official TasteTaught blog!
Gathering Supplies for Your Boston Cream Pie Cupcakes Recipe
Before we even think about creaming butter, we need to make sure our kitchen is set up for success. Liam always tells me that preparation is half the battle, especially when you’re making something that has multiple components, like these beautiful cupcakes. Trust me, having the right tools makes the difference between thinking you’re baking and actually getting those gorgeous, homemade bakery style cupcakes.
Don’t worry if you don’t have every single gadget under the sun. I use pretty standard equipment, and I’ve broken it down for you here so you can gather everything before you even start preheating the oven.
Essential Equipment for Easy Cupcake Baking
- You absolutely need a standard 12-cup muffin tin, naturally! And of course, grab your paper or foil liners—we don’t want any stuck bottoms.
- Your hand mixer or stand mixer is going to be your best friend for whipping up that light vanilla cake batter and making sure your ganache is perfectly smooth.
- For the pastry cream, you are going to want at least one good, heavy-bottomed saucepan. This really helps prevent the milk mixture from scorching while you watch for that first bubble.
- This is the fun part: to get that lovely pocket for the custard, you’ll need something to core the center. I usually use a small, sharp paring knife, but if you have a specialized cupcake corer, go for it!
- A wire cooling rack is non-negotiable. We need those cupcakes to chill down completely before we attempt to fill the centers, otherwise, we are just making hot, soupy messes!
Ingredients for the Moist Vanilla Cake Base of Your Boston Cream Pie Cupcakes
Okay, we’re moving onto the fun stuff! This is the foundation of everything. If the vanilla cake layer isn’t light and wonderfully flavorful, the whole experience of our boston cream pie cupcakes falls flat. Liam reminds me constantly that baking is chemistry, and the main rule for flawless texture in any classic dessert recipe is temperature consistency.
Please, please, please take this tip from my learning curve: make sure your butter and your eggs are at room temperature! If they are too cold, they won’t incorporate properly when you cream them with the sugar, and you’ll struggle to get that beautiful, airy base needed for a truly moist vanilla cake. If you forget to set them out, I sometimes put the eggs in a bowl of warm (not hot!) water for ten minutes to help things along. It’s worth the extra two minutes, I promise!
Here is exactly what you need for the 12 standard cakes. Don’t forget, you need to make sure these quantities are precise!
- One and a half cups of all-purpose flour.
- One and a half teaspoons of baking powder—that’s our lift!
- Half a teaspoon of salt to balance all the sweetness. It really makes the vanilla pop.
- Half a cup of unsalted butter, and remember, it needs to be softened. Not melted, just soft enough to leave a dent when you poke it.
- One full cup of granulated sugar.
- Two large eggs. Again, room temperature, please!
- One teaspoon of pure vanilla extract. Don’t skimp on this; it’s crucial for that classic flavor profile, like in these moist blueberry muffins we love!
- And finally, half a cup of whole milk. Whole milk really helps achieve that rich mouthfeel we are aiming for in these gourmet cupcakes.
Once you have all this ready and your ovens are preheating, we can move on to the true star of the show: that luscious interior filling!
Creating the Silky Pastry Cream Filling for Custard Filled Cupcakes
Now, let’s talk about the heart of this whole operation. If you’ve ever had a proper Boston Cream Pie, you know the vanilla cake is just the vehicle for that heavenly, creamy, thick custard. We’re making authentic results here, folks, which means we have to make real pastry cream filling from scratch. It sounds fancy, but trust me, it’s surprisingly straightforward once you get the hang of whisking! Don’t sweat it if you’ve never made custard before; that’s what I’m here for.
This portion of the recipe delivers those wonderful custard filled cupcakes we are seeking. Look at this list—it’s short, but every single item matters.
- We start with half a cup of granulated sugar.
- Three large egg yolks. Yes, just the yolks! They give us that gorgeous, deep yellow color and richness we associate with old-fashioned baking.
- Two tablespoons of cornstarch. This is our MVP for setting the cream perfectly thick!
- One and a half cups of whole milk. I really, really push for whole milk here. Lower fat milk just doesn’t give you that luxurious, decadent mouthfeel that makes these cupcakes feel so special.
- One teaspoon of vanilla extract—because vanilla is life.
- And finally, one tablespoon of unsalted butter right at the end for shine and smoothness.
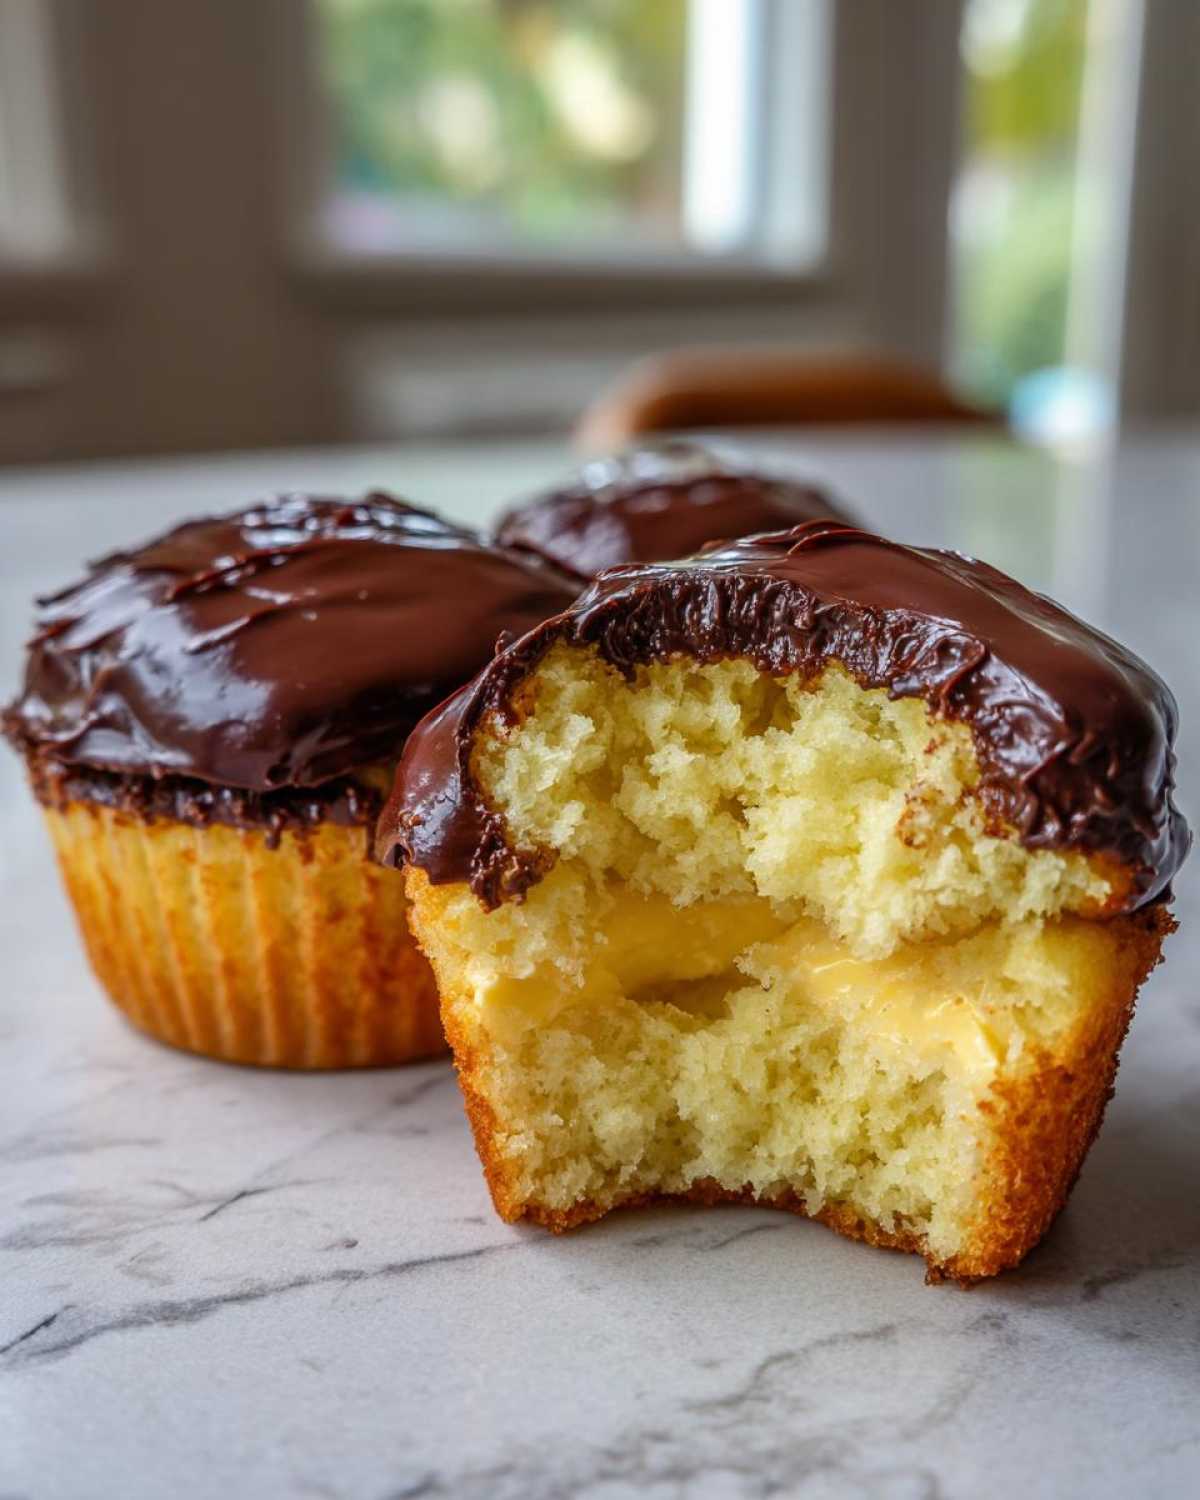
Ingredient Notes and Substitutions for Pastry Cream Filling
Since we are really focusing on texture here to make these gourmet cupcakes truly shine, let’s talk ingredients briefly. I’ve tried cutting corners before, and it never pays off with pastry cream, so listen to Clara!
First, the milk: Use whole milk if you possibly can. Skim milk makes the resulting custard feel thin, and we are aiming for something that’s almost spoonable but still holds its shape when piped into the cupcake. The richness comes from that fat content!
Second, the cornstarch! This is non-negotiable for setting up quickly and reliably. It thickens much faster and more predictably than using just flour, which is important because we need to get this cream chilled fast. The faster it chills, the better the texture is when we go to pipe it into our baked cakes later on. Don’t try swapping this out unless you are planning on cooking the mixture for ages longer!
Making the Rich Chocolate Ganache Topping for Perfect Boston Cream Pie Cupcakes
Okay, we have our perfect little vanilla base, and soon we’ll have our luscious custard filling. But what is any Boston Cream Pie without that signature, mirror-like chocolate topping? Getting the ganache right is where you really elevate these from just ‘filled cupcakes’ to real decadent desserts. It’s honestly the easiest part of the whole process, but it needs just a little bit of attention so it sets up beautifully glossy right on top of your finished treats.
When I first tried to make ganache in the early days—you know, back when I thought heating cream meant boiling it violently—it separated into oily sadness. Liam taught me that gentle heat and quality ingredients are the secret sauce. For the ultimate visual wow-factor on these chocolate glaze cupcakes, use a good quality semi-sweet chocolate. The higher the cacao butter content, the shinier that glaze will be!
You only need two things to create this magic layer. Don’t forget, if you want to check out my adventure making slow-cooker chocolate fondue (a totally different use for chocolate!), you can see the process here: chocolate fondue recipe.
- You’ll need 4 ounces of semi-sweet chocolate. Make sure it’s chopped small, or use chips, so it melts evenly!
- And half a cup of heavy cream. This is what we’ll gently warm up to melt that chocolate into submission!
My biggest piece of advice here, and this is pure Expertise from Liam’s teaching: don’t use chocolate chips if you can help it! Chips contain stabilizers to keep their shape, which can sometimes make your ganache a little dull. If you can grab a nice bar of baking chocolate and give it a rough chop, the resulting chocolate ganache topping will look like it was poured on in a professional bakery. It’s worth the extra minute it takes to chop it, trust me!
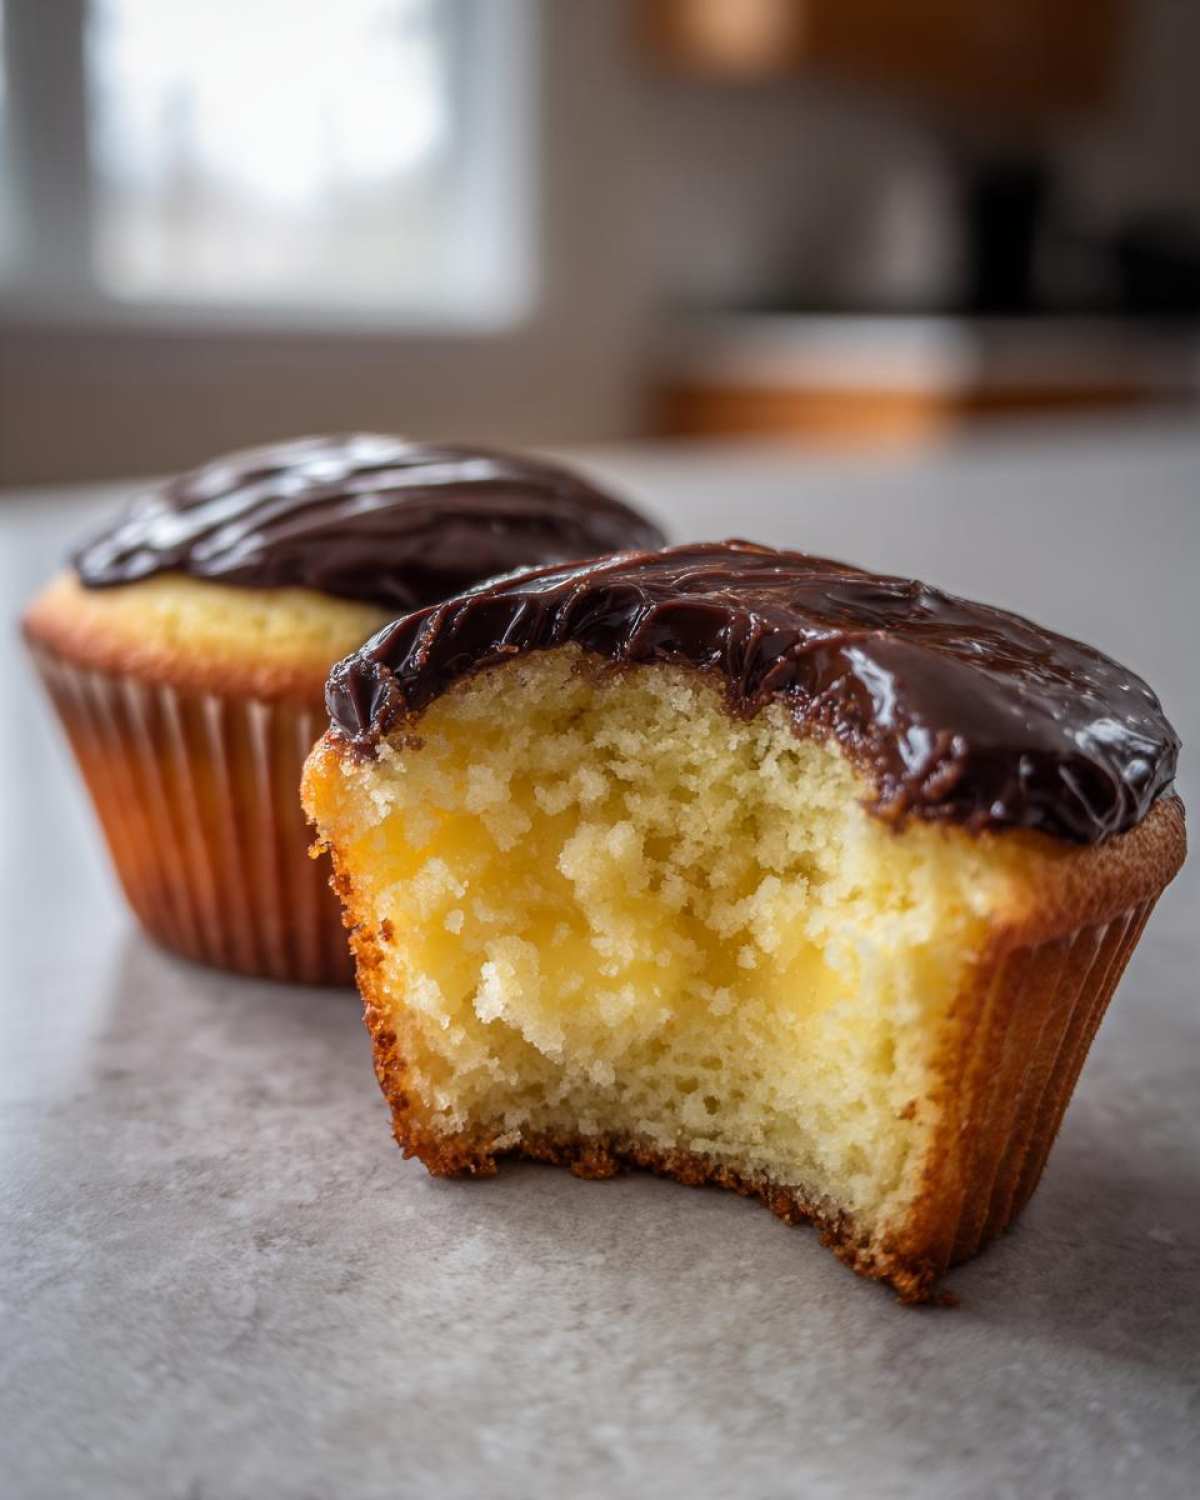
Step-by-Step Instructions for Boston Cream Pie Cupcakes
Alright, deep breath! We have our ingredients ready, and our equipment is laid out. This is where it all comes together. We have three main missions here to make these perfect boston cream pie cupcakes: bake the cake, make and chill the custard, and then assemble everything beautifully with that chocolate ribbon on top. Don’t let the steps intimidate you; just take it one small part at a time.
I remember the first time Liam taught me how to make that pastry cream, specifically the part where you “temper” the eggs by slowly drizzling in the hot milk. I was shaking so much! I thought for sure I was going to end up with scrambled eggs floating in warm milk foam. But Liam steadied my hand, reminded me to whisk like my life depended on it, and surprisingly, it worked! It went from liquid to pudding right before my eyes. If I, the former box-mix queen, can master tempering, you absolutely can too. We’ll get to that tempering trick in a minute, but first, let’s get these cakes baking!
Remember, if you want to see what the final product looks like—the perfect assembly—check out this link: this visual tutorial can be super motivating!
Baking the Vanilla Cupcakes
- First things first: Get that oven to 350°F (175°C) and get those paper liners into your 12-cup tin so they are ready to catch batter.
- Take your dry ingredients—flour, baking powder, and salt—and whisk them together really well in a medium bowl. Set that bowl off to the side for now.
- In your big mixing bowl, cream that softened butter and sugar until it’s truly light and fluffy. This usually takes a few minutes, but really watch for the color change to pale yellow—that means you’re building structure!
- Beat in your two eggs, one at a time. Wait until the first one is fully blended before adding the second one. Then, swirl in your vanilla extract.
- Now for the alternating dance! You are going to add the dry mix and the milk alternately into your butter mixture. Start and end with the Vanilla Cupcakes dry ingredients. Add about a third of the dry, mix until *just* incorporated, then half the milk, mix lightly, and repeat until everything is in. I cannot stress this enough: STOP MIXING as soon as you don’t see any more major streaks of flour. Overmixing makes for sad, tough cakes!
- Spoon that lovely batter into your prepared liners, filling them about two-thirds up the liner wall.
- Bake for 18 to 20 minutes. When you insert a toothpick right in the center, it should come out clean or maybe with just a few moist crumbs clinging to it.
- Let them cool in the pan for about five minutes—no more! Then gently transfer them right onto your wire rack to cool completely. This step is crucial before moving on to the filling!
Chilling and Filling the Custard Filled Cupcakes
While the cakes are cooling down, this is the perfect time to focus on the star: that rich custard. Remember that silky-smooth texture we talked about? We achieve it here by heating the milk and tempering the eggs.
Let’s get the filling started:
- In a bowl, whisk together your sugar, egg yolks, and cornstarch until it’s a smooth, pale ribbon. No lumps allowed!
- In your saucepan, heat the milk over medium heat until it’s steaming and you see tiny bubbles forming around the edge—that’s simmering, not boiling hard!
- Now, the technique: Slowly, slowly, drizzle about a cup of that hot milk into your egg mixture while whisking constantly and vigorously. You are gently raising the temperature of the eggs so they don’t panic and curdle.
- Once that’s all incorporated, pour that whole mixture back into the saucepan.
- Cook this over medium heat, whisking constantly, until it gets really thick and starts bubbling hard. You need to let it boil for one full minute while you keep whisking. That minute cooks out the raw starch taste!
- Remove it from the heat. Stir in the final tablespoon of butter and the vanilla until everything melts together beautifully.
- Pour this into a clean bowl. PRESS PLASTIC WRAP DIRECTLY ONTO THE SURFACE OF THE CREAM. I mean, it has to touch it! This stops that gross rubbery skin from forming.
- Chill this for at least two hours. Seriously, if it’s not cold and firm, you will just end up with sloppy centers in your custard filled cupcakes.
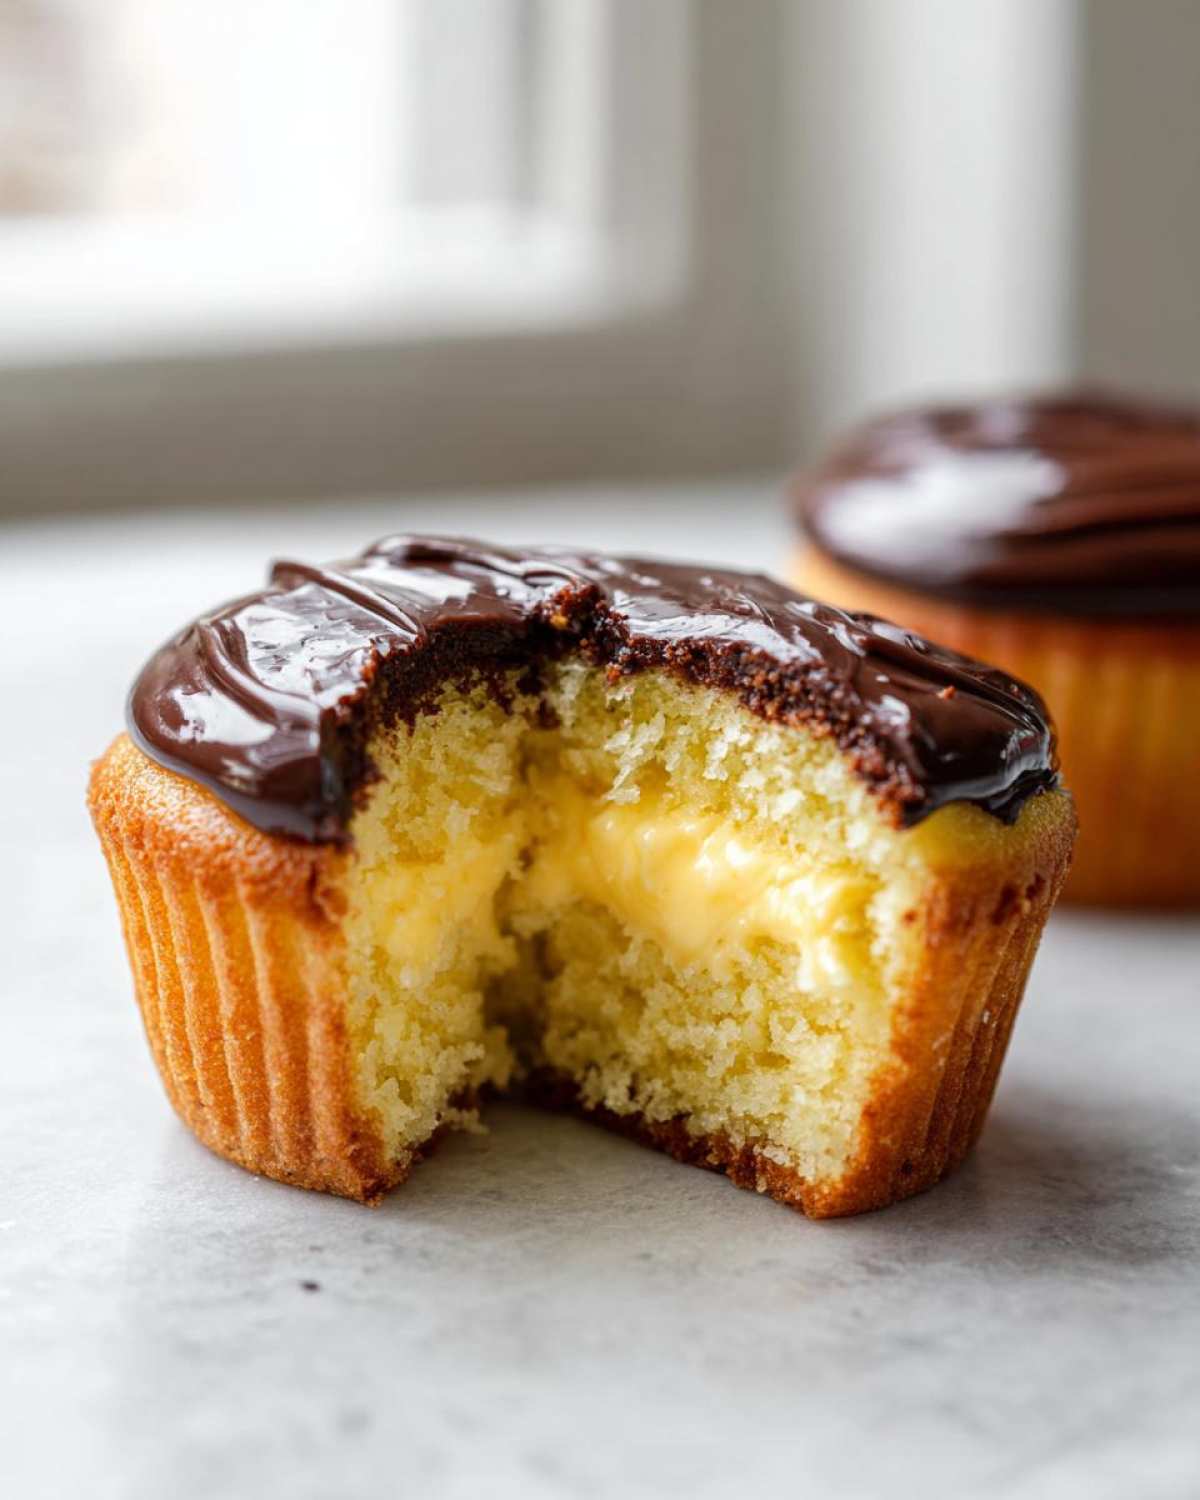
Once it’s chilled, you can dive into those cooled cupcakes. Pick a small knife and cut a cone shape right out of the middle of each one—don’t cut all the way to the bottom! Scoop out the cake piece, fill that hole generously with your cold pastry cream, and pop the little cake tip back on top if you want it covered, or leave it open so your filling is showing!
Finishing Your Boston Cream Pie Cupcakes with Ganache
For the final flourish, we are making our chocolate topping. This is so quick! Grab your finely chopped chocolate in a bowl.
- Heat your heavy cream in a tiny saucepan until it just starts steaming and curling up on the edges.
- Pour that hot cream right over your chocolate. Don’t touch it for five full minutes! I know, I have no patience either, but Liam says those five minutes are essential for even melting.
- After five minutes, gently whisk from the center outwards until you have a smooth, beautiful, glossy mixture. This is your chocolate ganache topping.
- Now, here is the trick for that perfect drizzle: Don’t use it immediately! If you pour piping hot ganache on the cold custard, it will just melt the insides and slide off. Let it cool on the counter for about 10 to 15 minutes. It should be thick enough to coat the back of a spoon nicely but still easily pourable.
- Spoon a generous dollop or drizzle over the top of each filled cupcake. Let them sit on the counter for just a few minutes for the ganache to set up a bit before you serve these amazing puff pastry treats look-alikes!
Tips for Perfect Homemade Bakery Style Cupcakes
Achieving that pristine, bakery-quality look for our boston cream pie cupcakes takes just a few extra tricks. These are the exact tips Liam shared with me once I stopped being terrified of the stove and started trusting the process. These little bits of knowledge are what turn a good batch into a total showstopper, perfect for any occasion, maybe even those big family gatherings mentioned in our lasagna post!
Everyone wants that perfect, slightly flat top on their cupcake so the ganache sits beautifully. Liam says the most common mistake that causes doming (those mushroom tops) is opening the oven door too early! Don’t peek until those 15 minutes are up, or you shock the batter and cause it to rise unevenly. Keep the heat steady, and you’ll get a nicely behaved cake top ready for filling.
Now, let’s talk about the filling one more time—I know how nerve-wracking tempering is. If your pastry cream filling seems like it’s starting to curdle just before you add the final butter, don’t panic! Take the pan off the heat entirely, grab a cold whisk, and whisk really hard. Sometimes, just removing it from the direct heat source calms the mixture down enough to smooth out. If it’s truly gone south, push it all through a fine-mesh sieve—it’s a total Lifesaver that catches any stray bits of cooked egg, leaving you with that perfect texture you see on sites like From Scratch Dishes.
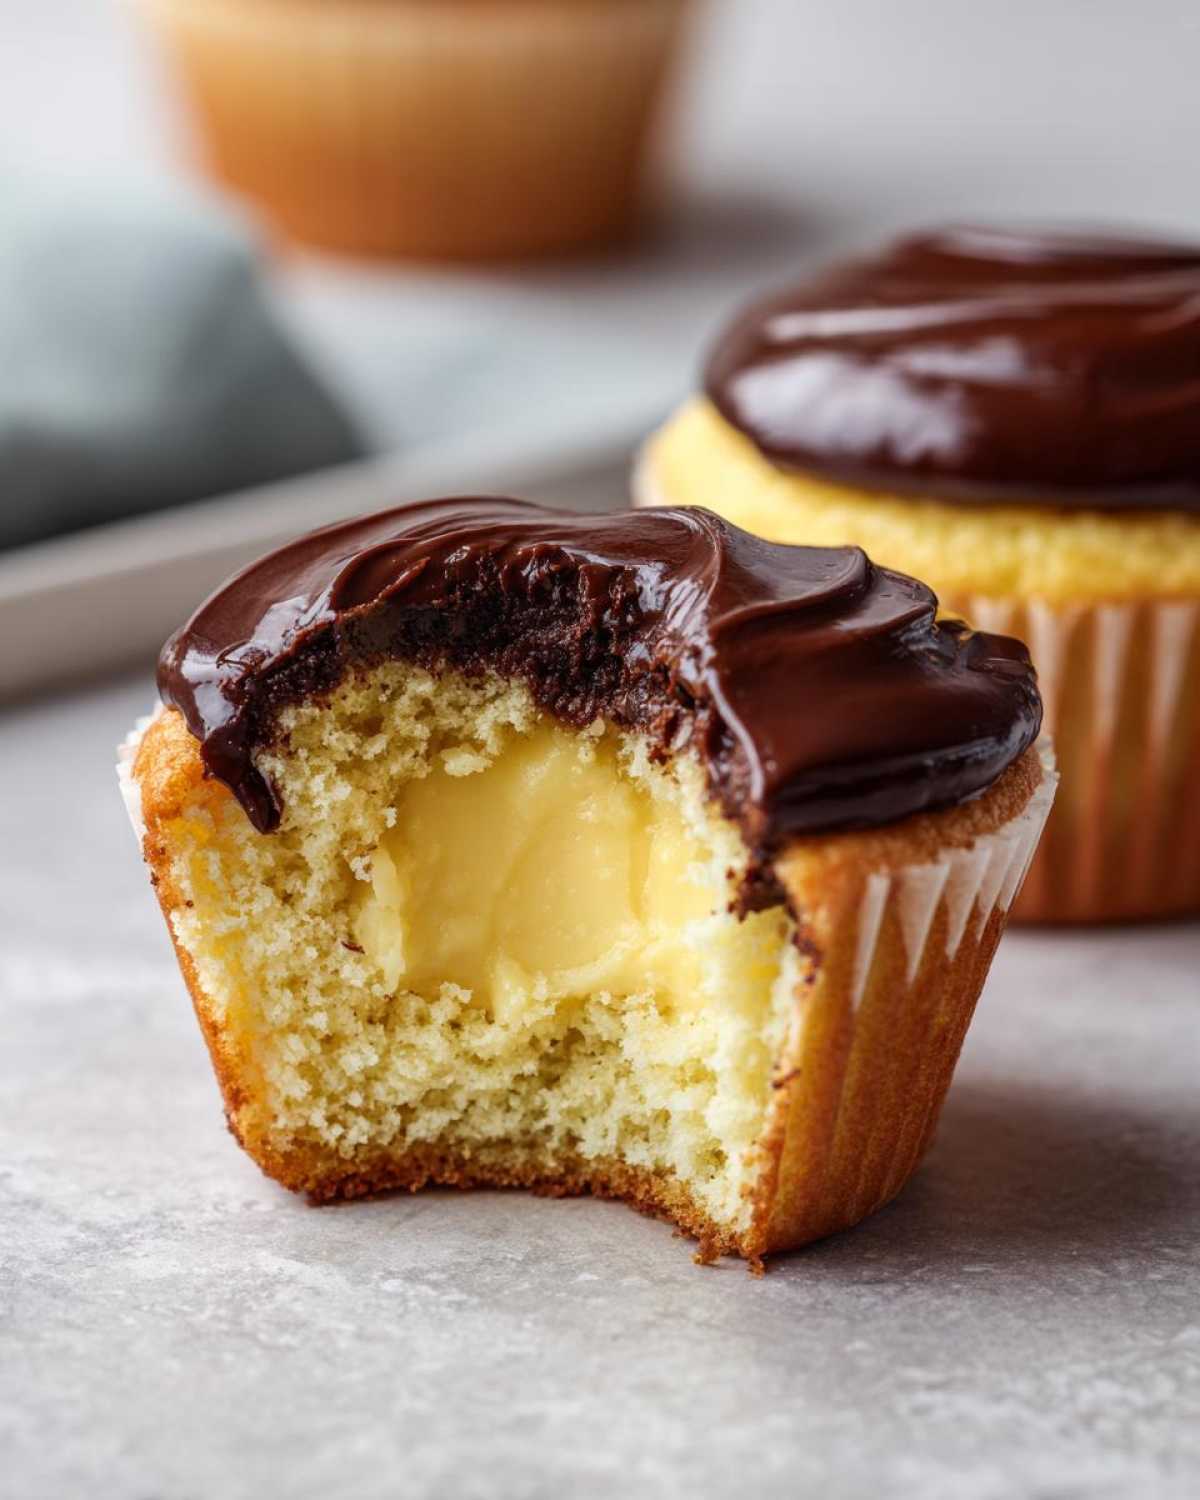
Here are a few quick-fire things I check right before assembling my homemade bakery style cupcakes:
- Sifting Saves: Even though we whisk the flour mixture, I always suggest sifting the dry ingredients one last time before adding them to the creamed butter. It ensures absolutely no hidden lumps sneak into your moist vanilla cake batter.
- Cooling is Key: Seriously, don’t try to core a warm cupcake. The cake will tear, and the cream will melt right out before it even gets into the hole. Patience pays off!
- Ganache Sheen: For the glossiest shine on your chocolate ganache topping, wait until the ganache is slightly warm, but not hot, before pouring. If it’s too hot, you cook the top of the custard; if it’s too cool, it will be too thick and look patchy instead of smooth.
Mastering these small details keeps your custard filled cupcakes looking professional and tasting like they came straight from a high-end bakery!
Storage and Serving Suggestions for Your Classic Dessert Recipes
So you’ve finished your boston cream pie cupcakes—congratulations! Now you have this glorious tower of individual treats ready to go. That glorious pastry cream filling means we have to be a little more careful with storage than, say, a double chocolate chip cookie. Since we are using actual custard, refrigeration is a must, but I have a trick to make sure they are still perfect when you pull them out later!
If you are planning on baking for parties or making these ahead of time, the best strategy is always Assembly Last. Keep your vanilla cakes totally plain and cooled. Store the chilled pastry cream in the piping bag (or covered container) in the fridge. Keep your ganache made but at cool room temperature—if it’s rock hard in the fridge, it will crack when you try to spread it on a cold cupcake.
Right before serving, core, fill, top with the chocolate glaze, and let them sit out for just 15 minutes. That short time lets the cake soften up just a tiny bit and takes the chill off the glaze so it isn’t stiff.
If you absolutely must refrigerate the finished chocolate glaze cupcakes (maybe you made them two days before the party, I hear you!), try to seal them in an airtight container. That chocolate top can get a little dull or sweaty in the fridge environment, so just be prepared to let them rest on the counter for a bit before guests arrive.
When it’s time to serve these amazing classic dessert recipes, they pair unbelievably well with a strong cup of coffee. The bitterness of the coffee cuts right through that sweetness of the vanilla cake and the richness of the chocolate perfectly. They are also fantastic served alongside something tart, like a bowl of fresh raspberries. Liam loves having them as a post-dinner indulgence when we make something simple, like this easy no-bake dirt cake recipe, because it feels like we’re still having dessert, but in a cute, mini package!
Honestly, whether you serve them for a big celebration or just sneak one late at night with a mug of tea, these custard filled cupcakes are pure joy. Just remember that little bit of time on the counter before serving makes all the difference!
Frequently Asked Questions About Boston Cream Pie Cupcakes
Oh, I bet you have questions! That’s totally normal when you are tackling a classic like this, even in cupcake form. When Liam and I started sharing recipes, I asked a million questions, so I feel like I know what you’re wondering before you even type it out. These boston cream pie cupcakes are worth mastering, and I’m happy to share the little secrets that make them foolproof. Any tips here are straight from my notes trying to perfect this exact cupcake recipe!
Can I use store-bought pudding instead of homemade Pastry Cream Filling?
This is the big shortcut question! And I get it—who needs to cook custard on a busy day? You totally *can* use good quality, instant vanilla pudding mix if you are really rushed, but I have to be honest: it won’t be the same experience. Store-bought pudding is usually much lighter and sweeter, and it doesn’t have that rich, almost silky texture that homemade Pastry Cream Filling delivers. If you go that route, make sure you chill it really well, and maybe thin it just a tiny bit with a splash of milk before piping it in, because the instant stuff can sometimes seize up too hard. For true Boston Cream Pie flavor though, stick with the homemade custard!
How do I get the Chocolate Glaze Cupcakes topping shiny?
This is all about quality and temperature, just like I mentioned earlier. For the shiniest result on your Chocolate Glaze Cupcakes, you need to use the best chocolate you feel comfortable buying. I prefer a nice bar of semi-sweet baking chocolate over chips because it melts cleaner. The other factor is temperature management. When you pour that hot heavy cream over the chocolate, let it sit undisturbed for a full five minutes before stirring. Then, when you do stir, do it gently! You don’t want to incorporate too much air into the mixture; air dulls the finish. We want that mirror-like sheen, so stir slowly until smooth, take a peek at what the folks over at Insanely Good Recipes show off, and you’ll see exactly what I mean!
Can I make the cake part ahead of time for these Cupcake Recipe treats?
Yes, you absolutely can, and I definitely recommend it when I’m planning a big bake day! The vanilla cake base is sturdy enough to hold up well. Bake the cakes, let them cool *completely* on the rack, and then store them in an airtight container at room temperature. They are good like this for up to two days. I actually think they taste even moister the next day! But listen closely: Do NOT fill or glaze them until you are ready to serve, especially since we are using dairy in the filling. Fill and top them about an hour before you plan to eat them. If you need to store them filled, they must go in the fridge, but try to bring them back to room temperature for about 20 minutes before serving for the best flavor!
If you’re looking for more general advice on keeping your baked goods fresh, check out my tips on storing homemade nacho cheese sauce—though clearly, these cupcakes deserve refrigeration more than cheese sauce!
Nutritional Estimates for Your Decadent Desserts
I love sharing how delicious these boston cream pie cupcakes are, but as a responsible home cook, I feel like I should chat just quickly about the numbers. When you are serving up something this rich and wonderful—truly one of those decadent desserts you save for special occasions—it’s only fair to give you a little peek at what’s inside! Liam is always reminding me that while taste comes first, knowing the composition helps everyone enjoy their treat responsibly.
Keep in mind these estimates are based on the specific recipe measurements provided for 12 servings, using standard baking products. Think of these as a fun guideline, not a strict rule, because the exact brand of chocolate or size of your eggs can always shift things a little bit!
For one single, glorious, filled, and glazed cupcake, here is what we are looking at:
- Calories: About 350
- Total Fat: 18g (with about 10g of that being saturated fat)
- Carbohydrates: Around 45g of lovely carbs to fuel your day!
- Sugar: That delicious sweetness clocks in around 35g—hey, it’s dessert!
- Protein: Roughly 5g per cupcake.
- Sodium: About 180mg.
- Cholesterol: Around 110mg.
Everything looks beautifully balanced for a truly special treat, if you ask me! These numbers reflect the richness coming from the butter in the cake, the egg yolks in the custard, and the chocolate in the glaze. Enjoy every single bite!
Share Your Boston Cream Pie Cupcakes Creations
Baking is always better when shared, and that’s exactly why Liam and I built TasteTaught. We want to see your finished boston cream pie cupcakes! I truly believe that every time someone manages a perfect filling or gets that chocolate ganache looking just right, it’s a huge win. I get so much joy seeing the kitchen come alive in your homes!
So, once you’ve finished your beautiful custard filled cupcakes, whether you’re serving them warm or nicely chilled, please don’t keep that masterpiece to yourself! Take a picture!
I’m encouraging everyone to rate this recipe right here on the site. If you loved the moist vanilla cake base or if the pastry cream turned out silky smooth, leave us five stars! It genuinely helps other new bakers feel confident enough to try this slightly more complex cupcake recipe.
- Snap a photo of your finished tower of chocolate glaze cupcakes!
- Tag us on social media! Seeing your creations helps us remember why we love teaching people how to bake.
- If you found any super helpful shortcuts or had a great serving suggestion, drop a comment below this recipe. Maybe you’ve figured out a great way to make these for a huge crowd? We’d love to hear it!
Have feedback or just want to tell us how much you loved the gourmet cupcakes? You can always reach out to us directly through our contact page right here: Let us know what you think! Thank you so much for baking with us today. We can’t wait to see what you make next!
PrintBoston Cream Pie Cupcakes: Moist Vanilla Cake with Pastry Cream Filling
You can make bakery-style Boston Cream Pie Cupcakes at home! This recipe gives you fluffy vanilla cupcakes filled with smooth pastry cream and topped with a rich chocolate ganache.
- Prep Time: 45 min
- Cook Time: 20 min
- Total Time: 65 min
- Yield: 12 servings
- Category: Dessert
- Method: Baking
- Cuisine: American
- Diet: Vegetarian
Ingredients
- 1 1/2 cups all-purpose flour
- 1 1/2 teaspoons baking powder
- 1/2 teaspoon salt
- 1/2 cup unsalted butter, softened
- 1 cup granulated sugar
- 2 large eggs
- 1 teaspoon vanilla extract
- 1/2 cup whole milk
- For the Pastry Cream Filling:
- 1/2 cup granulated sugar
- 3 large egg yolks
- 2 tablespoons cornstarch
- 1 1/2 cups whole milk
- 1 teaspoon vanilla extract
- 1 tablespoon unsalted butter
- For the Chocolate Ganache Topping:
- 4 ounces semi-sweet chocolate, chopped
- 1/2 cup heavy cream
Instructions
- Preheat your oven to 350°F (175°C). Line a 12-cup muffin tin with paper liners.
- Prepare the Vanilla Cupcakes: In a medium bowl, whisk together the flour, baking powder, and salt. Set aside.
- In a large bowl, cream the softened butter and sugar together until light and fluffy. Beat in the eggs one at a time, mixing well after each addition. Stir in the vanilla extract.
- Gradually add the dry ingredients to the wet ingredients, alternating with the milk, beginning and ending with the dry mixture. Mix until just combined; do not overmix.
- Fill the cupcake liners about two-thirds full with batter. Bake for 18 to 20 minutes, or until a toothpick inserted into the center comes out clean. Let the cupcakes cool completely in the pan before transferring them to a wire rack.
- Prepare the Pastry Cream Filling: In a medium bowl, whisk together the sugar and egg yolks until pale. Whisk in the cornstarch until smooth.
- In a small saucepan, heat the milk until it just simmers. Slowly pour the hot milk into the egg yolk mixture while whisking constantly to temper the eggs.
- Pour the entire mixture back into the saucepan. Cook over medium heat, whisking constantly, until the mixture thickens significantly and comes to a boil. Boil for one minute, still whisking. Remove from heat.
- Stir in the vanilla extract and butter until the butter is melted and incorporated. Pour the pastry cream into a clean bowl, press plastic wrap directly onto the surface to prevent a skin from forming, and chill in the refrigerator for at least 2 hours, or until cold.
- Fill the Cupcakes: Once the cupcakes are cool and the pastry cream is chilled, use a small knife or a cupcake corer to remove a cone-shaped center from each cupcake.
- Spoon or pipe the chilled pastry cream into the hollowed-out centers. Replace the removed cake piece on top if desired, or leave the filling exposed.
- Prepare the Chocolate Ganache Topping: Place the chopped chocolate in a heatproof bowl. In a small saucepan, heat the heavy cream until it just begins to simmer. Pour the hot cream over the chocolate. Let it sit for 5 minutes, then whisk until the mixture is smooth and glossy.
- Let the ganache cool slightly until it thickens enough to hold its shape when drizzled, about 10 to 15 minutes.
- Top each filled cupcake with a spoonful of the chocolate ganache. Allow the ganache to set before serving your homemade bakery style cupcakes.
Notes
- For the best texture, make sure your butter and eggs for the cake batter are at room temperature before you start mixing.
- If you want a very shiny ganache, use high-quality chocolate.
- Chill the filled cupcakes for 30 minutes before topping with ganache for a cleaner presentation.
Nutrition
- Serving Size: 1 cupcake
- Calories: 350
- Sugar: 35
- Sodium: 180
- Fat: 18
- Saturated Fat: 10
- Unsaturated Fat: 8
- Trans Fat: 0
- Carbohydrates: 45
- Fiber: 1
- Protein: 5
- Cholesterol: 110