

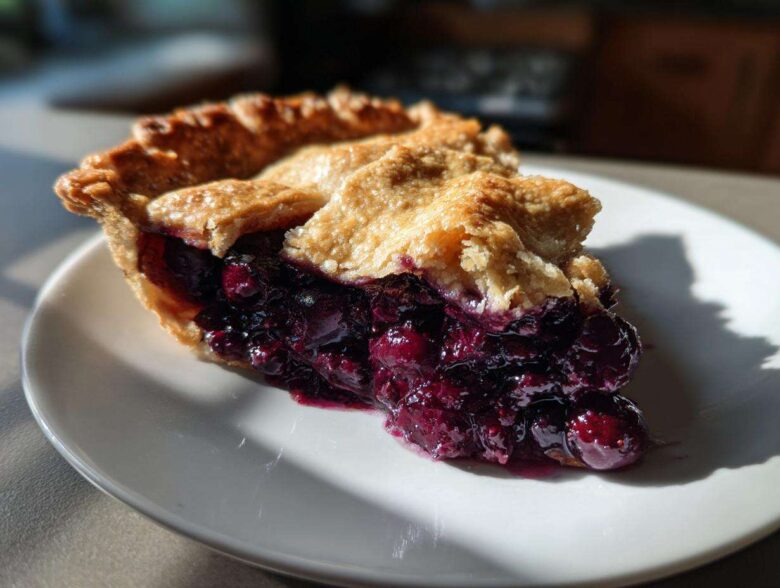
Okay, listen up! When the summer heat hits, there’s only one dessert serious enough to handle the occasion: a magnificent, towering blueberry pie. Forget those runny, soupy fillings you sometimes get—we are past that phase! I’m sharing my definitive, foolproof **blueberry pie recipe** that took me years to perfect. Trust me, after making this, you’ll never look at store-bought fillings again.
The real game-changer here is the texture. It has that crisp, shatteringly flaky crust that melts instantly, paired with a filling that actually holds its shape when you slice it. I spent an entire summer adjusting ratios just to get that perfect “set” without that weird gummy texture. This recipe is the culmination of all those messy experiments, developed right here in my kitchen so you can impress everyone at your next gathering!
If you want the ultimate deep dive into how we created this masterpiece, check out why baking matters so much to our family. But for now, let’s get these berries ready!
Why This Blueberry Pie Recipe Delivers the Best Results
Folks, this isn’t just another pie recipe; it’s a solution! I know how frustrating it is when you pull out a beautiful pie only to have the insides run all over the plate. We fixed that. This **blueberry pie recipe** guarantees structural integrity while keeping that wonderful fresh-squeezed flavor.
Here’s why I stand by this version:
- The filling *always* sets beautifully, resisting that dreaded runny mess.
- The crust is genuinely flaky—none of that tough, hard stuff. It’s like glass on the top, but soft inside!
- It manages fresh or frozen berries perfectly, making it a **Best Homemade Fruit Pie** year-round.
Achieving a Perfectly Set Blueberry Pie Filling That Sets
The absolute secret weapon here is cornstarch, used exactly as written. Don’t skimp! The cornstarch bubbles up thick while baking. But the real trick? You must let this pie cool, ideally for four hours or more. Seriously, resist the urge! That cooling time locks everything in place. You need that patience for a filling that truly sets.
The Secret to a Flaky Crust Instructions
This is where you channel your inner pastry chef! The whole **Buttery Pie Crust Tutorial** hinges on temperature. Your butter needs to be straight from the fridge—ice cold, cut into small cubes. Mix it minimally with your hands. We want visible pieces of butter; those melt in the oven and create those perfect, airy layers. Handle this dough gently, or it gets tough!
Ingredients for the Ultimate Blueberry Pie Recipe
Alright, let’s gather our battlefield supplies! We need distinct sets of ingredients for the crust and the filling. Remember, this is the foundation for the **Ultimate Blueberry Pie Recipe**, so pay close attention to the state of your butter. If you follow these exactly, you’re halfway to the perfect **From Scratch Blueberry Pie**.
I’ve broken this down so you don’t accidentally bake your crust with the filling ingredients. Keep everything cold, especially for the pastry—that’s the key player here!
For the Flaky Pie Crust Instructions
This is the serious stuff. Remember, the butter must be practically frozen and definitely cut into small pieces, like little pebbles. If your butter is soft, stop right there and chill it down! We need that extreme cold to get those amazing layers we talked about.
- 2 1/2 cups all-purpose flour
- 1 teaspoon salt
- 1 cup (2 sticks) cold unsalted butter, cut into cubes
- 1/2 cup ice water, plus more if needed
For the Blueberry Pie Filling That Sets
This component is all about balance—sweetness from the berries, structure from the cornstarch, and a bright pop from the lemon. Feel free to taste your berries first; if they look super tart, you might want to bump that sugar up just a tiny bit. The lemon zest is a must; it just wakes up the whole flavor profile!
- 6 cups fresh or frozen blueberries (do not thaw if frozen)
- 3/4 cup granulated sugar (adjust based on berry sweetness)
- 1/4 cup cornstarch
- 1 tablespoon fresh lemon juice
- 1 teaspoon lemon zest
How to Prepare This Classic Summer Dessert
Okay, here is where the magic happens! We have our ingredients prepped, and now we turn them into what will surely become the talk of the town: a perfect **blueberry pie recipe**. Take your time with these steps, especially the crust. Speed will hurt you here, but patience guarantees success. Preheat your oven to 425°F (220°C) *before* you start assembling. We need that high heat blast right away!
Making the Flaky Pie Crust Dough
Remember how we emphasized the cold butter? This mixing technique aims to keep those butter chunks intact. Whisk your flour and salt together first in a big bowl. Now, toss in those cold butter cubes. Use a pastry blender—or honestly, just your best, quickest fingers—to cut that butter in. You are looking for pieces ranging from tiny sand to small peas tucked into the flour. That’s what lifts the crust!
Next, start adding the ice water, tablespoon by careful tablespoon. You might not need all of it, so stop adding water the second the dough starts clinging together when you squeeze a handful. Divide that dough exactly in half. Flatten each half into a disk—don’t knead it, just flatten! Wrap those disks tightly in plastic wrap. They absolutely must chill for at least one hour in the fridge. Don’t cheat this step, or your **flaky pie crust instructions** won’t pay off!
Assembling and Topping the Blueberry Pie Recipe
Time to roll! Lightly flour your counter and roll out the first disk to about a 12-inch circle. Gently drape this over your 9-inch pie plate. Trim the edges, leaving about an inch hanging over the side. Now, take your filling—gently mix those berries, sugar, cornstarch, and lemon until everything is lightly coated. Pour all that glorious blueberry mix straight into the bottom crust.
Roll out that second disk. You can go classic: lay it right over the top and cut some slits for venting steam. Or, if you’re feeling fancy, cut it into strips for a lattice design. Just make sure you seal the edges tightly—crimp them, fold them, whatever lets you look proud! To get that gorgeous golden shine, brush the top lightly with the beaten egg wash, and sprinkle it generously with coarse sugar for crunch. Oh, and please, put that whole pie on a baking sheet before it goes in. Trust me, drips happen, and that saves your oven.
Baking Times and Temperature Adjustments
Here’s the two-stage baking secret we use for the perfect bake! Start the pie immediately in the 425°F oven for exactly 15 minutes. This high heat shocks the butter, setting the structure of that flaky crust right away. After 15 minutes, reduce the oven temp down to 375°F (190°C).
Now, let it bake for another 40 to 50 minutes. The visual check is vital here. You should see the crust turn deeply golden brown, and the filling must be bubbling enthusiastically—and thickly—through those vents or lattice openings. If the edges look like they are getting too dark too fast (the sneaky edges always do!), just snip some foil and tuck it around those rims. Remember the final step for this **blueberry pie recipe**: cooling completely, which is non-negotiable for a set filling!
Tips for Success with Your Blueberry Pie Recipe
Listen, even the best **blueberry pie recipe** needs a little expert nudge sometimes. I’ve baked enough of these in my life to know what works and what makes me throw my hands up in frustration. My goal is to save you those moments! Most people fail because they rush the cooling, but we aren’t going to let that happen, right?
Keep these pointers in mind as you pull this beautiful dessert together. They are the little bits of wisdom that turn a good pie into a legendary one. You want this to be your go-to recipe for every summer potluck!
Using Frozen Blueberries vs. Fresh Berry Pie Baking
Don’t fret if you can only find bags of frozen berries! This recipe handles them beautifully. The most important rule? Do not thaw them first! If you thaw them, you just get purple water, and that breaks down the structure you worked so hard to build. Toss those frozen beauties straight into the sugar and cornstarch mixture.
Because the frozen berries slightly lower the batter temperature, you might just need an extra five, maybe ten minutes on the bake time. Watch the filling bubbling thickly, not the clock! That thick bubble is your visual cue that the cornstarch has done its job, whether you started with frozen or **Fresh Berry Pie Baking** sweethearts.
Storage and Reheating Instructions for Your Pie Recipe
Phew! We survived the baking gauntlet, and now you have this masterpiece sitting on the counter. Naturally, you want to know how to keep it perfect for later. This pie is sturdy, which is great news if you’re planning a **Make Ahead Fruit Pie** for a big event next weekend. The filling setting properly is key to good storage!
First things first: It has to be completely cool before it sees plastic wrap or a proper storage container. If you wrap it while it’s warm, you’re just trapping steam, and that makes the flaky crust sad and soggy. Don’t do it!
Room Temperature vs. The Fridge
Since this filling relies on a high concentration of sugar and cornstarch—not dairy—it actually does really well sitting out for a bit. If you plan on serving your **pie recipe for gatherings** the same day you bake it, it is totally fine left on the counter, tented loosely with foil, for up to six hours. Just keep it away from direct sun or heat.
However, if you are saving leftovers or planning ahead, the fridge is your best friend. Tightly wrapped or covered with foil, this pie will keep beautifully for a good three to four days in the refrigerator. It tastes great cold, straight from the fridge, especially on a hot afternoon!
Reheating Slices for Maximum Enjoyment
If you serve your pie cold, you’re missing out on that aroma release! Reheating is simple, but you have to be gentle so you don’t undo all that hard work we did on the crust. If you want that flaky top to crisp up again, skip the microwave entirely.
I recommend reheating individual slices right on a baking sheet in a 325°F oven for about 10 to 15 minutes. That gentle heat warms the filling nicely and crisps the crust back up without burning the edges. If you’re worried about the edges, just brush a little butter on them before reheating. A warm slice of this blueberry beauty with a fresh scoop of vanilla ice cream? Perfection!
Variations on the Classic Blueberry Pie Recipe
While I absolutely believe this standard formulation—crust and filling—is the quintessential **blueberry pie recipe**, I know folks like to mix things up, especially when the weather gets sweltering and you start thinking about **No Bake Pie Summer Dessert** options or maybe something a little richer. This base recipe for the filling is so trustworthy, though, that it handles twists beautifully. We just swap out the top crust or tweak the flavor slightly!
Don’t be afraid to experiment once you’ve nailed the basic structure. These adaptations are fantastic for keeping things exciting when you’re making pies weekly during peak blueberry season!
Adding Lemon Zest and Creating a Blueberry Pie with Lemon Zest Accent
If you really love that bright, high-note flavor that cuts through the sweetness of the berries, you can definitely dial up the lemon. We already included a teaspoon in the filling, which gives it a nice lift, but if you want a full-on **Blueberry Pie with Lemon Zest** experience, amp it up! I would suggest adding another teaspoon of zest along with the juice.
You can also fold in about two tablespoons of very finely chopped fresh mint right before closing the pie. Mint and lemon together with blueberry? Wow! It tastes like summer exploded in your mouth. Just make sure the zest goes in with the sugar/cornstarch mix to get evenly distributed.
Rustic Blueberry Crumble Pie Topping Swap
If rolling out that second pie crust feels like too much work one afternoon, or if you just prefer that crunchy texture, switching to a **Rustic Blueberry Crumble Pie** topping is a fantastic change. You simply skip rolling out that second disk of dough entirely!
Instead, you whip up a simple streusel topping. You’ll mix about 1 cup of flour, 1/2 cup of packed brown sugar, and 1/2 cup of cold, cubed butter until it forms those lumpy, delicious crumbles. Sprinkle this mixture generously over the filling after pouring it into the bottom crust. It bakes up beautifully golden and crunchy! You might want to bump the oven temperature up slightly, maybe to 390°F, for the last 20 minutes when using the crumble so that topping gets nice and toasted.
Serving Suggestions for This Pie Recipe for Gatherings
Alright, your beautiful, perfectly set blueberry pie is out of the oven, it’s cooled (hallelujah!), and now we need to talk about how to present this masterpiece destined for your next potluck. A pie this stunning doesn’t just need to taste good; it needs to look like the star of the show! This **Classic Summer Dessert** really sings when paired with the right extras.
I usually keep the presentation simple because the rustic look of a golden crust already does half the job. But a little something extra on the side makes it feel truly special. Never underestimate the power of temperature contrast!
My number one go-to pairing? A scoop of good quality, rich vanilla bean ice cream. The cold creaminess against the slightly warm or room-temperature spiced blueberries is just heavenly. If you didn’t chill it long enough and it’s still a touch warm inside, the ice cream melts just enough to create its own little sauce on the plate. Divine!
If you want something a bit lighter, you can never go wrong with freshly made whipped cream. Trust me, make your own—it takes two minutes! Just whip heavy cream until soft peaks form, and add just a tiny bit of powdered sugar and maybe half a teaspoon of vanilla. A dollop of that on top of a slice, maybe with a sprinkle of that leftover coarse sugar you used on the crust, makes for a gorgeous platter presentation. It’s simple, elegant, and frankly, mandatory for any good holiday pie baking session!
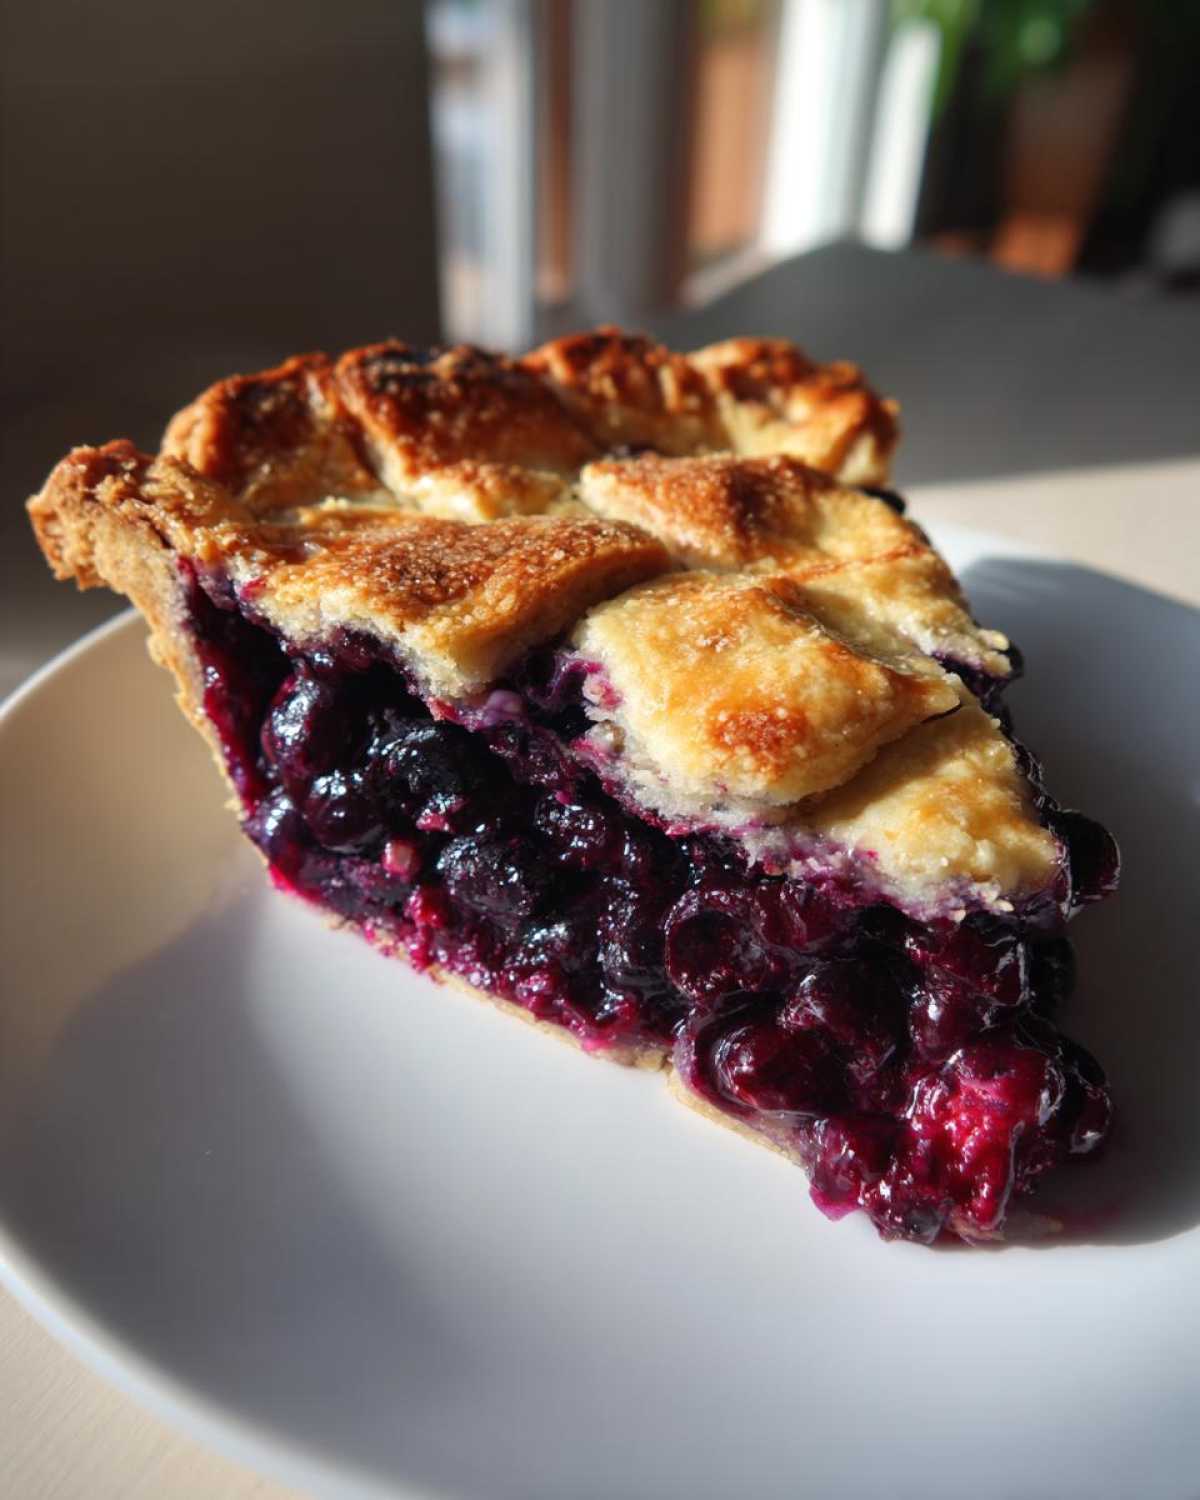
Frequently Asked Questions About This Blueberry Pie Recipe
I know you’re probably excited to get baking, but before you rush off, I wanted to tackle a few lingering questions I always get about this **blueberry pie recipe**. I’ve pulled these straight from my email inbox because everyone seems to worry about the same things when tackling an **Old Fashioned Blueberry Custard Pie** style or just getting the crust right!
Don’t hesitate to check these out before you start mixing! It’s always better to be prepared than to panic mid-bake. If you have questions about this site’s policies after you’ve made your pie, you can always review our full disclaimer here.
Why is my blueberry pie filling runny, even when I use cornstarch?
This is the number one heartbreak! If your filling is runny, it almost always comes down to two things: either you didn’t use enough cornstarch, or you didn’t let the pie cool long enough. I can’t stress this enough: that 4-hour cooling period is non-negotiable for achieving that **Blueberry Pie Filling That Sets** perfectly. The cornstarch needs time to completely hydrate and bind as the temperature drops. If you cut into it hot, it will weep.
Can I use pre-made pie crust instead of making the flaky crust from scratch?
Oh, gosh, I know pre-made crust is easy, especially if you are looking for a quick **Easy Blueberry Dessert Idea**! You certainly *can* use it, and your pie will still taste good, but you won’t get that amazing shatteringly **flaky pie crust instructions** result that comes from using ice-cold butter that we worked so hard to achieve. If you buy one, just make sure you let it warm on the counter for about ten minutes before unrolling so it doesn’t crack immediately.
Can I make this pie ahead of time for a party?
Yes! This is one of the secrets to being a hero at holiday parties. This is a robust **Make Ahead Fruit Pie**! You can absolutely bake the whole pie one day ahead of time. Once it has cooled completely to room temperature (remember, no warm pie touching plastic!), wrap it tightly and store it on the counter (if your kitchen isn’t too hot) or in the fridge. If you refrigerate it, just pull it out about an hour before serving so it’s not totally chilled when sliced.
Can I substitute the fresh blueberries with frozen ones?
Absolutely! This is why this recipe is so great for year-round baking. The instructions note this already, but I’ll say it again for emphasis: Do NOT thaw frozen berries! Toss them directly from the freezer into the sugar and cornstarch mix. They will release a little more liquid, which is why we rely so heavily on that cornstarch. They work perfectly for a **Fresh Berry Pie Baking** experience any day of the year.
Estimated Nutritional Information
Look, who cares about calories when you’re eating legendary pie, right? But for those of you tracking things, here is a rough estimate of what you’re diving into with one generous slice of this **Classic Homemade Blueberry Pie**. Keep in mind, this doesn’t account for any toppings like ice cream or whipped cream we talked about!
Since we use a good amount of real butter for that crust—which is non-negotiable for texture—the fat content is what it is! But look at that serving size; it’s generous!
- Serving Size: 1 slice
- Calories: 380
- Sugar: 28g
- Sodium: 210mg
- Fat: 21g (Mostly from that incredible, flaky butter!)
- Saturated Fat: 12g
- Carbohydrates: 48g
- Protein: 5g
Estimated Nutritional Information
Look, who cares about calories when you’re eating legendary pie, right? But for those of you tracking things, here is a rough estimate of what you’re diving into with one generous slice of this **Classic Homemade Blueberry Pie**. Keep in mind, this doesn’t account for any toppings like ice cream or whipped cream we talked about!
Since we use a good amount of real butter for that crust—which is non-negotiable for texture—the fat content is what it is! But look at that serving size; it’s generous!
- Serving Size: 1 slice
- Calories: 380
- Sugar: 28g
- Sodium: 210mg
- Fat: 21g (Mostly from that incredible, flaky butter!)
- Saturated Fat: 12g
- Carbohydrates: 48g
- Protein: 5g
Classic Homemade Blueberry Pie with Flaky Crust
Follow this recipe for a classic homemade blueberry pie featuring a perfectly flaky crust and a filling that sets well, using fresh or frozen blueberries.
- Prep Time: 45 min
- Cook Time: 65 min
- Total Time: 170 min
- Yield: 8 servings
- Category: Dessert
- Method: Baking
- Cuisine: American
- Diet: Vegetarian
Ingredients
- 2 1/2 cups all-purpose flour
- 1 teaspoon salt
- 1 cup (2 sticks) cold unsalted butter, cut into cubes
- 1/2 cup ice water, plus more if needed
- 6 cups fresh or frozen blueberries (do not thaw if frozen)
- 3/4 cup granulated sugar (adjust based on berry sweetness)
- 1/4 cup cornstarch
- 1 tablespoon fresh lemon juice
- 1 teaspoon lemon zest
- 1 large egg, beaten (for egg wash)
- 1 tablespoon coarse sugar (for sprinkling)
Instructions
- Prepare the Crust: In a large bowl, whisk together the flour and salt. Cut in the cold butter using a pastry blender or your fingers until the mixture resembles coarse crumbs with some pea-sized pieces of butter remaining. Gradually add the ice water, one tablespoon at a time, mixing until the dough just comes together. Divide the dough in half, form each half into a disk, wrap in plastic, and chill for at least 1 hour.
- Prepare the Filling: In a separate bowl, gently combine the blueberries, granulated sugar, cornstarch, lemon juice, and lemon zest. Mix until the berries are evenly coated. The cornstarch helps the filling set.
- Assemble the Pie: Preheat your oven to 425°F (220°C). On a lightly floured surface, roll out one dough disk into a 12-inch circle. Carefully transfer the dough to a 9-inch pie plate. Trim the edges, leaving a 1-inch overhang.
- Fill the Pie: Pour the blueberry mixture into the bottom crust.
- Top the Pie: Roll out the second dough disk. You can place it over the filling as a solid top crust (cutting vents) or cut into strips for a lattice design. Crimp the edges of the top and bottom crusts together to seal.
- Bake: Brush the top crust with the beaten egg wash and sprinkle with coarse sugar. Place the pie on a baking sheet to catch drips. Bake for 15 minutes at 425°F (220°C). Reduce the oven temperature to 375°F (190°C) and continue baking for 40 to 50 minutes, or until the crust is golden brown and the filling is bubbling thickly. If the edges brown too quickly, cover them with foil strips.
- Cool: Cool the pie completely on a wire rack for at least 4 hours before slicing. This cooling time is necessary for the filling to set properly.
Notes
- For an extra flaky crust, keep all ingredients very cold, especially the butter and water.
- If using frozen blueberries, do not thaw them first; use them straight from the freezer, but you may need to add 5-10 minutes to the total baking time.
- To prevent a runny filling, ensure you use the full amount of cornstarch specified and allow the pie to cool completely before cutting.
Nutrition
- Serving Size: 1 slice
- Calories: 380
- Sugar: 28g
- Sodium: 210mg
- Fat: 21g
- Saturated Fat: 12g
- Unsaturated Fat: 9g
- Trans Fat: 0g
- Carbohydrates: 48g
- Fiber: 3g
- Protein: 5g
- Cholesterol: 55mg