

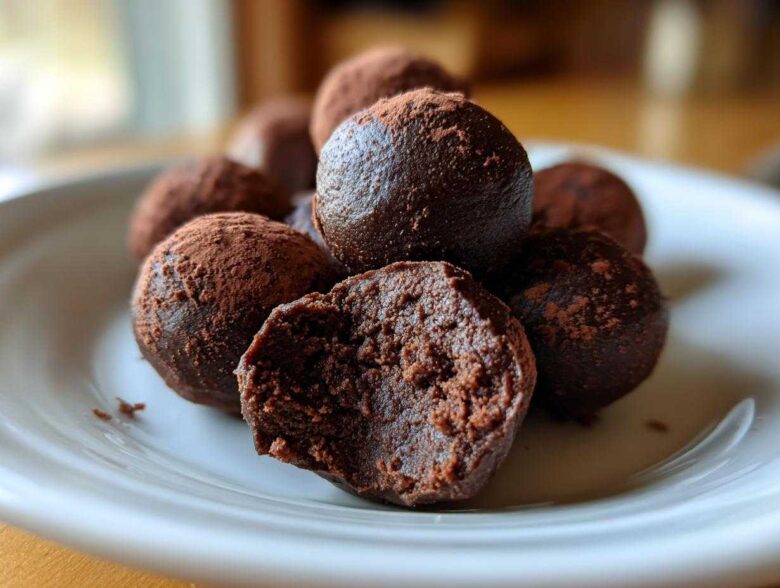
Honestly, if you need a showstopper dessert right now, like in the next hour, you need to meet your new best friend: these incredible, decadent oreo balls! I’m talking about the kind of treat that disappears first at every single holiday cookie exchange I attend. The secret sauce? It’s the simplest recipe you’ll ever find. We’re only using three ingredients—yes, three!—and absolutely zero oven time is required, which is why I call them my secret weapon when company shows up unexpectedly.
Forget fussy baking steps; this no bake oreo balls recipe is foolproof. You get that rich, fudgy texture that tastes like cheesecake had a party with a Chocolate Oreo, and everyone thinks you spent hours fussing over them. Trust me, once you try this method, you’ll have this recipe memorized. It’s just that good!
Why This Is the Best Oreo Balls Recipe (Easy & No Bake)
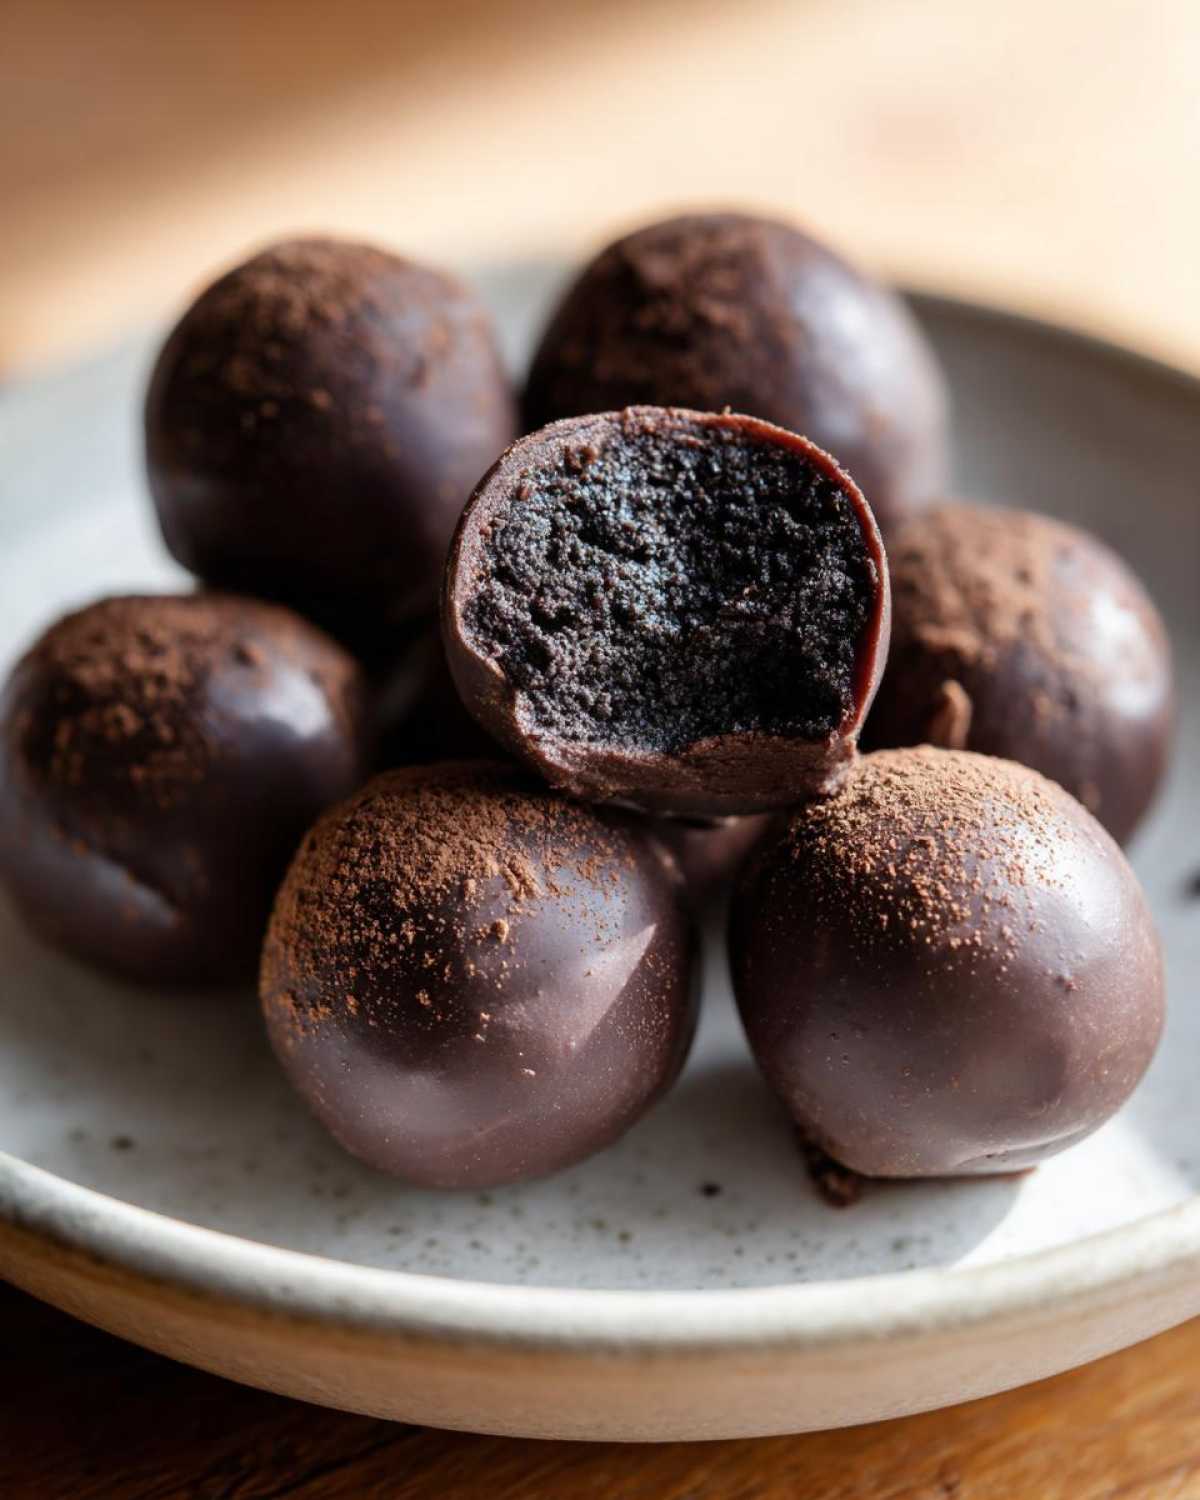
Why do I keep coming back to this recipe when I’m in a pinch? Simple: it’s unbelievably fast and delivers maximum decadence with minimal effort. Seriously, you mix it, chill it, dip it, and you’re done! That makes these easy oreo balls my go-to for any sudden gathering. They don’t rely on flour or eggs or any tricky baking science.
What you get is the most unbelievably creamy cookie balls you’ve ever tasted. The texture of the filling melts perfectly when you bite into that crisp chocolate shell. They look fancy, but they are so incredibly simple. It’s winning the dessert lottery!
- Pure speed: Ready to chill in under 20 minutes total.
- Minimalist magic: Only the absolute essentials are needed.
- Incredible results: Super fudgy interior every single time.
Quick Facts About These Oreo Balls
If you’re planning your timeline, here are the stats for this no bake superstar. It’s shockingly quick to pull together:
- Prep Time: About 20 minutes of actual work!
- Total Time: Less than 45 minutes, most of that is chilling.
- Yield: You get about 30 perfect little bites.
I always keep the ingredients stocked because you never know when the craving will hit! For full transparency on what goes into these amazing treats, you can always check out our standard recipe disclaimers, but I promise you won’t find any weird surprises lurking in this simple mix.
Gathering Ingredients for Your 3 Ingredient Oreo Balls
The best part about making oreo balls is how few things you actually have to buy. We are sticking to the absolute core trio here, which keeps the grocery run short and sweet! Forget complicated extracts or obscure flours. You just need the cookies, the cheese, and the coating.
Once you have your haul, a little advance prep makes the dough come together faster than you can imagine. The quality of these three things really matters since there’s nothing else to hide behind, so grab the good stuff!
Ingredient Preparation and Substitutions for Oreo Balls
First up, the cookies! You need the entire sandwich cookie—yes, filling and all! Don’t bother picking out the cream; that’s what helps these things bind so beautifully. If, for some reason, you hate the filling, you can use plain wafers, but you’ll need to sneak in just a tablespoon of softened butter to help the mixture hold together properly. That’s a swap my neighbor tried once!
Next is the cream cheese. It *must* be fully softened. Cold cream cheese will make lumpy filling, and nobody wants that situation on a holiday platter. If you forgot to take it out, cut those 8 ounces into small cubes, and microwave them for maybe 10-15 seconds until they squish easily. For the chocolate coating, use good quality melting wafers or chocolate bars. I usually stick to classic milk chocolate, but dark chocolate makes a wonderful, slightly more sophisticated truffle coating. Just melt it slowly, friends!
Step-by-Step Instructions for Perfect No Bake Oreo Balls
Alright, let’s get down to the fun part! Making these oreo balls is a total joy because it feels like you’re cheating since there’s no actual baking involved. The steps are super straightforward, but listen closely to the chilling times—that’s my biggest tip for avoiding a sticky mess later on. We want firm dough for rolling and firm balls for perfect dipping!
It all happens in just a few moves, but precision keeps things from getting messy. Keep your eye on the clock during the chilling phases, and you’ll have professional-looking chocolate covered Oreos in no time flat!
Mixing and Chilling the Creamy Cookie Balls
First, you gotta tackle those cookies. If you have a food processor, toss the whole package in there—lid on!—and pulse until they look like super fine, dark brown sand. If you’re working the old-fashioned way, pop them in a heavy-duty zip bag and just pound them with a rolling pin until every little piece is crumbly. Don’t leave big chunks floating around in there!
Next, dump those crumbs into a bowl and add the softened cream cheese. Mix it up! You can use your hands, but I prefer a hand mixer just to make absolutely sure everything is combined into a thick, uniform dough. Once it holds together when you squeeze a bit, roll them into inch-sized balls—about 30 of them should do it. Place them on parchment paper and stick that sheet right into the fridge for a solid 30 minutes. They need to firm up!
Achieving a Smooth Chocolate Coating on Your Oreo Balls
While those babies are chilling, melt your chocolate. If you’re microwaving, please remember the 30-second rule; stir it thoroughly between every little blast. Chocolate seizes up so easily if you rush it, and nobody wants hard, crumbly dip on their soft center. If you do it right, it should look shiny and smooth.
Once the centers are chilled and firm—this is key!—take them out. Grab a fork, spear one ball gently, and dip it right into that warm, luscious chocolate bath. Lift it up slowly, let that extra chocolate drip back into the bowl so you don’t waste any, and place it back on the parchment. Pop these finished treats back in the fridge for just 15 more minutes until that coating hardens up wonderfully. For a little extra confidence boost, check out some of our other helpful tips over on the About Us page!
Tips for Making the Best Oreo Balls Every Time
Making these best oreo ball recipe treats is simple, but there are always a few tricks I’ve learned over the years to take them from good to absolutely perfect. First, let’s talk about chocolate cracking. This usually happens if your chilled center is too cold when it hits the warm chocolate, causing a rapid temperature shock. Let those balls sit on the counter for about 5 minutes while the chocolate melts!
If you want that super professional look, ditch the fork sometimes! Grab a toothpick, stick it right into the center of the ball, dip it, and then let the excess drip off. When you pull the toothpick out after setting, use a tiny dab of extra melted chocolate—or even a small sprinkle—to smooth over that little hole you leave behind. That makes them look just like those fancy fudgy chocolate truffles you see in bakeries.
And here’s one last thing: don’t overmix after adding the cream cheese! Mix just until *barely* combined. Over-mixing whips too much air in, which can make the finished balls gritty or greasy rather than perfectly creamy.
Creative Variations for Your Oreo Balls
Now that you’ve mastered the classic dark chocolate shell on your amazing oreo balls, it’s time to have some fun! Since the base mixture is so simple, it begs for experimentation. These simple tweaks are perfect for making batches themed after different holidays or just matching your favorite flavor profile.
My rule is: keep it easy! You don’t need eight new ingredients, just one simple twist per batch. Try these crowd-pleasers next time you mix up a batch of cream cheese dessert balls.
- Minty Fresh: Add about half a teaspoon of pure peppermint extract right into the cookie and cream cheese dough when you’re mixing it up in Step 2. Then, melt white chocolate for dipping instead of dark! It looks gorgeous for Christmas.
- Golden Goodness: Swap out the regular Oreos for Golden Oreos. The filling is the same, but the resulting ball has a lighter color, and dipping it in that dark chocolate is just striking.
- Peanut Butter Dream: Stir in about a quarter-cup of creamy peanut butter along with the cream cheese. This makes them extra rich, and they are fantastic dipped in milk chocolate.
See? That’s super simple creativity right there! You can make three different kinds of treats without changing the basic process one bit.
Storage and Serving Suggestions for These Quick Party Dessert Bites
Since these amazing oreo balls are so simple to make ahead of time, they are truly the ultimate party helper. I usually try to make at least two batches before a big event because they disappear so fast! The key to keeping them perfect is how you store them, especially since they contain that luscious cream cheese center. You want them firm and cool when serving.
For serving, presentation is everything, even for a quick dessert! I always take time to grab those tiny, colorful cupcake or truffle liners. Placing each finished bite into its own little paper cup makes them look instantly finished and prevents anything sticky from getting all over your serving platter. They look so cheerful lined up like little soldiers, waiting to be devoured.
How Long Do Homemade Oreo Truffles Last?
Because we use real dairy in the center, these need to stay chilled—no leaving them out on the counter all day, even if the party is going strong! Store your finished truffles in a single layer, or maybe gently stacked with parchment paper between the layers, inside a completely airtight container. They stay perfectly fudgey and delicious in the refrigerator for about a week.
Now, if you made way too many (which, let’s be real, happens to me constantly), they freeze beautifully too! Pop those sealed containers right into the deep freeze. You can safely keep them frozen this way for up to two months. When you need them, just move the container to the fridge for a few hours to thaw slowly. They come out tasting as fresh as the day you made them. It’s honestly one of the best things about these no bake treats—the make-ahead power!
Frequently Asked Questions About Oreo Balls
I figured you might have some lingering questions since you’re about to dive into making these yourself! People always ask me about swapping ingredients or making them the day before a big event. Thankfully, these no oven desserts are super forgiving, but here are the answers to the most common things I hear.
Can I skip the cream cheese in these Oreo Balls?
Honestly? I really wouldn’t recommend it if you want the classic texture. That cream cheese is what brings the wonderful tang and holds the whole thing together to give you that moist, nearly cheesecake-like center. If you absolutely must skip it, you’ll need to replace that moisture. Try substituting it with an equal amount of softened butter plus two tablespoons of condensed milk, but know that the flavor profile will shift a bit away from that perfect oreo cheesecake balls vibe.
Can I make these ahead of time for a party?
Yes, please! That’s what makes them so amazing for busy home cooks. I always make mine two days ahead of time. Once the chocolate is fully set—and I mean solid!—store them in an airtight container in the fridge. They taste so good cold, and they are ready to go straight from the fridge to the serving platter when your guests arrive.
What’s the best way to melt the chocolate if I don’t have a double boiler?
The microwave is your absolute best friend here, but you have to be gentle! Use a glass or ceramic bowl—never plastic—and use short bursts. Heat for 25 seconds, stir well. Heat for another 20 seconds, stir well. Keep doing that until it’s almost totally smooth, then stop heating. The residual heat will melt the rest as you stir, and you avoid burning that delicate chocolate coating!
Can I use different cookies besides the standard Oreo?
You bet! My husband loves when I use Golden Oreos for a lighter look, but you can try vanilla wafers, ginger snaps for a spicy twist, or even chocolate wafers without the filling if you want a dryer, richer truffle flavor. Just remember what I said earlier: if you remove the filling entirely, sneak in just a touch of softened butter to keep that dough nice and pliable for rolling.
Estimated Nutritional Data for Oreo Balls
Okay, let’s talk about what’s fueling all that joy! Now, I always have to give you a little heads-up here: since we’re making these from scratch using different brands of Oreos and whatever chocolate melts I grab that week, these numbers are really just a good estimate. Think of them as a guideline rather than a strict legal document! You can find the full details on everything included in the recipe over in our terms section, but for our purposes, we should focus on the delicious reality.
What matters most is that these are incredibly concentrated bits of happy magic. Based on the standard recipe proportions, here is what one single, perfect bite looks like:
- Calories: Around 150
- Total Fat: Roughly 10 grams
- Carbohydrates: About 15 grams
- Protein: A nice little boost of 2 grams
Yes, they have some fat and sugar—hello, they’re cookies dipped in chocolate, of course they do! But because they are so rich, one or two is usually plenty to satisfy that intense craving. It’s easy to just grab one more though, isn’t it? That’s why they disappear so fast at gatherings!
Share Your Homemade Oreo Balls Creations
That’s it, friends! You’ve officially mastered the simplest, most decadent, no-bake dessert out there. I truly hope these oreo truffles bring as much joy to your kitchen as they do mine. Now that yours are chilling and setting up—or maybe you’ve already snuck the first one off the tray!
I always love hearing how you decorated yours! Did you stick to classic milk chocolate, or did you try that peppermint white chocolate combo I mentioned? Did you use sprinkles, crushed nuts, or maybe drizzle them with peanut butter?
Don’t be shy! I want to see your handiwork. Please take a second to rate this recipe below using the little star system—it helps me know if I’m keeping you happy with these quick fixes. And definitely drop a comment telling me what you thought of the texture and how fast they vanished from your counter. I read every single one!
If you have any last-minute questions about storage or substitutions, toss them down there, too! I try to pop into the comments section frequently to chat baking tips with you all. You can always reach out directly via the contact page if you have anything super urgent!
PrintThe Ultimate 3-Ingredient No-Bake Oreo Balls

Make simple, creamy Oreo Balls using only three ingredients. This no-bake recipe is fast, easy, and perfect for holiday parties or quick dessert fixes.
- Prep Time: 20 min
- Cook Time: 5 min
- Total Time: 25 min
- Yield: About 30 balls
- Category: Dessert
- Method: No Bake
- Cuisine: American
- Diet: Vegetarian
Ingredients
- 1 package (14.3 oz) Oreo cookies
- 8 oz cream cheese, softened
- 16 oz melting chocolate (milk, dark, or white)
Instructions
- Place the entire package of Oreo cookies, filling included, into a food processor. Pulse until you have fine crumbs.
- Transfer the crumbs to a medium bowl. Add the softened cream cheese. Mix with a hand mixer or by hand until the mixture is fully combined and forms a thick dough.
- Roll the dough into small balls, about 1 inch in diameter. Place the balls on a baking sheet lined with parchment paper.
- Chill the balls in the refrigerator for at least 30 minutes until firm.
- Melt the chocolate according to package directions. You can use a double boiler or microwave in 30-second intervals, stirring between each interval.
- Dip each chilled Oreo ball into the melted chocolate, ensuring it is fully coated. Use a fork to lift the ball out, allowing excess chocolate to drip off.
- Return the coated balls to the parchment-lined sheet.
- Refrigerate the finished Oreo Balls for about 15 minutes, or until the chocolate coating is set.
Notes
- For a different texture, you can use chocolate sandwich cookies without the cream filling. If you do this, add 1 tablespoon of softened butter to the mixture for binding.
- If you do not have a food processor, place cookies in a sturdy zip-top bag and crush them thoroughly with a rolling pin.
- For easy dipping, insert a toothpick into the ball before dipping, then remove the toothpick and smooth the hole with a small amount of melted chocolate.
Nutrition
- Serving Size: 1 ball
- Calories: 150
- Sugar: 15
- Sodium: 85
- Fat: 10
- Saturated Fat: 6
- Unsaturated Fat: 4
- Trans Fat: 0
- Carbohydrates: 15
- Fiber: 0
- Protein: 2
- Cholesterol: 15