

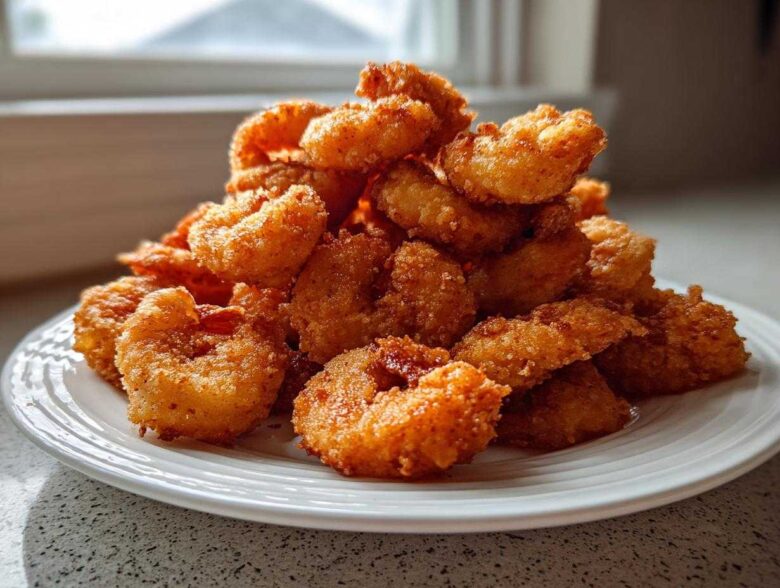
Listen, I know what you’re thinking. Fried shrimp sounds fancy, messy, and destined to come out greasy and floppy. But I promise you, that’s only when you get the technique wrong! Over the years, I’ve spent entirely too much time at my stovetop perfecting the absolute perfect way to make **fried shrimp** that shrieks with crispiness the minute it hits your plate. This isn’t just another recipe; this is the ultimate guide to getting that golden, crunchy shell every single time.
The secret, truly, lies in the little things—like making sure you pat those shrimp *bone dry* first! That simple step, followed by a proper buttermilk soak and a heavy, intentional dredge, is what separates glorious homemade seafood from a soggy dinner disaster. Trust me, once you nail this dredge, you’ll be throwing a seafood fry once a week. You can read a little more about my philosophy in the kitchen over at our story page, but for now, let’s get frying!
Why This Is the Best Fried Shrimp Recipe You Will Make
Forget complicated batters or double frying! If you are looking for the absolute best fried shrimp—one that tastes like you pulled it straight from a boardwalk stand—this is it. It’s surprisingly fast, making it perfect for a weeknight seafood fix when you need that great deep fried seafood flavor pronto. That coating stays adhered and shatteringly crisp, I guarantee it!
Key Benefits of This Fried Shrimp Recipe
- Superior, lingering crispiness thanks to the cornstarch addition.
- It’s genuinely an easy fried shrimp recipe—the soak does most of the work!
- Quick cooking time; you’ll have dinner on the table in under 45 minutes total.
- The buttermilk marinade tenderizes the shrimp beautifully.
Essential Ingredients for Perfect Fried Shrimp
Okay, when we talk about making stellar fried shrimp, you can’t skimp on the quality of your items—especially the shrimp itself! We are using large ones here; they hold up so much better to the frying process than tiny salad shrimp do. The list looks short, but trust me, every single item plays a huge role in that fantastic final crunch we’re after.
You’ll need about a pound of shrimp, already peeled and deveined. Remember, the goal is maximum surface area for that crispy coating to hug onto!
- 1 pound large shrimp, peeled and deveined
- 1 cup buttermilk
- 1 teaspoon salt
- 1/2 teaspoon black pepper
- 1 teaspoon paprika (use smoked paprika if you want an extra layer of flavor!)
- 1/2 teaspoon garlic powder
- 1 1/2 cups all-purpose flour
- 1/2 cup cornstarch (This is key for crispiness!)
- Vegetable oil, enough for 2 inches deep in your pot
Ingredient Preparation Notes and Substitutions
Make sure those shrimp are patted down before they hit the buttermilk. Like, really dry! Moisture is the enemy of adherence, and we need that coating to stick tight so it doesn’t slough off into the oil.
The buttermilk soak is non-negotiable; it’s not just for flavor, it slightly denatures the protein which helps the coating adhere and keeps the shrimp super tender. If you’re out of traditional vegetable oil, canola oil works nearly perfectly, but I’d steer clear of lighter oils like sunflower if you can, as they sometimes smoke too easily when trying to keep that 375°F temp.
How to Prepare Crispy Fried Shrimp: Step-by-Step Instructions
This is where the magic happens! Getting that perfect, shaggy coating on your **fried shrimp** is all about technique, not complicated ingredients. We’re moving straight from the wet bath into the dry dredge, and timing is everything here. If you mess up the coating sequence, you might end up with something soft, and we absolutely do not want that!
Achieving the Best Coating for Fried Shrimp
First things first: pat those shrimp dry! Seriously, use paper towels until they feel slightly rough. Then, toss them in that lovely seasoned buttermilk bath for at least 30 minutes. Once they’re done soaking, grab them one by one, let that excess buttermilk drip off—don’t wipe it! That little bit of moisture lets the flour stick.
Whisk your flour and your secret weapon, the cornstarch, together in a wide dish. Now, dredge the shrimp. You need to really press that flour mixture on; give it a little pat-pat-pat to make sure you’ve got a thick layer all around. If you want next-level crispiness, try my secret: dip them *back* into the buttermilk for just a second, and then coat them heavily in the flour again. That double layer is what makes the crust shatter!
Frying Technique for Golden Fried Shrimp
Now, the oil temperature is crucial. You need a deep pot with about two inches of oil heated exactly to 375 degrees Fahrenheit. Using a thermometer here isn’t optional; if it’s too cold, the shrimp get greasy. If it’s too hot, the coating burns before the shrimp cook.
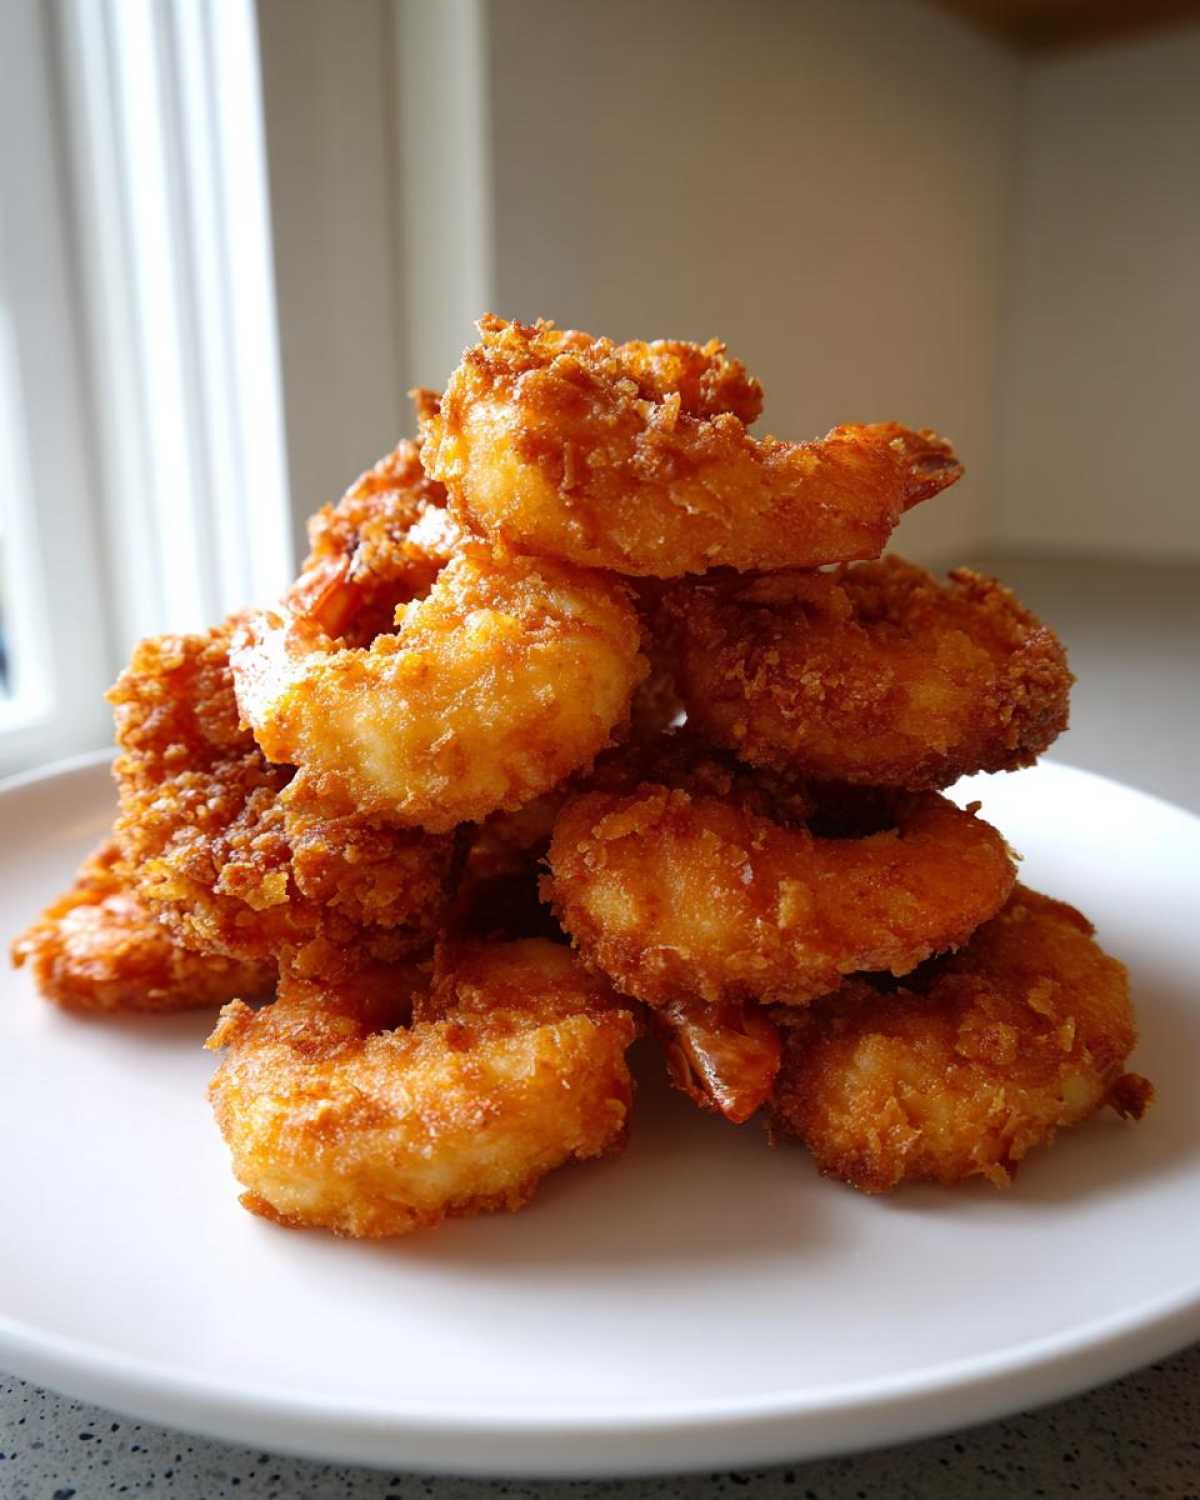
Carefully lower only four or five shrimp in at a time. Do NOT overcrowd that pot! Overcrowding drops the temperature instantly, which guarantees sogginess. Let them fry for about 2 to 3 minutes until they turn that beautiful golden color. Pull them out with a slotted spoon and put them right onto a wire rack so the air can circulate underneath them and keep them crisp while you fry the next batch. Serve these beauties hot!
Tips for Success with Homemade Fried Shrimp
Even with the perfect recipe, frying can still feel a little intimidating! But stick with me, and you’ll conquer deep frying for good. My biggest lesson learned when making fried shrimp relates back to what I mentioned earlier: temperature control is everything. If your oil is bouncing between 350°F and 380°F, you risk either a greasy texture or a burnt exterior. You really want to lock that temperature in that sweet spot, right around 375°F.
Another huge game-changer is how you drain them. Don’t just set the finished shrimp onto a stack of paper towels on a plate! The steam gets trapped underneath, and that’s another way to sabotage your crisp shell. You absolutely must use a wire rack set over a paper-towel-lined baking sheet. This allows the air to flow all around the shrimp as they cool down just a degree or two, keeping the crust rigid. It’s simple, but it works miracles for keeping that beautiful crunch intact. For more details on kitchen safety regarding oils, check out our disclaimer page.
Variations: Making Southern Fried Shrimp
If you’re like me, when you hear the word shrimp wrapped in a crispy coating, your mind immediately jumps to that incredible, slightly spicy, totally iconic Southern Fried Shrimp experience. That style is famous for a reason! While our core recipe gives you fantastic crispiness everywhere, we can tweak it slightly to give it that authentic, soulful Southern kick that makes it irresistible.
The great thing about this dredge method is how easily it accepts extra flavor without compromising the texture. We are keeping the buttermilk and cornstarch because they are the structural backbone of crispy perfection, but we can certainly adjust the seasoning blend.
Here are my favorite simple additions to turn this into incredible fried shrimp that tastes like it came from a roadside stand down South:
- Spice up the Buttermilk: Before you drop the shrimp in for their soak, stir in about a teaspoon of your favorite Louisiana-style hot sauce. It adds a wonderful background tang that just sings against the sweetness of the shrimp.
- Boost the Flour: For the dry dredge, I suggest adding an extra 1/2 teaspoon of cayenne pepper right into your flour/cornstarch mix. If you want that classic red hue, you can also add a touch more paprika, maybe even doubling the amount specified in the main recipe!
- The Final Touch: If you’re serving this as part of a big Seafood Fry Recipe spread, try adding a tiny pinch of dried thyme or crushed dried celery seed into the flour blend. It gives it an incredible, savory depth that screams ‘Southern cooking.’
Try these small adjustments! You’ll find they make a huge difference in rounding out the flavor profile without adding any extra mess or complicated steps to your fried shrimp process.
Serving Suggestions for Fried Shrimp
Now that you have produced the crunchiest, most perfect little bite of seafood possible, presentation matters! These are fantastic served simply piled high with a lemon wedge for squeezing over the top. If you’re setting these out as a shrimp appetizer at a party, keep the dipping sauces accessible so everyone can grab what they like.
For sauces, you can’t beat a classic tartar sauce, or even a spicy cocktail sauce. If you want something richer, a quick lemon aioli is marvelous against the salty breading. When serving this as a quick seafood dinner, pair these with crispy coleslaw and maybe some hushpuppies, and you’ve got yourself a true feast!
Storage and Reheating Instructions for Fried Shrimp
Alright, let’s talk leftovers! If you manage to have any delicious fried shrimp left over—which, good for you because my family certainly never does!—how you store them is critical for that next-day crunch.
First thing: never, ever store them in the refrigerator while they are piled up directly on a paper towel in a closed container. That steam gets trapped underneath, and you’ll find the bottom layer is instantly soggy by morning. Instead, you must let them cool completely, and then place them in a single layer on a tray lined with paper towels, cover that loosely with plastic wrap, and then seal them in an airtight container before refrigerating.
When it comes to reheating your fried shrimp, we are absolutely banning the microwave. Microwaves are flavor criminals that destroy crispness! The absolute best way to bring back that golden texture is to use a toaster oven or a conventional oven preheated to about 400 degrees Fahrenheit. Lay the shrimp out on a wire rack set over a baking sheet—just like when they first cooled—and reheat for about 5 to 8 minutes until they are piping hot all the way through. They’ll be nearly as good as fresh!
Frequently Asked Questions About Fried Shrimp
I get asked the same things over and over about this recipe, mostly because folks are so worried about messing up the precious oil bath! It’s okay to be nervous; frying can seem tricky at first glance. But once you understand the physics—it’s all about heat control—you’ll be making incredible results every single time. Let’s tackle those most common issues so you can move forward with confidence!
Why did my fried shrimp turn out soggy?
This is the #1 question I get, and nine times out of ten, it comes down to two things we stressed earlier: one, your oil temperature was probably too low when the shrimp went in, meaning the coating absorbed oil instead of frying instantly. Or two, you dropped too many shrimp in at once! That overheats the oil, causing the coating to soak up grease. Keep that oil steady at 375°F, and only fry a few at a time!
Can I make this Crispy Shrimp Recipe without deep frying?
You absolutely can try an air fryer for a lighter take! If you want a crispy shrimp recipe without submerging them, the air fryer is a good tool. Just be sure to spray those flour-coated shrimp generously with a little cooking oil spray—otherwise, they dry out instead of crisping. The texture won’t be quite as shaggy and intensely crunchy as the deep-fried version, but it is a fantastic, lower-fat alternative for a quick seafood dinner.
What is the secret to getting that perfect coating to stick?
It’s the buttermilk soak followed by patting the flour on tight! The buttermilk acts like glue. Make sure you let the shrimp drip off just enough buttermilk so it’s not dripping, but don’t blot it dry. Then, when you dredge it in that flour/cornstarch mix, really press it in there. If you want that extra thick, craggy crust, try the double-dip trick I mentioned—it’s phenomenal for texture!
What kind of oil is best for this Seafood Fry Recipe?
For high-heat cooking like this, you need an oil with a higher smoke point. Standard vegetable oil works just fine, as does canola. Peanut oil is amazing and adds a lovely, subtle nutty flavor that complements seafood really well. Just avoid olive oil or extra-light oils, as they break down too quickly when you need to keep that heat high and steady!
If you have any other burning questions while you’re planning your next fry night, feel free to send a message through our contact page!
Nutritional Estimates for This Fried Shrimp Recipe
I always include rough nutritional guides, even if they’re just estimates, because it helps when planning! For a serving size of about 4 ounces of this homemade fried shrimp, based on the ingredients listed, you’re looking at approximately 350 calories. It’s got about 22 grams of protein, which is fantastic, with 18 grams of fat. Remember, these numbers change based on your exact oil absorption and the size of the shrimp you choose!
You can find more details on our site policies regarding these estimates by checking out our privacy policy. Happy cooking!
Nutritional Estimates for This Fried Shrimp Recipe
I always include rough nutritional guides, even if they’re just estimates, because it helps when planning! For a serving size of about 4 ounces of this homemade fried shrimp, based on the ingredients listed, you’re looking at approximately 350 calories. It’s got about 22 grams of protein, which is fantastic, with 18 grams of fat. Remember, these numbers change based on your exact oil absorption and the size of the shrimp you choose!
You can find more details on our site policies regarding these estimates by checking out our privacy policy. Happy cooking!
PrintUltimate Crispy Fried Shrimp
Make perfectly crispy fried shrimp using a simple buttermilk soak and seasoned flour dredge. This recipe yields golden, non-soggy shrimp ideal for appetizers or dinner.
- Prep Time: 30 min
- Cook Time: 10 min
- Total Time: 40 min
- Yield: 4 servings
- Category: Seafood
- Method: Deep Frying
- Cuisine: American
- Diet: Low Fat
Ingredients
- 1 pound large shrimp, peeled and deveined
- 1 cup buttermilk
- 1 teaspoon salt
- 1/2 teaspoon black pepper
- 1 teaspoon paprika
- 1/2 teaspoon garlic powder
- 1 1/2 cups all-purpose flour
- 1/2 cup cornstarch
- Vegetable oil, for frying
Instructions
- Pat the peeled and deveined shrimp very dry with paper towels. This step helps the coating stick.
- In a medium bowl, combine the buttermilk, salt, pepper, paprika, and garlic powder. Add the shrimp and toss to coat. Let the shrimp soak for at least 30 minutes in the refrigerator.
- In a shallow dish, whisk together the flour and cornstarch.
- Remove the shrimp from the buttermilk mixture, letting excess drip off, but do not wipe it dry.
- Dredge each shrimp thoroughly in the flour mixture, pressing the flour onto the shrimp to create a thick coating. Place coated shrimp on a wire rack set over a baking sheet.
- Pour about 2 inches of vegetable oil into a deep, heavy-bottomed pot or Dutch oven. Heat the oil to 375 degrees Fahrenheit (190 degrees Celsius). Use a thermometer to monitor the temperature.
- Carefully place 4 to 6 shrimp into the hot oil, ensuring you do not overcrowd the pot. Overcrowding lowers the oil temperature and results in soggy shrimp.
- Fry for 2 to 3 minutes, turning once, until the coating is golden brown and crisp.
- Remove the fried shrimp with a slotted spoon and place them immediately onto a clean wire rack set over paper towels to drain excess oil.
- Repeat with the remaining shrimp, allowing the oil temperature to return to 375 degrees Fahrenheit between batches. Serve hot with your preferred dipping sauce.
Notes
- For extra crispiness, you can double-dredge: after the first flour coating, dip the shrimp back into the buttermilk briefly, then coat again in the flour mixture.
- Maintain the oil temperature strictly between 365°F and 375°F for the best texture.
- Serve immediately with cocktail sauce or a simple lemon aioli.
Nutrition
- Serving Size: 4 oz
- Calories: 350
- Sugar: 2
- Sodium: 650
- Fat: 18
- Saturated Fat: 3
- Unsaturated Fat: 15
- Trans Fat: 0
- Carbohydrates: 25
- Fiber: 1
- Protein: 22
- Cholesterol: 180