

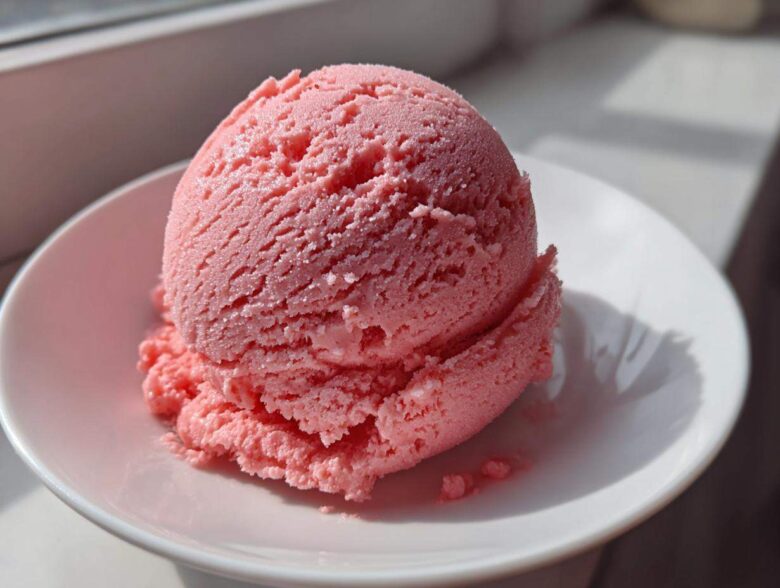
I swear, the difference between good homemade strawberry ice cream and *mind-blowing* strawberry ice cream is all about texture. We’re not messing around with icy freezer-burnt scoops here! My goal for you today is to unlock that unbelievably smooth, ridiculously creamy result you usually only find at those fancy artisanal shops. This recipe uses real, fresh berries, not just flavorings, and trust me, mastering the ratio between the cream base and that perfectly cooked fruit puree is how we get that luxurious mouthfeel every single time. It’s easier than you think!
Why This Homemade Strawberry Ice Cream Recipe Delivers Creaminess
Okay, let’s talk structural integrity, which is just a fancy way of saying, “Why isn’t this chunky ice?” The secret to genuinely creamy strawberry ice cream lies in controlling the water content and fiddling with the sugar. We want tiny, tiny ice crystals, not big chunky ones, and that’s where we get serious about the dairy.
- We use a higher ratio of heavy cream to whole milk to maximize the fat content, which physically prevents large ice crystals from forming.
- The sugar we cook into the strawberries isn’t just for sweetness—it actually depresses the freezing point, keeping the final batch soft enough to scoop straight from the freezer.
- Proper chilling of everything before it hits the machine is crucial. Warm base equals a sad, slow churn!
Key Factors for Creamy Strawberry Ice Cream
Think of your dairy components as a team. If you use too much milk, you’ve introduced too much water, and bam—icy disaster. We aim for that perfect, rich balance of fat that coats the tongue. And here’s my number one expert tip for avoiding iciness: make sure that cooked fruit puree is *completely* cold, almost fridge-cold, before you pour it into your ice cream maker recipes base. If it’s even slightly warm, it throws off the whole game.
Gathering Ingredients for Fresh Strawberry Ice Cream
Okay, don’t panic about ingredient lists! For this absolutely perfect batch of creamy strawberry ice cream, we need straightforward things. I listed everything you need in the recipe card, but really pay attention to the prep work. We need two cups of berries that are hulled *and* sliced before they even think about hitting the pot! And notice we use sugar in two separate batches—that’s important for how the fruit and the cream base get treated. Don’t try to eyeball this part; precision guarantees we hit that perfect flavor profile.
Ingredient Notes and Substitutions for Strawberry Ice Cream
When choosing your strawberries, aim for the deepest red ones you can find, the ones that smell super sweet even before you slice them. Overripe is actually perfect here because they have the most intense flavor to carry through the coldness of the final dessert. If you absolutely *must* swap the sugar, be warned: it will change the texture dramatically unless you use a high-quality substitute known for humectant properties. For this specific recipe, though, stick to the granulated sugar, especially in the cream mix, because it helps stabilize us against forming ice crystals. Really, the quality of the strawberries is your secret weapon here!
How to Prepare Perfect Strawberry Ice Cream Base
Now we move into the fun part—turning those beautiful fresh berries into an amazing, deep-flavored puree for our strawberry ice cream! This isn’t just mashing fruit; we’re gently cooking it down, which concentrates that sunshine flavor and helps the sugar fully integrate. You’ll want to get the sliced strawberries, the first cup of sugar, and the tiny bit of water into a saucepan. Cook this over medium heat for about 8 to 10 minutes. You want them soft, happy, and the sugar nicely dissolved. Give them a little mash with a fork while they cook so you get that lovely chunky-yet-smooth texture we love, not just whole slices floating around.
Once they are cooked and smelling incredible, pull that pot right off the heat. This next step demands patience! You absolutely must let this strawberry mixture cool completely. I usually pop it into a small bowl and stick it in the fridge for at least an hour. If you rush this, you ruin the temperate for the cream mixture later, and we don’t want that!
Achieving the Best Strawberry Flavor
The cooking process is vital because it releases the flavor locked inside the fruit. If you skip cooking, the ice crystals form too quickly around the raw fruit, making it taste icy instead of true berry heaven. Now, if you are someone who just *hates* seeds, here’s my little trick: once your puree is cooled, pour it through a fine-mesh sieve right over your mixing bowl. Use the back of a spoon to push out all that liquid gold, leaving only the tiny seeds behind. This step is purely optional, of course, but it gives you the silkiest texture imaginable!
Mixing the Sweet Cream Base
While we wait for those strawberries to chill out, let’s get the dairy ready. Grab your biggest bowl—you need room to whisk! Combine the heavy cream, the milk, the remaining half-cup of sugar, that splash of vanilla, and just a tiny pinch of salt. Whisk this until you can barely feel any sugar grit between your fingers when you rub the mixture. If the sugar isn’t dissolved, it won’t mix into the base evenly later. Once the cream mixture is smooth and the berry puree is cold, gently stir the two together. That’s your final base, ready for churning or freezing!
Churning Instructions for Ice Cream Maker Recipes
If you have an ice cream maker, you’ve chosen the path to superior smoothness, in my opinion! This is where the magic really happens for that luxurious strawberry ice cream. But you absolutely *must* follow my pre-churn rule: your whole mixed base needs to be thoroughly chilled.
I mean it needs to be refrigerator-cold—ideally sitting in the fridge for at least four hours, or even better overnight. Cold base means the machine works efficiently, and efficient churning means smaller ice crystals. Anything else just leads to slow churning and a less fluffy result.
Once your machine is ready, pour the lovely pink mixture in and let it run according to the manufacturer’s specific instructions. Usually, for a base this rich, it takes about 20 to 30 minutes, but you’re watching for texture, not the timer. You’re done when it looks like thick, luxurious soft-serve—it should cling nicely to the dasher paddle.
Remember, even a machine-churned product isn’t ready for the deep freeze yet. You have to transfer that soft-serve consistency into an airtight freezer container. It needs another good four hours in the deep bottom of your freezer to truly set up before you can scoop those beautiful, creamy mounds!
Easy Ice Cream Recipe: No Churn Strawberry Ice Cream Method
Okay, maybe you don’t have a fancy machine, or maybe you just need an easy ice cream recipe *right now*. No worries at all! You can absolutely achieve wonderful results with this no-churn method, although it requires a little bit of elbow grease and timing. This technique is all about manually breaking up those ice crystals that want to form when dairy freezes solid.
First things first: pour your beautifully mixed strawberry base (cream, milk, and puree all combined!) into a wide, shallow freezer-safe pan. The wider the pan, the faster and more evenly it freezes, which helps us immensely. Seriously, don’t use a deep container for this method!
Then, the repetitive part begins. Pop it in the deep freeze for exactly one hour. When that hour is up, you pull it out, and I mean *immediately* attack it with a sturdy fork or a whisk. Scrape those frozen edges into the softer center! Put it back in for another 30 minutes, and repeat that scraping process. You have to do this every 30 minutes for about three to four hours total. It feels tedious, I know, but that constant agitation is what mimics the churning action and keeps your dessert from turning into a solid block of strawberry-flavored ice. Keep going until it’s firm but still scoopable—that’s your success sign!
Tips for Success with Your Homemade Strawberry Ice Cream
Since you put in all this effort making the perfect base for your strawberry ice cream, you want to make sure that gorgeous texture lasts! The final stage—freezing and storing—is just as important as perfectly cooking your berries down. Don’t just throw the container into the freezer and forget about it; a little forethought goes a long way in keeping that creamy dream alive for weeks.
My biggest non-negotiable rule for storage is using an airtight container. I love using a shallow, rectangular loaf pan wrapped tightly in plastic wrap *before* putting the lid on. That plastic wrap pressed right against the surface of the ice cream is your best defense against freezer burn and those nasty little ice patches that form when air gets trapped. Seriously, don’t skip the plastic wrap barrier!
If you churned it or scraped it manually, remember that final hardening step takes time. Give your finished product at least four hours in the coldest part of your freezer before you even think about scooping. It might seem like forever when you’re smelling fresh berries, but that settling time solidifies everything just right.
Storage and Serving Suggestions
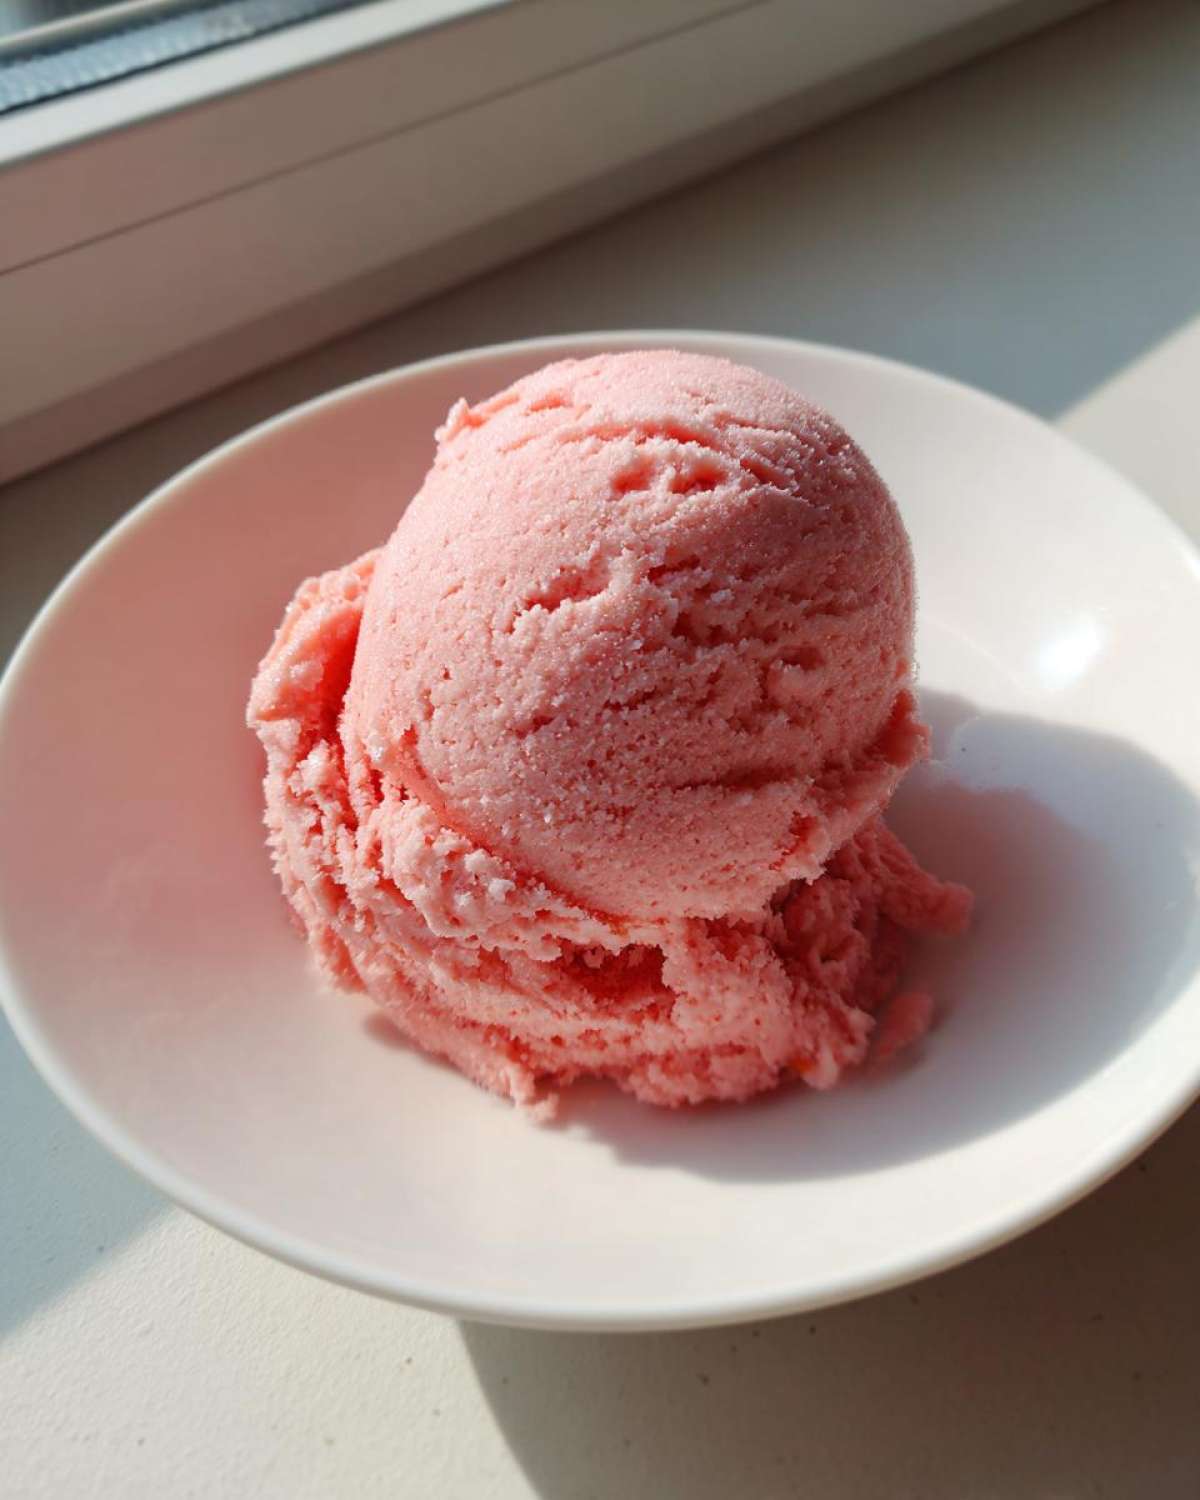
When it’s time to serve this glorious strawberry ice cream, don’t try to scoop it straight out of a super-deep freeze! That’s when you risk tearing the surface and ruining our careful work. Take the container out onto the counter and let it sit there for about 5 to 10 minutes. That little bit of tempering time softens the edges just enough so your scoop glides right through. If you’re only serving one scoop, put the container right back in the freezer immediately afterward; that on-again, off-again softening is what destroys texture over time. Keep it cold, keep it sealed, and you’ll have perfect summer dessert for days!
Frequently Asked Questions About Strawberry Ice Cream
When you’re making something this delicious, I totally get that you’re going to have a couple of hanging questions. It’s smart to check things beforehand! We want this to be the absolute best summer frozen dessert you’ve ever made, so let’s tackle the common queries I always get about this recipe.
Can I use frozen strawberries instead of fresh for this strawberry ice cream recipe?
Oh, absolutely you can! Sometimes the fresh ones just aren’t up to par, and using frozen ones is a total lifesaver. The key here is that you still need to cook them down with the sugar and water exactly like the recipe says. When you thaw them, they release a lot of liquid, so you might need to cook that mixture a little longer to reduce the excess water. If you don’t cook it down enough, you end up with too much water content, which brings back those pesky ice crystals! So yes, use frozen, but just be ready to simmer that compote a bit longer!
What makes this the best homemade ice cream?
For me, what elevates this recipe from good to the *best homemade ice cream* is the process we went through to concentrate the fruit flavor. So many recipes just stir in raw, macerated fruit, and it gets diluted by the cream. We take the time to cook the fruit down into a thick, intense puree first. Couple that intense berry flavor with our rich, sweet cream base—which has that perfect fat-to-sugar ratio—and you get that unbelievable, scoopable texture you just can’t beat. It tastes exactly like real strawberries, only colder and sweeter!
Estimated Nutritional Data for This Strawberry Ice Cream
Listen, when you’re making rich, beautiful dairy desserts like this, you know you can’t expect it to be kale salad nutrition, right? Just being upfront! The numbers below are my best estimate based on running the ingredients through the standard calculations for a half-cup serving. As we discussed, this relies on using full-fat heavy cream and whole milk. If you choose to adjust the sugar or fat content, these numbers will definitely shift!
- Serving Size: 1/2 cup
- Calories: approximately 320
- Total Fat: about 20g
- Carbohydrates: around 33g
- Protein: low, about 3g
- Sugar: roughly 30g
Keep in mind that this is just a guideline, especially if you’re using different brands or adding mix-ins. For the most accurate count, you’d need to plug *your* exact ingredients into a reliable tracker, but this gives you a good ballpark! Speaking of accuracy, this data is provided just for your information, as laid out in our cookie policy details.
Share Your Creamy Strawberry Ice Cream Creations
I hope you are sitting down right now with a gigantic bowl of your freshly made creamy strawberry ice cream! Seriously, I want to hear all about it. Rate this recipe down below and tell me: Did you strain out the seeds? Did you use a machine or try the scraping method? Knowing how you put your own spin on this classic recipe helps everyone else who wants to make the best homemade ice cream. Don’t be shy—drop your thoughts in the comments!
PrintCreamy Homemade Strawberry Ice Cream

Make rich, creamy strawberry ice cream at home using fresh strawberries. This recipe focuses on deep flavor and smooth texture.
- Prep Time: 20 min
- Cook Time: 10 min
- Total Time: 4 hours 30 min
- Yield: About 1 quart
- Category: Dessert
- Method: Churning or Freezing
- Cuisine: American
- Diet: Vegetarian
Ingredients
- 2 cups fresh strawberries, hulled and sliced
- 1 cup granulated sugar, divided
- 1/4 cup water
- 2 cups heavy cream
- 1 cup whole milk
- 1/2 cup granulated sugar
- 1 tablespoon vanilla extract
- Pinch of salt
Instructions
- Combine the sliced strawberries, 1 cup of sugar, and water in a saucepan. Cook over medium heat, stirring occasionally, until the strawberries soften and the sugar dissolves, about 8 to 10 minutes. Mash the berries slightly with a fork.
- Remove the strawberry mixture from the heat and let it cool completely. You can chill it in the refrigerator for at least 1 hour.
- In a separate large bowl, whisk together the heavy cream, whole milk, 1/2 cup of sugar, vanilla extract, and salt until the sugar is dissolved.
- Stir the cooled strawberry mixture into the cream base.
- If using an ice cream maker, churn the mixture according to the manufacturer’s directions until it reaches a soft-serve consistency.
- Transfer the churned ice cream to an airtight container and freeze for at least 4 hours to firm up before serving.
- If you do not have an ice cream maker, pour the mixture into a shallow freezer-safe dish. Freeze for 1 hour, then scrape the mixture with a fork. Repeat this scraping process every 30 minutes for 3 to 4 hours until firm.
Notes
- For a richer flavor, use very ripe strawberries.
- If you prefer a smoother texture without seeds, press the cooled strawberry puree through a fine-mesh sieve before mixing it with the cream base.
- This recipe yields a classic, rich ice cream. For a no-churn version, skip the churning step and follow the freezing/scraping method described in step 6.
Nutrition
- Serving Size: 1/2 cup
- Calories: 320
- Sugar: 30
- Sodium: 35
- Fat: 20
- Saturated Fat: 12
- Unsaturated Fat: 8
- Trans Fat: 0.5
- Carbohydrates: 33
- Fiber: 1
- Protein: 3
- Cholesterol: 75