

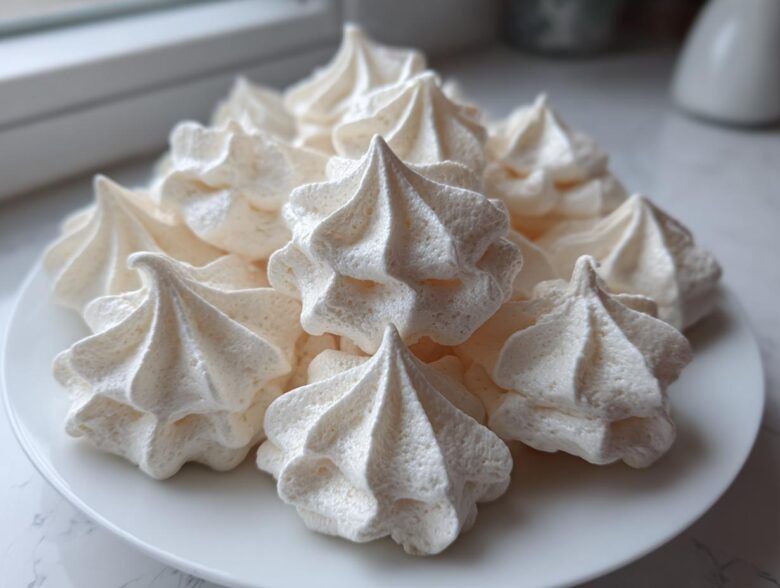
Oh, meringue cookies! We all dream of those tiny, cloud-like puffs—the ones that shatter into a thousand sweet crumbles the second they hit your tongue. But let’s be real, getting that perfect, shatteringly crisp texture without them turning sticky or weeping on the counter feels like magic, right? I used to think so too! For years, I wrestled with egg whites that refused to cooperate. Then I found this incredibly straightforward French meringue technique. Trust me, once you see how easily these meringue cookies become light, crisp, and perfectly airy using just a few simple ingredients, you’ll never look back. This recipe is truly the easiest way to master this delicate baked good. Head over to our main baking philosophy to see why we focus on fundamental techniques.
Why This Is the Best Easy Meringue Cookie Recipe
Listen, if you want the best easy meringue cookie recipe, you need one that skips the complicated Swiss or Italian methods. We’re sticking to the foundation here! This recipe sets you up for success, guaranteeing those wonderfully light and airy cookies that just melt in your mouth. It’s the gold standard for a reliably crisp meringue dessert without any drama.
Achieving That Crisp Meringue Dessert Texture
The entire secret to that magic is temperature control, not complicated steps. We bake these low and slow—that 225°F oven is only *mostly* for baking; it’s really for drying! We need to evaporate every speck of moisture without letting them brown on you. And don’t you dare take them out right away! Letting them cool down slowly inside the turned-off oven is non-negotiable for a truly solid, crisp meringue dessert.
Ingredients for Perfect Meringue Cookies
Okay, for this recipe, precision really does matter since we aren’t using flour or fat to stabilize things the way you would in a regular cookie. We need purity! Don’t try to guess on the measurements here—it throws the whole chemical reaction off. Stick exactly to what’s written for the best meringue cookie recipe, especially regarding the sugar!
- 4 large egg whites, room temperature
- 1 cup superfine granulated sugar (caster sugar)
- 1 teaspoon vanilla extract
- 1/4 teaspoon cream of tartar
- Pinch of salt
Ingredient Notes and Substitutions for Meringue Cookies
First off, those egg whites absolutely must be at room temperature; cold whites won’t whip to their full, glorious volume. Second, please use **superfine sugar** if you can manage it. It dissolves so much faster, giving you that wonderfully smooth, never-gritty texture that defines these melt in your mouth cookies. If you want color for your holiday treats, use gel food coloring, not the watery liquid stuff, which can affect the structure. A little bit goes a long way!
Mastering the Basic Meringue Technique: How to Make Meringue Cookies
This is where the magic happens! Making these meringue cookies is mostly technique, not complicated ingredients. We are leaning into the classic simplicity of the French meringue method, which is totally beginner-friendly. First things first: your tools must be spotless. Seriously, wipe down that mixing bowl with a little white vinegar or lemon juice before you even crack an egg. Any hint of grease or fat is the enemy of fluffy peaks.
Whipping Egg Whites: The Foundation of Great Meringue Cookies
Get those room temperature egg whites into your impeccably clean bowl along with the salt and the cream of tartar—that actually helps stabilize everything! Start beating them on medium speed. You are aiming for soft, pillowy clouds. You know they are ready when you lift the whisk and the peaks curl over gently, like sleepy flags. This initial step is key to building the structure for our perfect, delicate treats.
Adding Sugar Slowly for Stiff, Glossy Meringue Cookies
Now, the crucial part: the sugar! You absolutely cannot just dump it all in. Reduce your speed slightly and begin adding that superfine sugar one tablespoon at a time. Give it about 30 seconds between each addition to fully dissolve. Once it’s all incorporated, crank that mixer up to high speed! Beat it until it shines—I mean really glossy! You’re looking for stiff peaks that stand straight up when you lift the whisk. Touch a little bit of the mixture between your thumb and forefinger; if you feel even a speck of grit, keep whipping! Once it’s smooth as silk, stir in your vanilla and check out the stunning results of your hard work.
Piping and Shaping Your Meringue Cookies
Now that you have that gorgeous, stiff meringue, it’s showtime! This is the fun part where you turn that fluffy cloud into lovely little treats. I always reach for my star tip—a Wilton 1M works magic—because those ridges bake up beautifully and look so professional. If you aren’t feeling the piping bag stress, don’t worry one bit! You can absolutely just use two spoons to dollop the meringue onto the sheets, creating those rustic, beautiful homemade meringue swirls. Either way, keep your shapes small, about one inch across, because they don’t spread at all while baking.
Tips for How to Pipe Meringue Cookies Neatly
When piping, hold the bag straight up and down, with the tip just barely touching the parchment paper to start a base. Apply steady pressure while you move your hand in a circular motion to create a little kiss shape. When you reach your desired size, stop squeezing before you lift the tip away. This prevents a little meringue tail from sticking up awkwardly. Make sure they are all roughly the same size so they all bake at the same speed. Consistency is key for even results!
Baking and Drying Meringue Cookies for Perfection
This next part is where most people panic, but please trust the process! We are not really baking these; we are drying them out. Preheat your oven super low, like 225°F. Line those sheets with parchment—don’t skip that! Pipe or spoon your little kisses onto the paper, leave space between them because they are drying in place, and then slide them in. They’ll bake, essentially, for about an hour up to 75 minutes. You’ll know they are done when they feel dry to the touch and lift off the paper like they weigh nothing at all.
But here is the absolute, must-follow rule if you want those perfect melt in your mouth cookies: once the time is up, turn the oven completely off. Do not open the door yet! Prop it open just a tiny crack using a wooden spoon handle. That slow, gentle cooling period inside the turned-off oven is what sets the internal structure, pulling out any last bit of moisture. I usually leave mine in there overnight. Seriously, don’t peek! When you finally open the door in the morning, your perfect, crisp meringue cookies will be waiting for you.
Meringue Cookie Variations for Holidays and Special Occasions
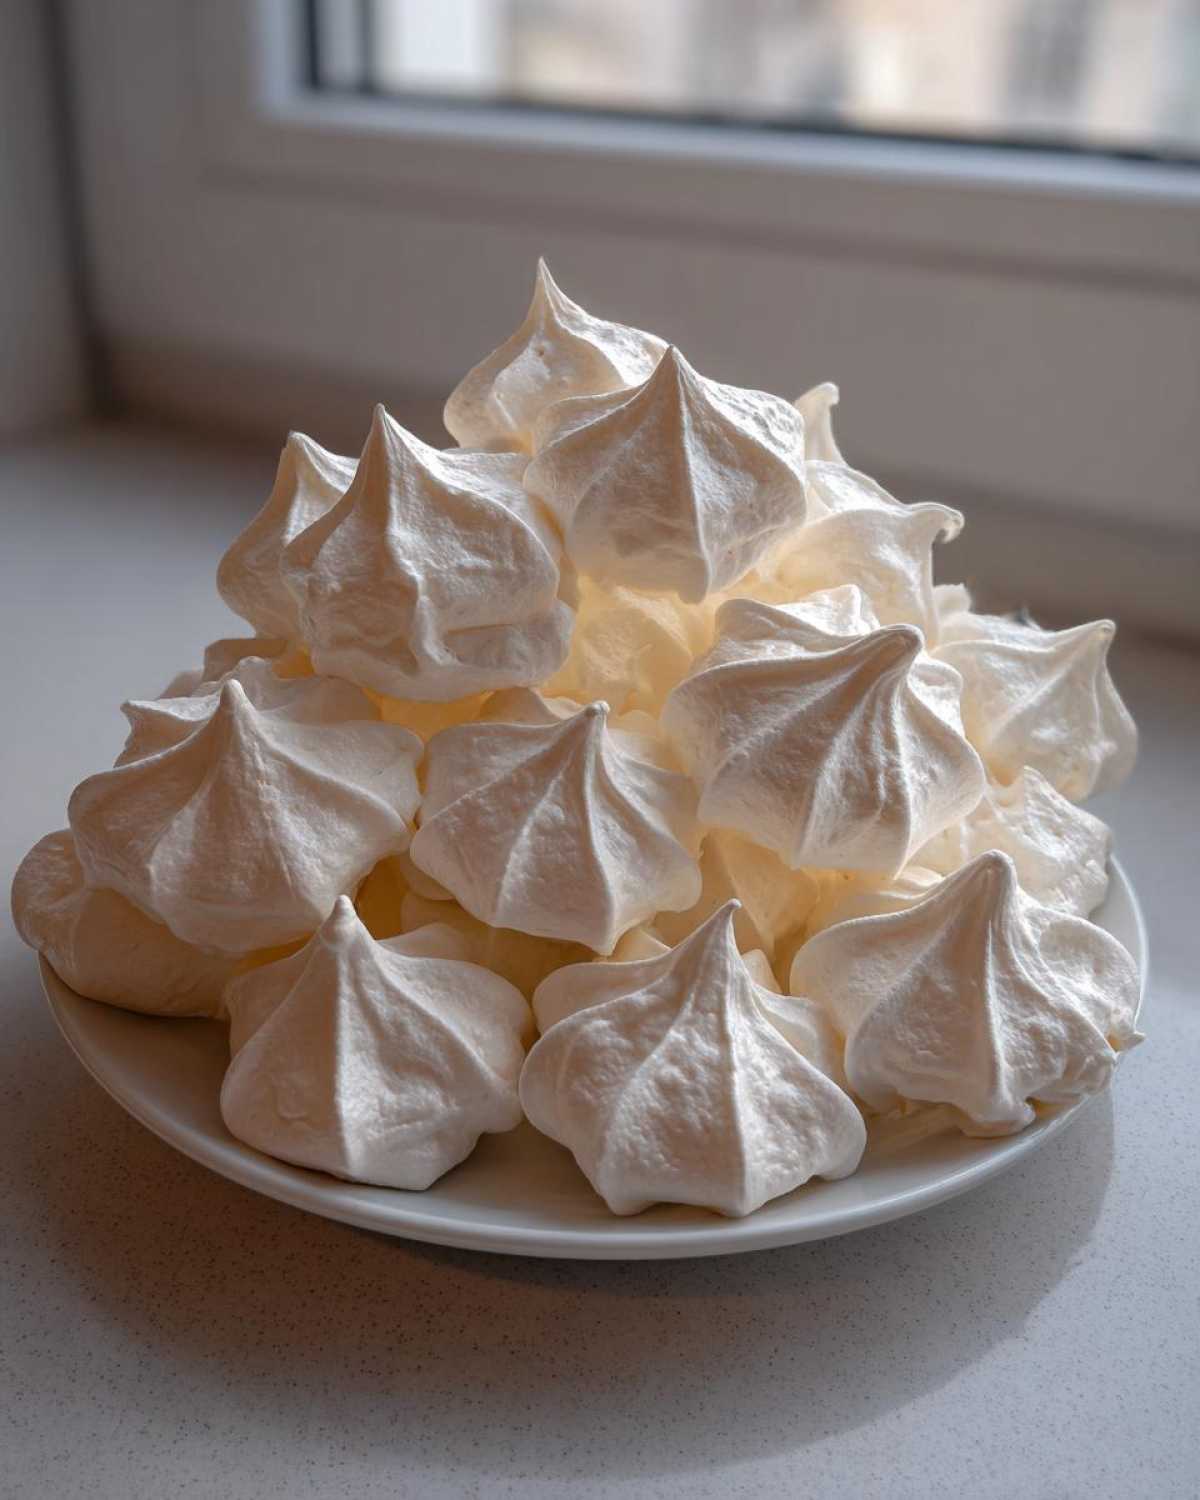
Once you nail the basic white meringue, the world of decorating opens up! These cookies are practically begging for some festive flair, making them perfect holiday meringue cookies. You can add flavorings like almond extract instead of vanilla, or even a dash of peppermint if you’re feeling minty—my absolute favorite combination is folding in just a tiny bit of freeze-dried raspberry powder right near the end; it gives a beautiful pale pink color and a lovely tartness.
For truly elegant meringue desserts, color is your best friend. If you’re aiming for soft pastels for Easter or bright reds and greens for Christmas, use gel coloring right after you start whipping the sugar in. It keeps the structure tight! These look utterly charming piled high on a cookie tray.
Making Meringues for Cookie Trays and Holiday Meringue Cookies
After they are fully dried and cooled, that’s when we get really fancy. If you’re assembling meringues for cookie trays, try dipping the pointed tips of your cooled meringues into melted dark chocolate. Let that set completely on parchment paper before storing them. You can also dust them lightly with cocoa powder or powdered sugar for a snowy effect on your Christmas treats. They look so pretty and feel extra special!
Storage and Troubleshooting for Your Meringue Cookies
Phew, you made them! Now, how do we keep these delicate beauties perfect? Storage is everything. Meringues hate humidity more than anything, so you MUST keep your finished, cooled meringue cookies in a truly airtight container at cool room temperature—no fridge, ever! If you notice your cookies getting a little sticky or soft the next day, that usually means two things: either your house is just too humid, or, more likely, you didn’t bake them long enough for them to dry completely.
If you see little beads of moisture forming on the cookies—that’s called weeping, and it’s annoying! It almost always means the sugar didn’t dissolve properly or the oven temp was too high. If you ever need to talk about baking disasters or want to share your successes, please don’t hesitate to reach out through our contact page. We’ve all been there!
Frequently Asked Questions About Crisp Meringue Dessert
I get so many questions about these little guys! It’s funny how something made of just egg whites and sugar can cause so much confusion. I tried to make this recipe foolproof, but if you still have a few lingering doubts, chances are someone else does too. Before you sign off, I want to make sure you leave feeling totally confident about achieving that perfect crisp meringue dessert. Check out these quick answers!
Are Meringue Cookies Naturally Gluten Free?
Yes, they absolutely are! Since this easy meringue cookie recipe uses only egg whites, sugar, and vanilla—no flour whatsoever—these are wonderfully gluten free meringue cookies. See? It’s one of the easiest naturally gluten-free sweet dessert ideas out there. Feel free to check our privacy policy for more details on our ingredient standards.
Can I Make These Meringue Cookies Without a Stand Mixer?
You sure can! I often use my hand mixer when I’m feeling too lazy to drag out the big one. However, be warned: you need patience! Getting those stiff, glossy peaks with a hand mixer is going to take you at least double the time, maybe more. Keep beating until your arm gets tired AND you’ve confirmed there’s no sugar grittiness left!
Estimated Nutritional Data for Meringue Cookies
Now, I’m certainly no nutritionist, and I always say that baking is about love more than macros, but I know some of you like to keep track! Since these are basically just sweetened egg whites, they are wonderfully light. Keep in mind these numbers are rough estimates based on the standard ratios we used in this recipe. You can find more about our data estimates over on our terms of use page.
- Serving Size: 1 cookie
- Calories: About 35 (Wow, right?)
- Sugar: 8g
- Fat: 0g
- Carbohydrates: 8g
Classic Easy Meringue Cookies

Follow these steps to make light, crisp, and airy French meringue cookies that melt in your mouth.
- Prep Time: 15 min
- Cook Time: 75 min
- Total Time: 90 min
- Yield: About 3 dozen
- Category: Dessert
- Method: Baking
- Cuisine: General
- Diet: Gluten Free
Ingredients
- 4 large egg whites, room temperature
- 1 cup superfine granulated sugar (caster sugar)
- 1 teaspoon vanilla extract
- 1/4 teaspoon cream of tartar
- Pinch of salt
Instructions
- Preheat your oven to 225°F (107°C). Line two baking sheets with parchment paper.
- In a clean, grease-free bowl of a stand mixer fitted with the whisk attachment, combine the egg whites, cream of tartar, and salt. Beat on medium speed until soft peaks form.
- Gradually add the superfine sugar, about one tablespoon at a time, while continuing to beat on medium-high speed. Wait about 30 seconds between additions.
- Once all the sugar is added, increase the speed to high and beat until the meringue is stiff, glossy, and holds firm peaks. When you rub a small amount between your fingers, you should not feel any sugar granules.
- Beat in the vanilla extract.
- Transfer the meringue to a piping bag fitted with a star tip (like a Wilton 1M) or use two spoons for drop cookies.
- Pipe or spoon small kisses onto the prepared baking sheets, leaving about one inch between each cookie.
- Bake for 60 to 75 minutes. The time depends on the size of your cookies. They should feel dry and lift easily from the parchment paper when done.
- Turn off the oven, prop the door open slightly with a wooden spoon, and let the cookies cool completely inside the oven for at least one hour, or preferably overnight. This drying process helps them become crisp.
Notes
- Ensure your mixing bowl and whisk attachment are completely free of any grease or egg yolk residue; this prevents the egg whites from whipping properly.
- For colored meringues, add a few drops of gel food coloring when the meringue reaches soft peaks.
- To make holiday shapes, pipe the meringue into the desired shape, such as a small tree or swirl.
- Store finished meringue cookies in an airtight container at room temperature.
Nutrition
- Serving Size: 1 cookie
- Calories: 35
- Sugar: 8
- Sodium: 5
- Fat: 0
- Saturated Fat: 0
- Unsaturated Fat: 0
- Trans Fat: 0
- Carbohydrates: 8
- Fiber: 0
- Protein: 0
- Cholesterol: 0