

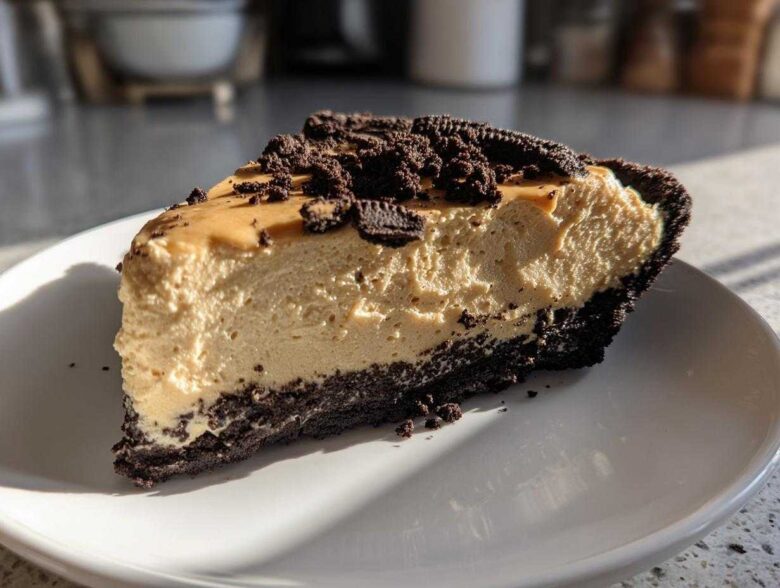
You know those days? It’s scorching hot, the AC is barely keeping up, and the thought of turning on the oven feels like a personal betrayal? Me too! That’s why I am sharing what I consider the absolute peak of summer baking: my version of the **no bake peanut butter pie**. Forget those dense, sad versions you might have tried; this one is different.
I’m calling this the Ultimate Creamy No Bake Peanut Butter Pie with Easy Oreo Crust, and trust me, after perfecting this over many ridiculously hot summers, I’ve figured out the secret to the fluffiest, most decadent filling you can imagine. It comes together fast, tastes like heaven, and requires zero actual cooking. It’s pure, indulgent magic, and you’re going to love how simple it is to make! For more about the folks behind these tried-and-true recipes, check out our About Us page!
Why This Creamy No Bake Peanut Butter Pie is Your New Favorite
Honestly, if you need a quick dessert recipe that knocks people’s socks off, this is it. We’re talking about assembling the whole thing in about 20 minutes, tops! It requires zero babysitting in the oven, which is why it’s my go-to for everything from unexpected company to those emergency weeknight cravings.
The real star here is the texture. I learned long ago that you can’t just dump everything together; you have to treat your ingredients right to get that incredible, light, fluffy pie recipe finish. It’s ridiculously rich, seriously indulgent, and just melts in your mouth. When I bring this to a gathering, I never bring home leftovers. It’s just that good!
Assembling Your No Bake Peanut Butter Pie: Ingredients Checklist
Okay, before we even think about mixing, we need to do what I call the ‘Mise en Place’ part—getting everything ready on the counter! Since this is a no bake peanut butter pie, there’s zero oven time to distract you, so you need everything measured and prepped before you start assembling. Trust me, rushing the setup ruins the fluffiness later on. Make sure your cream cheese is soft and your heavy cream is absolutely ice cold!
For the Easy Oreo Crust Dessert
- 1 1/2 cups chocolate sandwich cookies (like Oreos), finely crushed
- 6 tablespoons unsalted butter, melted
For the Fluffy Creamy Peanut Butter Filling
- 1 cup creamy peanut butter
- 8 ounces cream cheese, softened (this is major for the no bake peanut butter pie base!)
- 1 cup powdered sugar, sifted
- 1 teaspoon vanilla extract
- 1 1/2 cups heavy whipping cream, cold
- 1/4 cup granulated sugar (for whipping)
- Optional topping: 1 cup whipped topping or extra whipped cream, chocolate syrup
Step-by-Step Guide to the Ultimate No Bake Peanut Butter Pie
Now for the fun part! It moves fast once you get going, so have your crust ready to go into the freezer. Because this is a no bake peanut butter pie, speed is our friend, but stopping to clean up later is not. Let’s build this beauty layer by layer.
Creating the Perfect Oreo Crust for Your No Bake Peanut Butter Pie
This is where the sweetness starts! Grab that bowl with your finely crushed chocolate sandwich cookies and your melted butter. Mix it up with a fork until everything looks like damp sand. That’s the perfect texture. Then, dump it into your 9-inch pie plate. You have to press this down *hard*. Really use the bottom of a measuring cup to compact the mixture across the bottom and right up the sides to form a sturdy Oreo crust pie wall. Don’t leave any soft spots!
Once you’ve patted it down until it’s rock solid—seriously, pack it in there—slide that plate straight into the freezer. It needs to chill out completely while we focus on the filling, so set a timer for about 15 minutes.
Mixing the Creamy Peanut Butter Filling
While the crust is hardening, grab your peanut butter base ingredients. In a large bowl, you’re going to whip together your creamy peanut butter, that fully softened cream cheese, the sifted powdered sugar, and the vanilla. Beat it until it’s totally smooth—no lumps are allowed here if you want that incredible creamy peanut butter filling! Set that bowl aside.
Now, you need a separate, completely clean bowl. Pour in your cold heavy whipping cream and the granulated sugar. Use your electric mixer and whip it until you see stiff peaks forming. If you tip the bowl, the cream shouldn’t move an inch. This is critical for that fluffy texture!
Folding and Assembling the Fluffy Pie Recipe
This folding technique is the true secret to a light, airy pie. Take about a third of your freshly whipped cream and gently fold it into the peanut butter mixture. This step “lightens the load” of the heavier peanut butter base, making everything easier to combine later. Be gentle, like you’re folding a cloud!
Next, add the remaining two-thirds of the whipped cream and fold everything together until it’s just combined. I mean it—stop mixing the second you see no white streaks left. Overmixing equals deflation, and we want the fluffiest pie possible! Spoon this gorgeous filling right into your frozen crust. Smooth the top gently with a spatula, cover it loosely with plastic wrap, and tuck it into the fridge. This no bake peanut butter pie needs to chill for at least four hours to set up properly so it doesn’t turn into a puddle when you slice it!
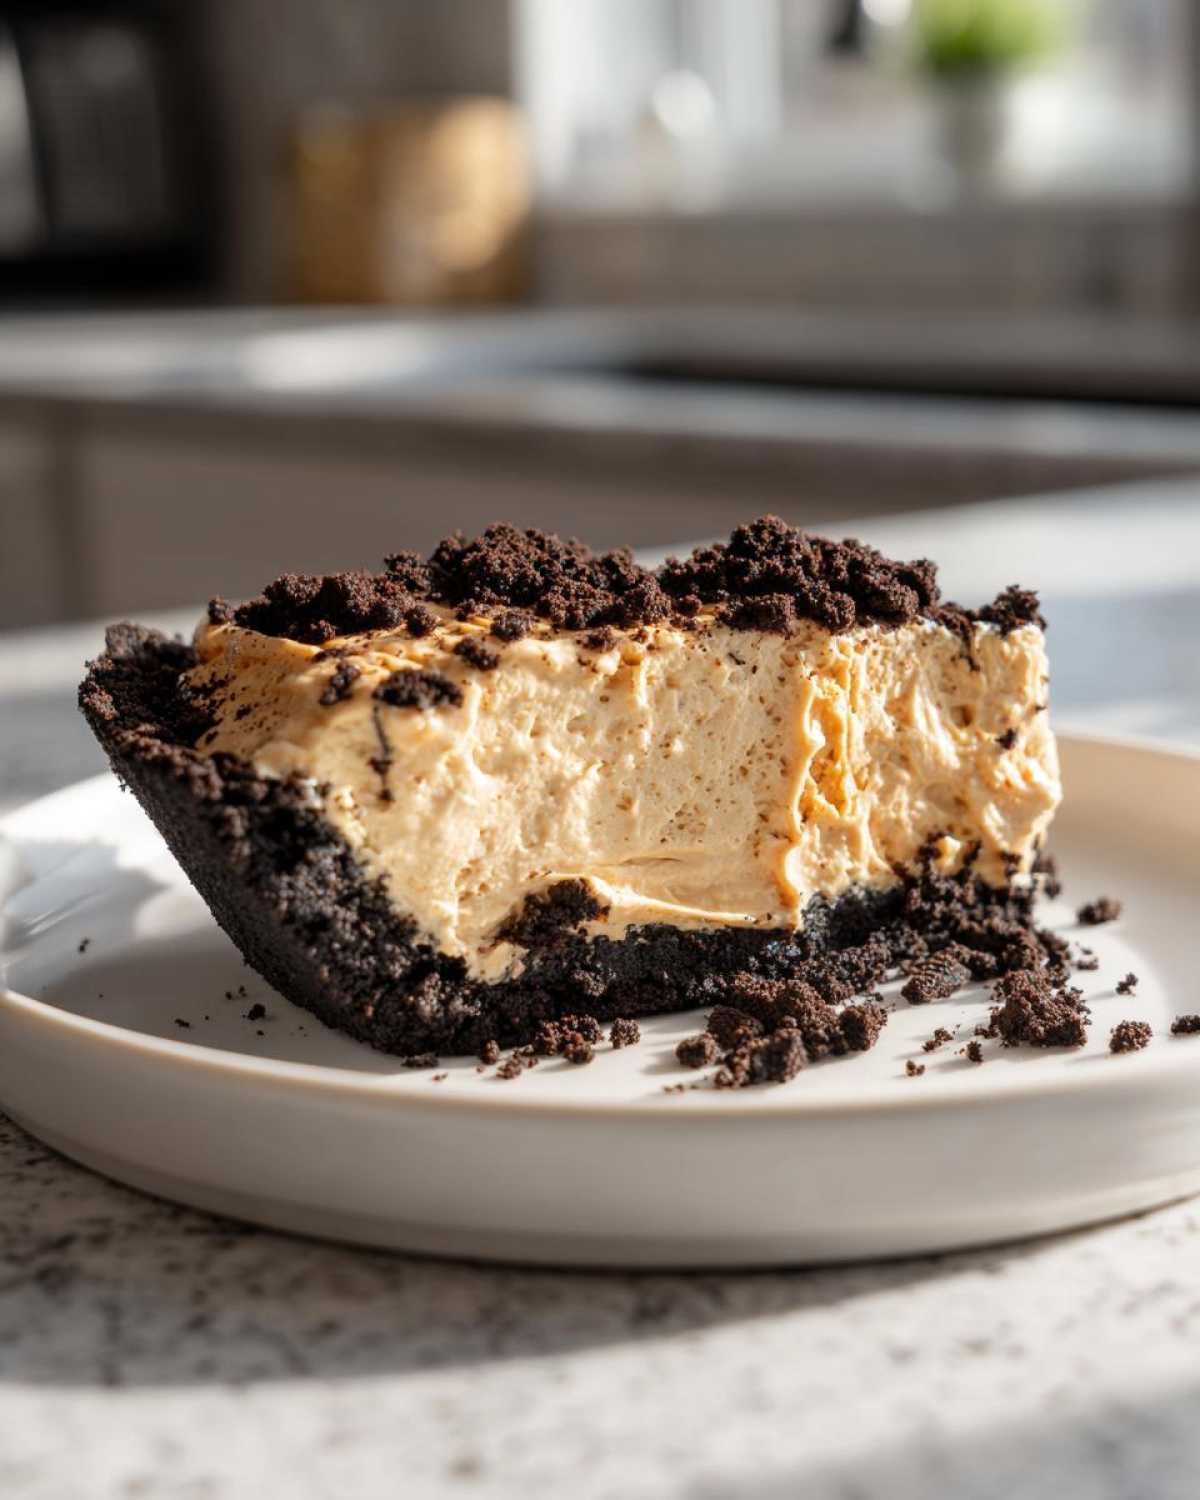
Expert Tips for a Perfect No Bake Peanut Butter Pie Every Time
I’ve learned a few non-negotiable rules over the years making these simple pie recipes. If you follow these little tricks, your pie will be consistently perfect, just like mine!
First up: Temperature control is everything. You absolutely must ensure your cream cheese is softened—I mean room temperature soft, not ‘I left it on the counter for five minutes’ soft. If it’s even slightly cold, you’ll get little lumps in your base, and guess what? Lumps do not disappear when you chill a pie. They just get harder!
Speaking of texture, I cannot stress this enough: you have to be gentle when folding in the whipped cream. You just spent 10 minutes whipping air into that heavy cream—don’t deflate your hard work by stirring aggressively! Use a rubber spatula and cut straight down the middle, then scoop up from the bottom and turn the batter over. It feels slow, but it protects the air bubbles that give us that wonderful, signature fluff.
Also, patience during setting is just as important as speed during assembly. Don’t rush the chilling time! If you try to slice this an hour early, you’ll end up wearing a spoonful of filling. Wrapping it loosely prevents condensation from dripping onto the surface, which keeps the top looking beautiful and smooth when you finally get to slice it.
Ingredient Notes and Substitutions for Your No Bake Peanut Butter Pie
So, you might be looking at my ingredient list and thinking, “Uh oh, I don’t have Oreos in the house!” Don’t panic! That’s the beauty of a fantastic no bake peanut butter pie; it’s wonderfully forgiving—though certain steps aren’t optional, I won’t lie.
Let’s talk crust first. If chocolate isn’t your absolute favorite flavor profile for this type of pie, you can easily swap out those chocolate sandwich cookies for graham crackers. If you make that switch, you’ll end up with a classic graham cracker crust dessert, which is lovely and buttery! Just use the same amount—1 1/2 cups finely crushed—and mix it with the 6 tablespoons of melted butter exactly the same way. It changes the vibe slightly, but it’s still delicious.
However, when we move to the star of the show—the filling—we have to be a bit more strict. For that truly amazing, lush, creamy peanut butter filling, the temperature of your cream cheese is the biggest factor you control. If you’re short on time and try to rush softening it, you’re going to end up with chunks of cream cheese refusing to blend into the peanut butter and sugar.
My biggest tip? If you’re in a real rush, slice the 8 ounces of cream cheese into four small cubes. Pop those cubes onto a microwave-safe plate and give them a very short blast—maybe 10 to 15 seconds on 50% power. You’re not looking for it to melt; you just need it to lose that refrigerator chill so that when it hits the mixer with the peanut butter, it blends into one silky smooth base. It’s a little trick that saves the whole pie!
Serving Suggestions for this Easy Peanut Butter Pie
So you’ve made it through the chilling phase, and your gorgeous, fluffy pie is set! Now comes the best part of any easy peanut butter pie: decorating it! While the recipe calls for a simple drizzle of chocolate syrup, we can definitely amp this up a bit to make it truly memorable, especially if you are taking this to a gathering.
If you’re looking to make this the showstopper at your next family reunion or neighborhood cookout—definitely framing it as the ultimate potluck dessert—you need texture contrast! That smooth, cool filling begs for something crunchy on top.
My absolute favorite thing to do is toast some chopped peanuts, just for a minute in a dry skillet until they smell amazing, and sprinkle those generously over the top layer of whipped cream. The crunch against the smooth filling? Forget about it!
Here are a few other things I love to do before setting this incredible no bake peanut butter pie out on the buffet table:
- A little sea salt: Seriously, a light sprinkle of flaky sea salt cuts right through that sweetness and makes the peanut butter flavor *pop*. It’s phenomenal, trust me.
- Chocolate shavings: Grab a vegetable peeler and shave a nice bar of dark chocolate right over the top. It looks elegant, even though you didn’t use an oven all day!
- More whipped cream piping: If you’re feeling fancy, use a piping bag with a star tip to add decorative dollops around the edge before adding any other toppings. It elevates this from ‘quick treat’ to ‘fancy dessert.’
No matter how you finish it, remember that this pie is best served nice and cold. It holds up wonderfully, but the cooler it is, the firmer that creamy peanut butter filling stays!
Storage and Make Ahead Dessert Tips for Your No Bake Peanut Butter Pie
One of the biggest gifts this no bake peanut butter pie gives you is its incredible shelf life right in the fridge! Seriously, this recipe is the definition of a make ahead dessert. If you’re planning a big weekend BBQ or a party, you can whip this up the day before with zero stress.
I always stress that you need a minimum of four hours in the refrigerator for the filling to completely set up, but honestly? I think this pie tastes even better when it’s had about six to eight hours to firm up. That time lets the peanut butter and the whipped cream marry up perfectly, making for a denser, silkier slice.
Because this pie sets in the cold, there’s absolutely no reheating needed, which is perfect for those relaxing summer desserts where you just want to keep the kitchen cool! Never attempt to warm this up; the cream and cream cheese filling will just weep on you, and we worked too hard for that fluffiness!
When you are storing it, you MUST cover it loosely. If you wrap the plastic wrap tight right against the filling, you risk smearing your beautiful topping or creating condensation drips. I usually tent a piece of plastic wrap an inch or two above the surface, and then sometimes put an overturned bowl over the top of the pie plate just to keep everything safe from stray smells in the fridge.
This pie keeps beautifully for three to four days in the refrigerator. If you find yourself with leftovers on day four, that’s when you should consider freezing any remaining slices—but only if they are already set! Wrap individual slices tightly in plastic wrap and then foil. Thaw them overnight in the fridge, and they come out almost perfectly fine, though maybe just a touch less fluffy than when freshly made. It’s still way better than ordering takeout, though!
Frequently Asked Questions About No Oven Pies
I get so many messages about this recipe because people love that they don’t need to turn on the stove, but sometimes the chilling part throws folks for a loop! Here are a few quick answers to the most common questions I hear about making the perfect no bake peanut butter pie.
How long does the no bake peanut butter pie need to chill?
This is the hardest part: waiting! You need a minimum of four hours under refrigeration for the filling to firm up enough for slicing. Honestly though, if you can wait six or even eight hours, you’ll be rewarded with an exceptionally firm and silky slice. If you are making this ahead for a big event, overnight chilling is perfect. It lets the creamy peanut butter filling really settle in.
Can I use natural peanut butter in this recipe?
Oh, I really advise against it for this specific pie. Natural peanut butters tend to separate a lot—you know, where the oil rises to the top? That oil just doesn’t incorporate well into the cream cheese and the whipped cream base. It leads to separation in your finished pie. Stick to the standard, stabilized creamy peanut butter; that’s what guarantees that smooth, luxurious texture for your creamy peanut butter filling.
What is the best way to get a clean slice of this fluffy pie recipe?
This is a pro move for any chilled or frozen dessert! Before you make your first cut, take a nice sharp, long knife and dip it into a glass of very hot water. Wipe the knife completely dry with a paper towel, and then make your slice. That hot, clean blade glides right through the cold filling without dragging or messing up the sides. Wipe and reheat the knife between every single slice to keep things professional!
For more legal details about the site and content, please review our Disclaimer page!
Nutritional Estimates for This Indulgent Treat
Now, let’s talk numbers, although I always say that the joy of a proper **no bake peanut butter pie** outweighs counting calories! Remember, this is just an estimate based on the ingredients list I shared, and your specific brand choices can change things a little bit. But it gives you a good ballpark figure for this incredibly rich chocolate peanut butter dessert.
This beauty is definitely an indulgent treat! When you look at the data, you’ll see it’s higher in fat—that’s because we used real butter, cream cheese, and heavy cream to get that unbelievably luxurious texture. It’s worth every single bite, trust me!
Here is the breakdown for one slice (assuming 8 servings):
- Approximate Calories: 450
- Total Fat: 30g (with about 12g being saturated fat—that comes from the cream cheese!)
- Carbohydrates: 40g
- Protein: 10g
It’s higher in sugar, naturally, because we are using powdered and granulated sugar to hit those peak dessert flavors. But hey, that’s why we call it a treat, right? This pie should definitely be saved for special occasions or when you need a major morale boost!
If you want to see the full terms regarding site usage and how we calculate these figures, you can always hop over to our Terms and Conditions page for all the fine print!
Share Your Ultimate Creamy No Bake Peanut Butter Pie Experience
Okay, now that you’ve made this incredible no bake peanut butter pie—maybe you even did the salted peanut topping or went wild with chocolate shavings—I absolutely need to hear about it!
Seriously, these recipes only get better when we share the results. Please, please leave a rating below. If this pie earned its spot in your summer rotation, give it a shining five stars! I love seeing how many of you have found your new favorite easy peanut butter pie.
More importantly, drop a comment and tell me how it went! Did you stick to the Oreo crust, or did you go for the graham cracker version? What toppings did you decide on? Did your creamy peanut butter filling turn out perfectly fluffy on the first try? I read every single comment, and I love getting tips from you all, too. Happy baking—or, well, happy *not* baking!
If you have questions about storage or substituting ingredients after you’ve tried it, don’t hesitate to reach out! You can always find a way to get in touch with me via the Contact page if anything pops up!
PrintThe Ultimate Creamy No Bake Peanut Butter Pie with Easy Oreo Crust
Make this rich, fluffy peanut butter pie without turning on your oven. It features a simple chocolate cookie crust and a creamy filling that sets quickly.
- Prep Time: 20 min
- Cook Time: 0 min
- Total Time: 4 hr 20 min
- Yield: 8 servings
- Category: Dessert
- Method: No Bake
- Cuisine: American
- Diet: Vegetarian
Ingredients
- 1 1/2 cups chocolate sandwich cookies (like Oreos), finely crushed
- 6 tablespoons unsalted butter, melted
- 1 cup creamy peanut butter
- 8 ounces cream cheese, softened
- 1 cup powdered sugar, sifted
- 1 teaspoon vanilla extract
- 1 1/2 cups heavy whipping cream, cold
- 1/4 cup granulated sugar (for whipped cream)
- Optional topping: 1 cup whipped topping or extra whipped cream, chocolate syrup
Instructions
- Prepare the crust: Combine the crushed chocolate sandwich cookies and melted butter in a medium bowl. Press the mixture firmly and evenly into the bottom and up the sides of a 9-inch pie plate. Place the crust in the freezer while you prepare the filling.
- Make the peanut butter base: In a large bowl, beat the creamy peanut butter, softened cream cheese, powdered sugar, and vanilla extract until the mixture is smooth and creamy. Set aside.
- Prepare the whipped cream: In a separate, clean bowl, beat the cold heavy whipping cream and granulated sugar with an electric mixer until stiff peaks form.
- Fold the mixtures: Gently fold about one-third of the whipped cream into the peanut butter mixture to lighten it. Then, fold in the remaining whipped cream until just combined and the filling is uniform and fluffy. Do not overmix.
- Assemble the pie: Spoon the peanut butter filling evenly into the chilled Oreo crust. Smooth the top with a spatula.
- Chill: Cover the pie loosely with plastic wrap and refrigerate for at least 4 hours, or until the filling is firm enough to slice.
- Serve: Before serving, top with additional whipped topping, a drizzle of chocolate syrup, or chocolate shavings if desired.
Notes
- You can substitute graham crackers for the chocolate cookies if you prefer a traditional crust flavor.
- For the best texture, ensure your cream cheese is fully softened to room temperature before mixing.
- This pie tastes best when chilled for at least 6 hours, making it a perfect make-ahead dessert.
Nutrition
- Serving Size: 1 slice
- Calories: 450
- Sugar: 35
- Sodium: 300
- Fat: 30
- Saturated Fat: 12
- Unsaturated Fat: 18
- Trans Fat: 0
- Carbohydrates: 40
- Fiber: 2
- Protein: 10
- Cholesterol: 55