

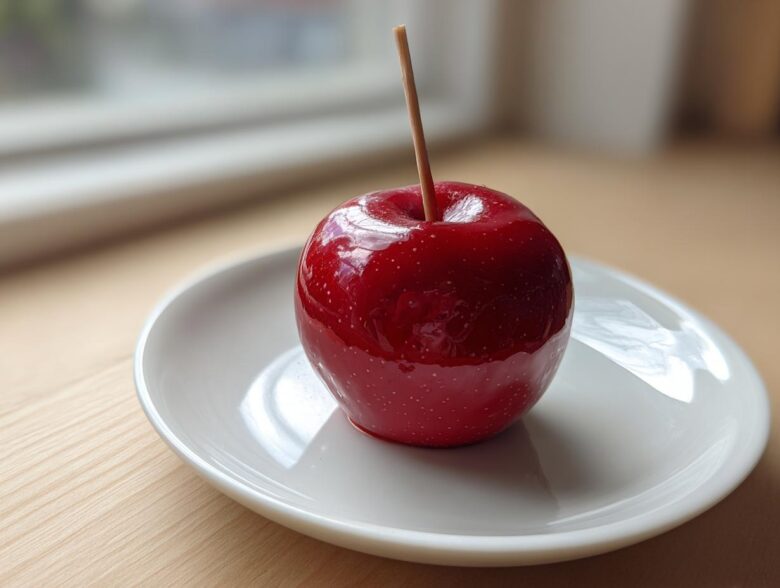
Oh, the sheer joy of biting into a perfect, shiny red candy apple! It instantly takes me back to crisp autumn evenings and boardwalk strolls. Seriously, there’s nothing like that hard, glass-like shell crunching before you hit that tart, cool apple underneath. For years, I struggled with sticky coatings and those awful cracks that appear the second they cool down. I tested batch after batch, basically turning my kitchen into a sugary war zone! Now? I’ve cracked the code. Trust me when I say this classic candy apple recipe is truly foolproof. We’re talking glossy, vibrant, and totally crack-free every single time. If you want the best homemade candy apples for Halloween or just a great fall apple treat, you have to try this method.
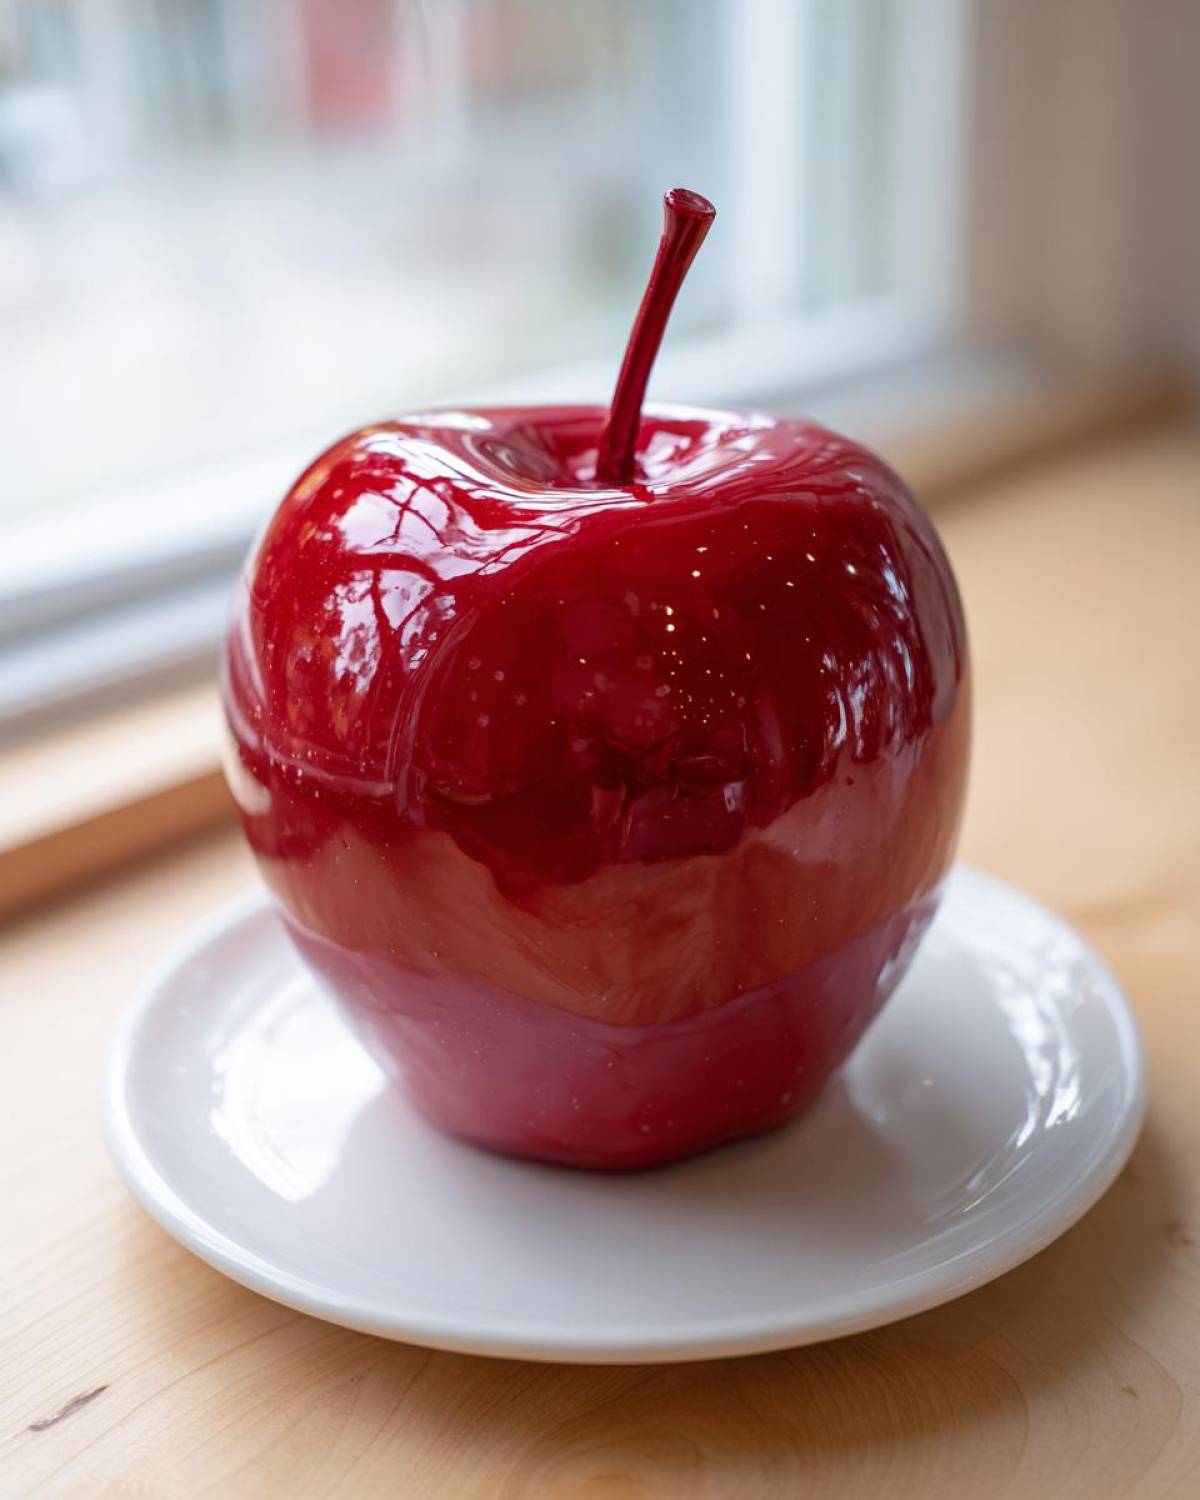
Why You Will Master This Easy Candy Apple Tutorial
I know what you’re thinking: candy making is scary! But this isn’t some complicated gourmet recipe; this is my go-to for easy candy apple success. If you follow these exact steps, you’ll get that incredible, vibrant shine you see at fairs.
- No more sticky messes! We promise a dry, **crispy candy coating**.
- The temperature control method guarantees a **crack free candy apple coating**.
- It’s fast! You can whip these up quicker than you think, making them perfect **party apple treats**.
- Perfect for seasonal fun—they bring true Halloween candy apples magic to any gathering.
Gathering Ingredients for Perfect Homemade Candy Apples
Okay, let’s talk ingredients because this is where the science meets the fun! For the absolute best tasting candy apples, you need apples that can handle the hot syrup and balance the sweetness. I always grab Granny Smith or Fuji—they stay firm and tart, which is what you want so the candy coating doesn’t overwhelm the fruit. You need six firm apples for this batch.
Now for the coating itself. We’re using simple pantry staples, but the ratios have to be spot on to get that beautiful, non-crystallizing shell. Remember, if you play around with the sugar too much, you’ll end up with grainy syrup, and that ruins the whole experience. If you’re curious about how this fits into broader site policies, you can check out our disclaimer page.
Essential Components for Glossy Candy Apple Shell
You’ll need exactly two cups of granulated sugar and one full cup of light corn syrup. That corn syrup is our secret weapon against graininess! Don’t forget the cup of water to get everything moving smoothly on the stove. For that signature vibrant hue, we rely on one teaspoon of bright red food coloring. And here’s the crucial kicker for achieving that **glossy candy apple shell**: one teaspoon of white vinegar. That little bit of acid keeps the sugar from turning cloudy or crystallizing as it cools, guaranteeing that perfect, smooth finish.
Equipment Needed for Your Candy Apples
You can’t master the crispy candy coating without the right gear! Honestly, you don’t need much cluttering up your cabinets, but there is one tool you simply *must* have if you want these to turn out right. That tool is your candy thermometer. This investment makes the whole process foolproof because getting to the hard crack stage (300 degrees!) is non-negotiable for that perfect crunch.
Beyond the thermometer, you’ll need a medium saucepan—one that lets the syrup spread out a bit is best—some wooden sticks, and a baking sheet ready with parchment paper.
Step-by-Step: How to Make Shiny Candy Apples
Alright, this is the exciting part where we turn goo into gold! Making great candy apples is mostly about being prepared and not messing with the magic once it starts cooking. Seriously, get everything ready *before* you even turn on the stove. You don’t want to be fumbling for sticks while the syrup is screaming hot!
Preparing Apples for Dipping
First thing’s first: cleanliness is key to a non-cracking shell. You have to wash those apples really well because they usually have a waxy coating from the grocery store. I dip mine quickly—just five seconds—into a pot of boiling water, then I dry them completely. I mean, bone dry! Pat them down with a paper towel, leave them out for a few minutes, whatever it takes. If there’s even a hint of moisture, the candy coating will steam and bubble, giving you craters instead of that lovely, smooth shell. Once they’re dry, jam those wooden sticks right into the core, nice and secure. If you need to get in touch for any reason while you’re baking, you can always find me on the contact page!
Cooking the Syrup to Hard Crack Stage
Now, time for the syrup! Put your sugar, corn syrup, and water into your saucepan. Stir it gently over medium heat only until the sugar crystals disappear completely. Once you see it start to bubble up, promise me you will stop stirring! That’s the biggest rule in candy making. Stirring introduces air, and air adds bubbles and causes crystallization later, which ruins that glassy look. Just let it boil away until that candy thermometer screams 300 degrees Fahrenheit. That is the hard crack stage, and it’s the magic number for that perfect, snappy coating.
Dipping and Setting the Candy Apples
When you hit 300°F, yank that pan right off the heat immediately. Now, quickly stir in your red food coloring and that teaspoon of vinegar. Use a spoon to skim off any foamy bits you see floating on top—we want pure, clear candy!
Tilt the pan slightly so the syrup pools up. Take your prepared apple, dip it deep so it’s totally submerged, rotate it around, and then lift it straight up. Let the extra syrup drip back in for just a second or two. Don’t wait too long, or the candy gets too thick! Gently place the coated apple onto parchment paper or a silicone mat. Don’t touch it! Let them sit undisturbed for about 30 minutes until that beautiful, hard shell sets up completely.
Expert Tips for a Crack Free Candy Apple Coating
Even with this easy tutorial, sometimes the candy world throws curveballs! The number one enemy of a perfect, shiny coating is moisture, so I’m going to hit that point one more time: your apples must be completely dry before they even look at the hot syrup. Any condensation equals cracks down the road.
If you find your beautiful red candy apples start looking dull or sticky after they’ve set, chances are they were stored somewhere too humid, maybe even near the sink! Always let them cool completely in a non-humid spot. Also, remember those notes about custom colors? If you’re trying to make swirled candy apples, you have to be quick! Dip in color one, let it set for just a moment until tacky, then dip immediately into color two. If you wait too long, the colors won’t blend nicely.
And if by chance your syrup hardens in the pot before you finish dipping your last apple—don’t panic! Just put that pan back on the lowest heat setting until it liquefies again. It works like a charm!
Making Colorful Custom Candy Apples
Now that we have the classic presentation down—that gorgeous, vibrant red—we can talk about making these treats truly showstoppers! Getting those bright red candy apples is easy, but customizing them opens up a whole world of fun for birthdays or themed parties. If you’re feeling ambitious, you can totally go beyond red!
For a simple color switch, just swap out the red food coloring for gel tones you love. Want spooky black candy apples? Use black dye. Trying to make festive green ones? Easy swap!
If you really want to impress your guests with gourmet candy apples, try for those cool, **swirled candy apples**. Like I mentioned briefly before, this requires speed. You let your first color set just long enough so it’s tacky—not fully hard. Then, you dip it quickly into a second, contrasting color, rotating fast to catch those streaks. It’s tricky, but when it works, those custom candy apple treats look professional!
Storage and Reheating Instructions for Candy Apples
Once your beautiful, shiny candy apples have fully hardened, you need to treat them right! The absolute worst thing you can do is stick them in the fridge. Seriously, don’t do it! That cold box creates condensation, and before you know it, your perfect shell turns into a sticky, gooey mess. Keep them wrapped loosely at room temperature, away from intense heat.
If you happen to have extra hard syrup left in the bottom of the saucepan—life happens!—you don’t have to toss it out. That hard chunk is just sugar that cooled too quickly. Just pop the pan back onto the lowest heat setting on your stove. Gently warm it until it melts back into a smooth liquid. Then, be careful and use it again right away, or just let it cool and save the chunk for another time to melt down later. Check out our About Us page to learn more about how we test these kitchen hacks!
Frequently Asked Questions About Classic Candy Apple Recipe
I know you’re probably buzzing with excitement to try making these, but sometimes little questions pop up right before you start. Candy making feels intimidating, but I promise, most issues are easily fixed once you know the trick! Here are some things folks often ask when they try making a classic candy apple recipe for the first time.
First off, can I use apples other than Granny Smith? Absolutely! While I love Granny Smith for their tartness, any firm apple works for your party apple treats. Just make sure they are room temperature and totally dry. The crispness of the apple itself is what makes the entire dessert amazing.
My biggest question always is: Why are my candy apples sticky? If they start getting tacky after cooling, it means they absorbed humidity from the air. Resist the urge to refrigerate them! Store them wrapped loosely in a cool, dry pantry instead.
And finally, can I substitute the hard candy coating for caramel? Well, yes, you totally can use caramel, but then you’re making a caramel apple, not a hard-shell candy apple! The texture is completely different. If you want that satisfying *crack* you need to stick to the sugar-syrup recipe. If you’re wondering about our site policies regarding specific ingredient substitutions, you can review our terms at terms and conditions.
Troubleshooting Common Candy Apple Issues
If your sugar mixture turns grainy or crystallizes while you’re cooking, that’s usually from stirring it after it started boiling, or from stray sugar crystals on the sides of the pan splashing into the liquid. If you notice crystallization starting, quickly grab a clean pastry brush dipped in water and gently wipe down the sides of the pot above the liquid line to dissolve those offending grains.
If your perfect red shell breaks when you bite it, you likely had moisture on the apple surface, or perhaps you didn’t quite reach that 300°F hard crack stage. If it’s too soft, it won’t hold its shape properly!
Estimated Nutritional Data for Candy Apples
Okay, let’s talk numbers for a second. While these amazing, shiny candy apples are certainly a treat and not an everyday food, I know some of you like to keep track! The data below is based purely on the ingredients specified in this recipe—six apples, the sugar, the corn syrup, and the coloring. Since we’re making a big batch and splitting it evenly onto six servings, these calculations work out for one beautiful apple.
Please remember that this is just an estimate based on the general amounts of sugar and the size of the fruit we used. How tart your apples are, or if you accidentally use a slightly different brand of corn syrup, will change the final tally just a tiny bit. Treat this as a general guideline for your nostalgic fall dessert!
- Serving Size: 1 apple
- Calories: About 350 per apple
- Sugar: This one is high, naturally! We are looking at roughly 85 grams in that coating shell.
- Total Carbohydrates: Around 90 grams.
- Fat and Protein: Essentially zero across the board, which is typical for a straight hard candy coating.
This recipe is incredibly simple in components, meaning we don’t have a lot of hidden fats or proteins sneaking in—it’s mostly pure sugar energy for that Halloween costume party! Speaking of site information, if you ever have questions about how we source our general cooking information, check out our cookie policy for details on our site processes.
Share Your Shiny Candy Apples Creations
Alright, friends, you did it! You tackled the candy thermometer and achieved that perfect, glossy shell. I want to see them! Seriously, snap a picture of your colorful, custom candy apples and tag me on social media. It makes my whole week seeing your successes.
Did this easy candy apple tutorial work perfectly for you? Please leave a rating down below! Tell me what color you chose—I love hearing about what everyone tries next. If you have any last-minute questions about your beautiful results, you can always drop a note on our GDPR compliance statement page, though comments are usually best!
PrintShiny Red Candy Apples
Follow this simple recipe to make glossy, crack-free hard candy apples perfect for fall or Halloween parties.
- Prep Time: 15 min
- Cook Time: 20 min
- Total Time: 35 min
- Yield: 6 servings
- Category: Dessert
- Method: Stovetop Cooking
- Cuisine: American
- Diet: Vegetarian
Ingredients
- 6 medium firm apples (like Granny Smith or Fuji)
- 6 wooden sticks or skewers
- 2 cups granulated sugar
- 1 cup light corn syrup
- 1 cup water
- 1 teaspoon red food coloring
- 1 teaspoon white vinegar
Instructions
- Wash and thoroughly dry the apples. Remove any wax by briefly dipping them in boiling water for 5 seconds, then dry completely. Insert a stick firmly into the core of each apple.
- Combine sugar, corn syrup, and water in a medium saucepan. Stir over medium heat until the sugar dissolves.
- Stop stirring once the mixture boils. Cook the syrup until it reaches 300 degrees Fahrenheit (hard crack stage) on a candy thermometer. This usually takes about 15 to 20 minutes.
- Remove the pan from the heat. Carefully stir in the red food coloring and vinegar. Skim off any foam from the surface with a spoon.
- Tilt the pan slightly. Dip each apple into the hot syrup, rotating to coat completely. Lift the apple out and let excess syrup drip back into the pan.
- Place the coated apples on a baking sheet lined with parchment paper or a silicone mat.
- Allow the candy coating to cool and harden completely, about 30 minutes, before serving.
Notes
- For a crack-free shell, ensure your apples are completely dry before dipping. Moisture causes the candy to steam and crack.
- To make custom colors, use different food colorings. For swirled effects, dip the apple in one color, let it set slightly, then dip it quickly into a second color.
- If the candy hardens in the pan before you finish dipping, gently reheat it over low heat until it liquefies again.
Nutrition
- Serving Size: 1 apple
- Calories: 350
- Sugar: 85g
- Sodium: 2mg
- Fat: 0g
- Saturated Fat: 0g
- Unsaturated Fat: 0g
- Trans Fat: 0g
- Carbohydrates: 90g
- Fiber: 1g
- Protein: 0g
- Cholesterol: 0mg